| Author |
 Topic Search Topic Search  Topic Options Topic Options
|
Ryan Thompson 
Guest


Joined: April 11 2006
Location: Lehi
Status: Offline
Points: 3546
|
 Post Options Post Options
") Thanks(0) Thanks(0)
 Quote Quote  Reply Reply
 Topic: My 40 Gallon - New Pictures! Topic: My 40 Gallon - New Pictures!
Posted: January 22 2010 at 1:49pm |
Well the time has come for me to start a build thread on my new tank. This tank has honestly been in the making for probably the last 2.5 years. So I am super excited to get it going.
Here is the equipment list so far:
Tank: 40 Gallon Breeder Sump: 20 Tall Stand: Home made Lights: ATI Sunpower 4x24W (2 ATI Blue Plus, 1 ATI Aquablue and 1 KZ Fiji Purple) Skimmer: Bubble Magus NAC6 Return Pump: Quiet One 2200 (for now) Powerheads: Voretch MP10w ES Plumbing: Herbie style drain with an emergency backup drain Controller: RK Lite Level 1
My lights will be ordered next week and I hope to have them by next Friday at the lastest. I also ordered my hole saw and some bulkheads and they should arrive next week also. So if anyone can help drill a tank I would love the help!
I will be dosing Brightwell Aquatics MicroBacter7 and Vodka to this tank. I have been dosing vodka in my sump that is curing rock right now and it is incredible how much better the skimmer performs when I dose vodka.
Ok enough of me talking let's get to the next post and I will show the progress so far.
Thanks for looking!
Edited by Ryan Thompson - September 01 2010 at 11:15pm
|
 |
Ryan Thompson
Guest
Joined: April 11 2006
Location: Lehi
Status: Offline
Points: 3546
|
Post Options
Thanks(0)
Quote Reply
Posted: January 22 2010 at 1:50pm |
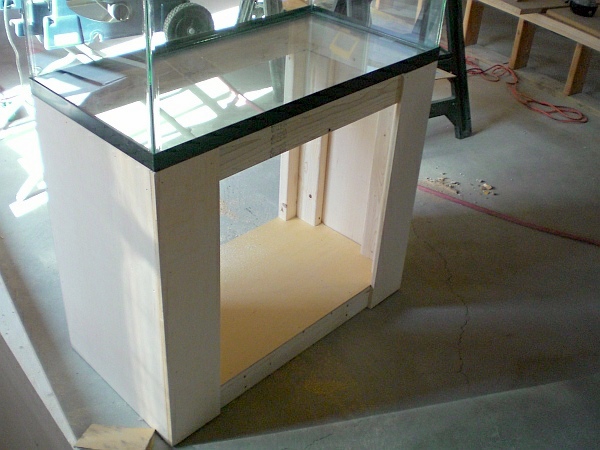
So here is the stand build. I did miss a few steps when taking pictures. I sanded all the corners and rounded them to look a little distressed and beat up. I then painted 2 coats of green and then 2 coats of black. When I distressed it after painting, the green show through very nicely 
The stand is roughly 30 inches tall and is perfect height to work in the tank comfortably. I didn't want to get out a stool every time I worked on the tank but I also didn't want back problems from always bending over to look at the tank.
Now for the pics:
The stand with some of the shell put on.
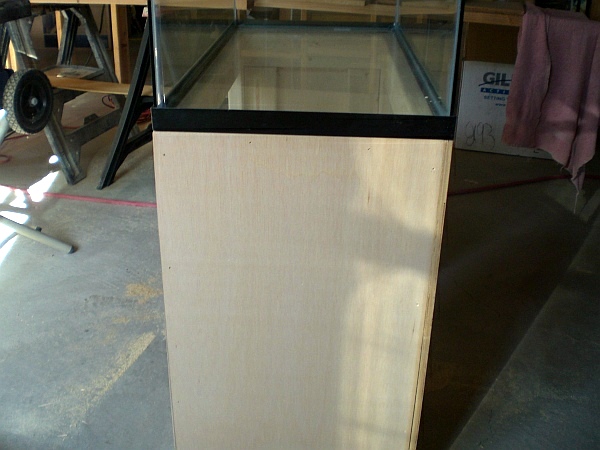
Added some molding....I measured wrong and had to run to Home Depot to buy some more 
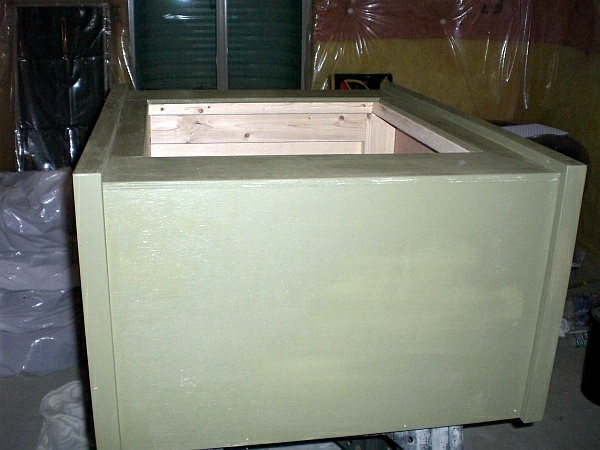
First coat of green:
Second coat of green:
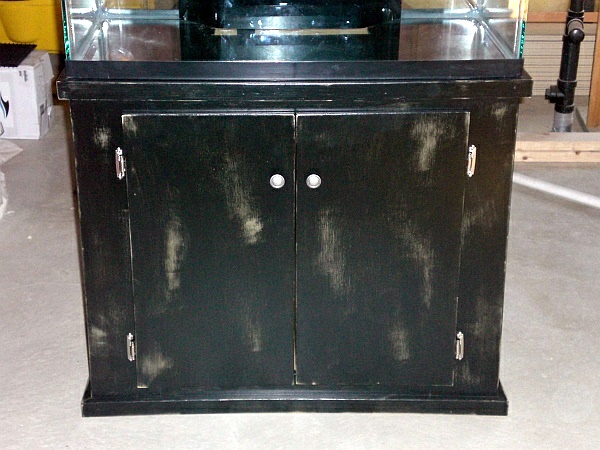
That is all the pictures I have for now. I somehow skipped taking pictures with the black painted on. Right now the stand is all finished and has been coated with a protective finish. I painted the inside and sealed it all off with three coats of protective sealer to help with the humidity and water drips inside the stand.
It took me 5 or 6 days to complete the whole thing and I am VERY happy how it all turned out! 
I will get pictures of the completed stand this weekend sometime.
Edited by Ryan Thompson - January 22 2010 at 2:10pm
|
|
jwoo
Presidency

Joined: April 29 2009
Location: Alpine
Status: Offline
Points: 3603
|
Post Options
Thanks(0)
Quote Reply
Posted: January 22 2010 at 2:04pm |
Oh wow looks like a certain place froze over! You've been talking about this since I got on the board. 
|
|
None at the moment
Soon: 72 Gallon Bowfront
|
|
Jeremyw
Guest

Joined: April 09 2009
Location: Utah County
Status: Offline
Points: 8513
|
Post Options
Thanks(0)
Quote Reply
Posted: January 22 2010 at 2:06pm |
i just had a small heat attack then I realized there arent pictures so this cant be real! 
|
|
Ryan Thompson
Guest
Joined: April 11 2006
Location: Lehi
Status: Offline
Points: 3546
|
Post Options
Thanks(0)
Quote Reply
Posted: January 22 2010 at 2:16pm |
 woottonjeremy wrote: woottonjeremy wrote:
i just had a small heat attack then I realized there arent pictures so this cant be real!
|
Jeremy you need to refresh the page and check again! I just put pictures of the stand build.
|
|
Jeremyw
Guest
Joined: April 09 2009
Location: Utah County
Status: Offline
Points: 8513
|
Post Options
Thanks(0)
Quote Reply
Posted: January 22 2010 at 2:33pm |
|
You up loaded those 4 min after I posted dork! But hey looks good!
|
|
Ryan Thompson
Guest
Joined: April 11 2006
Location: Lehi
Status: Offline
Points: 3546
|
Post Options
Thanks(0)
Quote Reply
Posted: January 22 2010 at 3:01pm |
woottonjeremy wrote:
You up loaded those 4 min after I posted dork! But hey looks good!
|
I know! LOL I reserved the second post for pictures and then had to upload all those.
Thanks for the compliment!
|
|
Jeffs_little_ocean
Guest

Joined: October 04 2009
Location: Kaysville
Status: Offline
Points: 869
|
Post Options
Thanks(0)
Quote Reply
Posted: January 22 2010 at 3:10pm |
|
Are you going to drill the tank?
|
|
Life is good....right?
|
|
Ryan Thompson
Guest
Joined: April 11 2006
Location: Lehi
Status: Offline
Points: 3546
|
Post Options
Thanks(0)
Quote Reply
Posted: January 22 2010 at 3:13pm |
Jeffs_little_ocean wrote:
Are you going to drill the tank? |
Yes I ordered the drill bit last night and it was shipped today. I will drill through the bottom for the main drain and haven't decided where I will drill the emergency drain. It will either be in the bottom by the main drain or on the back at the top.
I am gonna build my own overflow box with Burt when he returns from Idaho.
|
|
Corey Price
Guest

Joined: August 25 2004
Location: Farmington
Status: Offline
Points: 2567
|
Post Options
Thanks(0)
Quote Reply
Posted: January 22 2010 at 10:56pm |
Um, not enough drama. The thread needs something, like a difference of opinions...
(looks great)
|
|
Ryan Thompson
Guest
Joined: April 11 2006
Location: Lehi
Status: Offline
Points: 3546
|
Post Options
Thanks(0)
Quote Reply
Posted: January 27 2010 at 2:23pm |
Well since I had Monday off I took the time to drill the holes in my tank for the drains and return. Overall it turned out pretty good for my first time ever drilling glass. I did learn some lessons though. I should have drilled opposite of what I did. I drilled from the bottom and into the tank. It chipped the glass where the gaskets will sit so I will have to use some silicone to make sure I don't have any leaks. Here is the picture of it all completed.
I will be getting my bulkheads this week along with the black acrylic to make my overflow box. Also my lights are supposed to be ordered this week!
One step closer.
|
|
Jeremyw
Guest
Joined: April 09 2009
Location: Utah County
Status: Offline
Points: 8513
|
Post Options
Thanks(0)
Quote Reply
Posted: January 27 2010 at 2:26pm |
|
Is that a crack on the right hand hole that goes from the whole to the back of the tank?
Edited by woottonjeremy - January 27 2010 at 2:31pm
|
|
Ryan Thompson
Guest
Joined: April 11 2006
Location: Lehi
Status: Offline
Points: 3546
|
Post Options
Thanks(0)
Quote Reply
Posted: January 27 2010 at 2:28pm |
|
No it isn't even though it looks like it. That is the first hole I did and the bit jumped on me and scratched the glass. It isn't as bad as the picture makes it look. When I run my fingers over it you can barely feel it.
|
|
fishoutawater
Guest

Joined: March 23 2009
Location: Herriman
Status: Offline
Points: 639
|
Post Options
Thanks(0)
Quote Reply
Posted: January 27 2010 at 2:29pm |
|
Going very very slowly with the bit, especially in the last half of the hole will reduce that chipping quite a bit. For the next build, there's always another build. Is this an SPS tank?
|
|
Some day, when I grow up,...
|
|
Ryan Thompson
Guest
Joined: April 11 2006
Location: Lehi
Status: Offline
Points: 3546
|
Post Options
Thanks(0)
Quote Reply
Posted: January 27 2010 at 2:36pm |
Thanks Mike! That is one of the lessons I learned. Drilling glass is a piece of cake. I just rushed it this time but know now for next time.
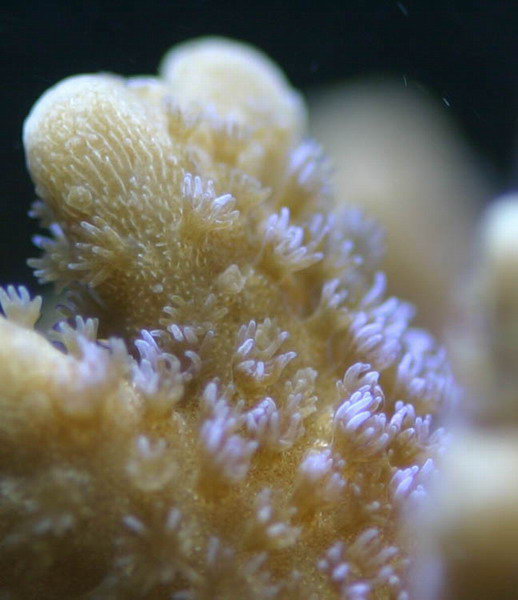
Yes this will be probably 80% SPS and the rest LPS. There will be no softies except some Ricordeas (if those even count as a softie).
|
|
Ryan Thompson
Guest
Joined: April 11 2006
Location: Lehi
Status: Offline
Points: 3546
|
Post Options
Thanks(0)
Quote Reply
Posted: February 01 2010 at 6:03pm |
Alright well I have some updates for everyone.
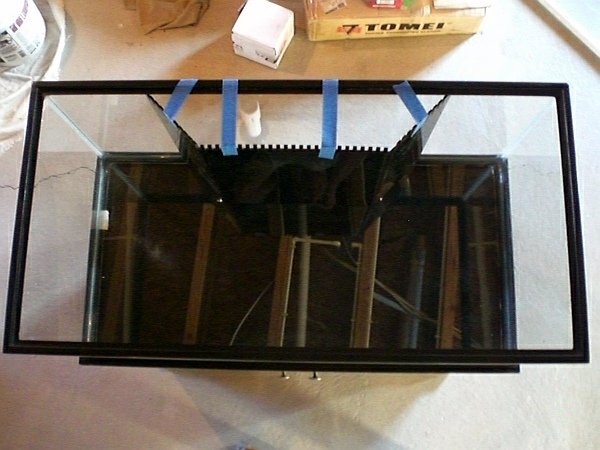
I took some pictures of the stand being totally finished. I also took pictures of the overflow that Burt and I built on Saturday.
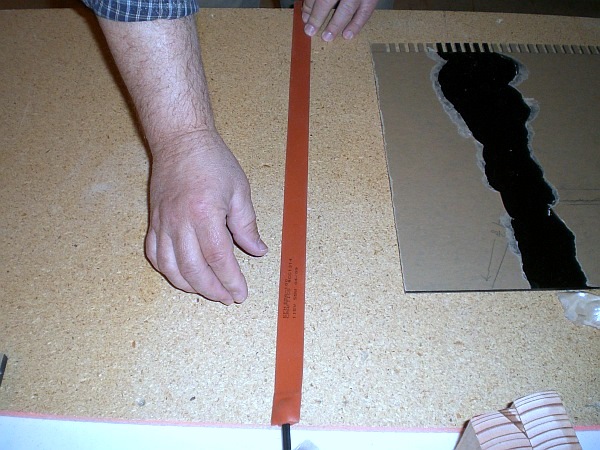
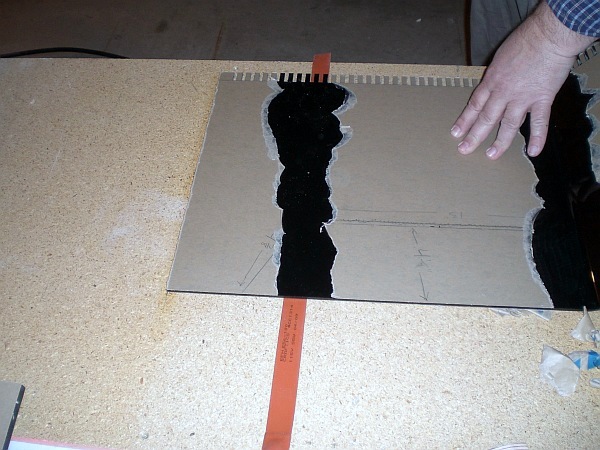
We made the overflow out of 3/16" black acrylic. Learned some very valuable lessons from the whole thing though. Use at least 1/4" thick acrylic and do NOT heat the acrylic for too long.
As Burt and I were staring at our fine work we heard two loud "pops". Burt and I were totally confused at where the sound came from. Upon further investigation we found 2 cracks running horizontally through one of the bends. As Burt was patching them up, another loud pop and a third crack. huh!!!OMG!!!!SOB!@##$
So I call Eric at Marine Aquatics and ask him what could have caused that. Very first thing he says is "HEAT". So I tell him how we made it and he is 99% sure the cracks were from us heating the acrylic too long. So don't overheat acrylic if bending.
I am simply gonna silicone up the crack so water can't leak through. I have bent and tugged on the overflow to see if I can get it to crack anymore and it won't. I am 99% positive the thing is safe and will still use it. We will find out on the FW test, I guess.
Also my lights are officially ordered and should arrive this week. I changed my mind and went with the 6x24W version instead of the 4 bulb version.
Plumbing supplies are on the way and as soon as I silicone in the bulkheads and the overflow it will be time for the FW test! I am really excited to be to this point.
|
|
Ryan Thompson
Guest
Joined: April 11 2006
Location: Lehi
Status: Offline
Points: 3546
|
Post Options
Thanks(0)
Quote Reply
Posted: February 01 2010 at 6:08pm |
Pictures of the last week of progress...
|
|
ksmart
Guest
Joined: August 31 2009
Location: West Jordan
Status: Offline
Points: 1582
|
Post Options
Thanks(0)
Quote Reply
Posted: February 01 2010 at 7:21pm |
|
Looking good!
Edited by ksmart - February 01 2010 at 7:21pm
|
|
|
|
Crazy Tarzan
Guest
Joined: September 12 2003
Location: Riverton, WY
Status: Offline
Points: 1681
|
Post Options
Thanks(0)
Quote Reply
Posted: February 01 2010 at 9:28pm |
One of my favorite sizes for a tank--has the same width vs height vs length as a 120 one of my other favorites. I miss mine, but the next one will either be a custom black silicone tank or a 50 gal (same as 40, just a little taller).
Looks awesome, don't let my wife see it--I'll have to have ryan over to build the stand for me.
|
|
Was that in there yesterday? Casper--WY windier than ?
Down to a 20, soon to double or nothing
|
|
Nick801
Guest
Joined: July 03 2008
Location: Sandy
Status: Offline
Points: 4155
|
Post Options
Thanks(0)
Quote Reply
Posted: February 01 2010 at 11:31pm |
|
Man it looks sweet =) what did you do to bend the overflow? just toss it in the oven or?
|
|
|
|