| Author |
 Topic Search Topic Search  Topic Options Topic Options
|
Idaho-Tank 
Guest


Joined: November 03 2010
Location: McCall, Idaho
Status: Offline
Points: 26
|
 Post Options Post Options
") Thanks(0) Thanks(0)
 Quote Quote  Reply Reply
 Topic: Idaho 100 build Topic: Idaho 100 build
Posted: November 03 2010 at 10:07am |
Hello,
Been lurking around here and decided to join and post up my tank build project. I make it to Utah several times a year and am really impressed with your site - so I hope you don't mind a lowly Idahoan. 
After being out of the hobby for about 6 I decided it was time to get back into it.
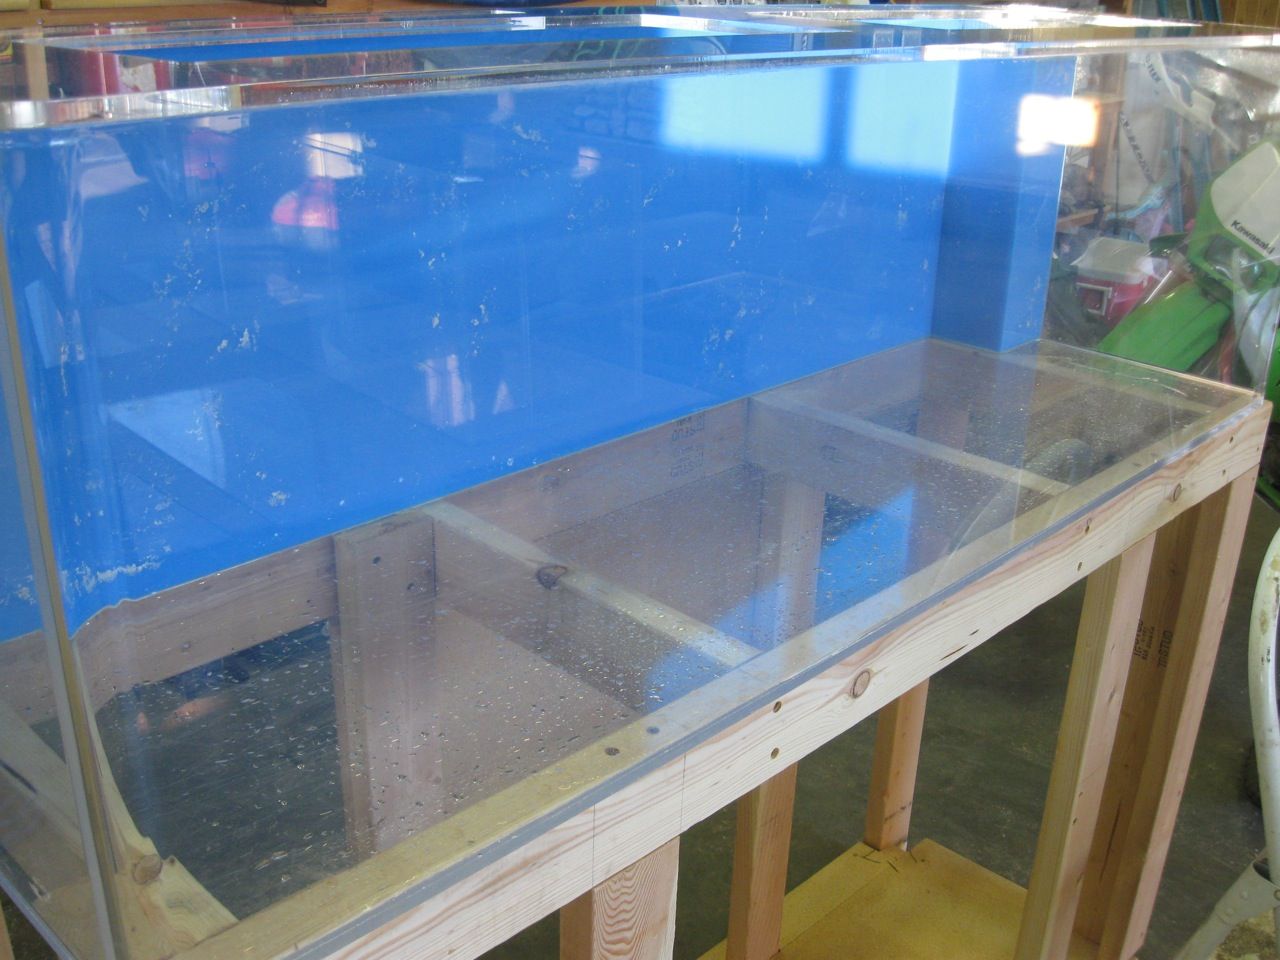
I unpacked my tank which I've had for about 15 years. Needed a good cleaning! It will also need some polishing to get rid of the tiny little scratches I have made during the years of use.
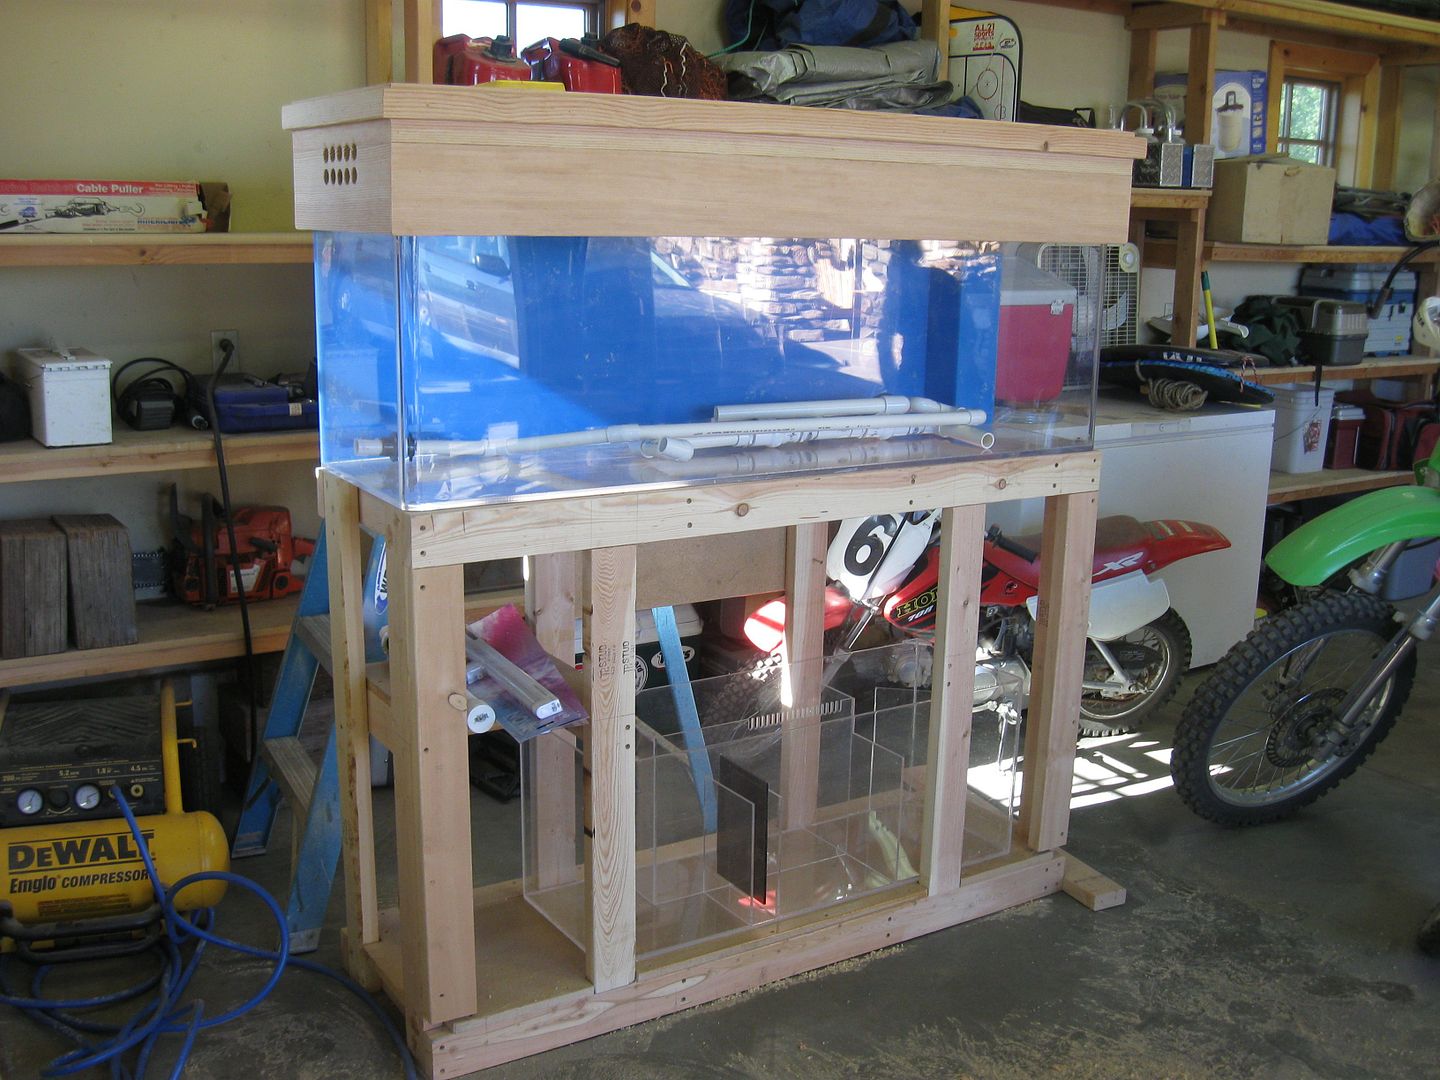
Plans for the stand...
The front... I am going higher with my stand this time to get the tank up higher.
The guy who built this tank for me put the overflow right in the back corner... Im sure this is typical but it makes getting the overflow line through the stand top and structure a pain. I didn't plan for it last time I built a stand... this time I am keeping that corner clear of structure.
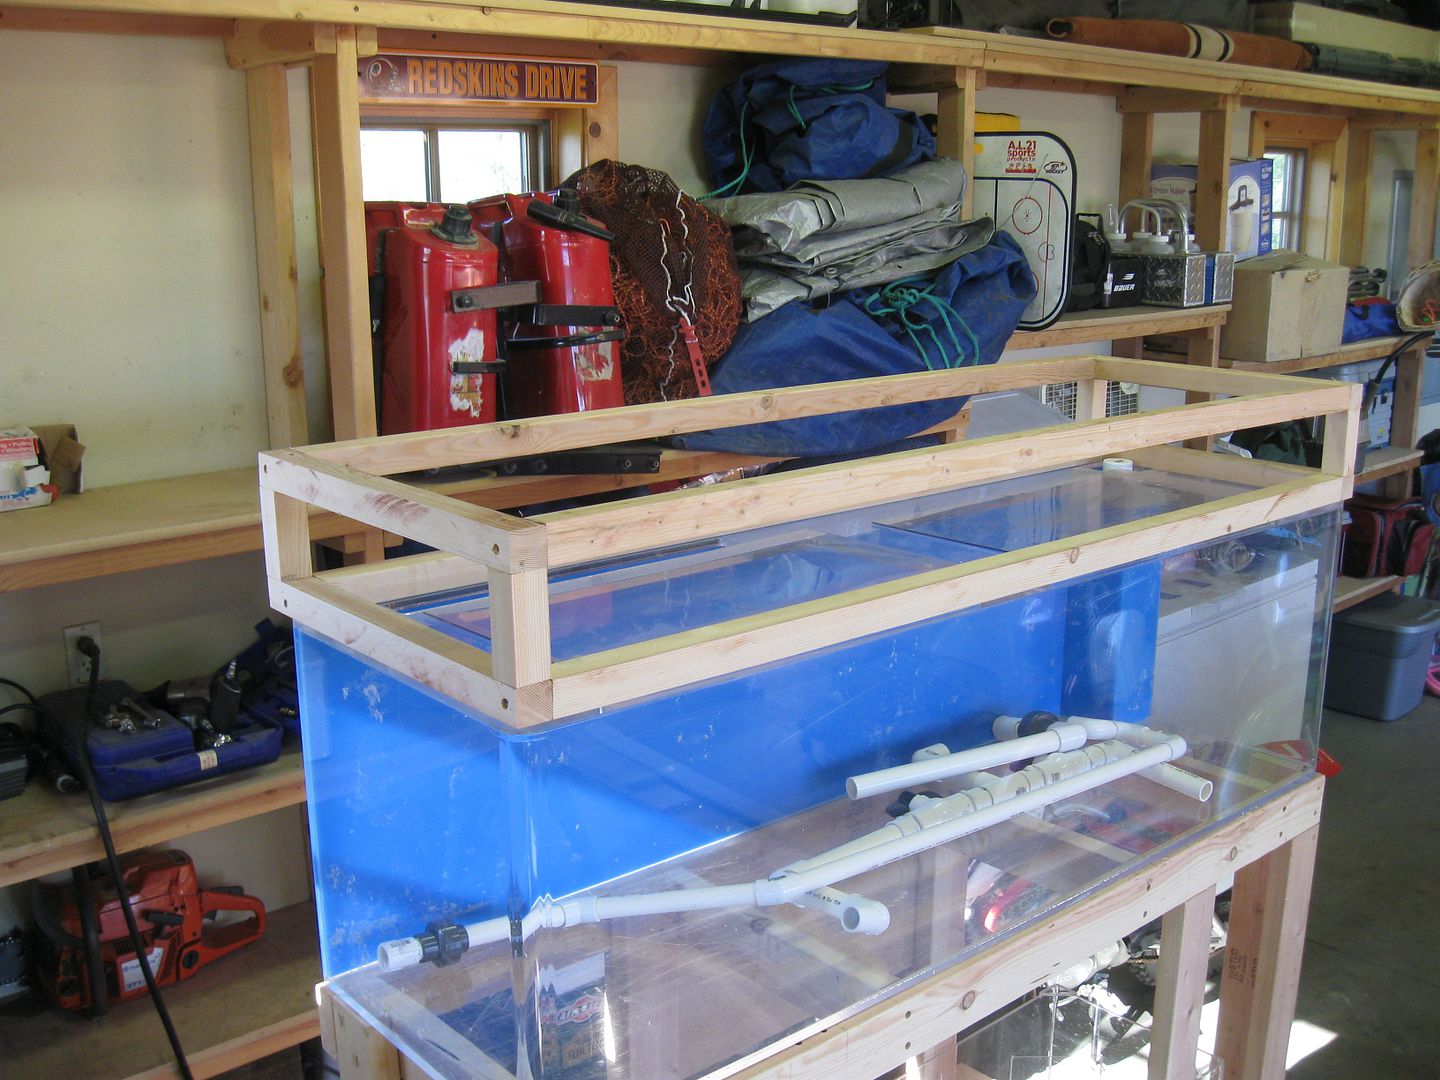
I will be starting the Hood as soon as I have the stand done...
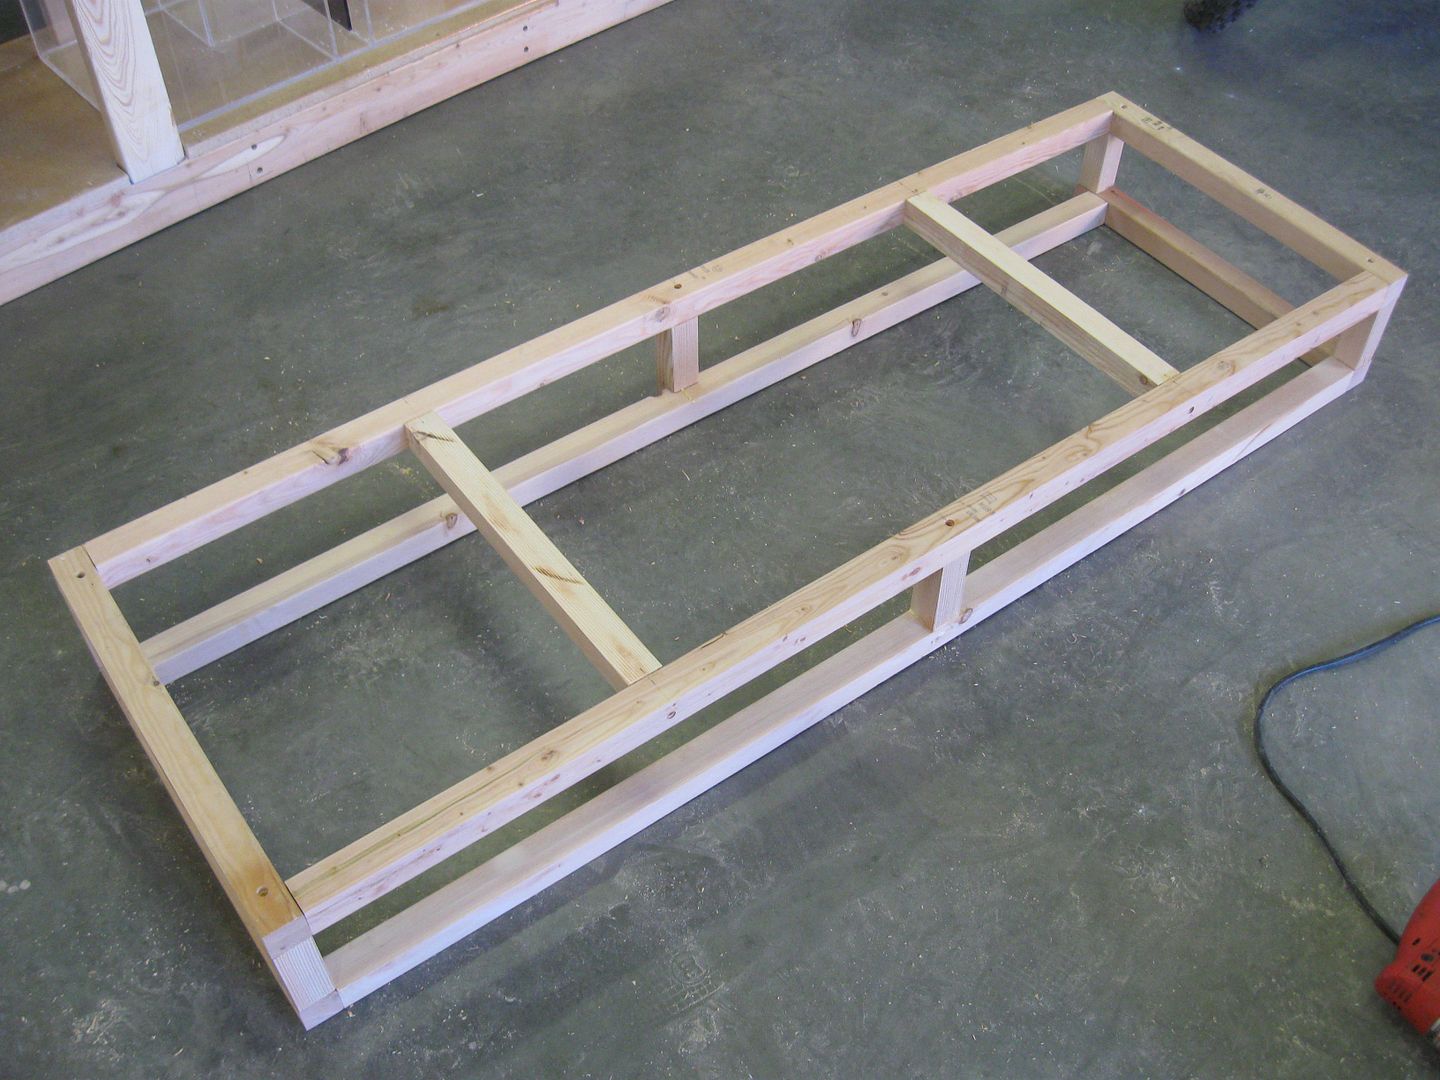
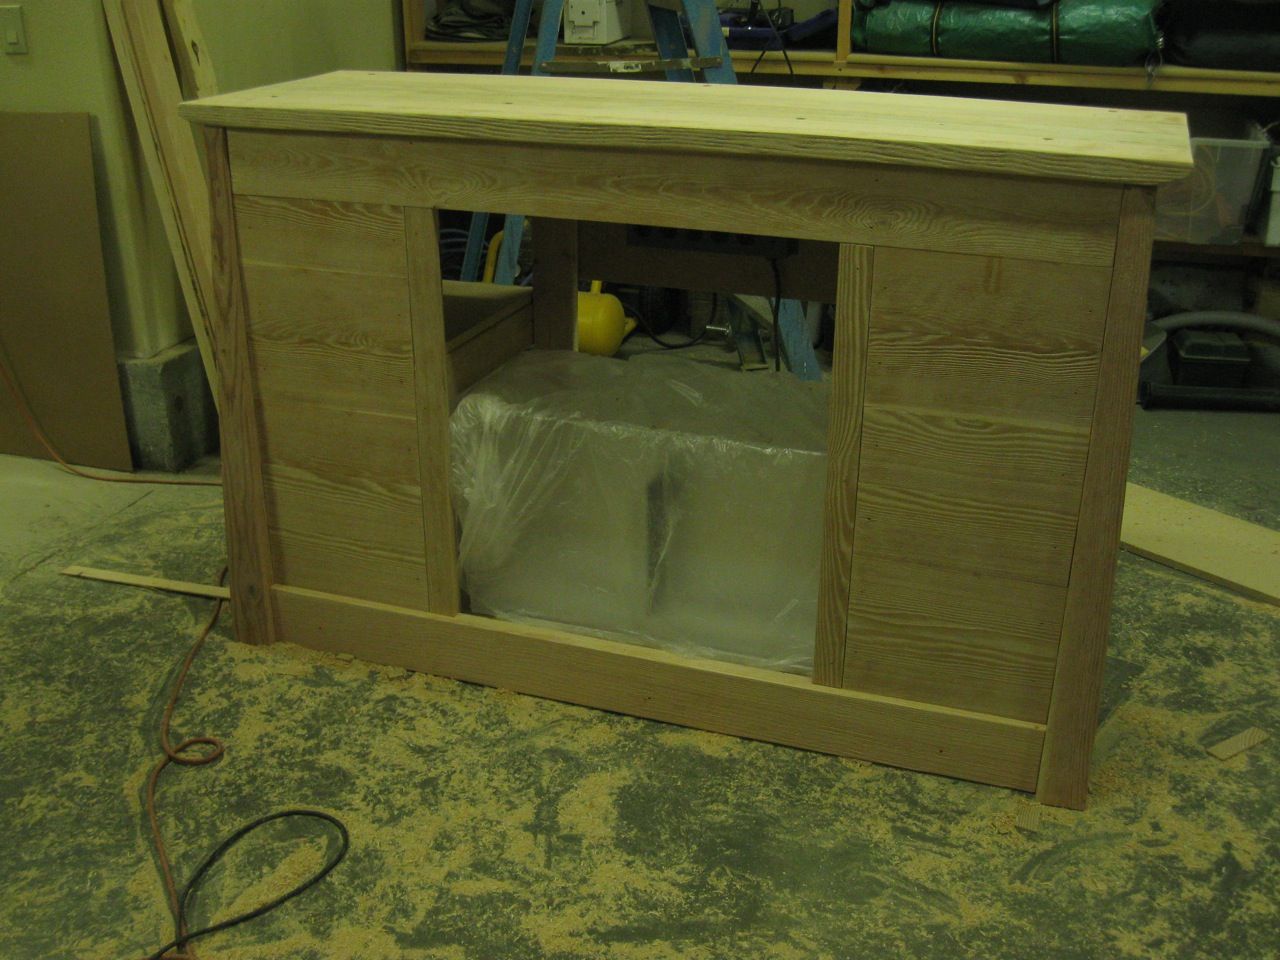
Construction of the stand....
Thought Id post up some photos of my stand so far.. this is just the frame obviously. Had to purchase the 2x material but the screws and MDF was stuff I had. Let me know if anyone has any thoughts... Obviously the 2x4s are overkill but inexpensive and easy to work with for a frame - I also like the peace of mind knowing its solid.
The overflow corner drain is clear of all material.
|
|
100 gal reef. 180 gal build starting
|
 |
Idaho-Tank
Guest
Joined: November 03 2010
Location: McCall, Idaho
Status: Offline
Points: 26
|
Post Options
Thanks(0)
Quote Reply
Posted: November 03 2010 at 10:08am |
Sump....
Here is what the original looks like:
I will have some acrylic left over after but I figure I will need some to practice with and perhaps a stand for my skimmer etc... And I couldn't get a smaller amount on short notice from the supplier...
I ordered 1/4" cell cast. Based on the reading I did 1/4" will be adequate and I will be installing some bracing along with the baffles etc... for extra support. Having never worked with acrylic I am planning on practicing with some welds prior to putting the finish pieces together.
Need to also purchase the solvent/cements.
My sump plans:


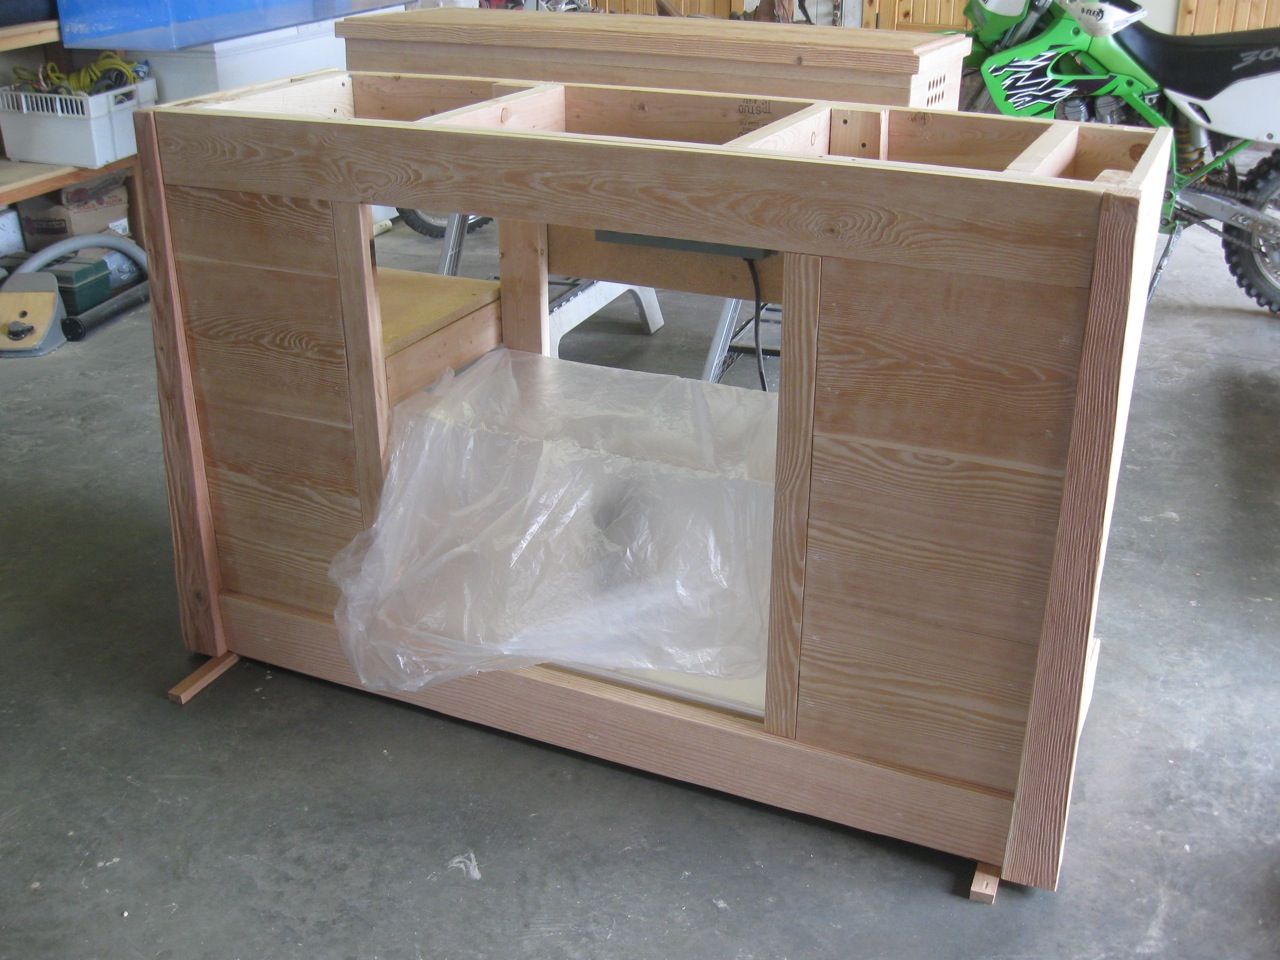
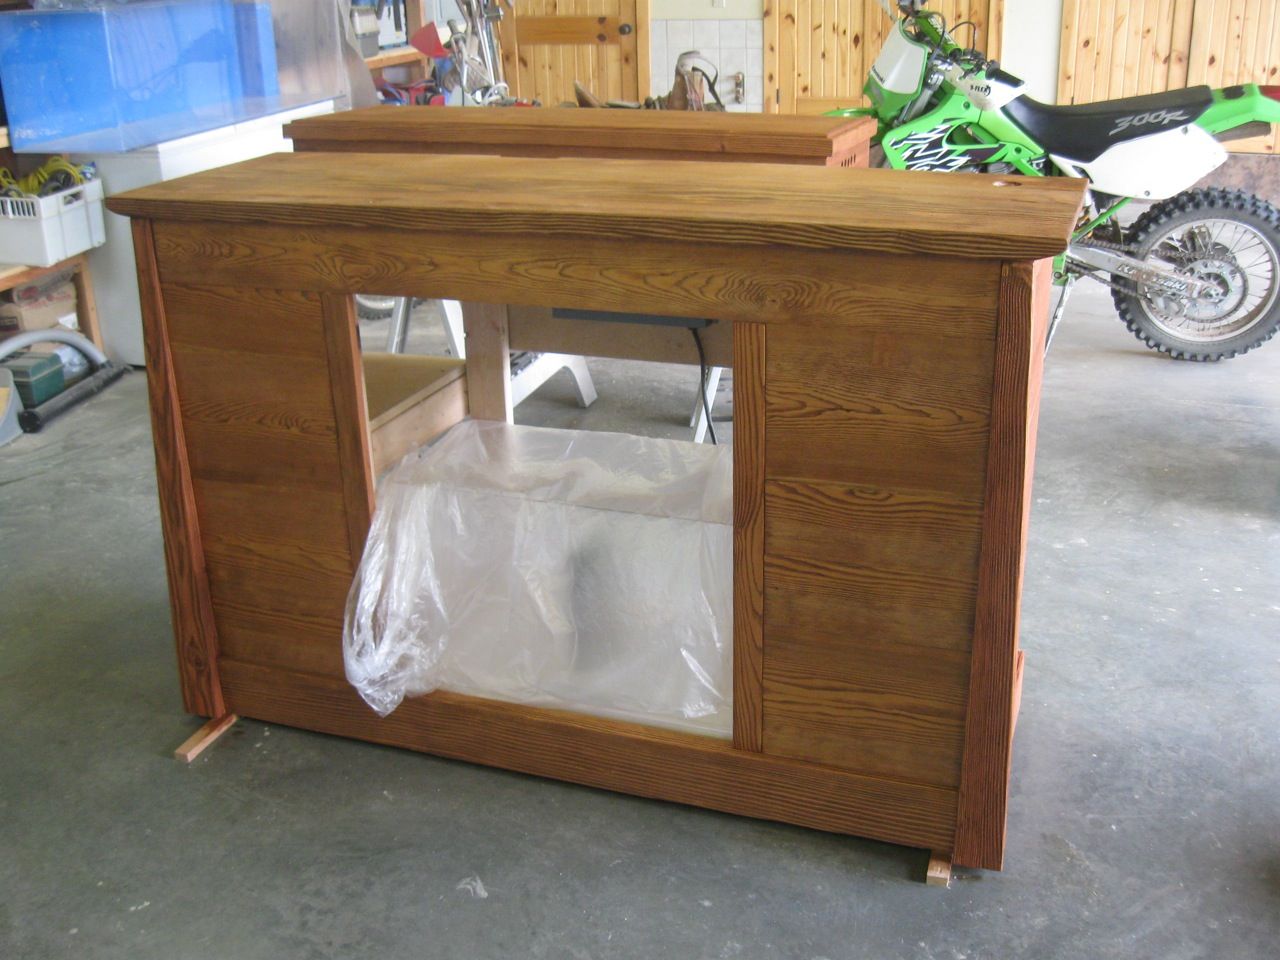
Work on the stand continues....
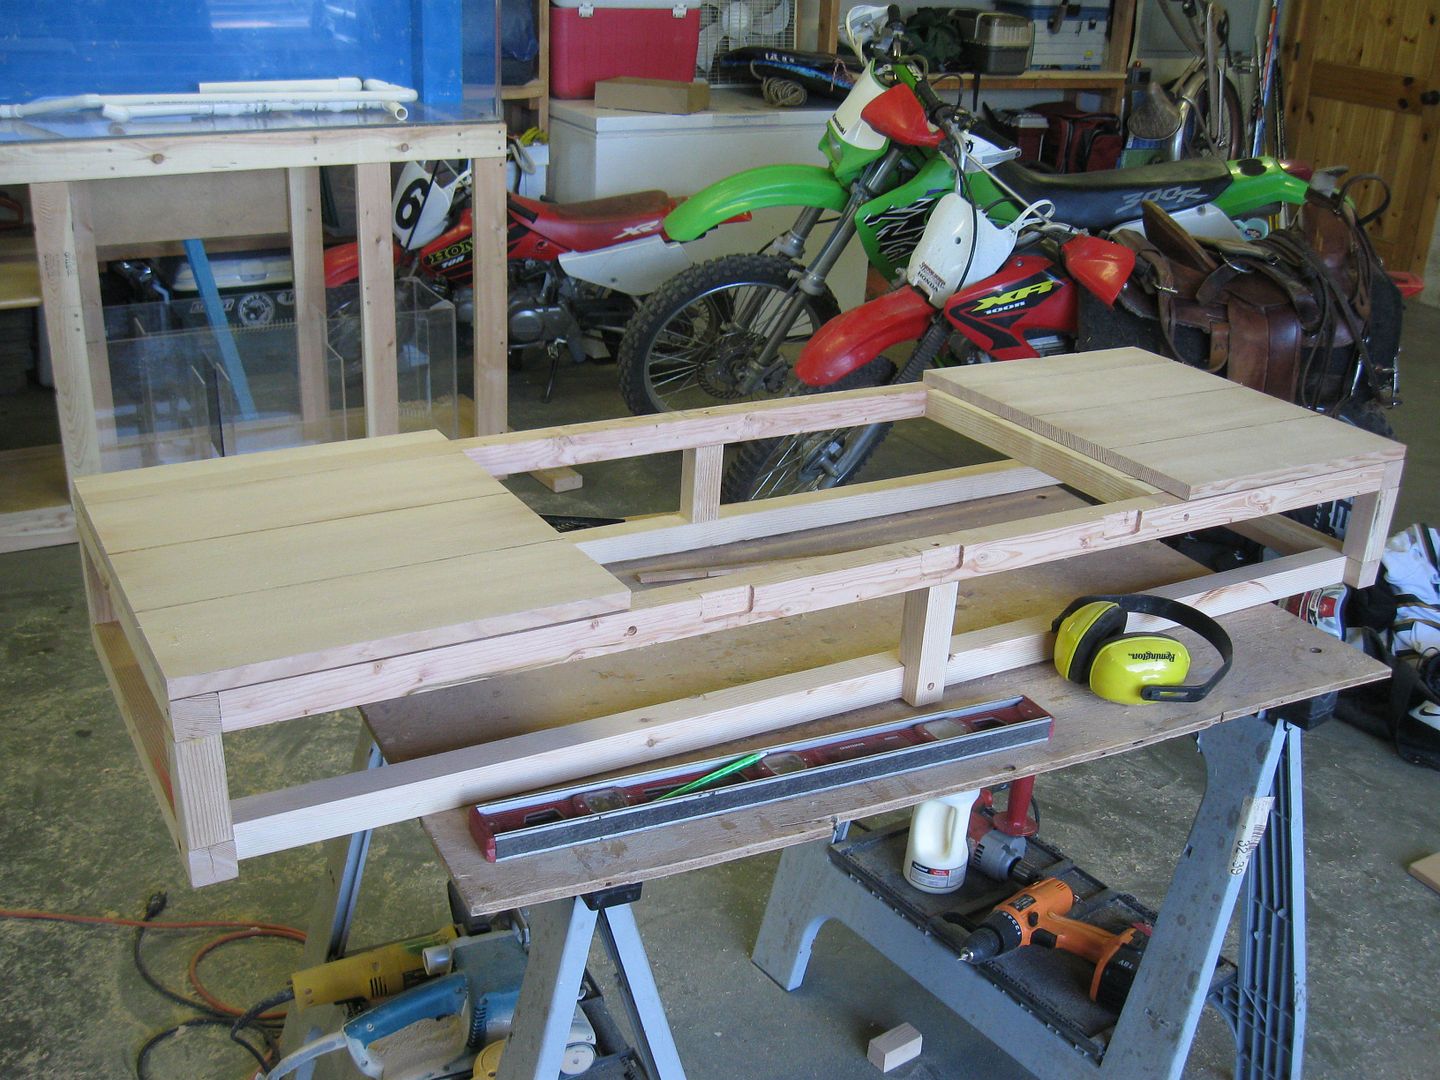
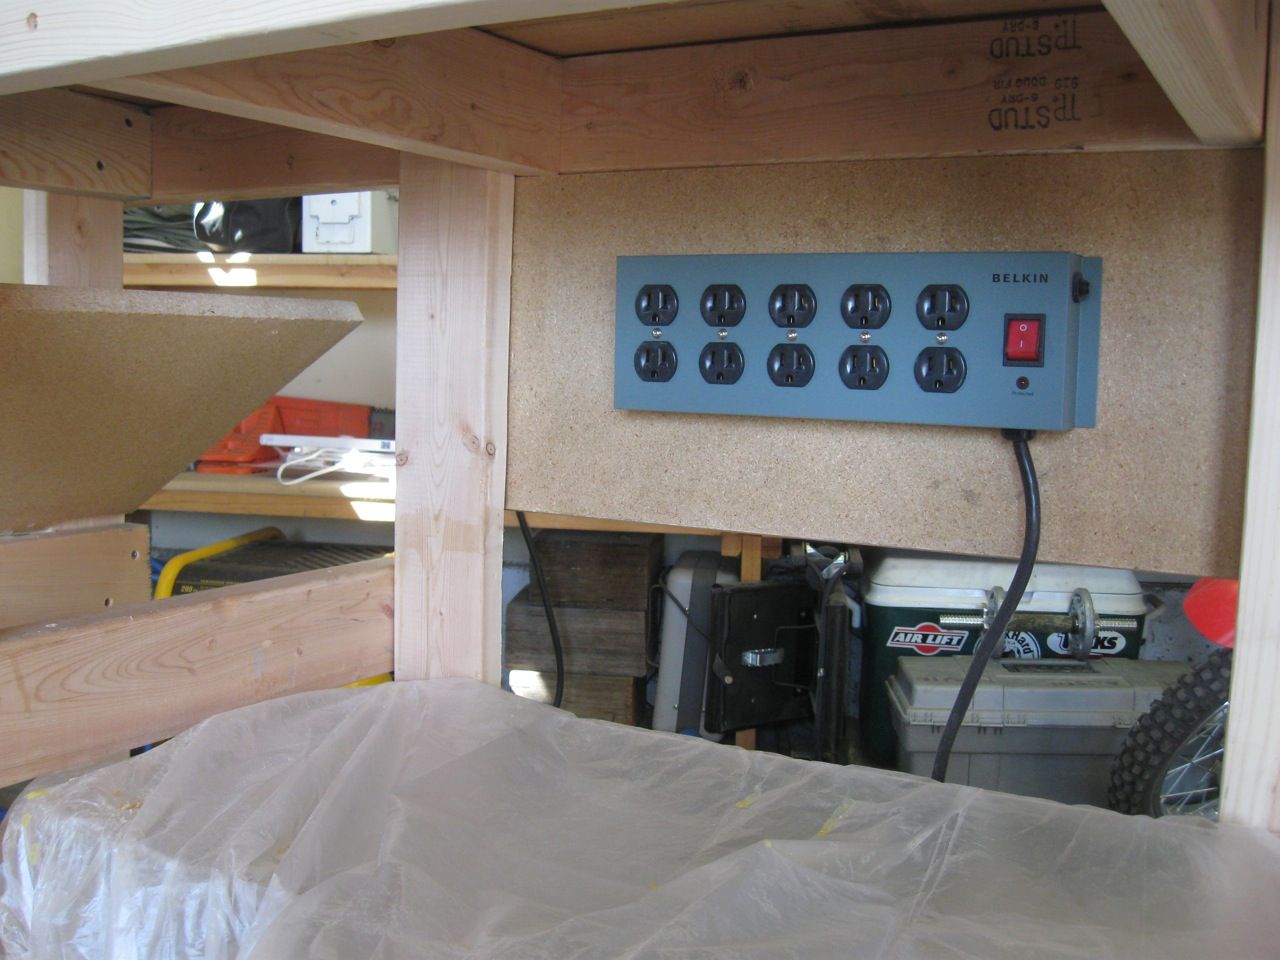
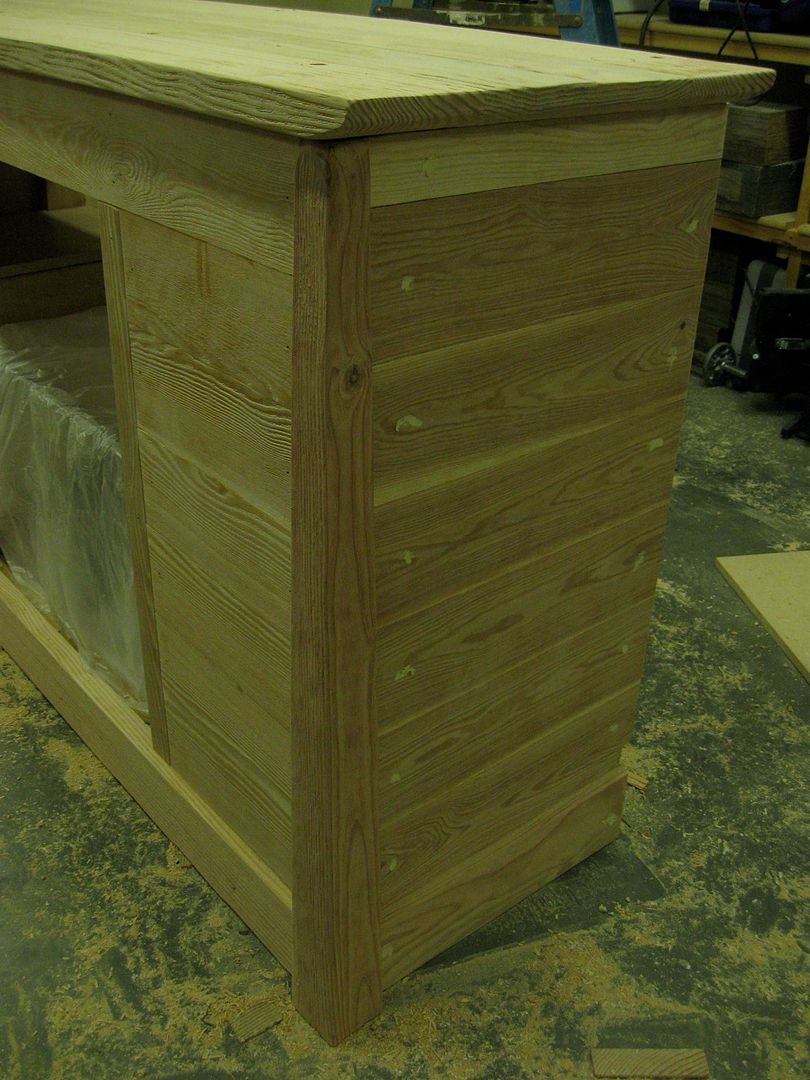
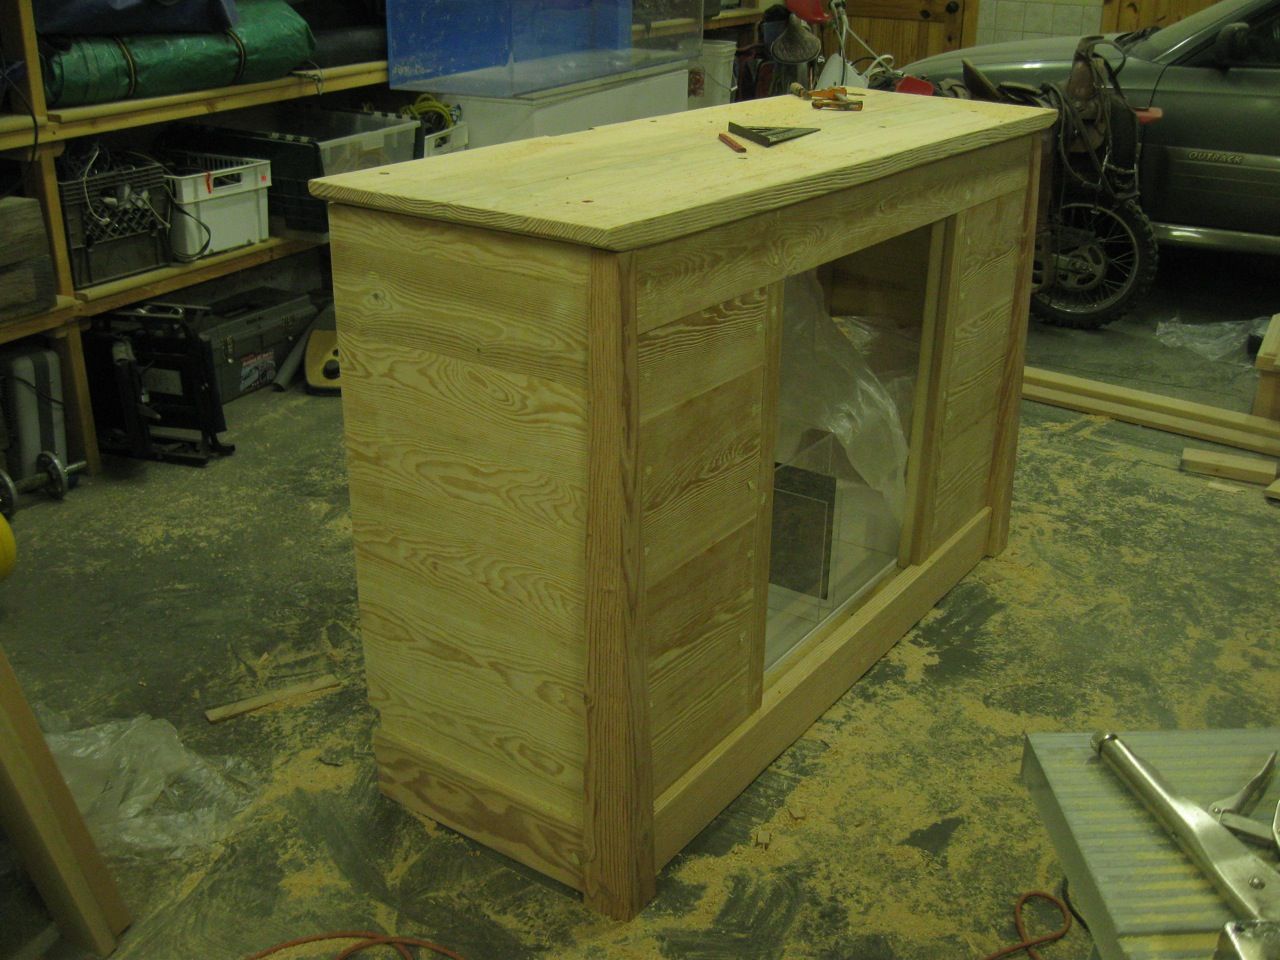
I realized that the top shelf could not go all the way across as it would make accessing the skimmer to difficult (it will be on the far right). I decided to cut the shelf back - I still wanted a shelf for test kits, misc "things" etc.. I also put a panel in the back - I will mount two power strips to this panel which will help keep power cords organized and tidy.
I am still waiting for my 1x fir that is being wire brushed - should have it this week. I forgot to order a 4x4 for the corner trim detail I wanted do so I bought one and wire brushed it myself. I cut the corner so it tapers in two directions and has the look of legs. I cut a dato notch into the back corner so it will fit over the corner of the frame. The 1x finish material will butt into these corners. This stand is going to weigh as much as the 100 gallon tank... lol.
Wire brush technique - before sanding.
Stand with corners, back panel and modified shelf. I also applied a couple coats of polyurethane to all MDF.
|
|
100 gal reef. 180 gal build starting
|
|
Idaho-Tank
Guest
Joined: November 03 2010
Location: McCall, Idaho
Status: Offline
Points: 26
|
Post Options
Thanks(0)
Quote Reply
Posted: November 03 2010 at 10:08am |
Back to the Sump
After a couple hours of working on the stand I decided to start on my sump. I have been anxious to start this part of the project since I decided to build my own last week. I purchased a full 4x8 sheet of 1/4" cast acrylic (cast is supposed to be better for cutting than is extruded acrylic). I was a little nervous about cutting the acrylic as I have read more than one guy talk about how difficult it can be.
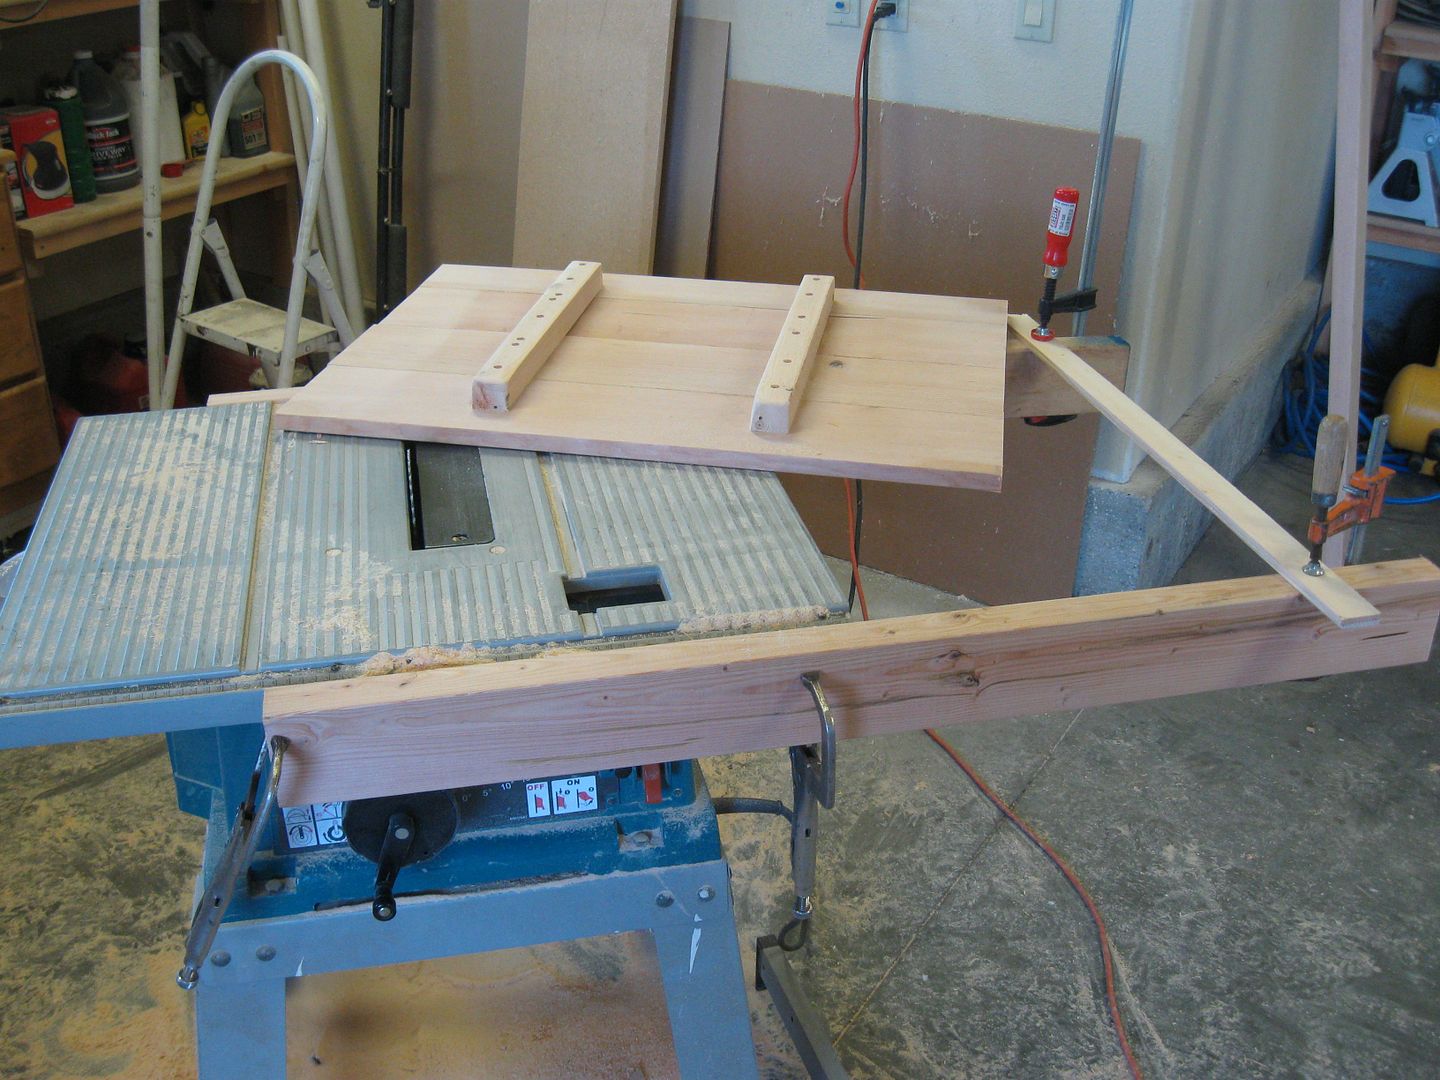
I bought a 60 tooth 10" blade for my table saw (the 80 tooth I wanted was to expensive). I also have a chop saw with a 60 tooth blade. I found cutting the acrylic to be really easy and not near as difficult as I had anticipated. I did not use any water spray or anything like that (a couple guys had recommended doing that to prevent melting). I found that the table saw was the easiest way to get good square cuts. I did use my chop saw as well.
The only difficult part was making the very first cut - my little table saw is not really set up for cutting full sheets.
After the first cut was made it was easier. I had to create a makeshift fence.
Slow and steady worked great.. no melting, no chipping....
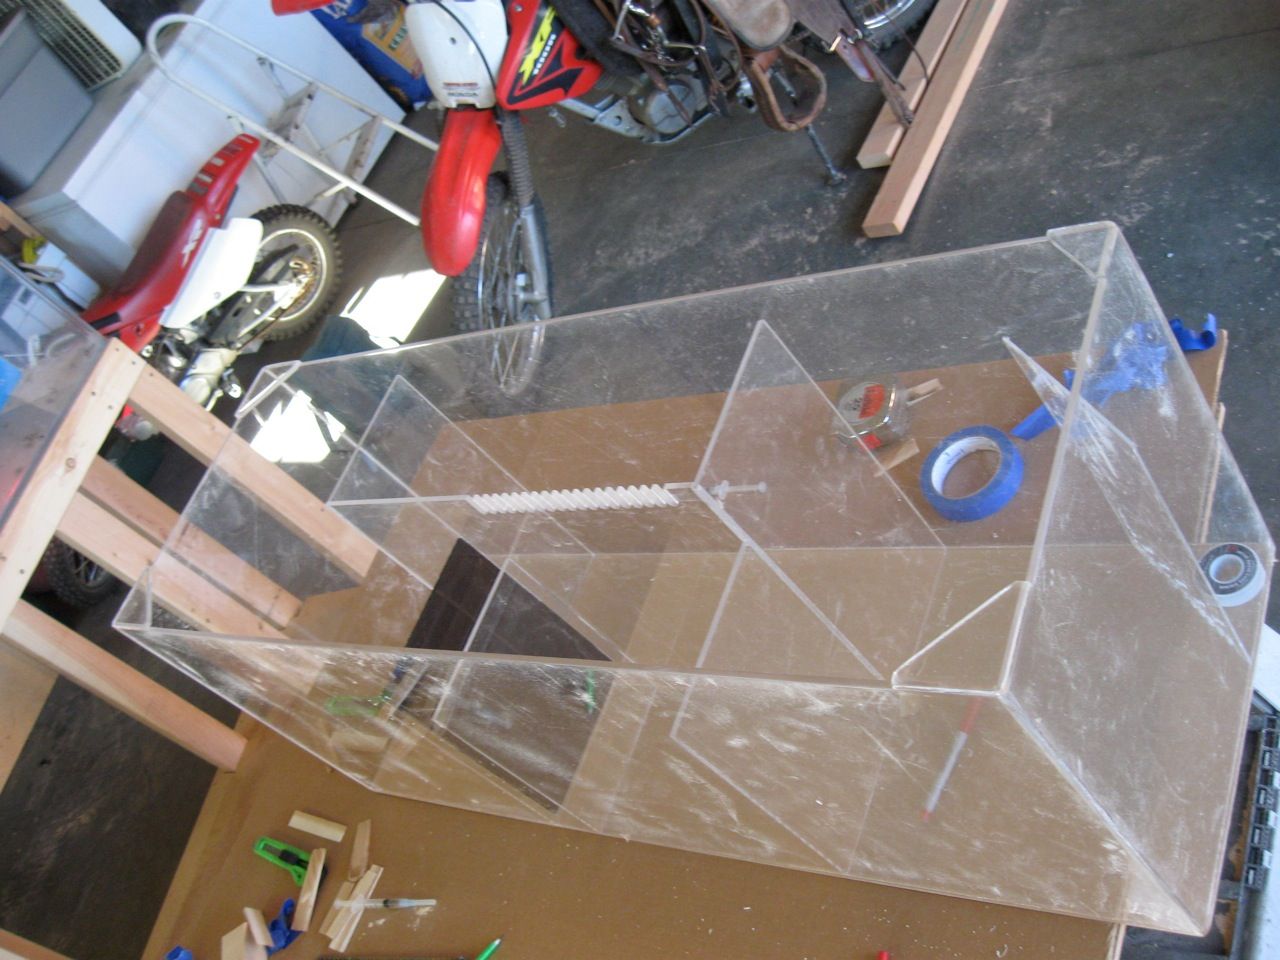
After I had most of the pieces cut I decided to try the teeth for the overflow from the refugium. This also went smoothly and was no problem... I used a dovetail template which worked great. I hope the glueing goes as smoothly but I am guessing that is the hardest part...
After that I decided to tape it all together and see how it looked.
 

Sump continued:
I pulled my old sump pump out.. it is a Danner Mag drive 9.5. It looks like the head height will be about 4.5' so the GPH will be about 800GPH....
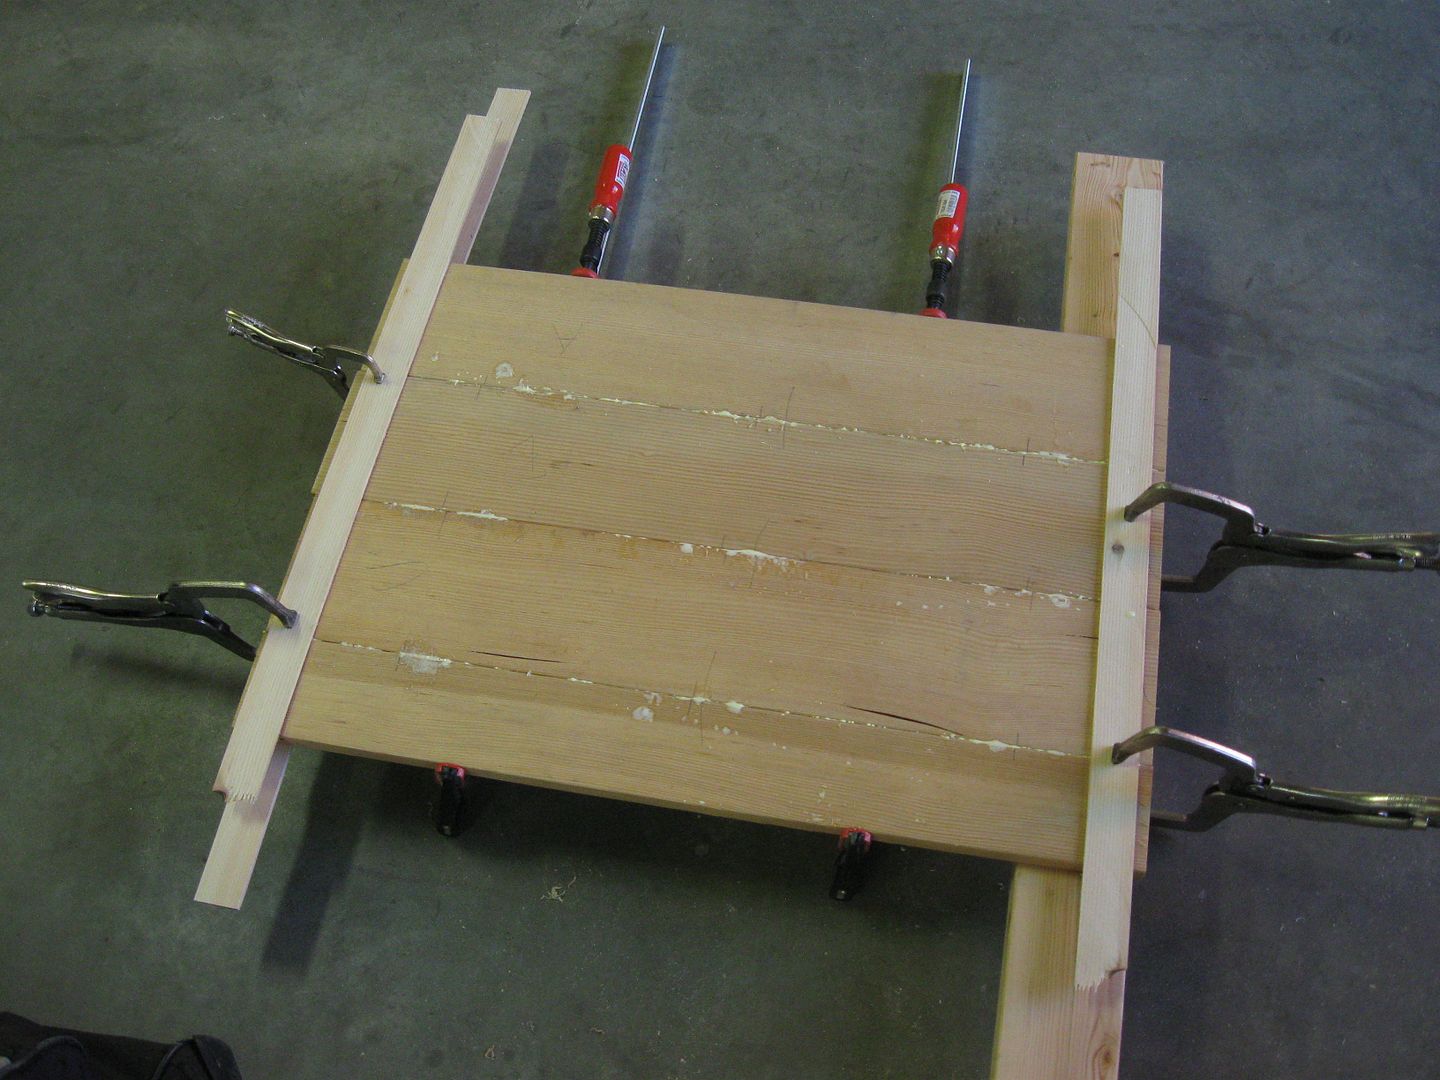
I finished cutting the last few pieces of acrylic and started putting it together. In addition to the #16 cement I decided to buy some #4 - I was glad I did, the capillary action using the #4 is really nice. I applied the #4 & #16 with a syringe which worked great. I also used some wedges as others had recommended.
I found that I didn't need the pins others had used to create a space between the acrylic before applying the #4. The solvent would wick in between without the pins. I did apply from both sides. After the #4 dried I ran a tiny bead of the #16. Hopefully this will strengthen the seams.
Here you can see on the left where I have ran the #4 and then stopped... The lighter color is where no solvent has been ran yet. Its easy to tell where the bond is good.
In the process of putting it all together
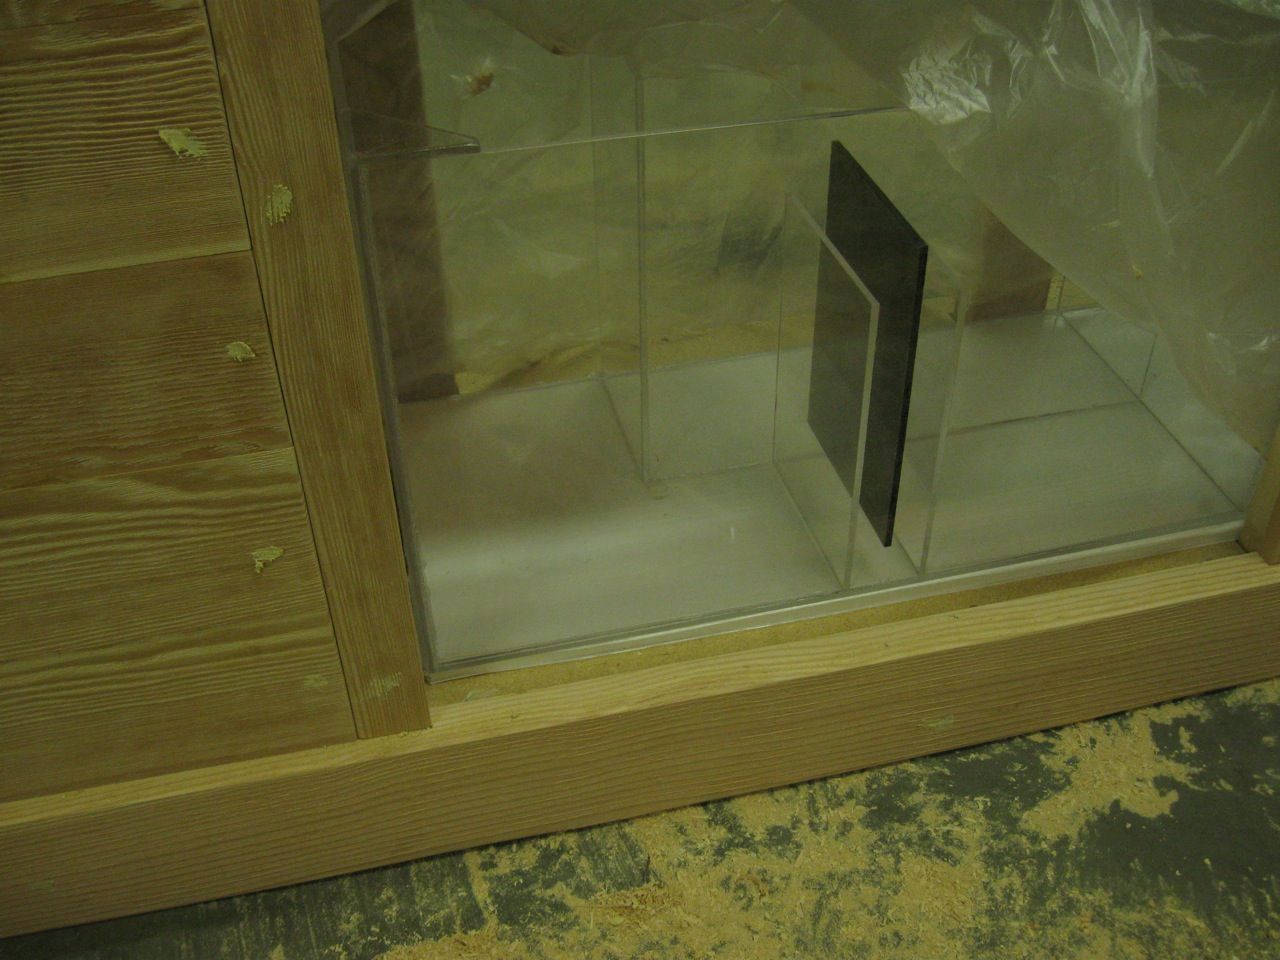
The guy who I bought my acrylic from gave me a few pieces of extra - one was a tinted piece.... Thought Id use it as my center baffle on the bubble trap...
Here you can see the bubble tower... the location the water first enters the sump from the display tank. I will fill this with some live rock chunks to help break up the bubbles.
|
|
100 gal reef. 180 gal build starting
|
|
Idaho-Tank
Guest
Joined: November 03 2010
Location: McCall, Idaho
Status: Offline
Points: 26
|
Post Options
Thanks(0)
Quote Reply
Posted: November 03 2010 at 10:10am |
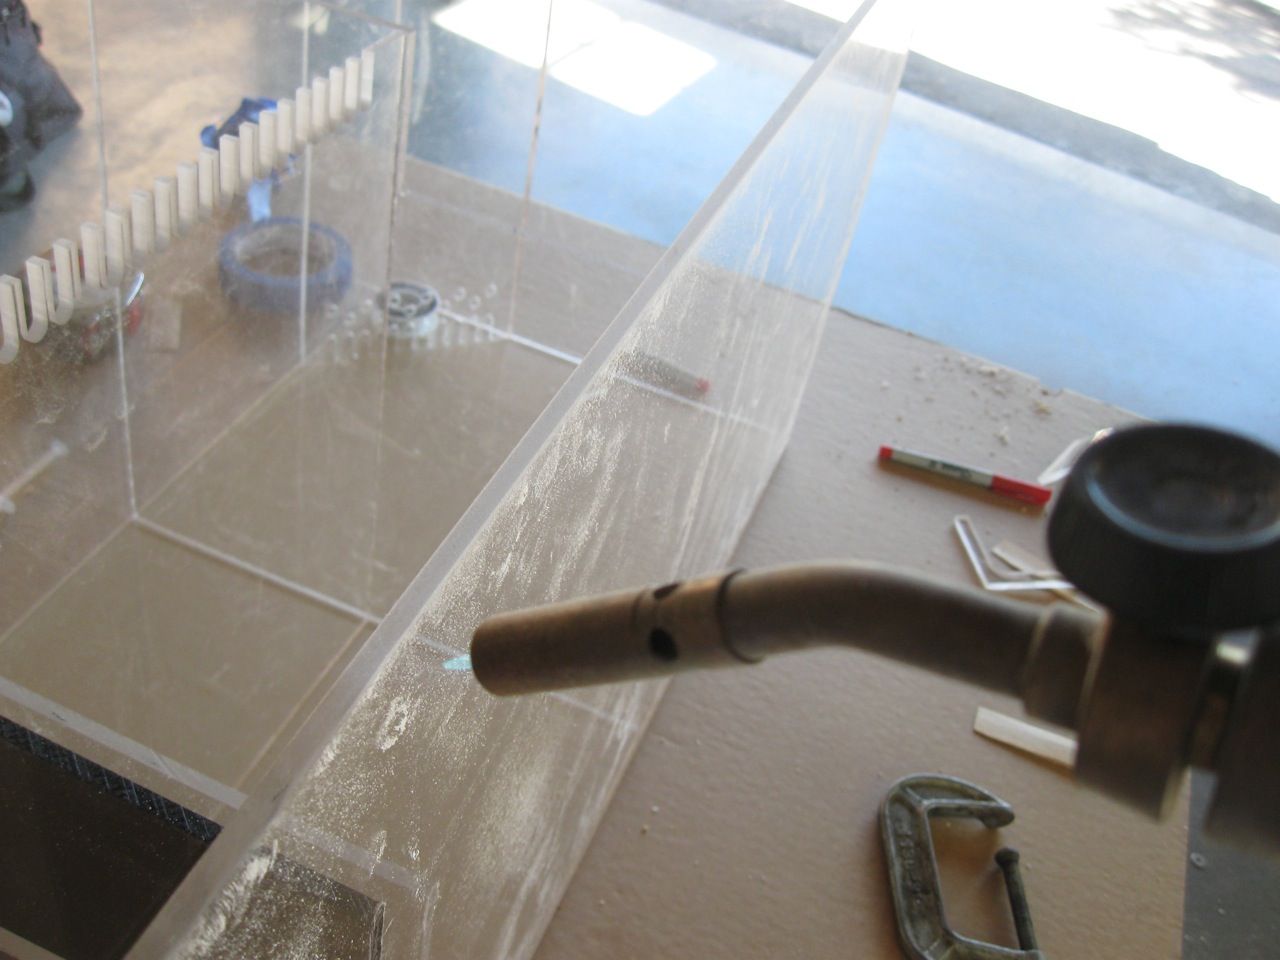
Yesterday I finished putting the sump together..... Then I let dry for about 3 hours and sanded the exterior corners and top edge. After sanding I used a torch to heat the edges which makes everything nice and smooth. Tomorrow I will test for leaks!!
After sanding (thats what all that dust is from... static electricity).. here she is. I figured 1/4" acrylic would be adequate to prevent any deforming (especially since there are interior supports) but I did decide to put corner bracing in each corner just to make thinks a little stronger.
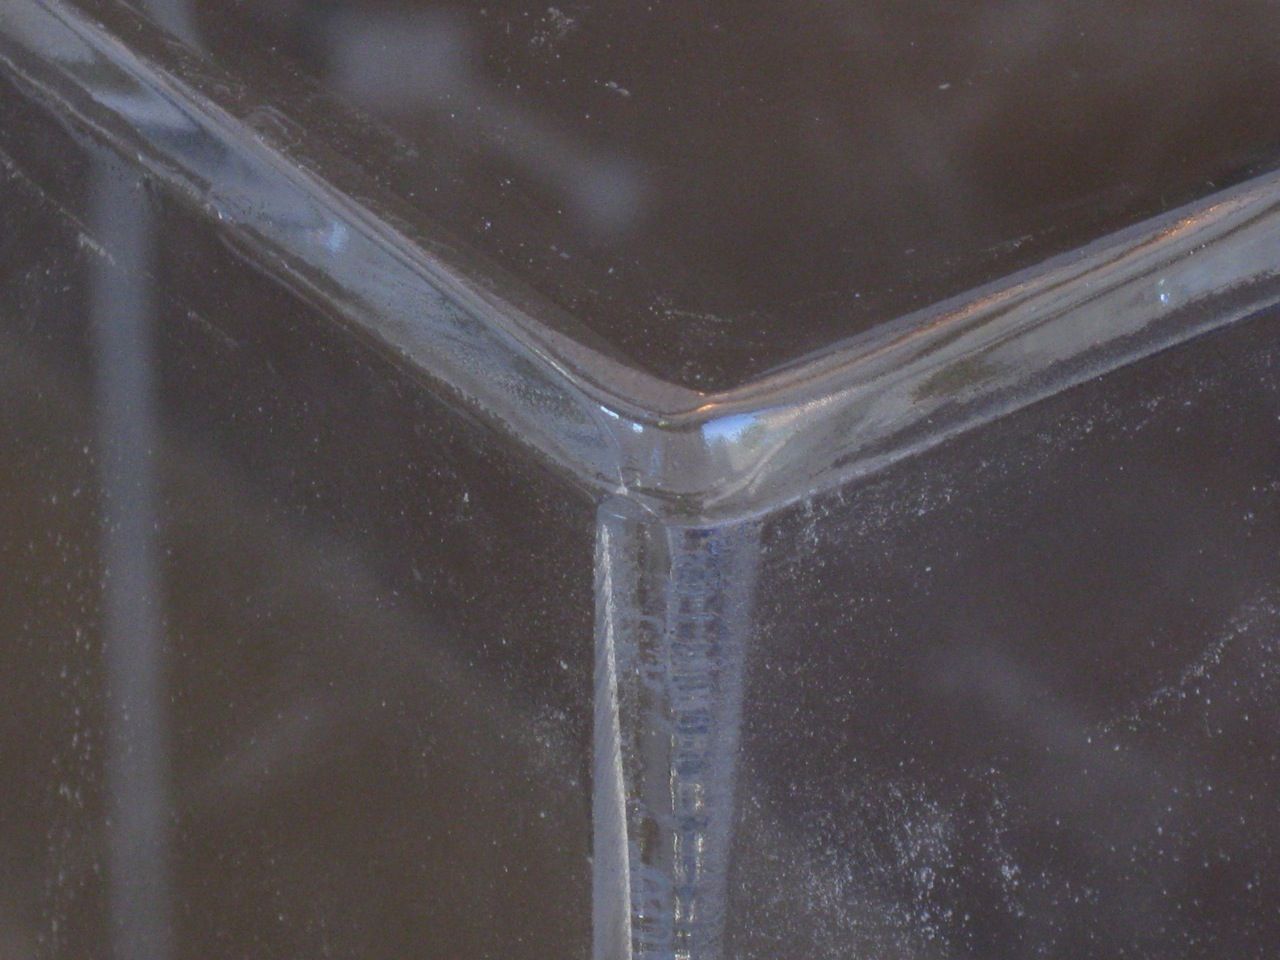
After sanding, I used a torch to smooth out the edges and make them clear.
here is a corner
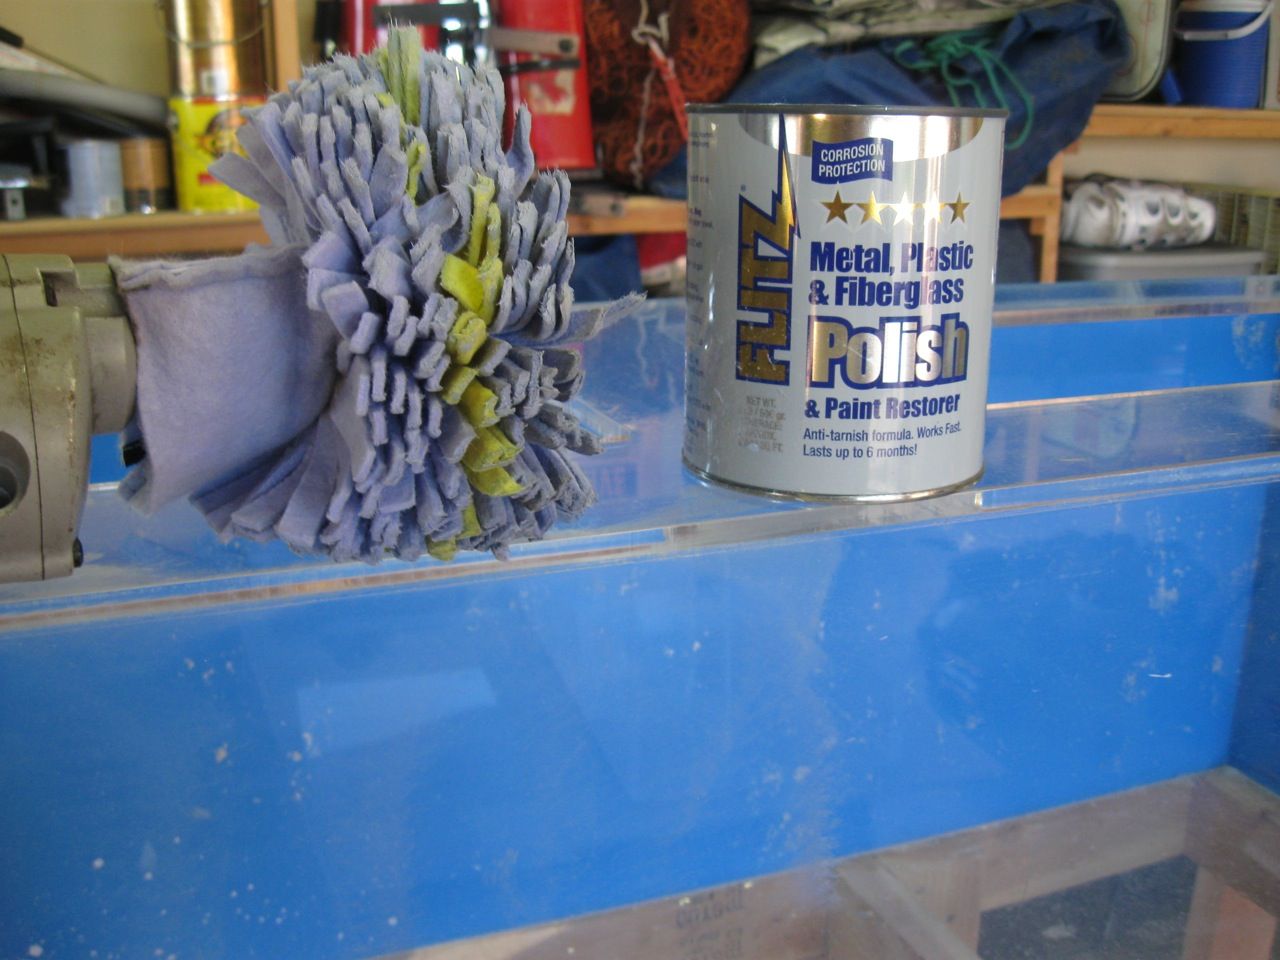
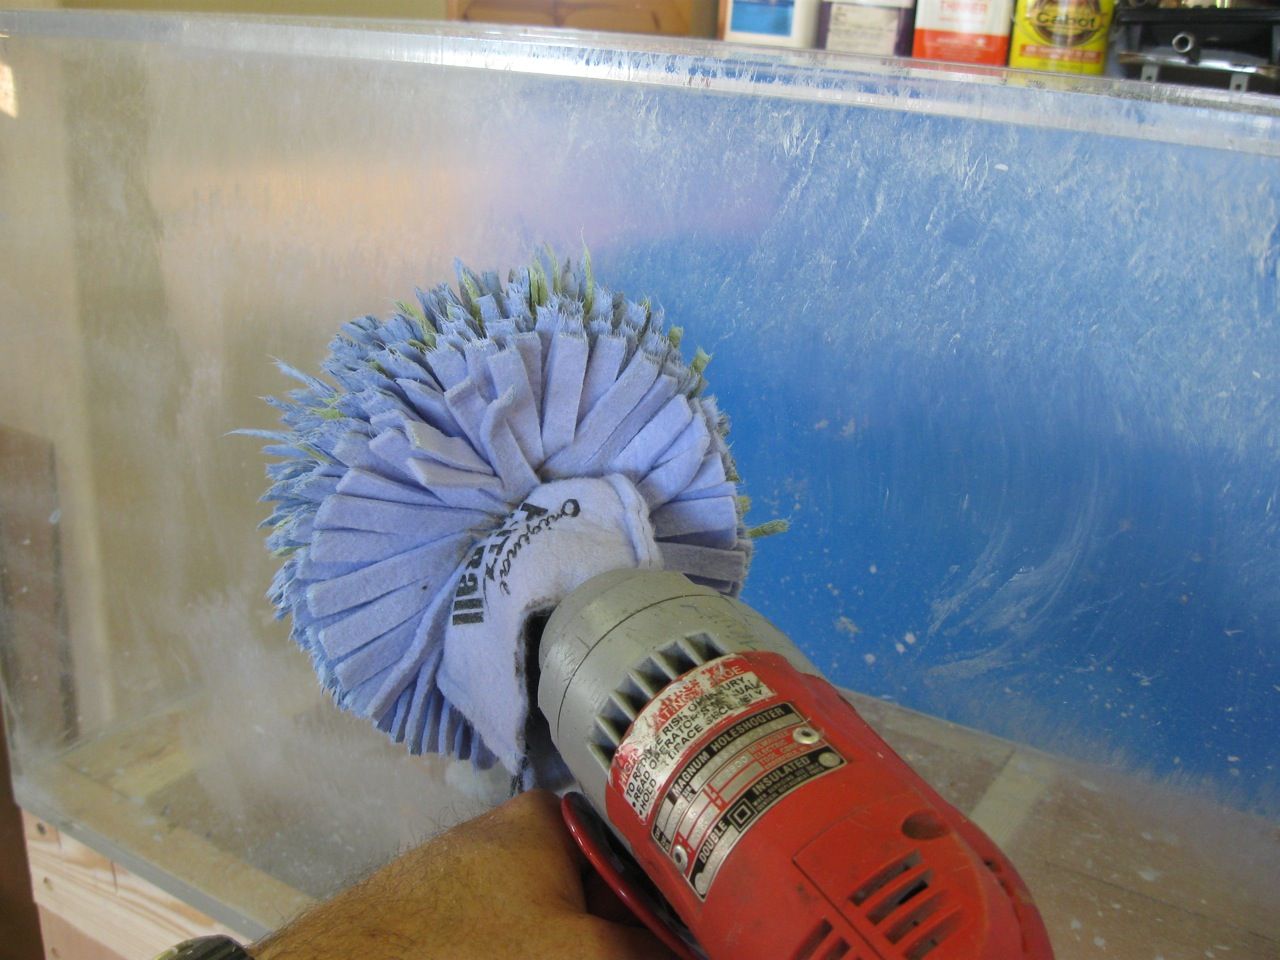
After the sump was done I decided to clean my existing tank.. It was filthy after sitting on a shelf for 6 years... After the previous years of use there were several minor scratches from various things. Using a polish I purchased for plastics & metals and a drill attachment I polished the inside and outside of the tank. This worked to take out all but a couple small scratches I have from rock being moved.
The stuff I used which worked well
This would take forever without a drill attachment!
All done and ready for water.
Today I plan to test my pump out and start the plumbing..
Here is the plan for plumbing.... any thoughts?
|
|
100 gal reef. 180 gal build starting
|
|
Idaho-Tank
Guest
Joined: November 03 2010
Location: McCall, Idaho
Status: Offline
Points: 26
|
Post Options
Thanks(0)
Quote Reply
Posted: November 03 2010 at 10:11am |
Today was the big day to test out the sump.... The cement had had 24 hours to cure so I was ready.
Everything was flowing just as I had hoped... the bubble tower and bubble trap worked great.
Then I filled up the Refugium.
Then I noticed a little leak! I was hoping I wouldn't have any but.... there was one spot where a small gap occurred in the edge and I thought I had used enough of the #16 cement to seal it but no... So I emptied the sump, dried it all and fixed the the leak. I was able to inject the #16 cement into that gap with the syringe. Then just to be safe I applied a small bead of #16 to all interior seams.
Here you can see water from the leak on the left. This is also a shot of about where the water levels will be in the sump when it is at max capacity.
Will let the #16 cure for another 24 hours then test again. I also plan to test the plumbing before glueing it (will probably leak everywhere) just to verify the flows all work...
Jimbo, well not everyone can be masters of acrylic like you and Pat.. lol.
The good news is that the sump is now water tight! Sat for one hour full of water with no leaks.... Then I took out some water and hooked up the plumbing. I didn't glue anything so there were a few leaks in the plumbing obviously but I was able to test out the flow... worked great! The bubble trap everything seemed to function perfect... I may put an elbow on the inlet to the refugium not sure yet. Now I just need my special order fir to show up so I can finnish this stand and hood!! Im running out of things to do until it arrives.
The sump tank takes up just about all of the stand...
Up and running
Even a boring video of a sump....
|
|
100 gal reef. 180 gal build starting
|
|
Idaho-Tank
Guest
Joined: November 03 2010
Location: McCall, Idaho
Status: Offline
Points: 26
|
Post Options
Thanks(0)
Quote Reply
Posted: November 03 2010 at 10:17am |
Friday afternoon I started the Hood portion of the project - I finished it yesterday afternoon. I had the specs on the lights I ordered and from that was able to build the hood around it. Fortunately the light fixture is low profile and the hood didn't need to be really tall - I am trying to keep the weight down so its easier to take off and on.
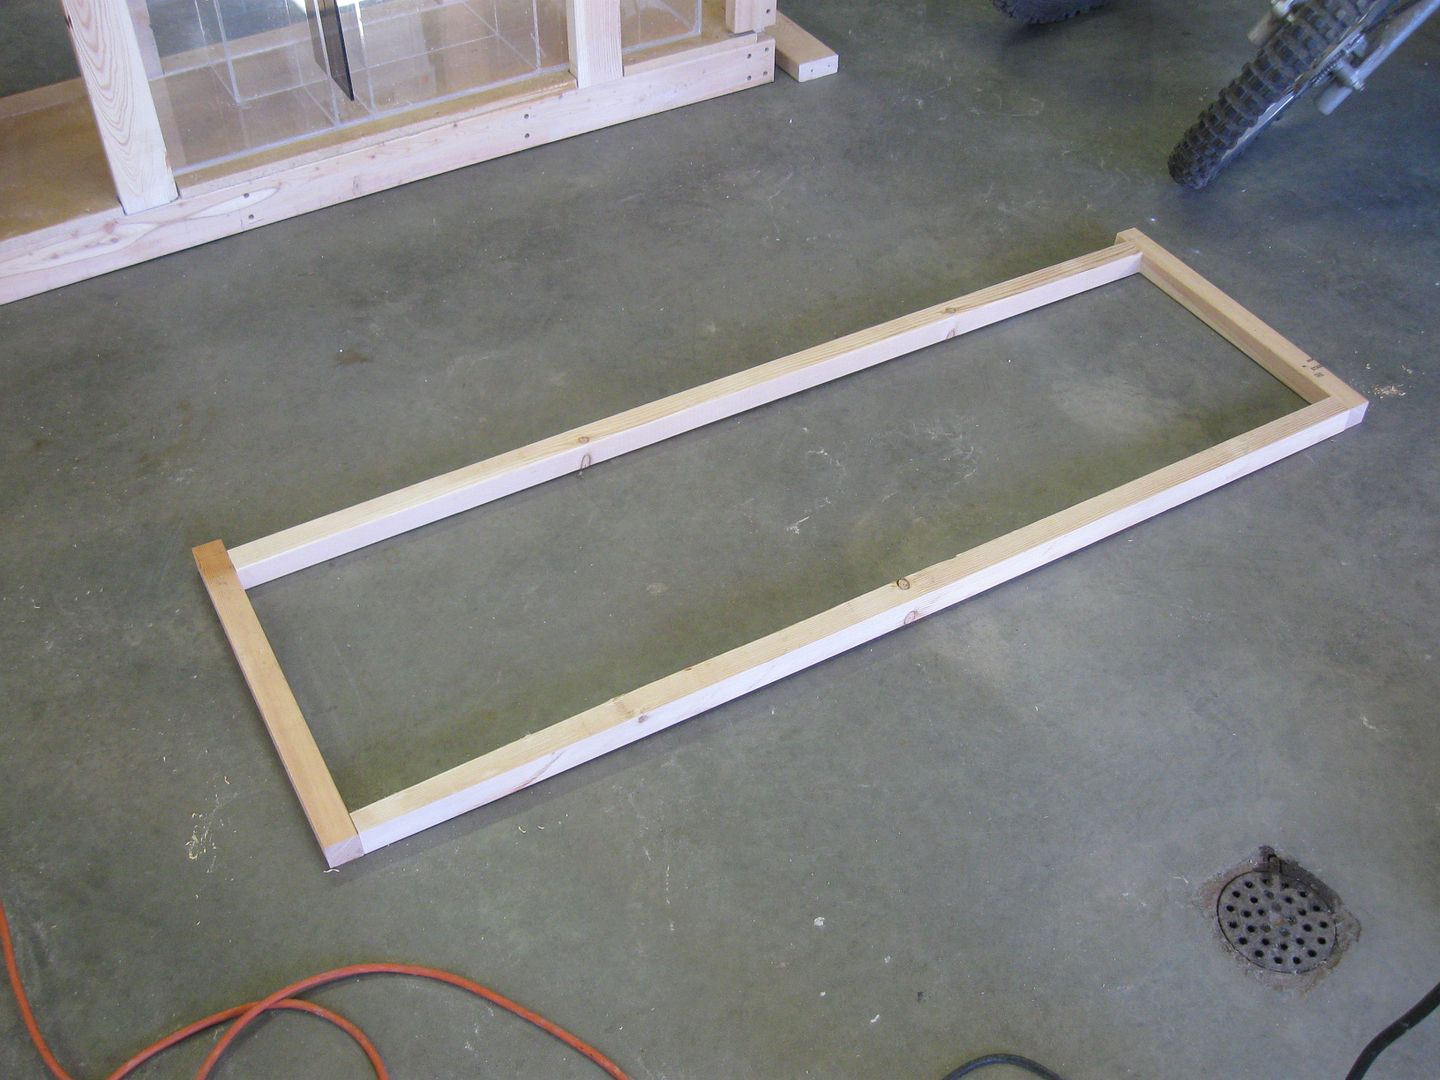
To start I just ripped down some 2x4 to make 2x2 (1.5x1.5). The last hood I made I primarily just used 1x with no frame... over time it moved slightly which I didn't like... I think a frame will help it keep its shape and integrity better.
The bottom of the frame - basically follows the shape of he tank. Screwed and glued each corner.
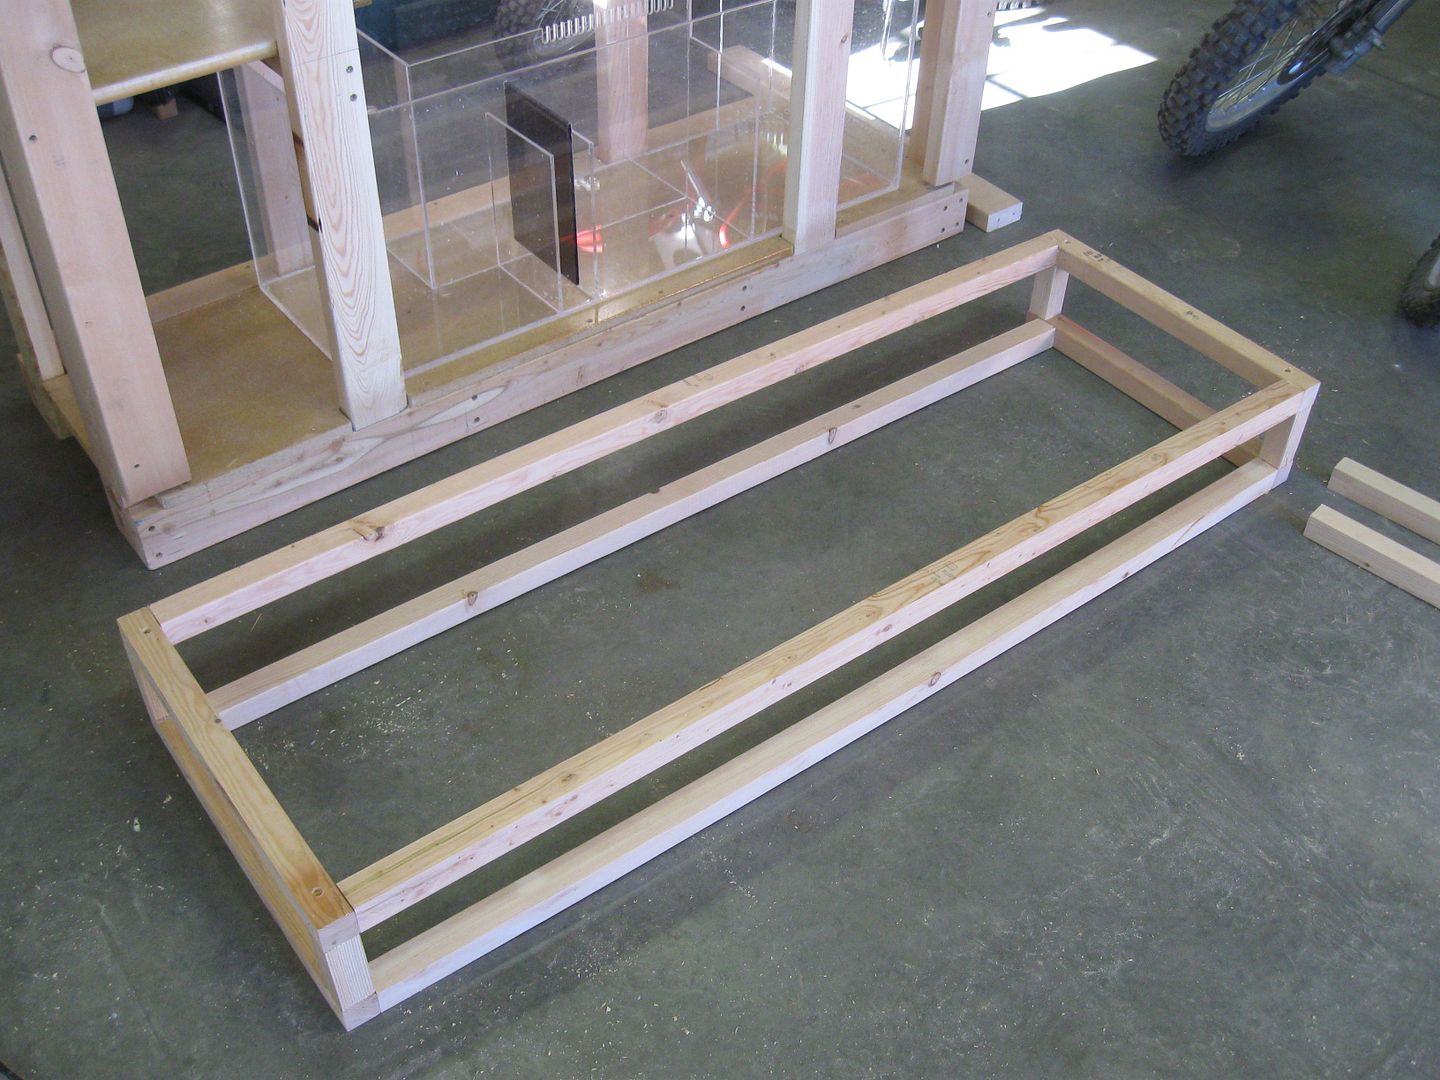
Added corners and the top part of the frame.
Added some intermediate members.
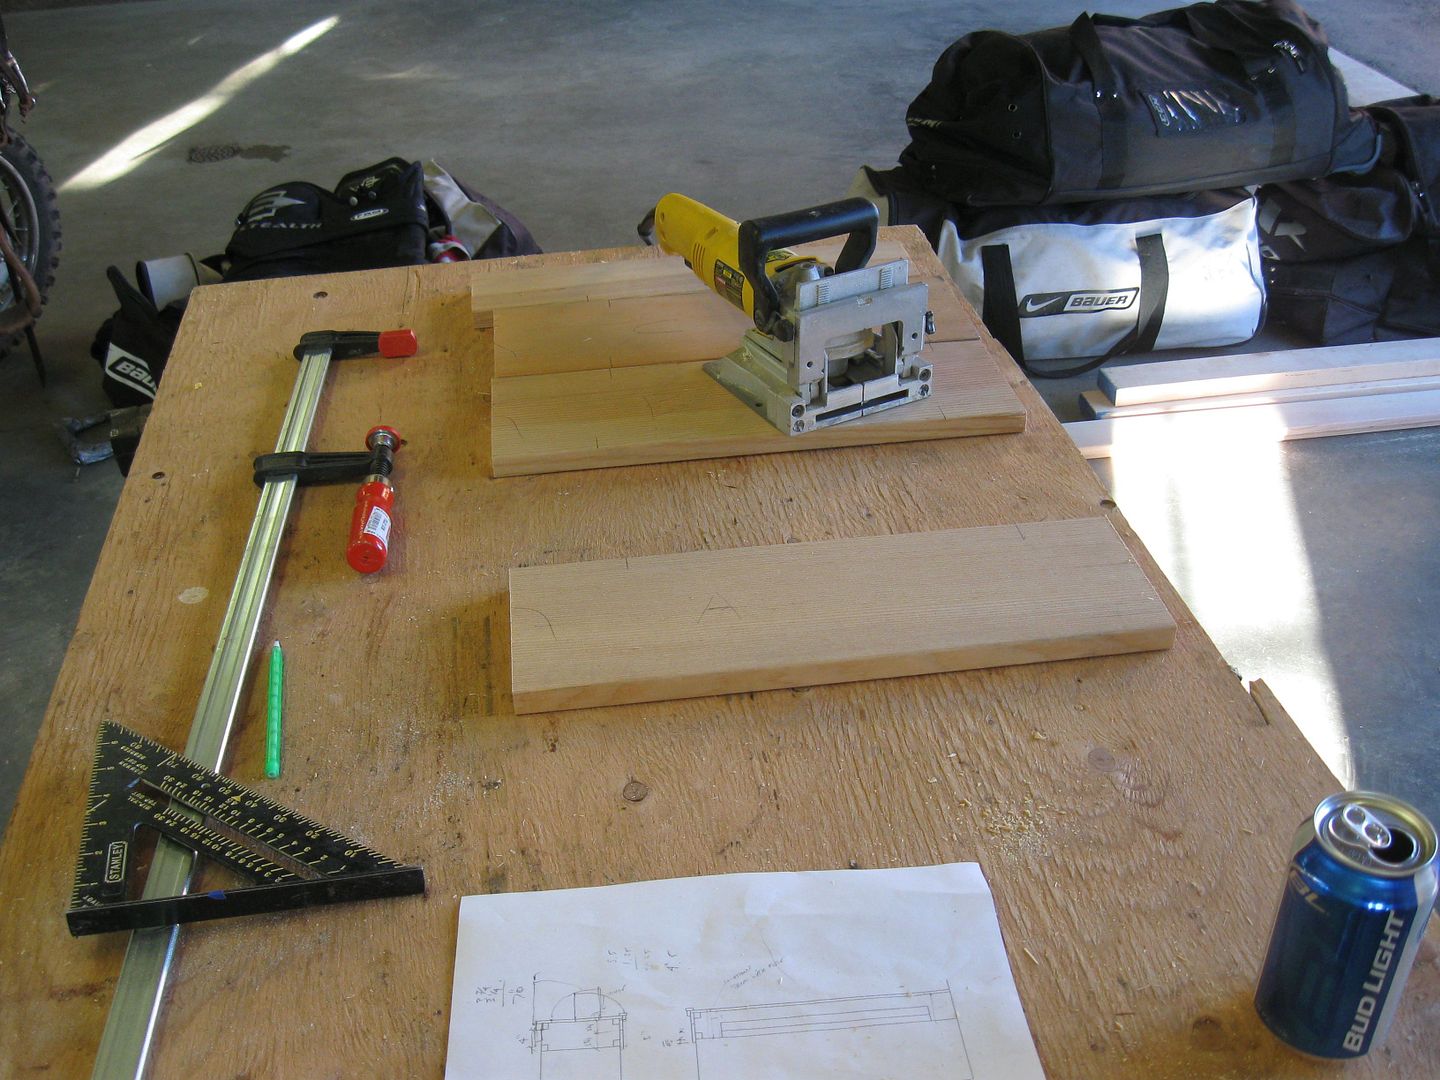
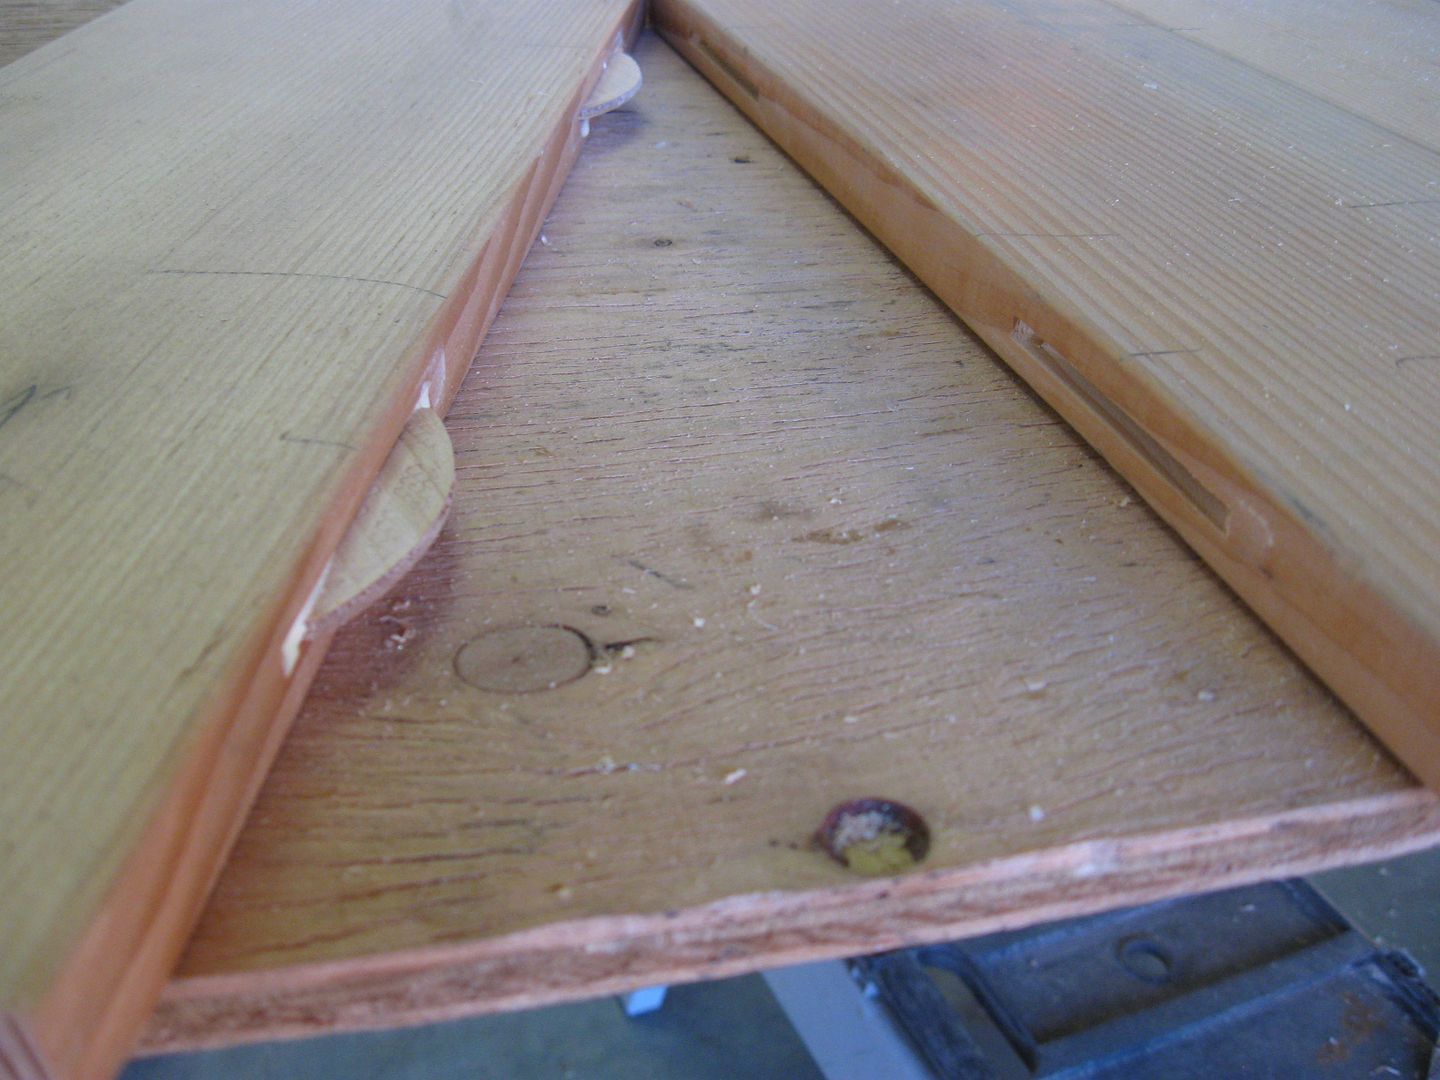
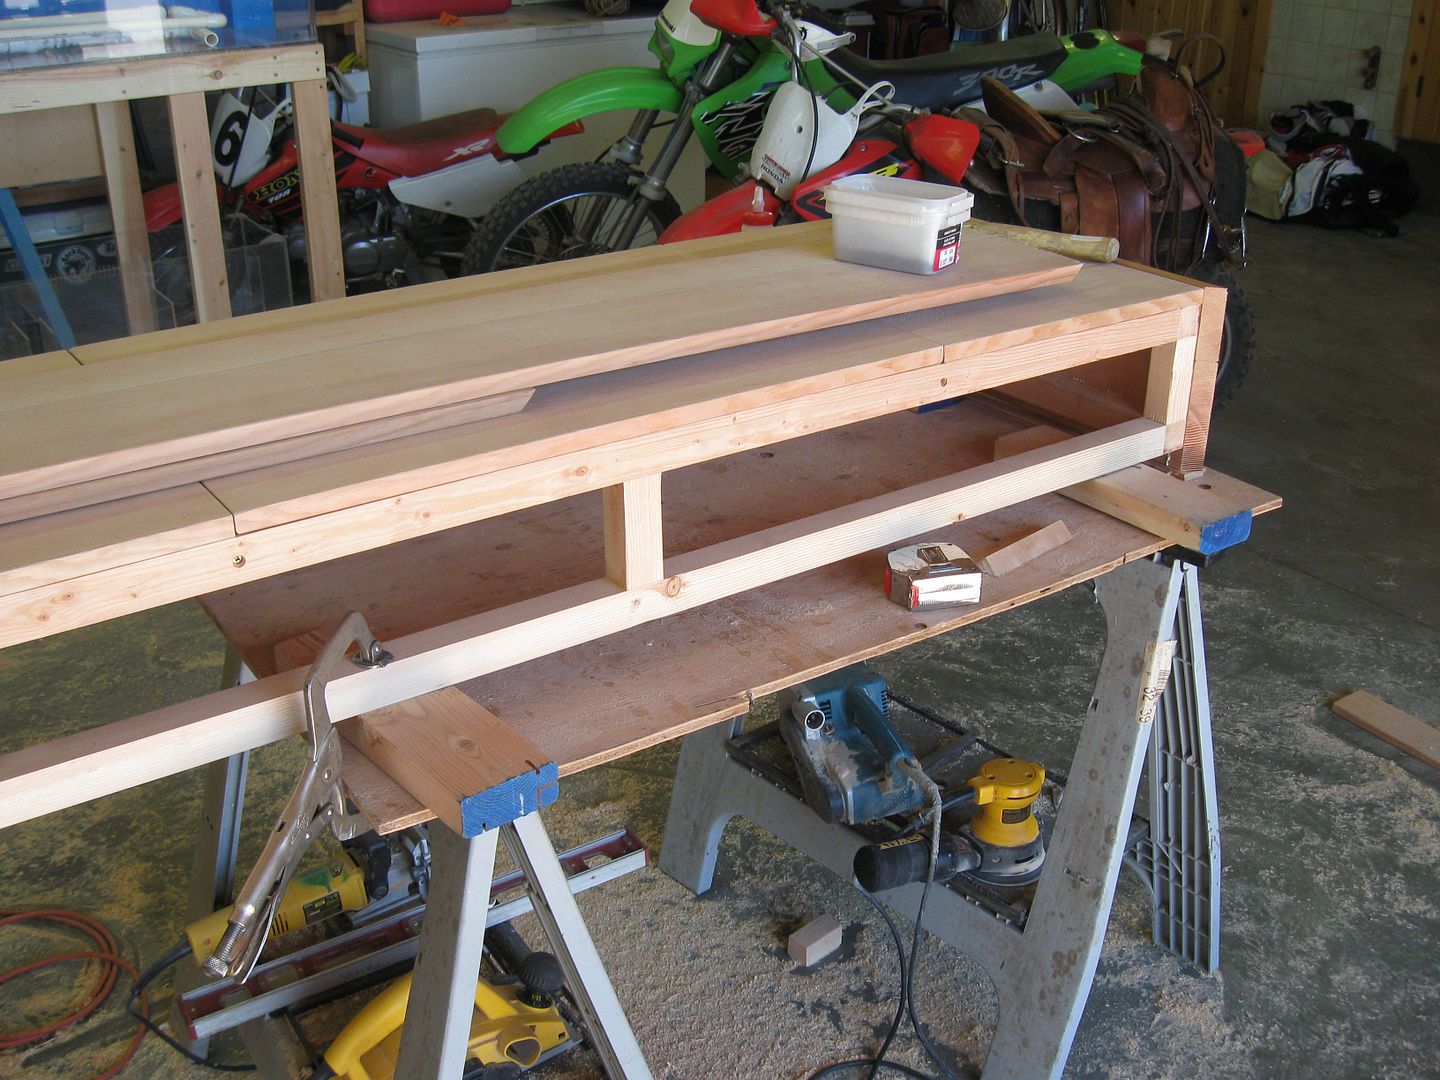
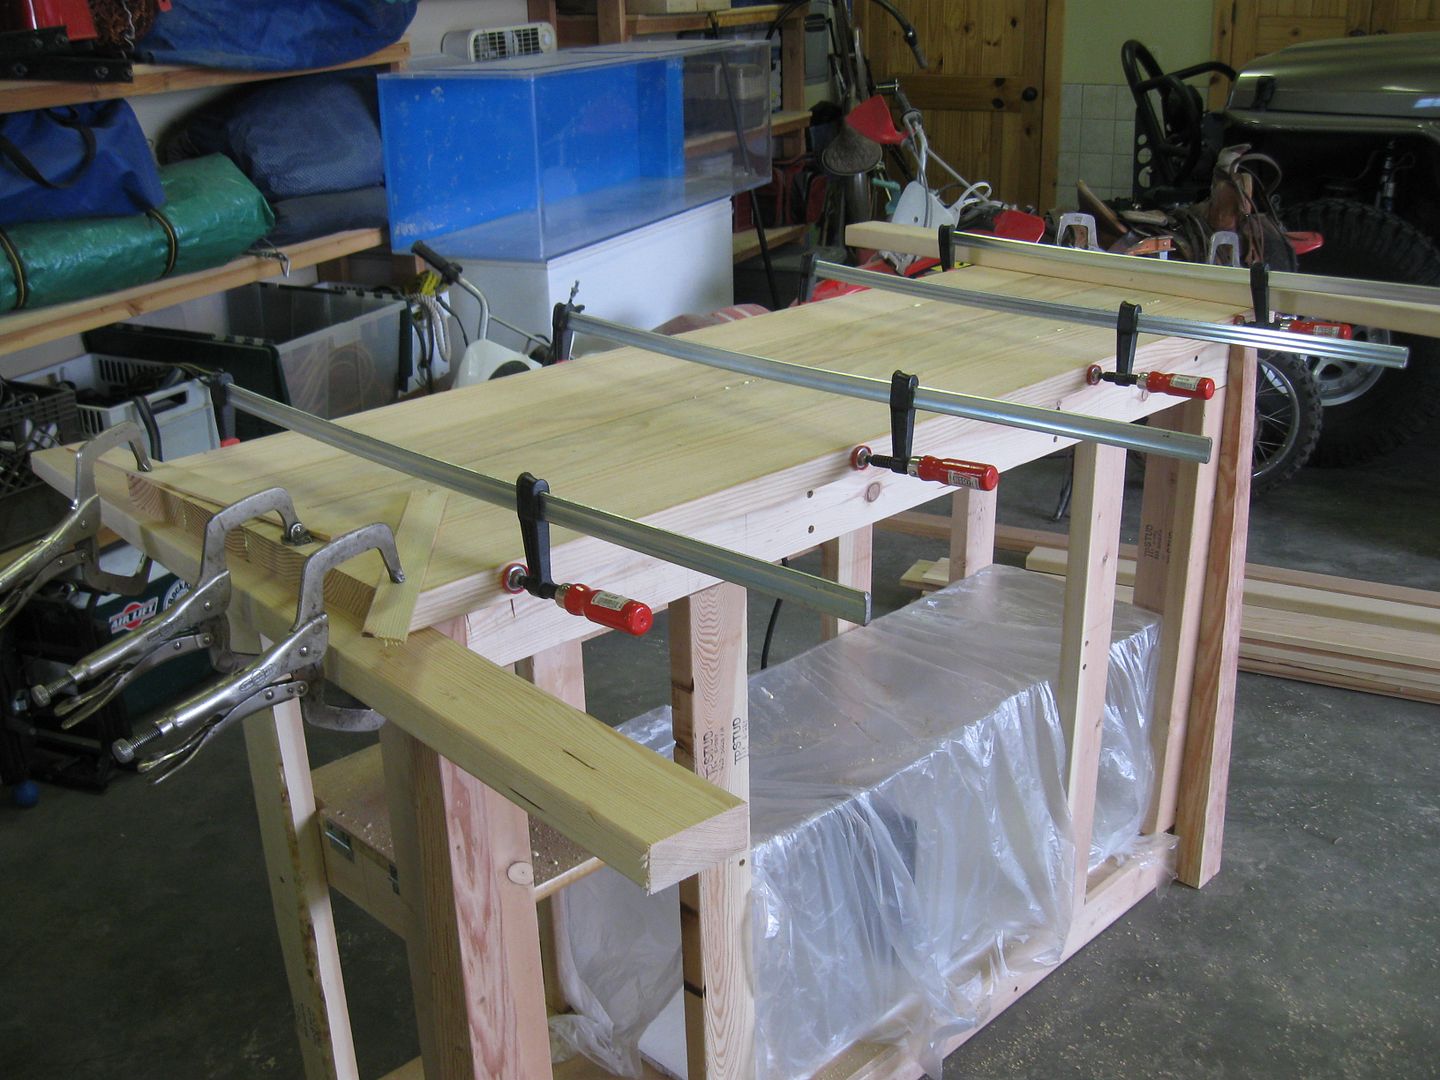
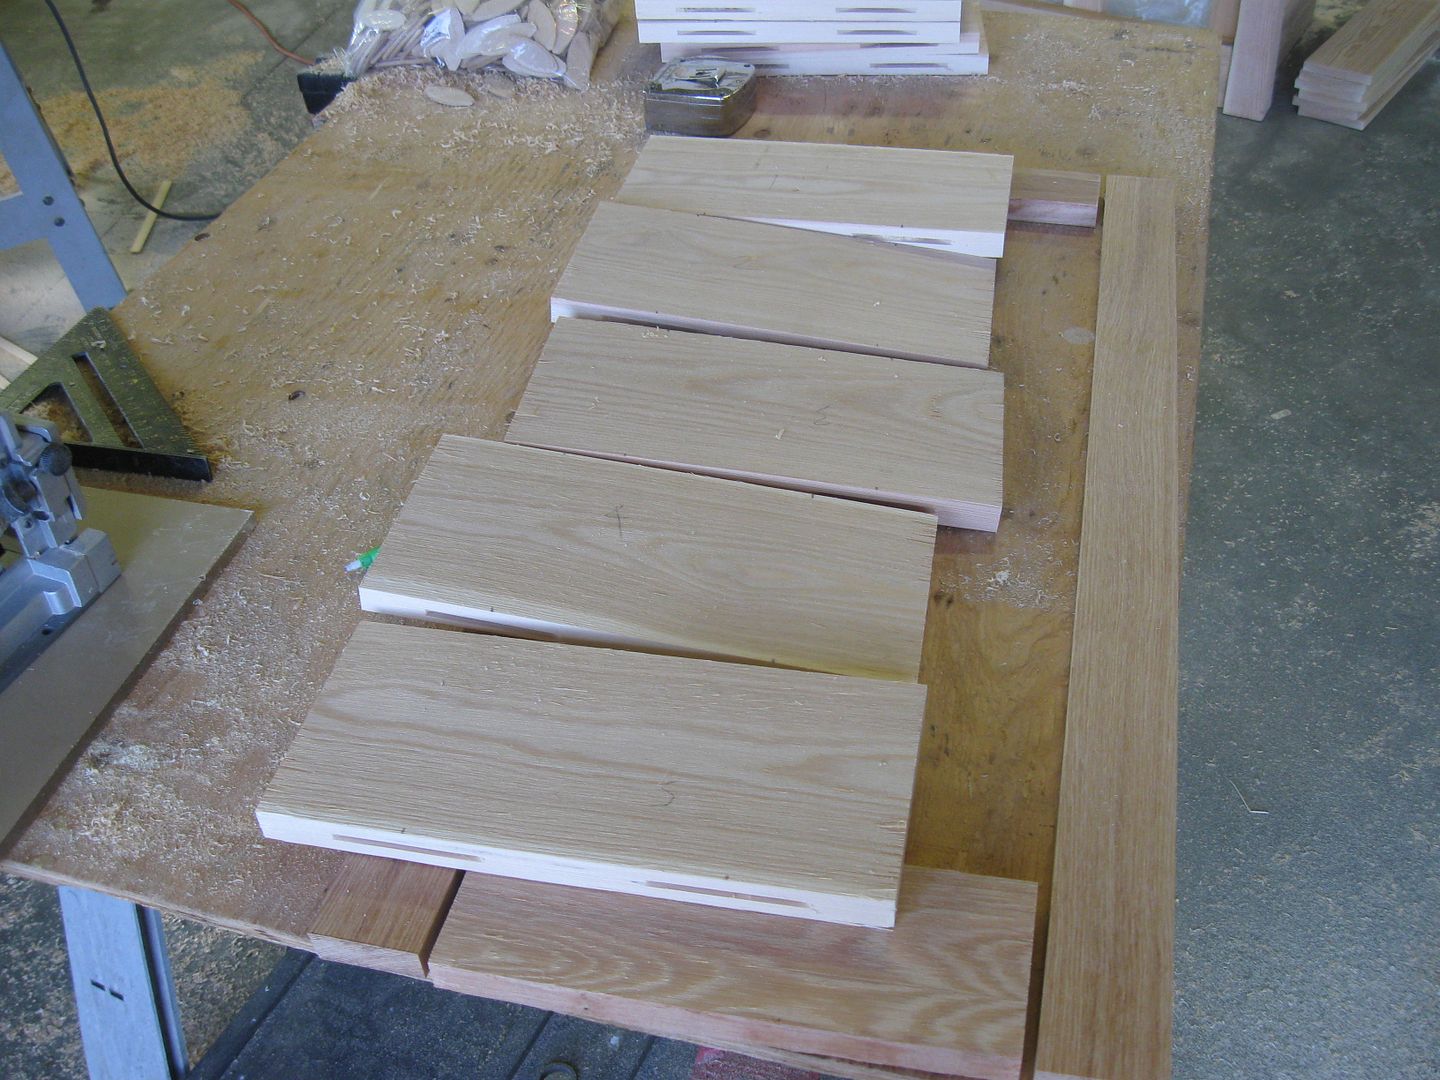
Then I started to focus on the finish material... I am still waiting on my shipment of wire brushed fir to arrive so I decided to do it myself for the hood... Bought some CVG Fir (stuff is pricy!) and started cutting. Last time when I built my stand I basically just attached the finish material right to the stand piece by piece - over time the boards separated slightly.. The stuff I am using now has a lower moisture content than that material did and I am also glueing and putting biscuits in. This will help keep everything tight - also gives me a reason to use the biscuit jointer.
I then put the individual panels together and clamped everything up and let sit for the night.
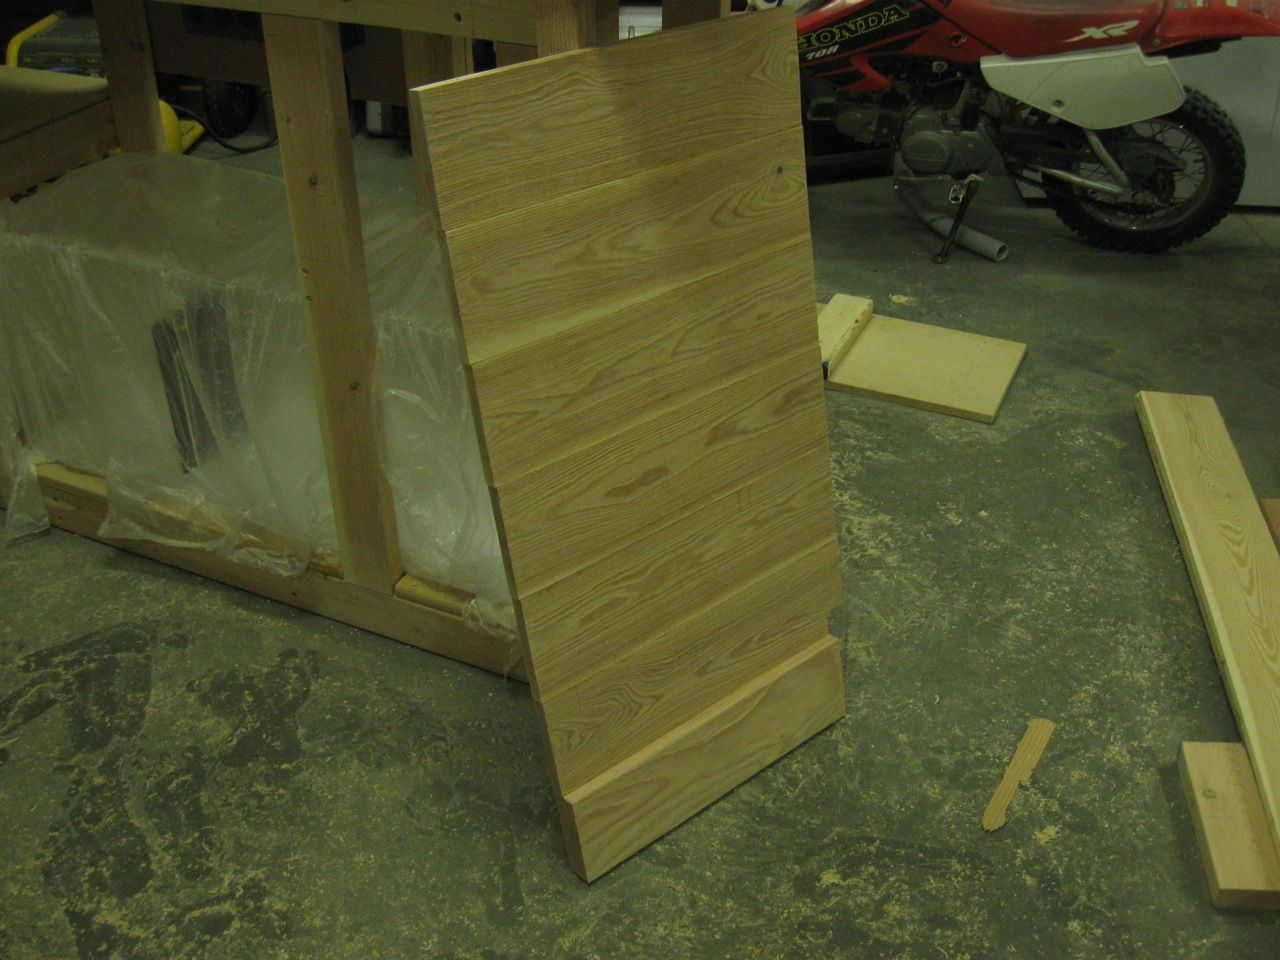
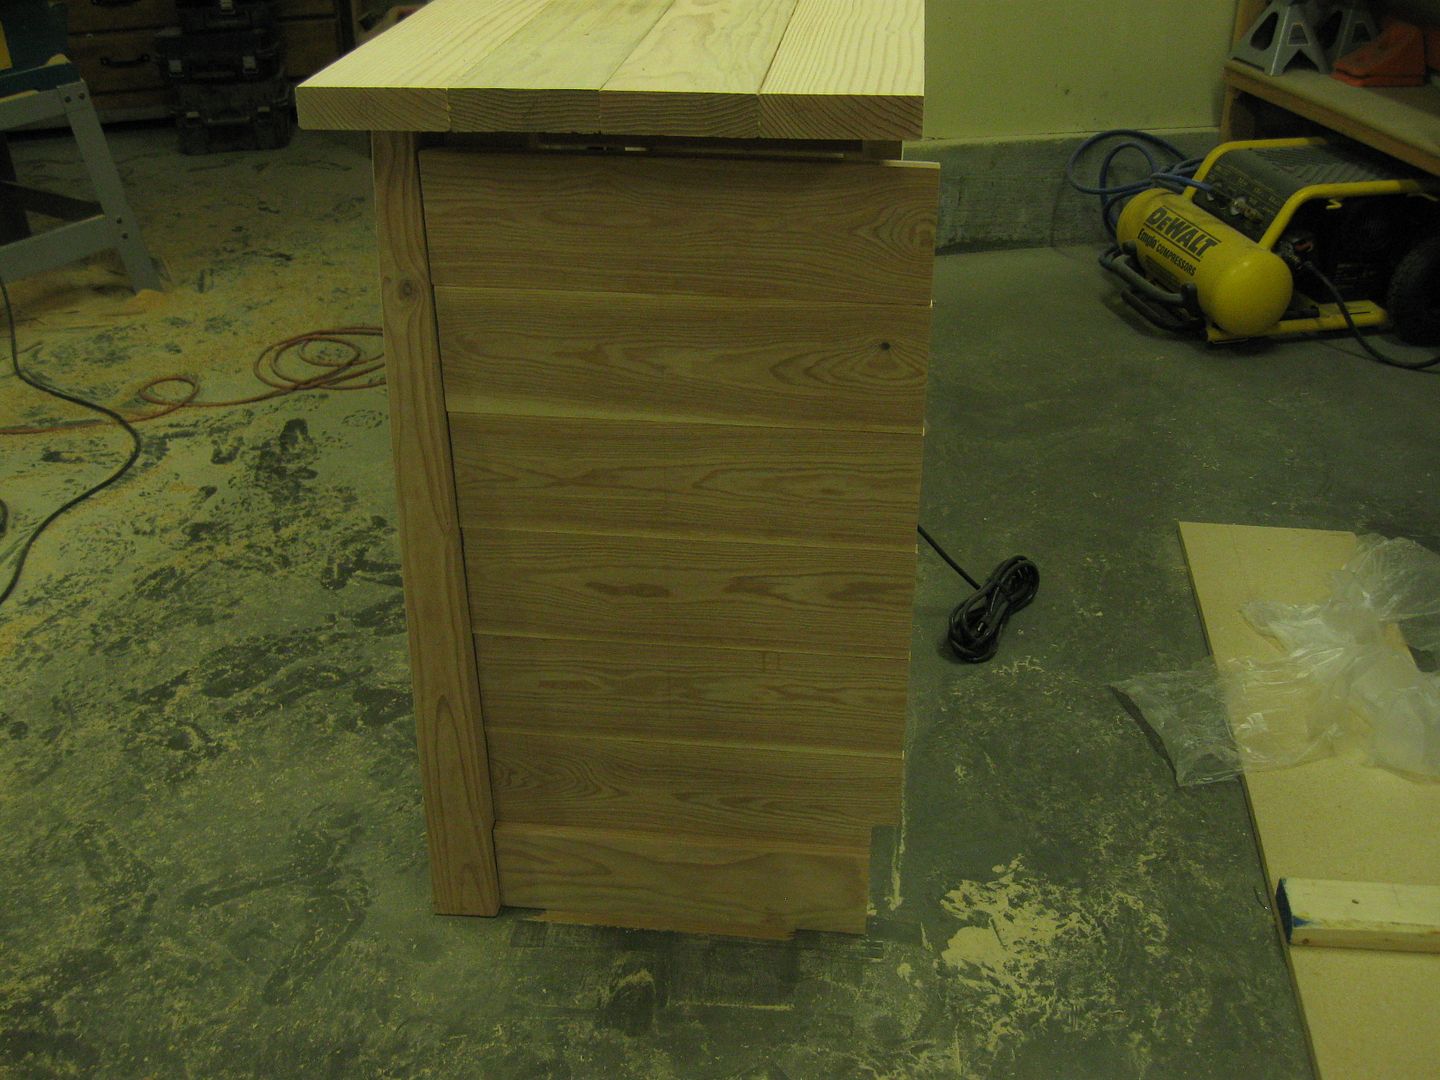
Next day I pulled off all the clamps and had some nice panels to work with. They were all intentionally longer so I could cut perfect on the table saw.
Now I began to attach the panels to the frame. Glue and finish nail.
|
|
100 gal reef. 180 gal build starting
|
|
Idaho-Tank
Guest
Joined: November 03 2010
Location: McCall, Idaho
Status: Offline
Points: 26
|
Post Options
Thanks(0)
Quote Reply
Posted: November 03 2010 at 10:18am |
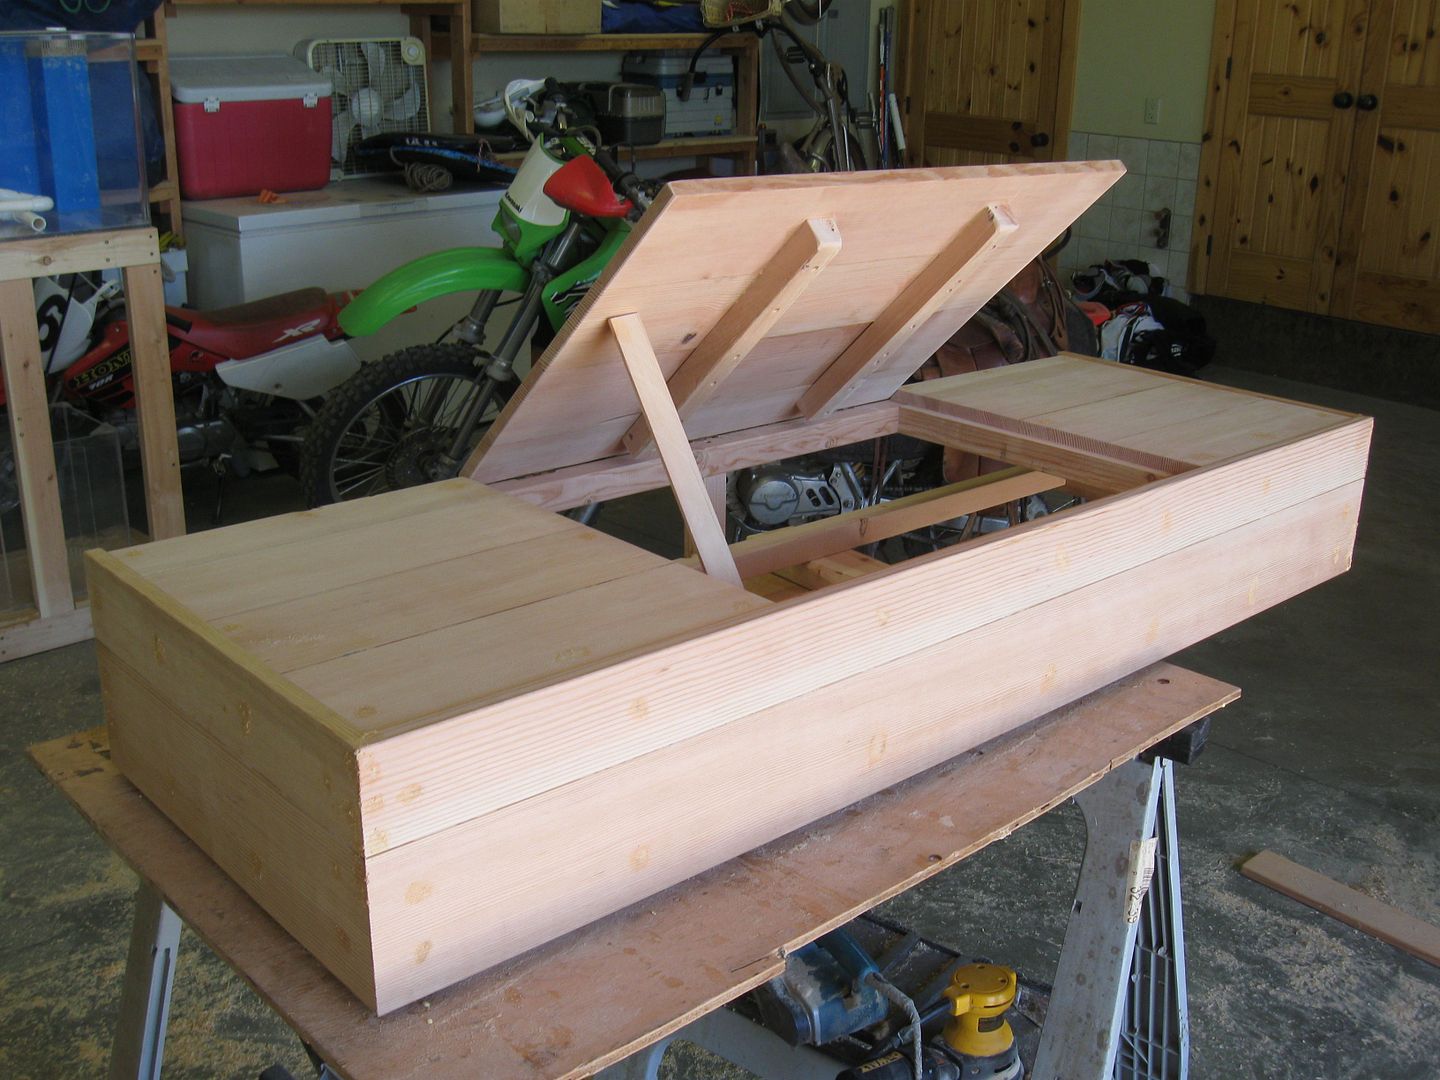
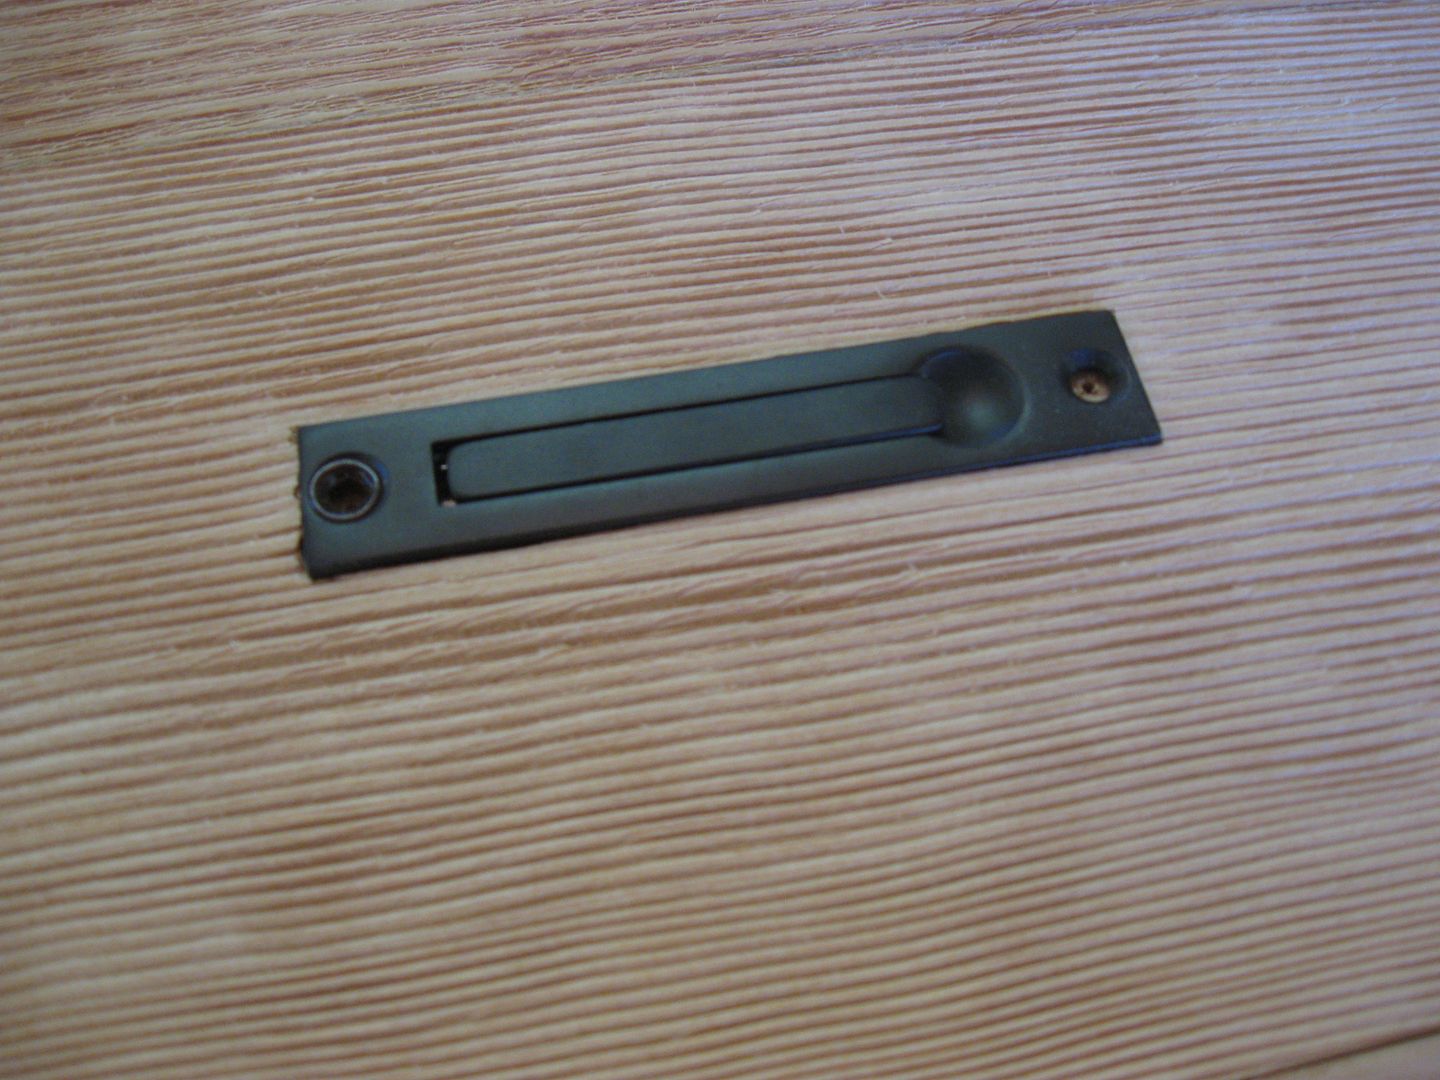
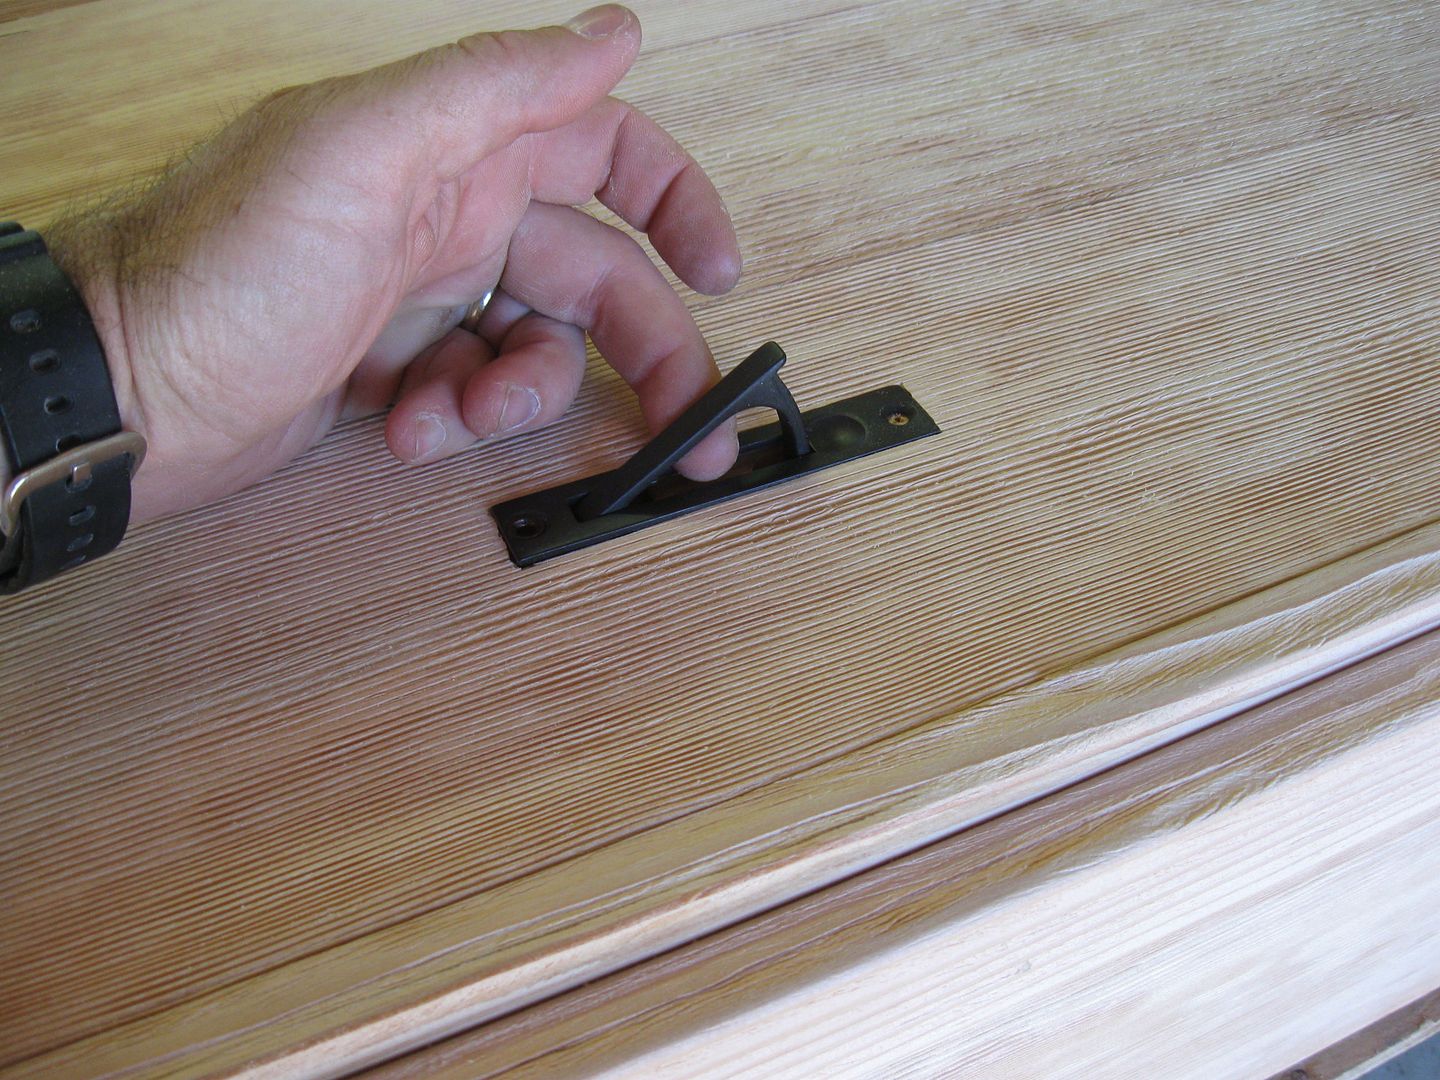
I added a door to the top of the hood so I would have some access without taking the hood off.
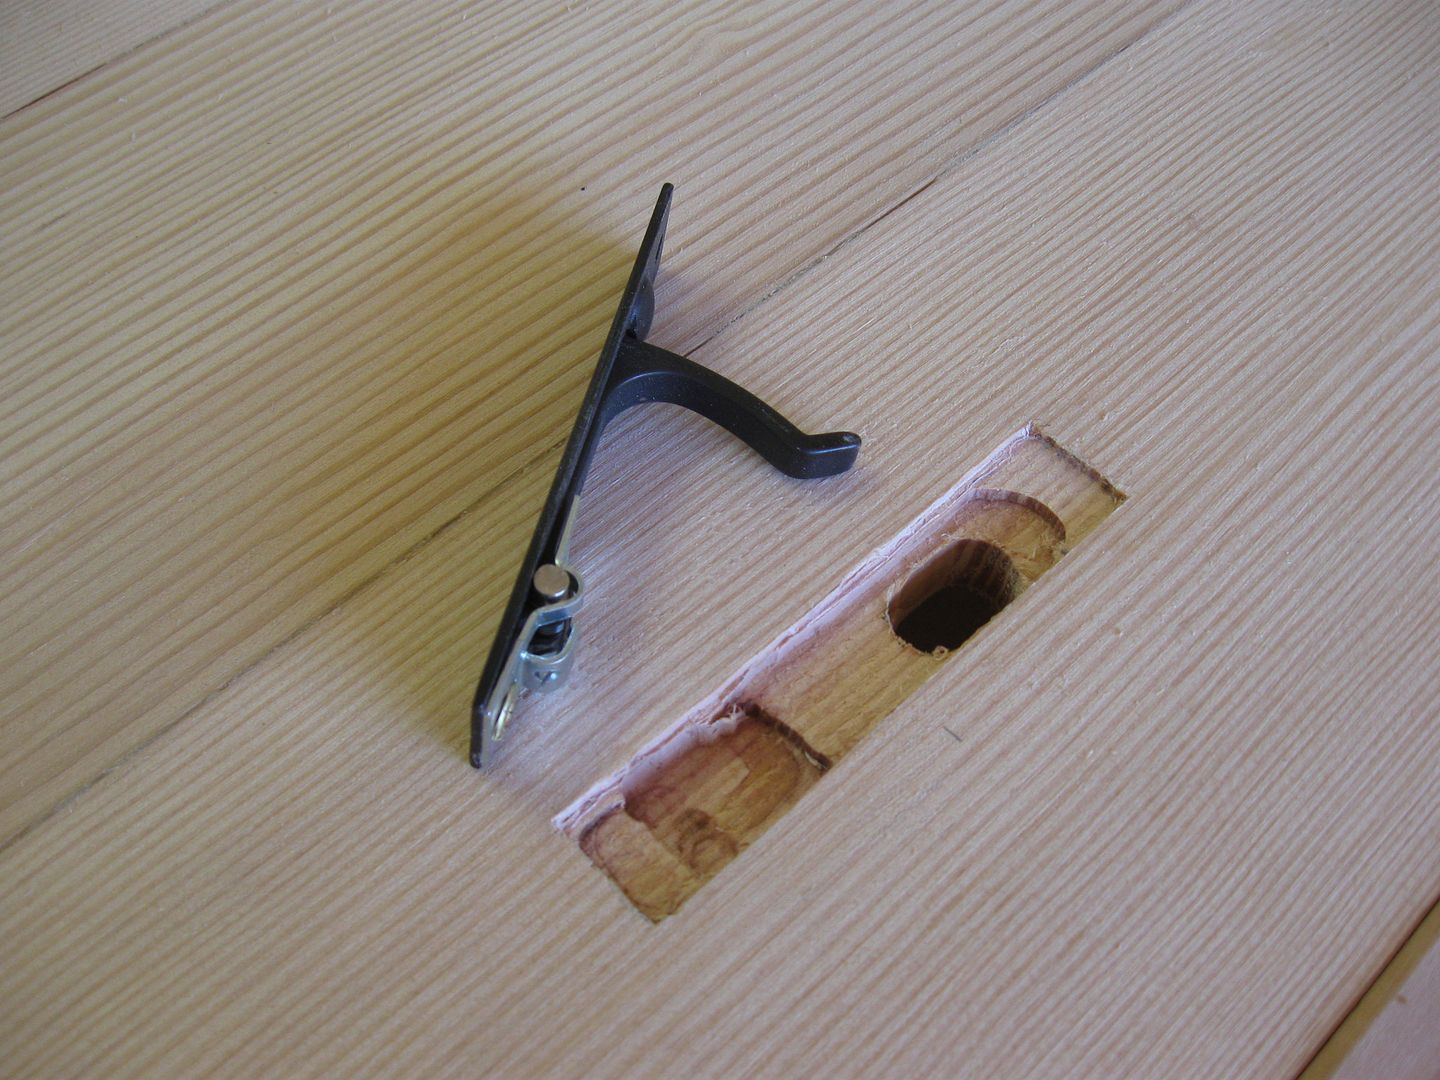
I had a nice oil rubbed bronze door pull that I never used - thought this might be a nice concealed handle for the hood door. I used a router to cut the recesses required for the handle.
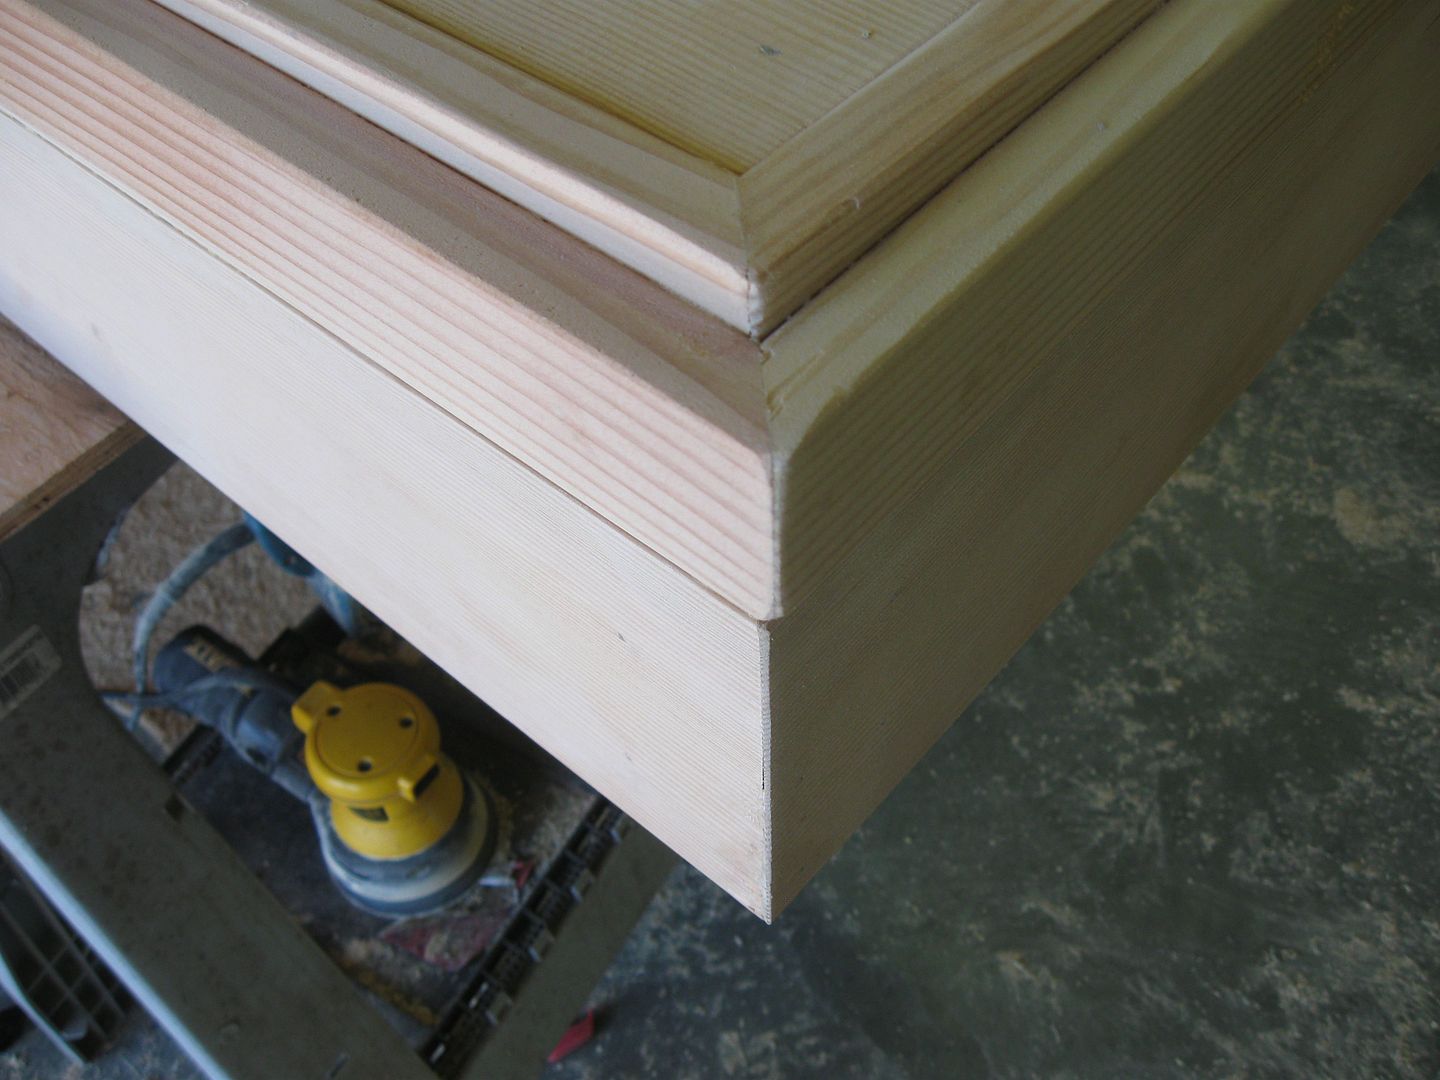
I added a piece of trip so the shape was not so boxy. I mitered the corners.
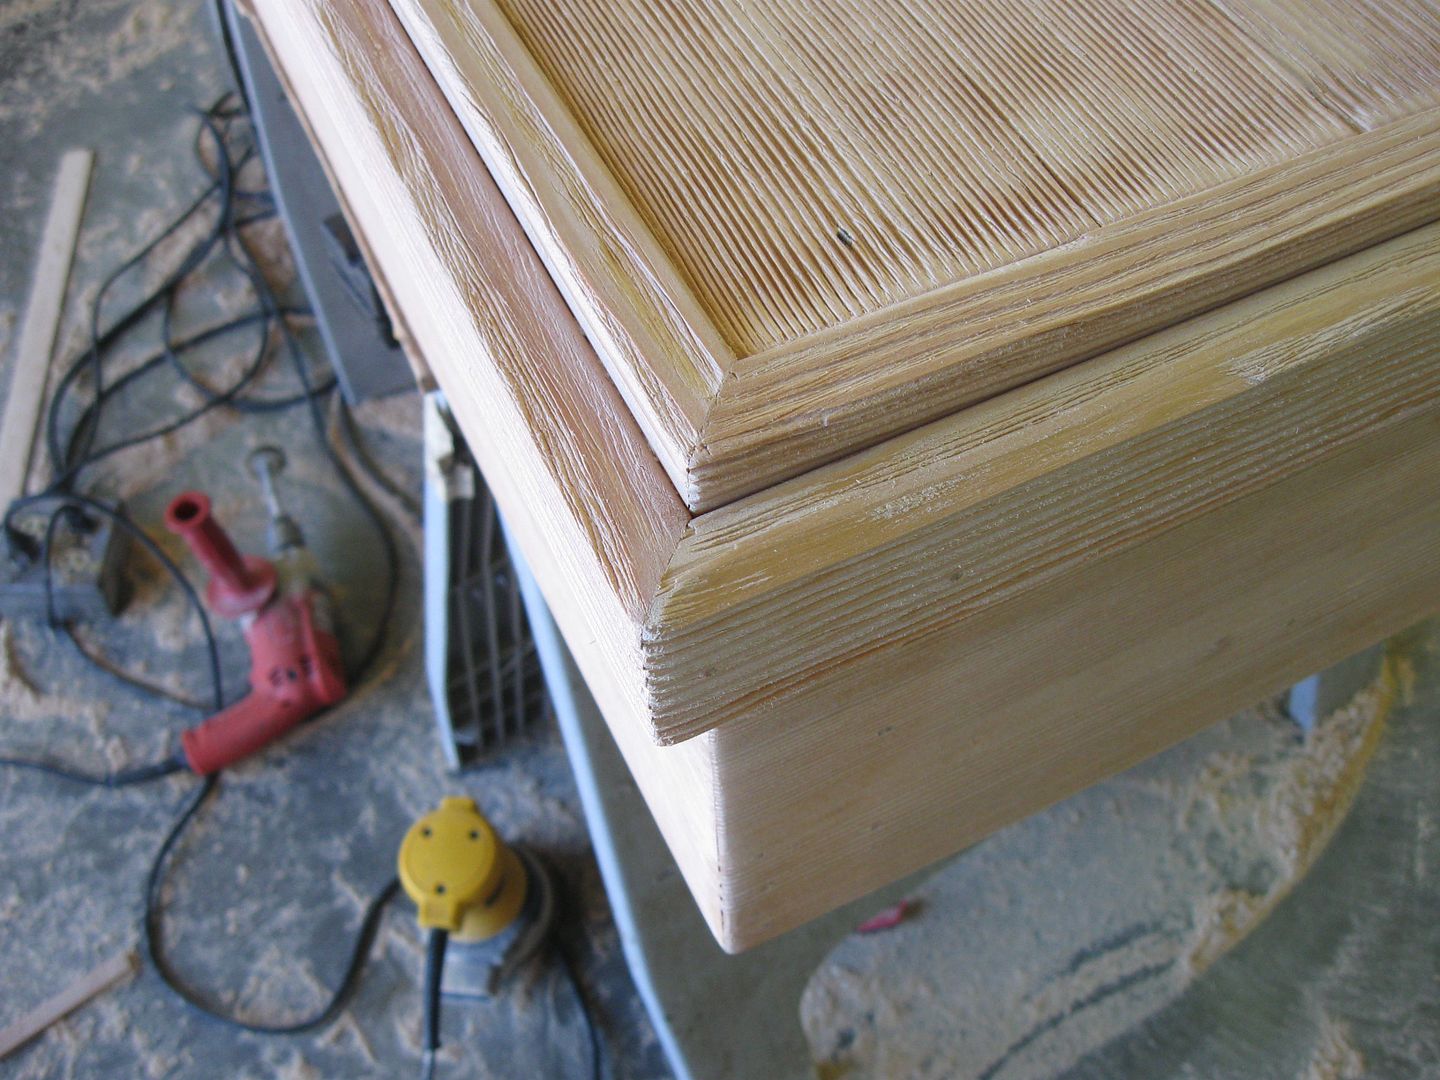
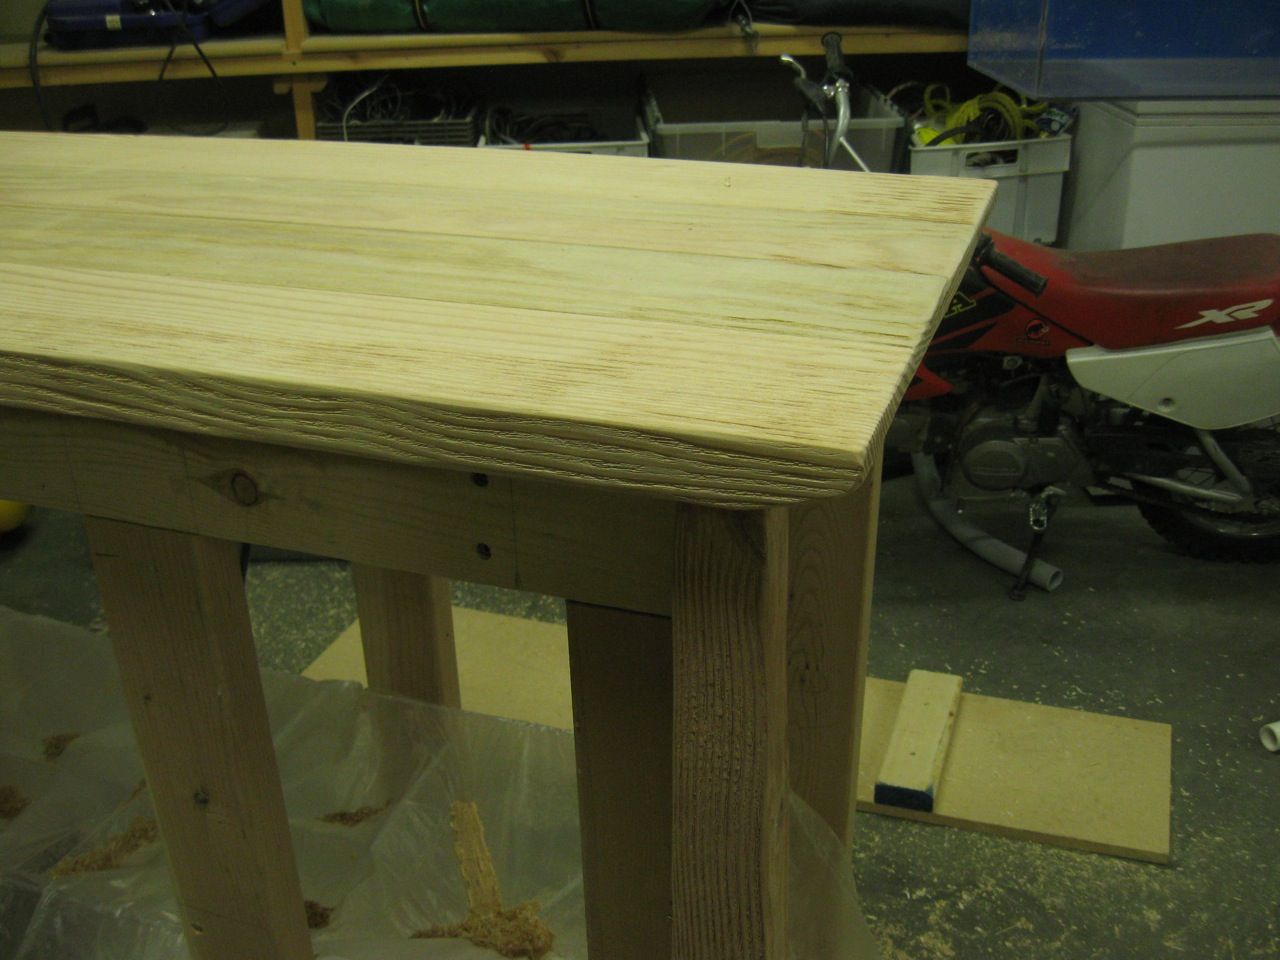
Then I got to work with the wire brush... Ugh - what a pain that was. Takes a lot of time even with power tools. But the finish looks really good and after I oil this it will look great. Here is the corner after brushing the wood.
Here is that handle and how it will look. I will screw it in after I oil and put poly on everything. You can also see the texture of the wood in these photos.
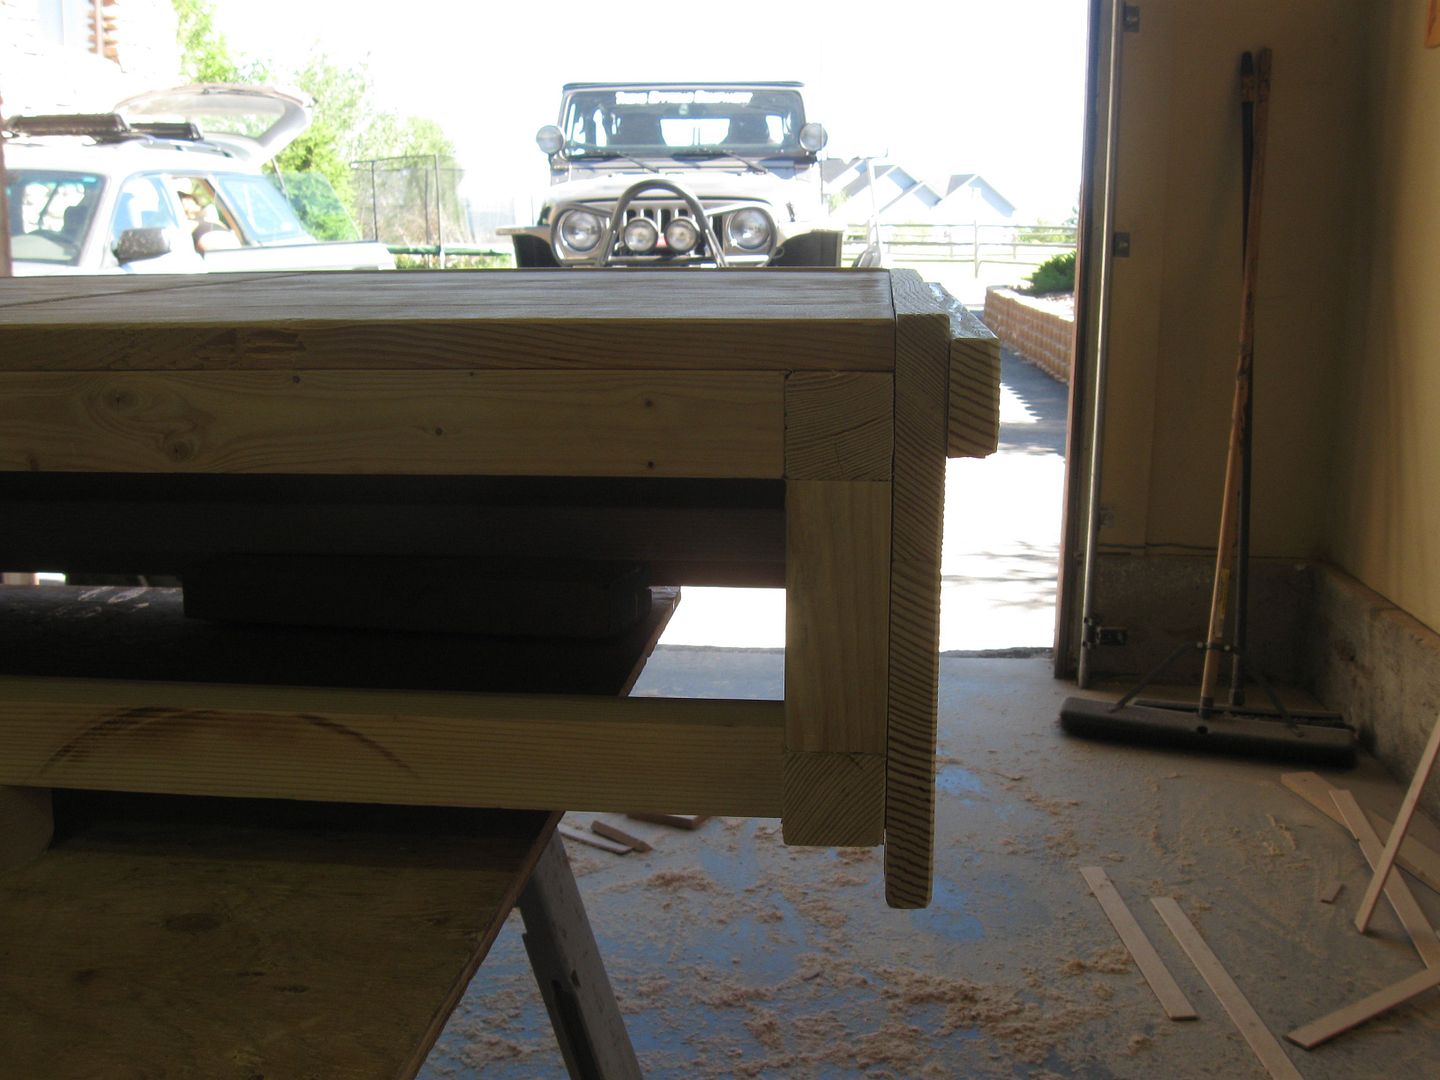
A profile photo taken from the back. I have about a 1 1/8" lip that will overhang the edge of the tank to conceal the water line.
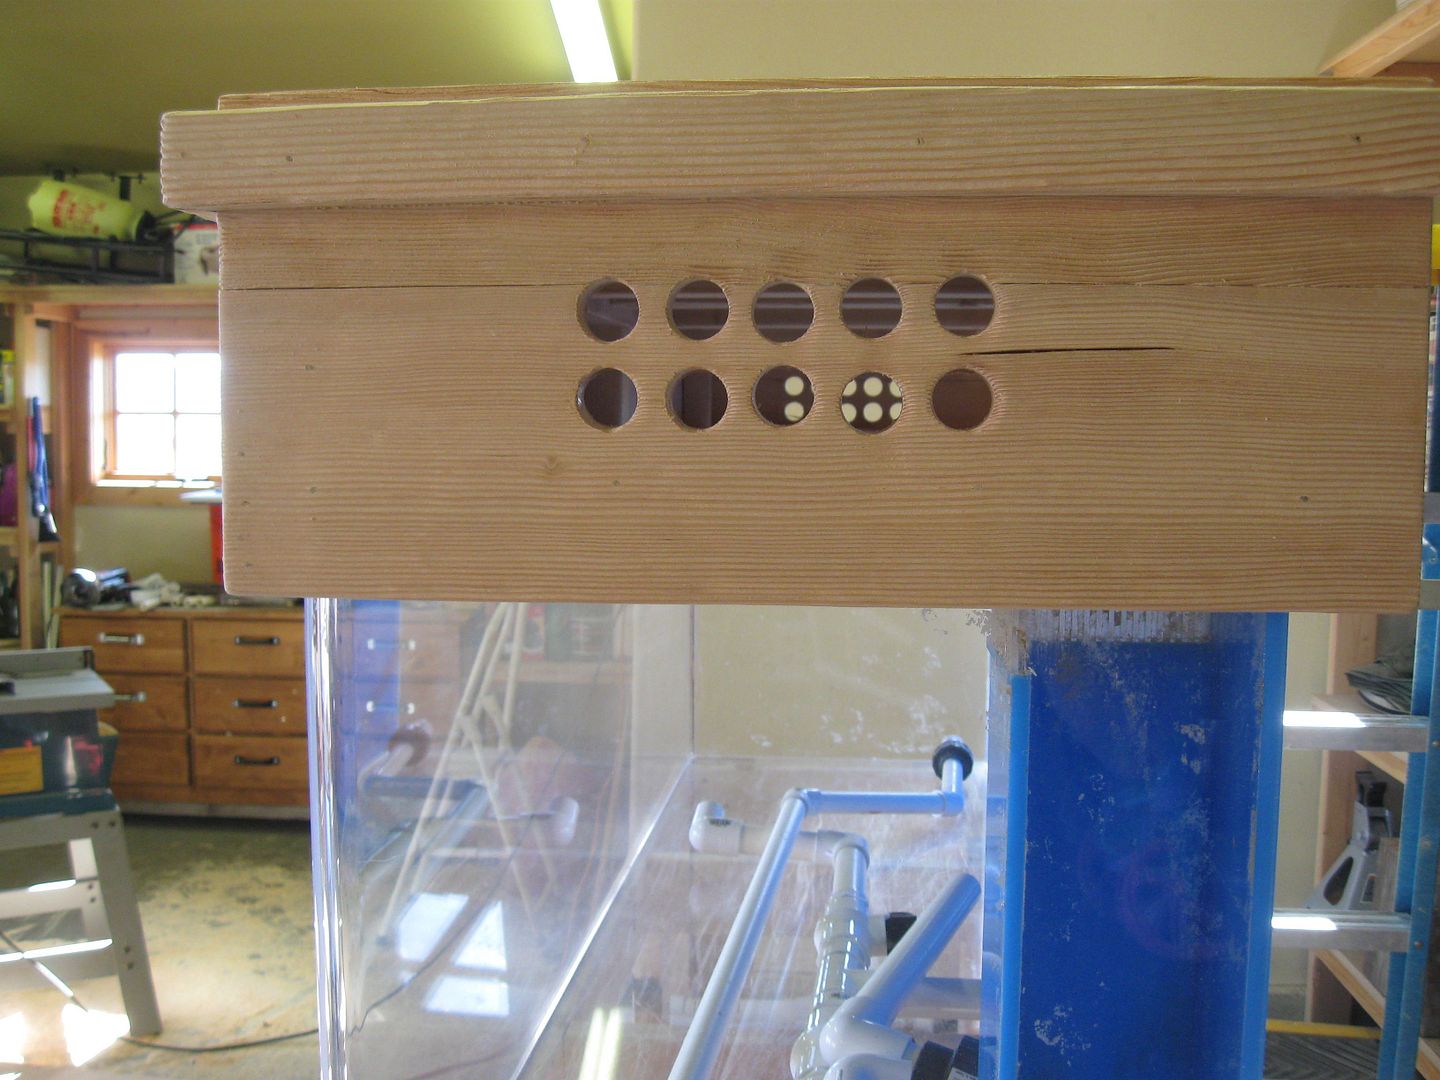
I hated to do it, but had to cut some vent holes into the side where the fans will keep the lights cool.
And it is all done and ready for oil.. I hope to get back to working on the stand tomorrow afternoon.
|
|
100 gal reef. 180 gal build starting
|
|
Idaho-Tank
Guest
Joined: November 03 2010
Location: McCall, Idaho
Status: Offline
Points: 26
|
Post Options
Thanks(0)
Quote Reply
Posted: November 03 2010 at 10:18am |
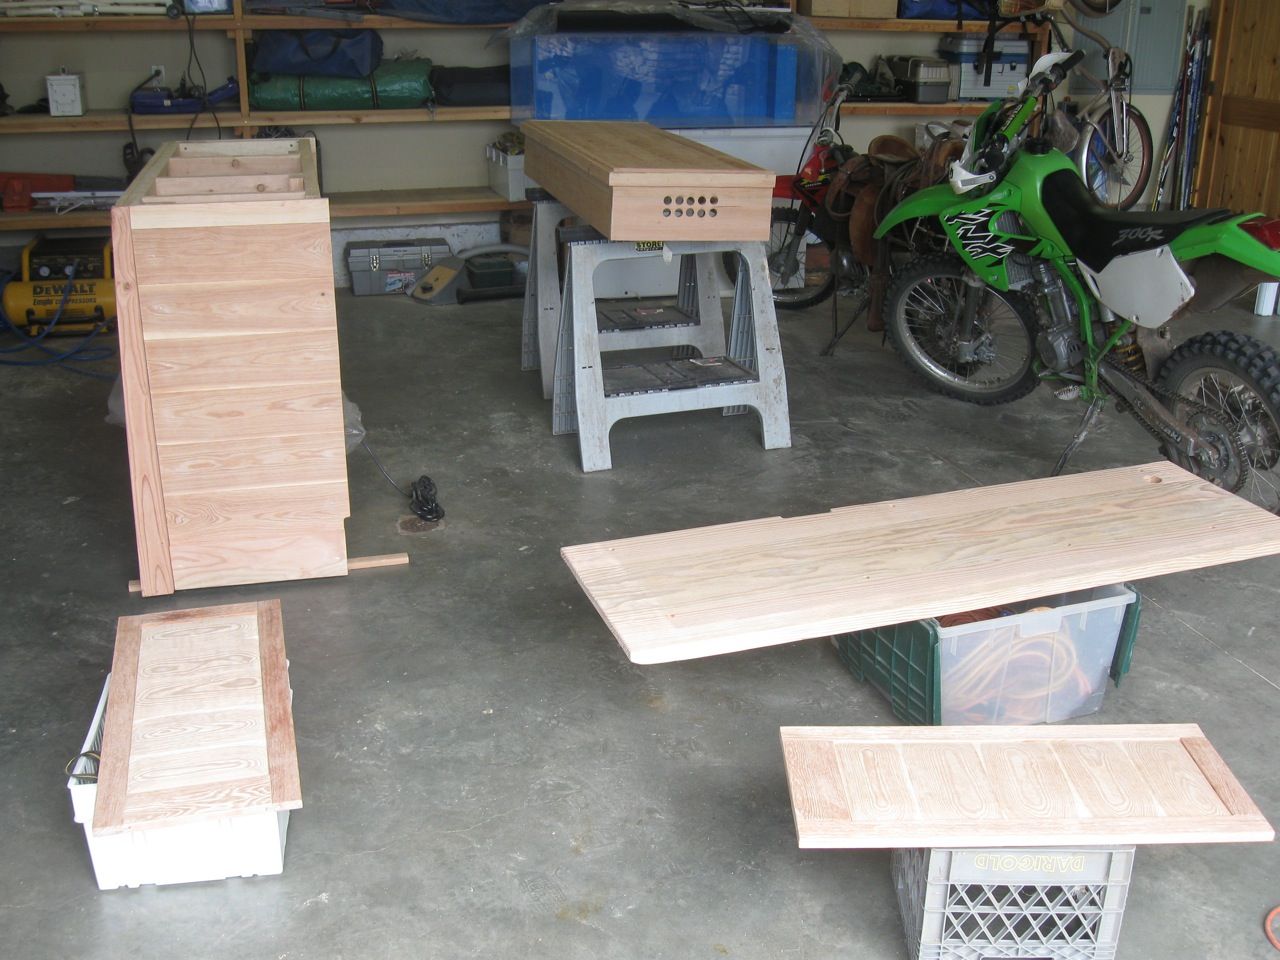
The other fir I was waiting for finally showed up... It was wire brushed but the texture is not heavy enough so I will have to wire brush it some more.
I put the 2x6 top pieces together with 5 biscuits between each, glued and clamped it for 24 hours. I have to texture it and shape the edges still.
Then I cut and put the end panels together glued, biscuited and clamped... I will still need to cut to fit.
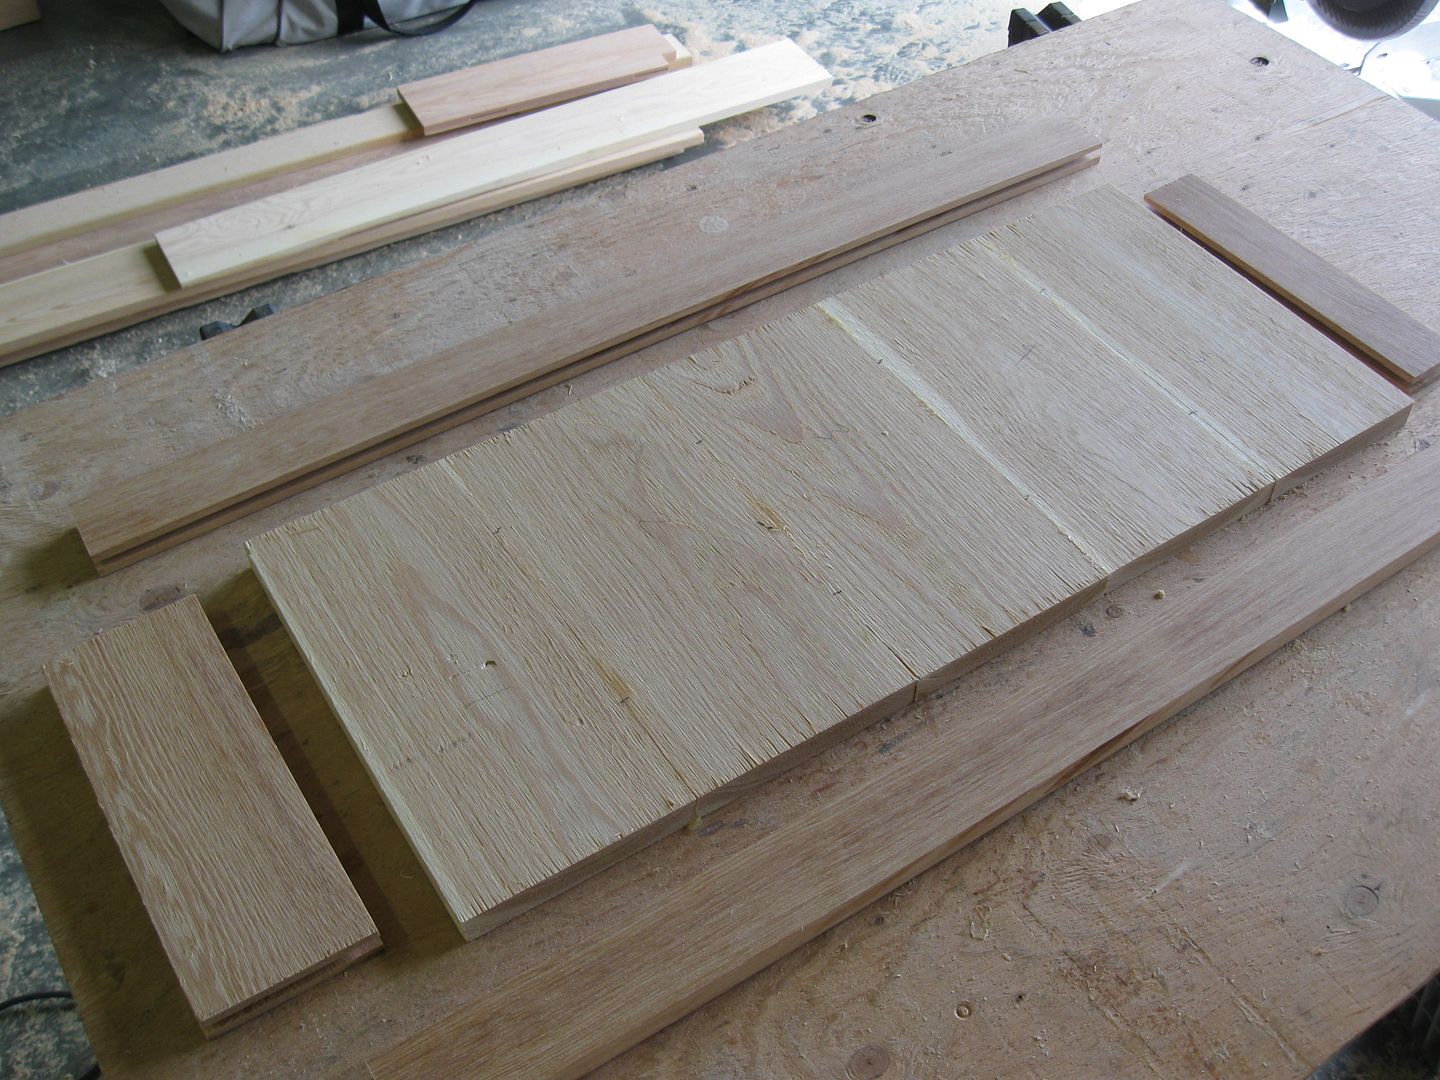
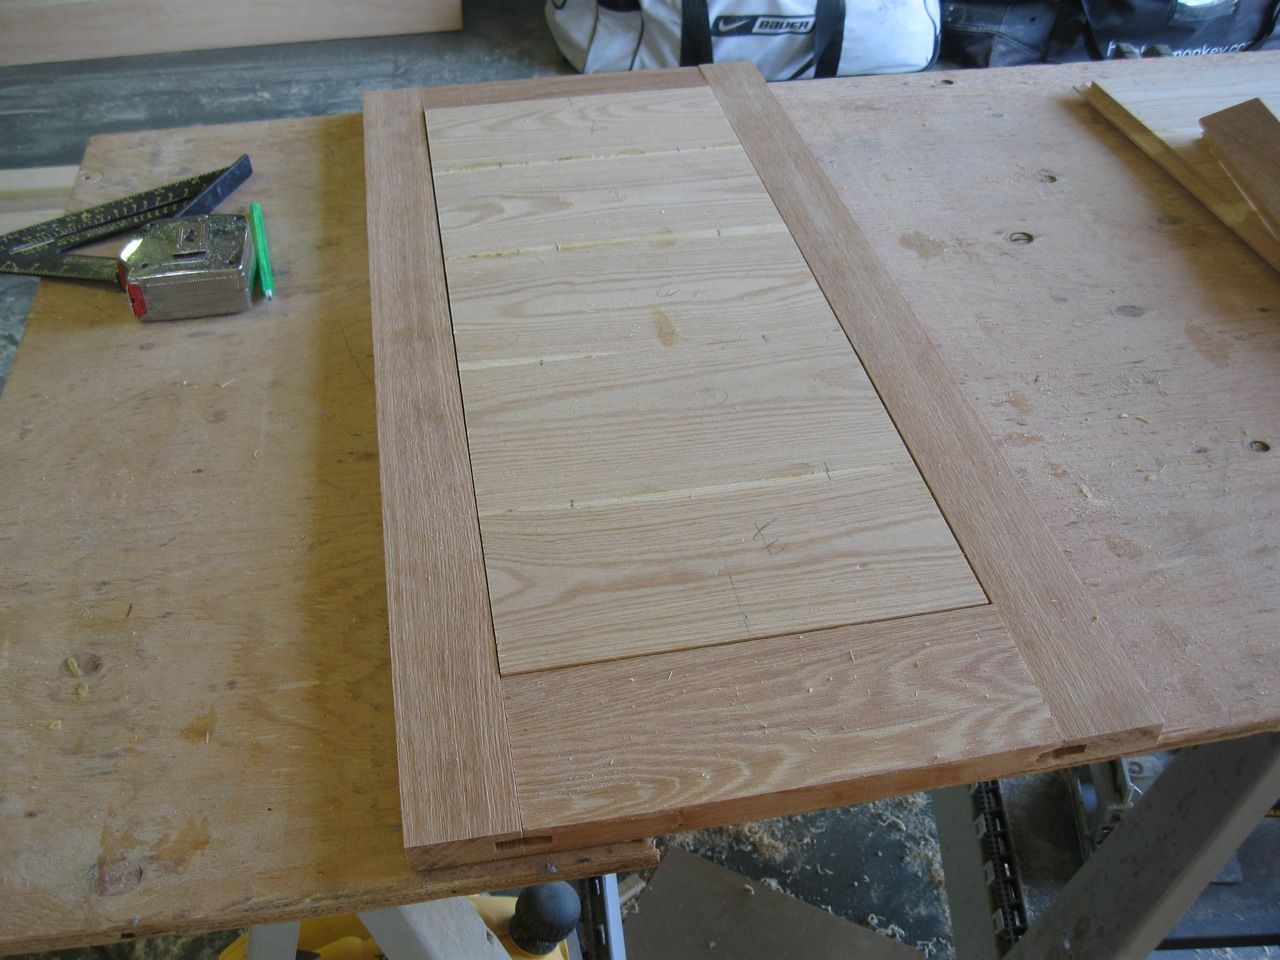
Next I was anxious to start on the doors.. I also wanted to have the doors built before starting the front panels on each side of the doors. I have never built any type of cabinet door before but wanted to copy the doors on our entertainment center so I figured I would give it a try. I don't have a shaper or any tools beyond a table saw, chop saw etc... so....
First I cut out the door frame.. then cut a notch or dado into one side of each of the four pieces. Then I put together the panels that will go into the frame. Here are all the pieces.
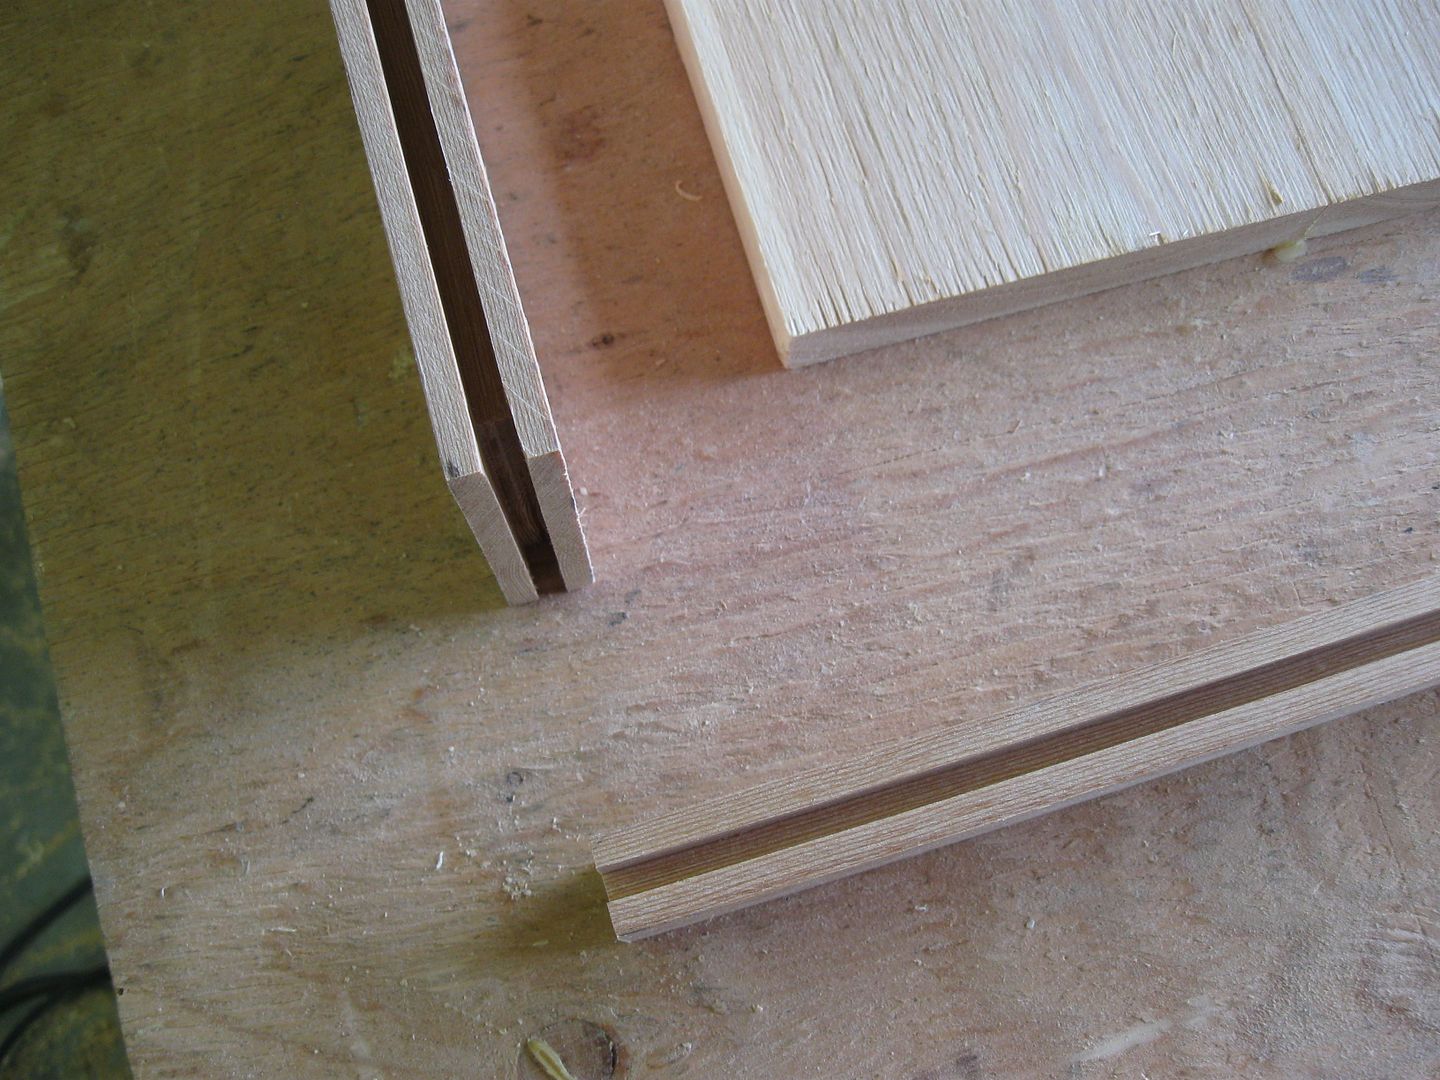
Here is the notch into the frame.
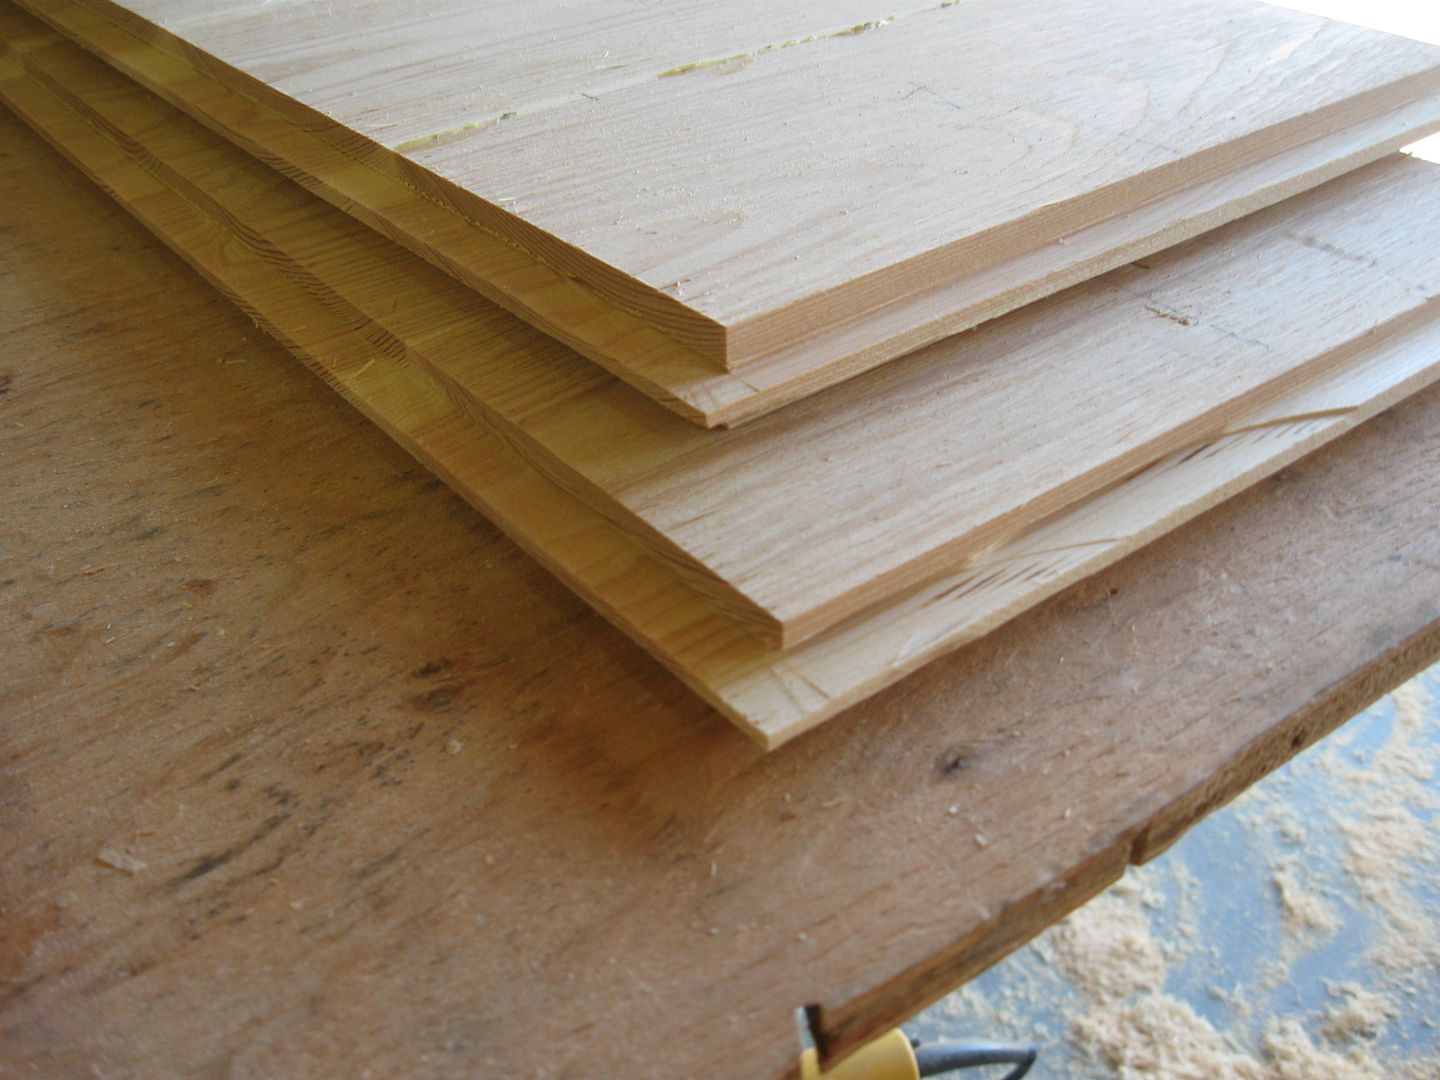
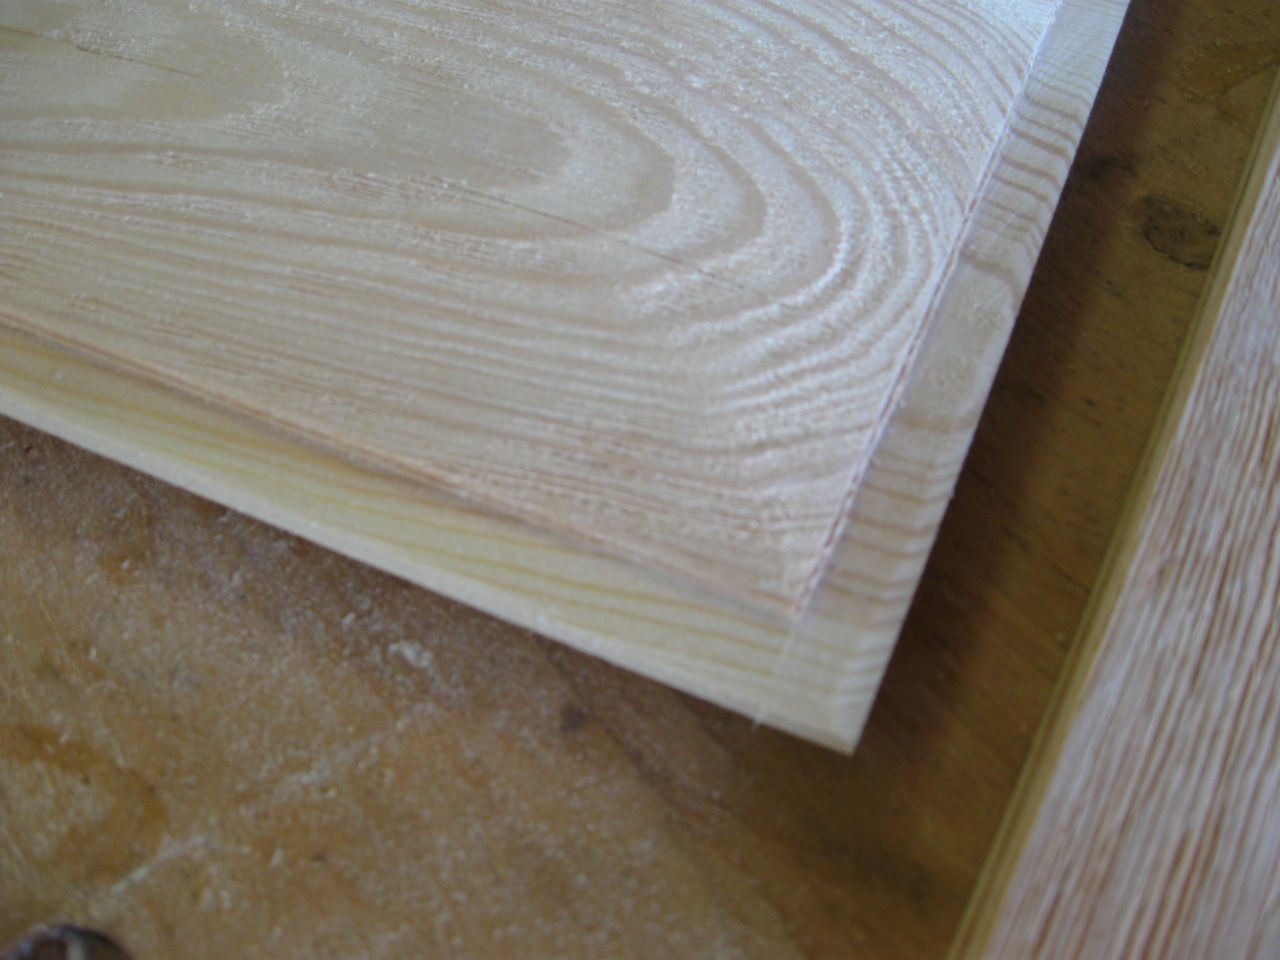
Then I took the panels and cut a tongue into the edges.
Here is the door put together prior to any shaping. If you look close you can see small holes at the bottom of the door where the sides meet the bottom... I ran that dado all the way though and decided to put a spline into that space when I glue it all together.
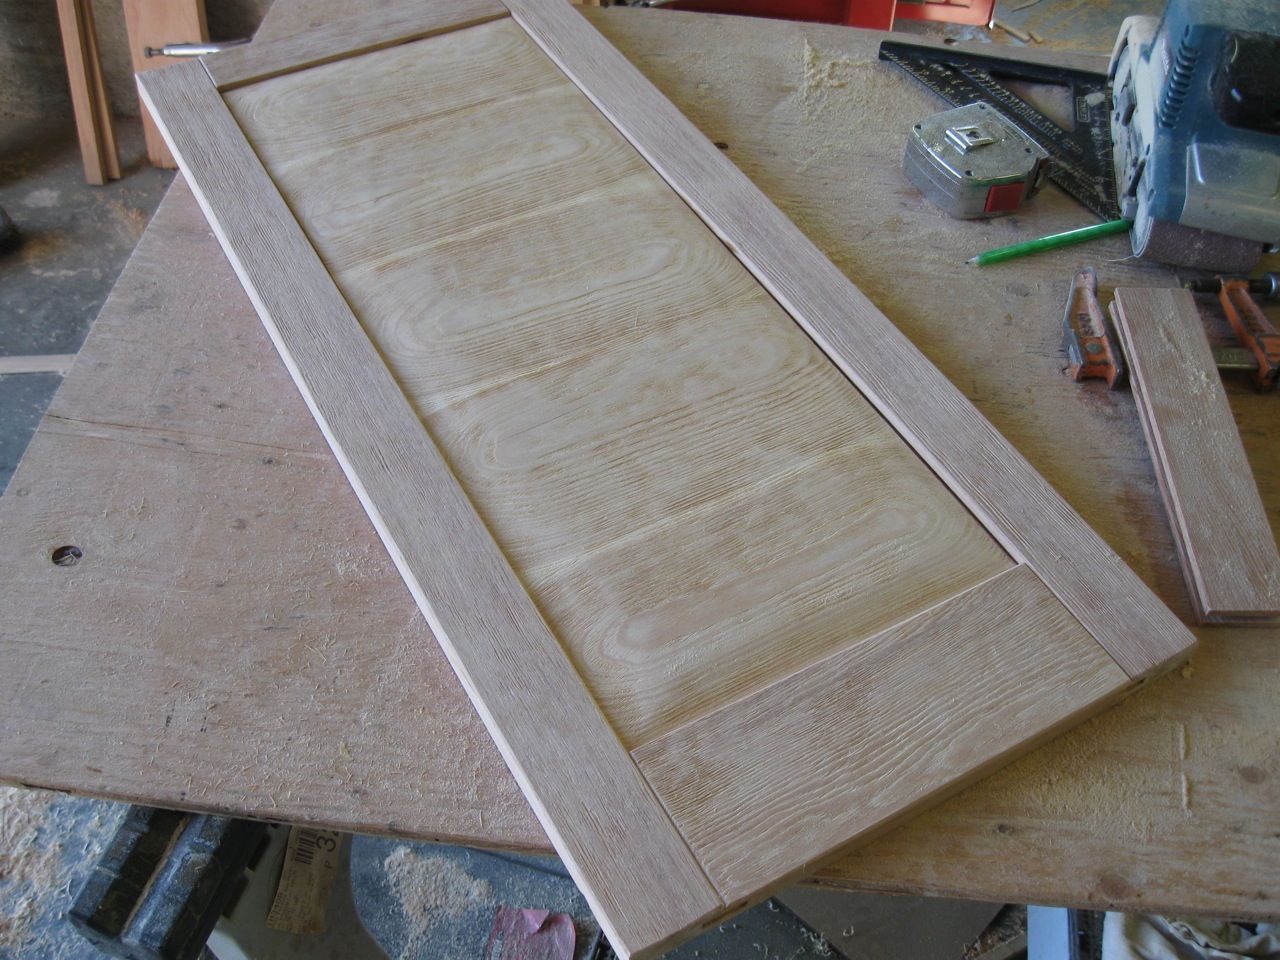
Then using a belt sander I shaped the edges.
Finished door prior to glueing Thats it for now... more of a wood working project than anything at the moment... I think I will be adding water next week though!
|
|
100 gal reef. 180 gal build starting
|
|
Idaho-Tank
Guest
Joined: November 03 2010
Location: McCall, Idaho
Status: Offline
Points: 26
|
Post Options
Thanks(0)
Quote Reply
Posted: November 03 2010 at 10:20am |
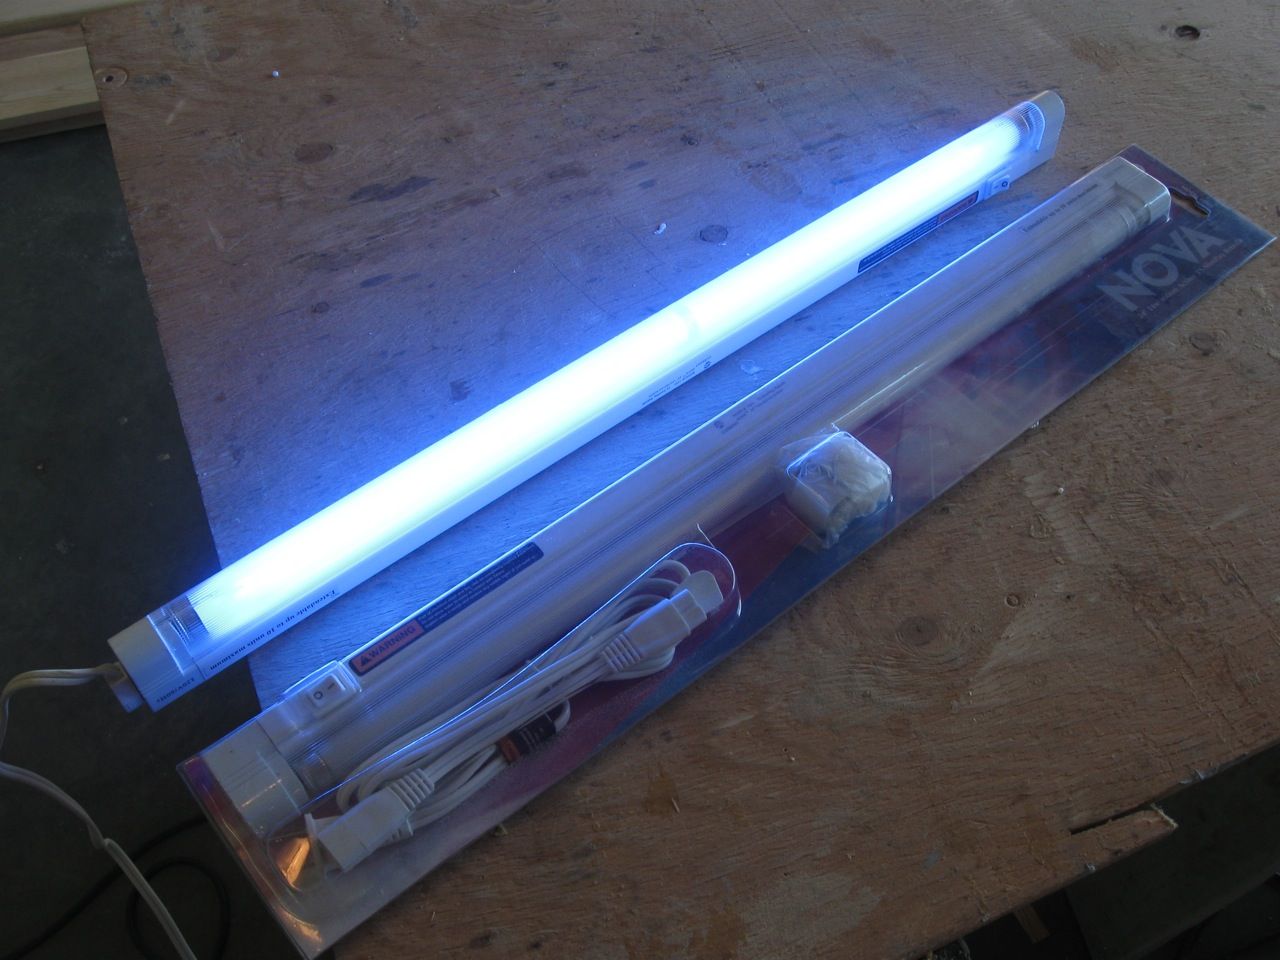
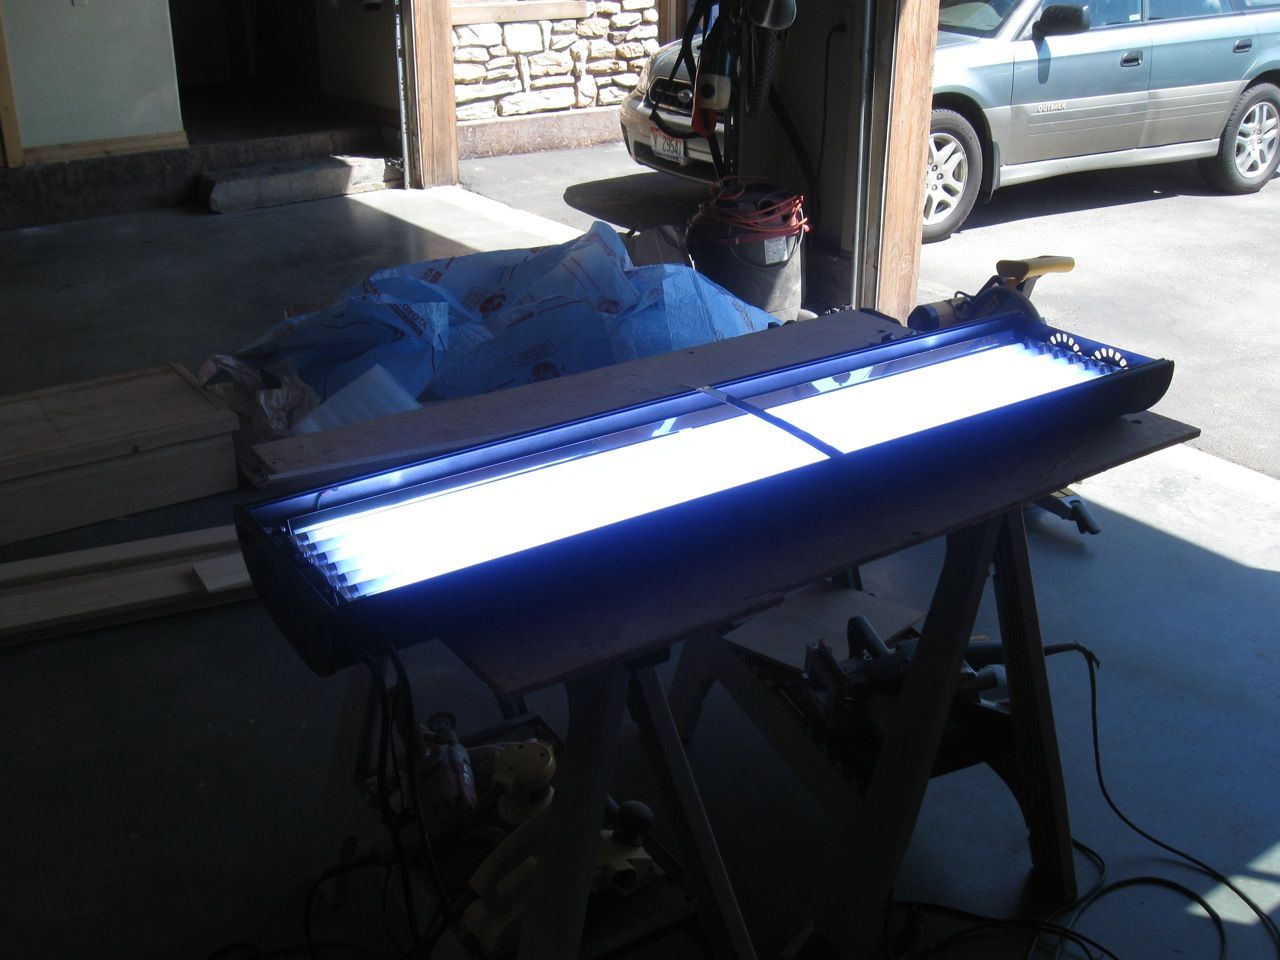
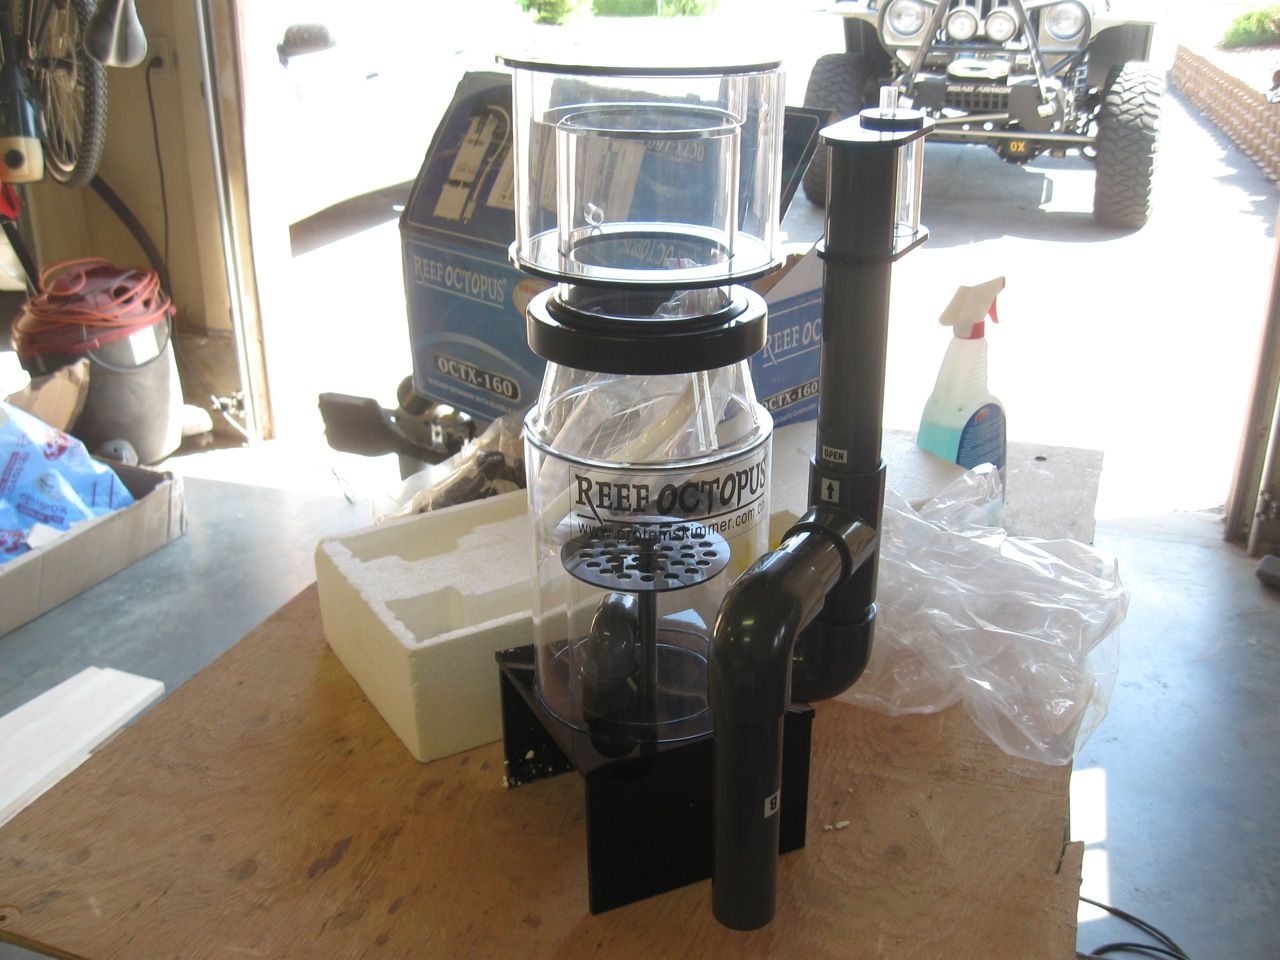
Brown Santa came by today with my lights and skimmer...
Pair of 24" T5 lights for the sump.
Nova Extreme 48" T5 HO light fixture
Octopus 160 Extreme Skimmer
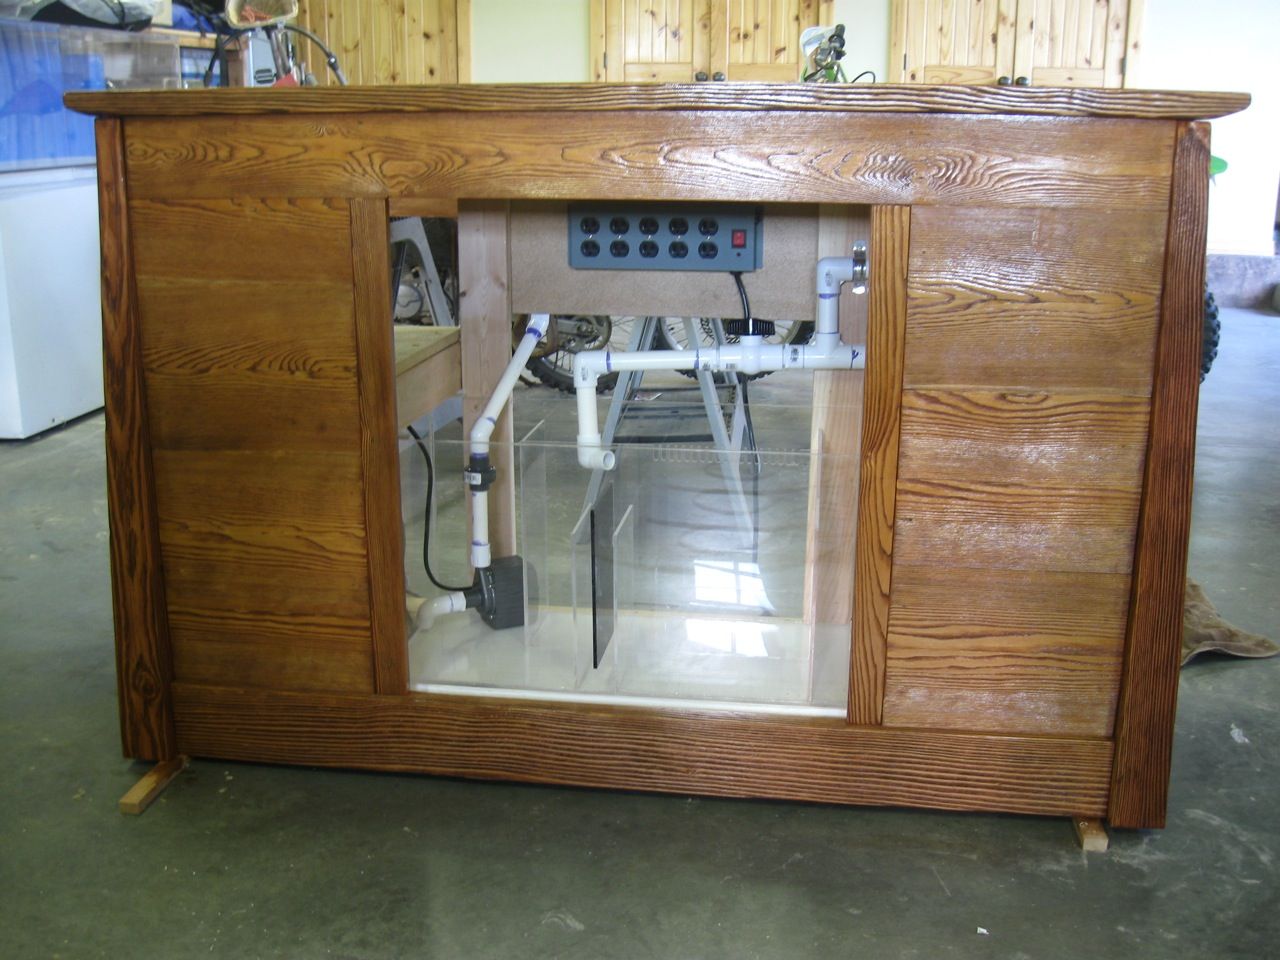
Had a couple hours to work so I mounted a the heavy duty power strip I bought to the back panel.
I glued and clamped the doors I made and then textured and sanded the stand top.
Got about 8 hours in last night and get to work about half of the day today and tomorrow. I plan on having this thing finished by Sunday evening. I got lucky and found a great deal on an almost new RO/DI system locally so I hope to start making water later today.
Photos from yesterday. Basically everything is put together - just need to do a final sanding and start applying polyurethane... then I can mount the doors, anchor down the top etc... after that I can move into the house! Thing has to weigh close to 200 pounds or more! lol.
Sitting without doors on.
Top is drilled but not fastened down yet.
I forgot to show the sump sitting on a piece of low density foam I bought. This was recommended by melevsreef.com so I thought I should do it.
|
|
100 gal reef. 180 gal build starting
|
|
Idaho-Tank
Guest
Joined: November 03 2010
Location: McCall, Idaho
Status: Offline
Points: 26
|
Post Options
Thanks(0)
Quote Reply
Posted: November 03 2010 at 10:26am |
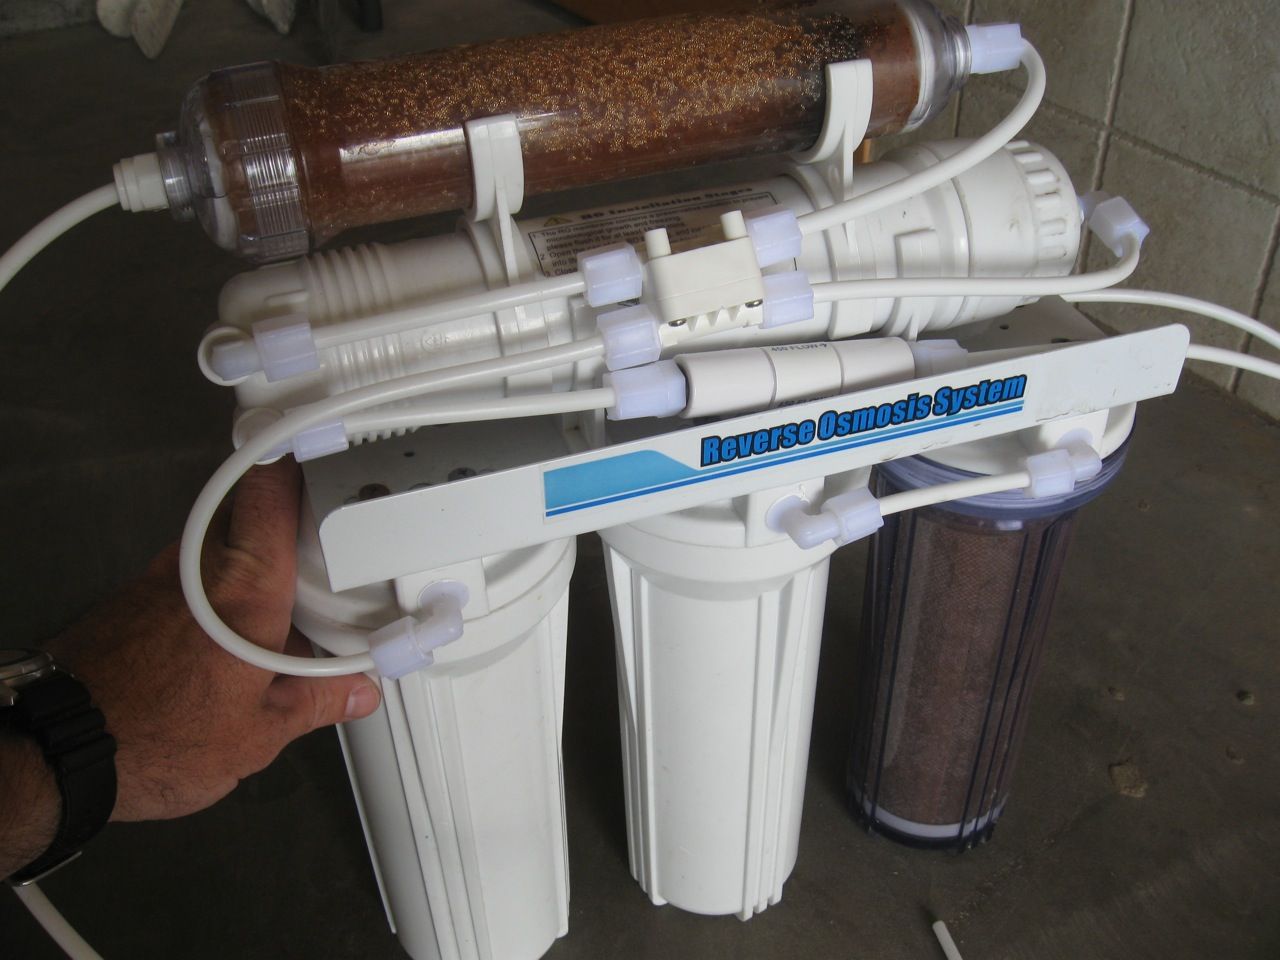
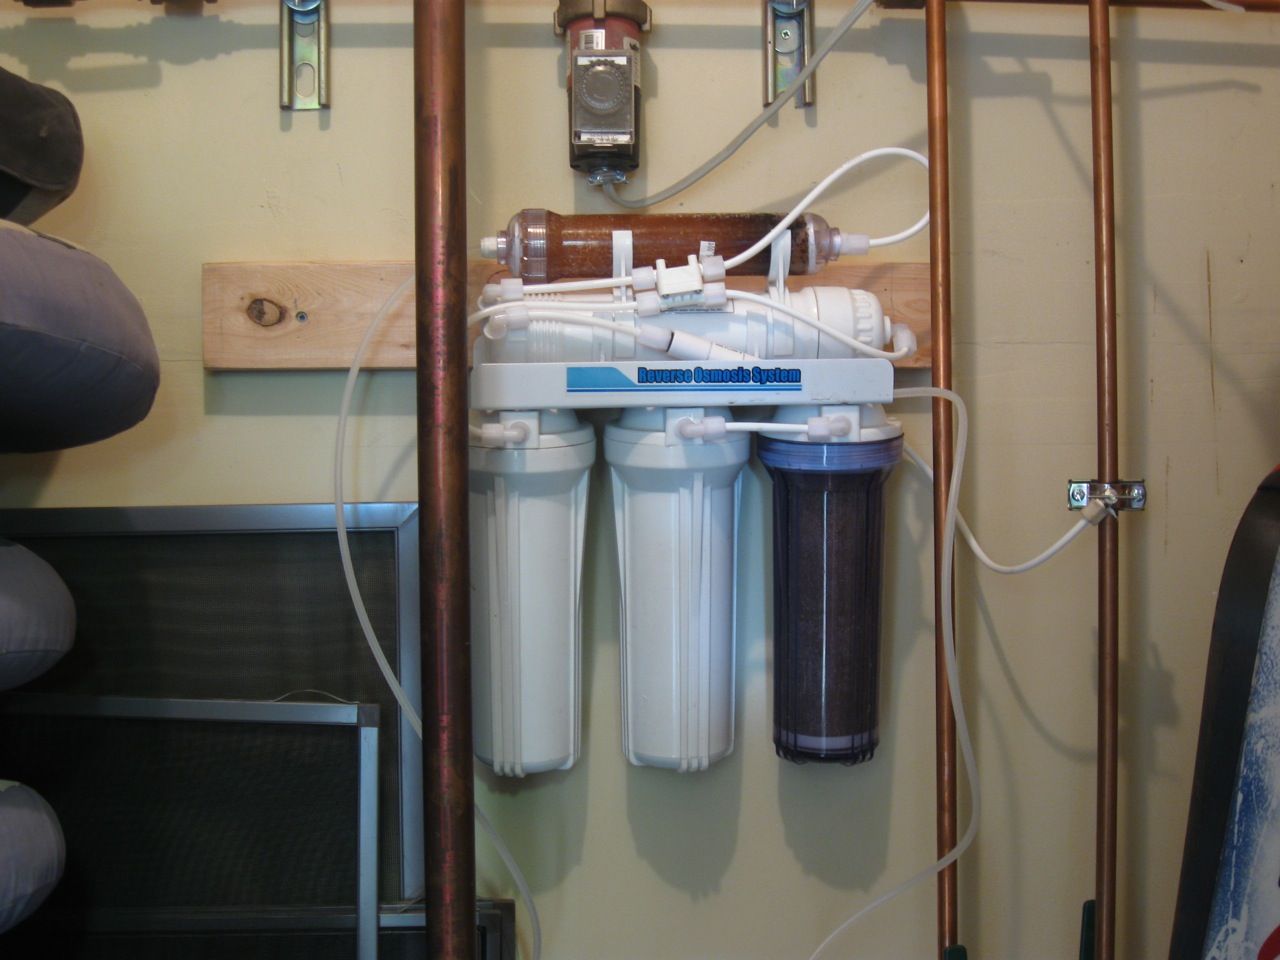
I was looking at the spectrapure unit but couldn't pass up the deal on a nice RO/DI system I bought locally... Is like new - used just a couple times. I am not sure exactly what each chamber does etc.. need to learn about it as I didn't get any paperwork with it.
I mounted the system in my mechanical room which has a floor drain and an easy location to tie into a water line. I started making RO water right away. Slow process I found out.
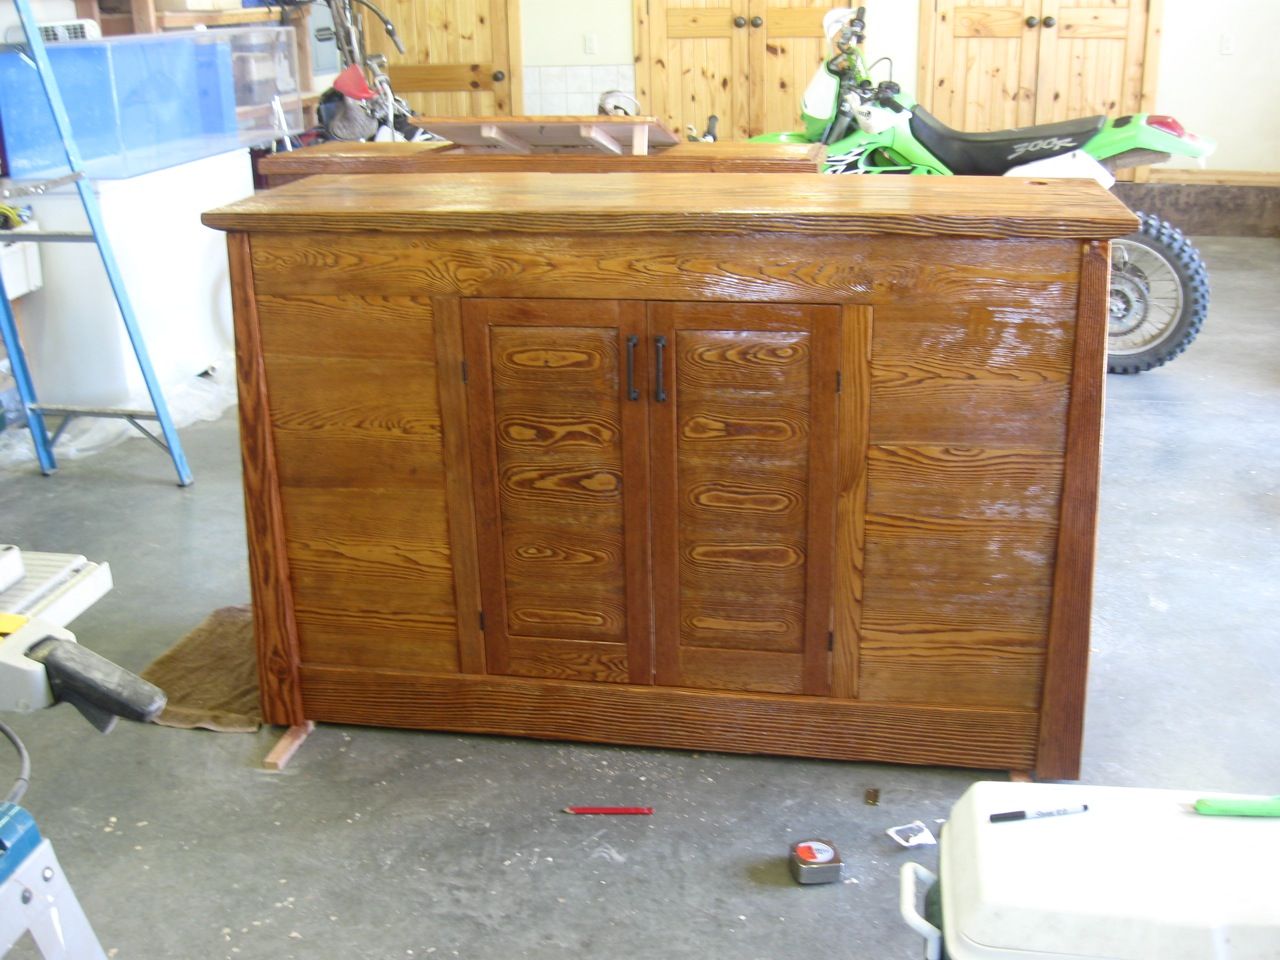
Back to the stand... Finally everything is about done and ready for stain!!!!
After a coat of stain.
And after 3 coats of polyurethane.
Time to install the doors.
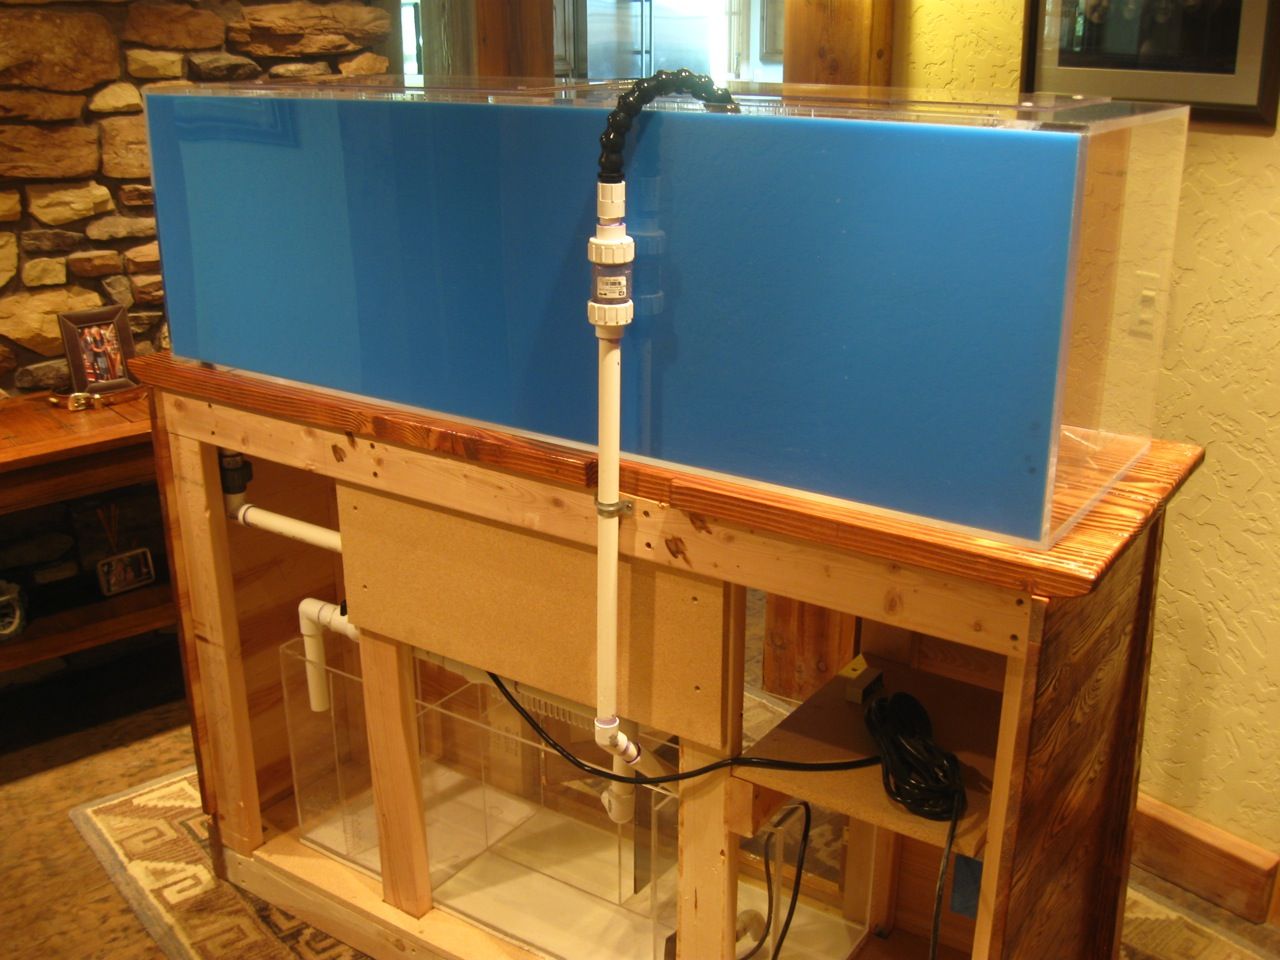
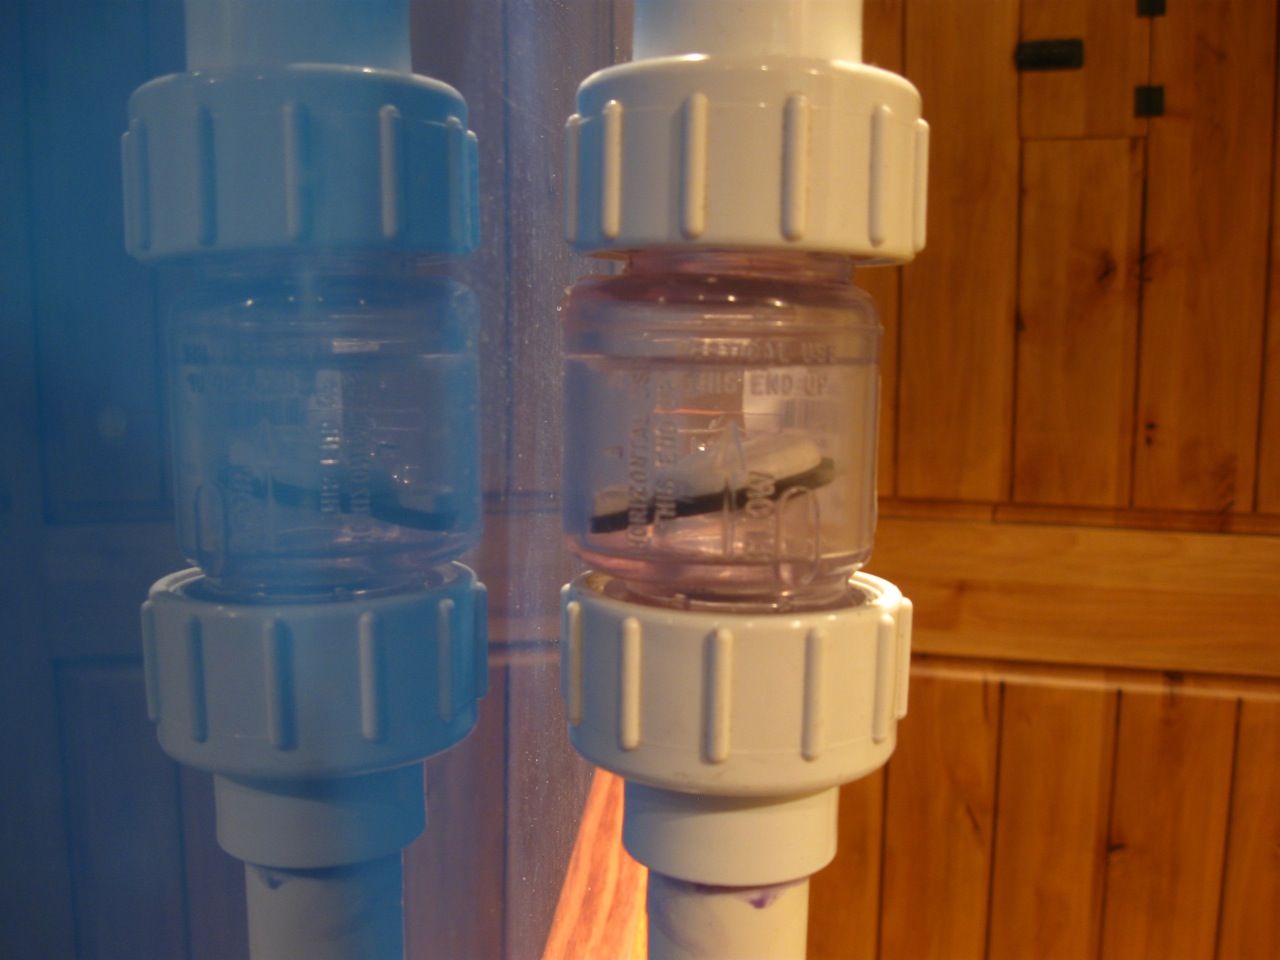
Once the stand was completely dry I moved it into the house along with the tank... Finished all the plumbing.
You can see the check valve I got here, mounted towards the top of the supply line.
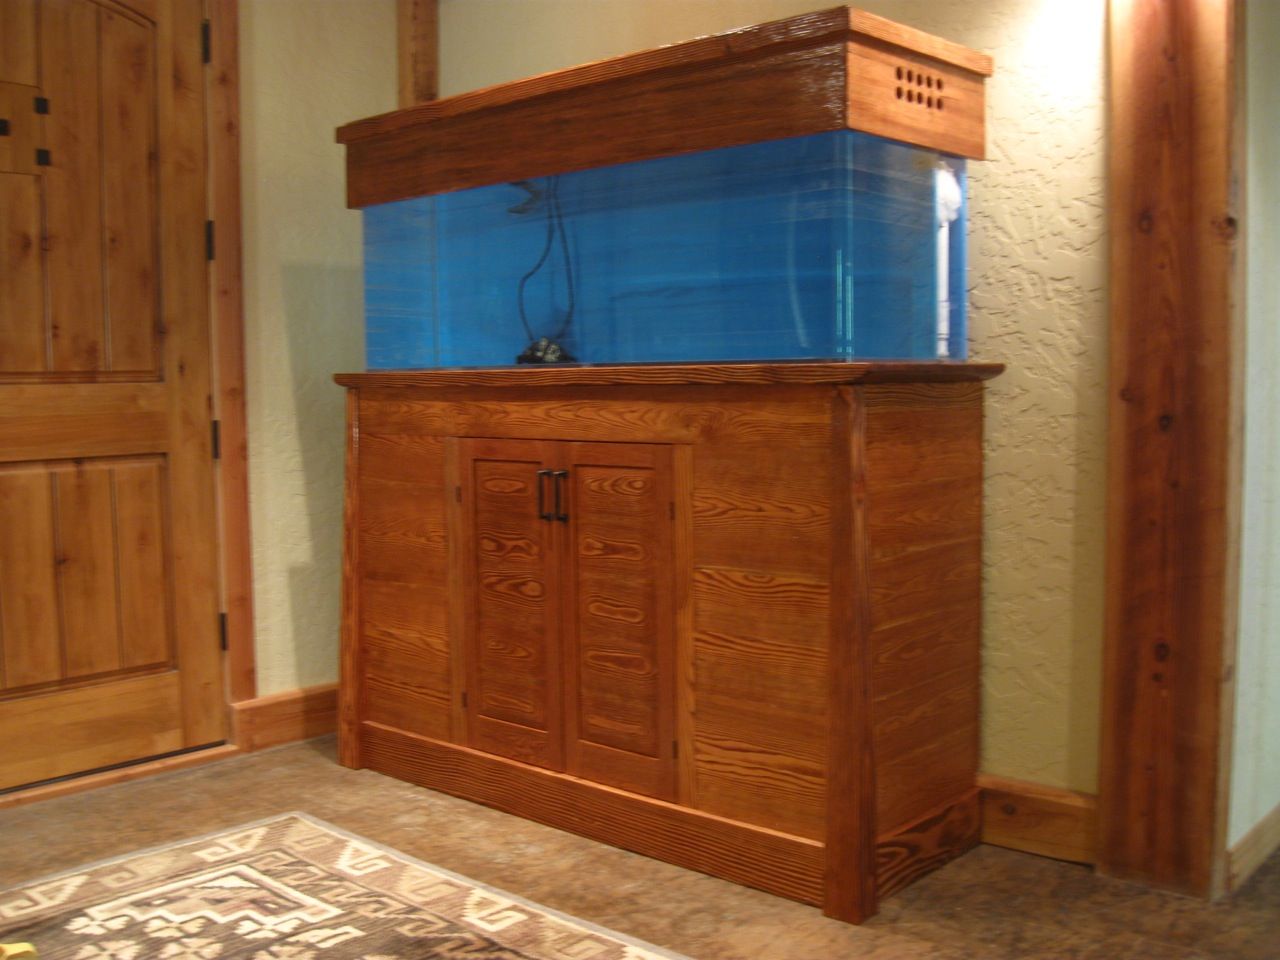
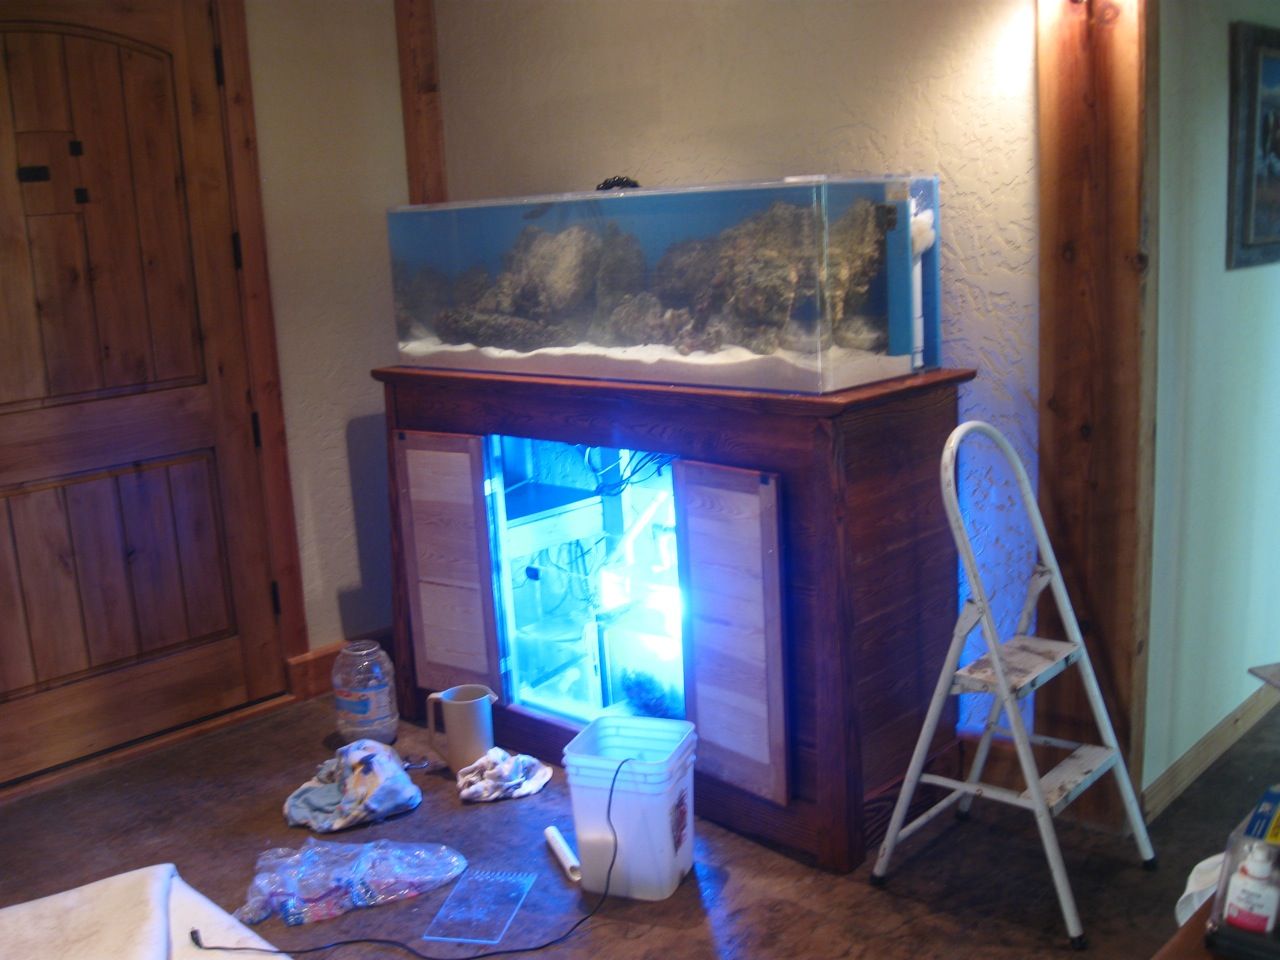
Finally moved into place!!!! And even filled with water (only fresh water at this point.. I don't have any salt yet). I put the tank in my entry area... its actually a fairly dark area of the house usually and we had a spot for it here so it seemed to work well.
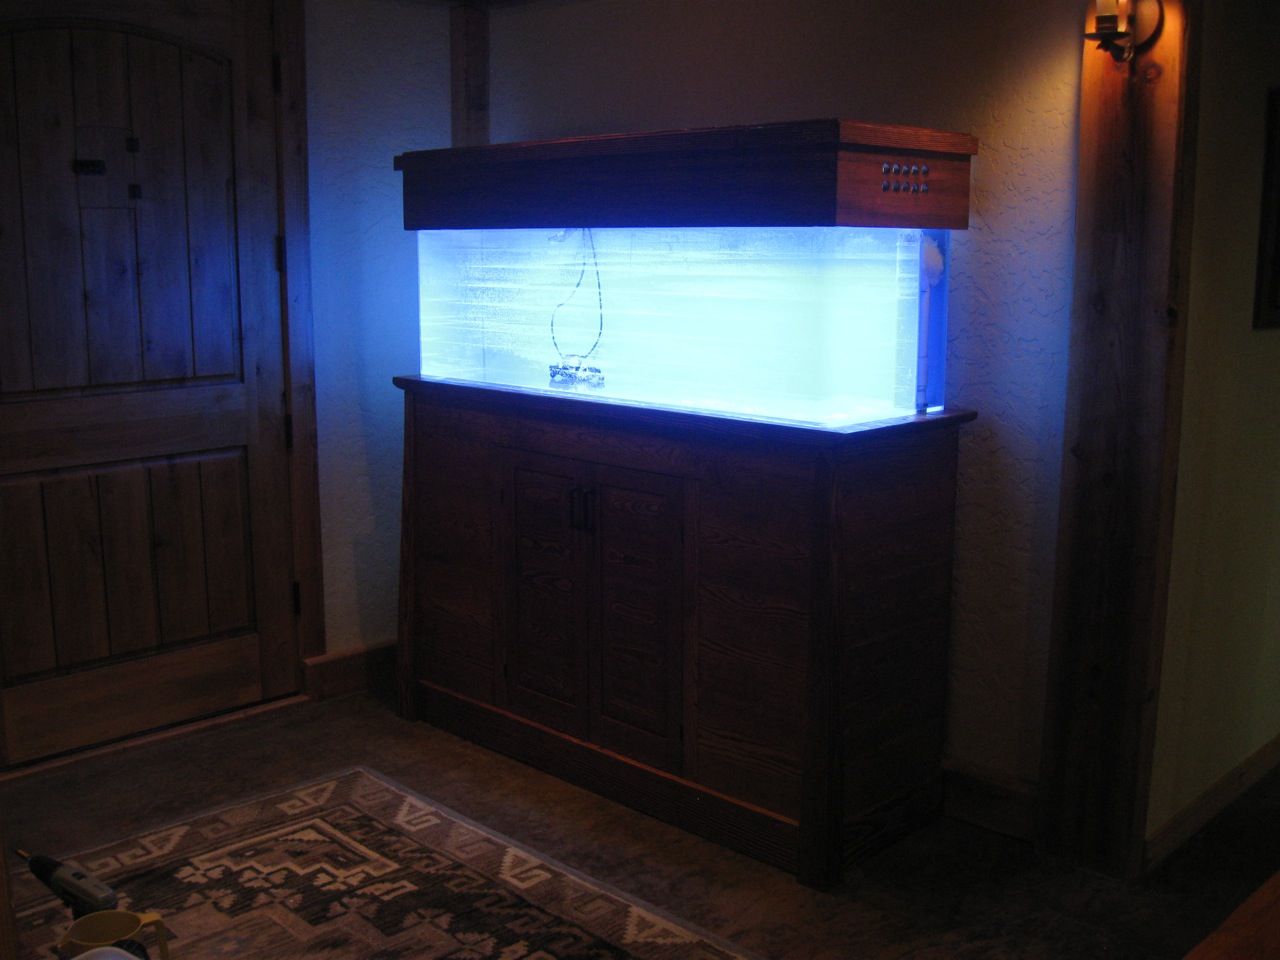
With the lights on
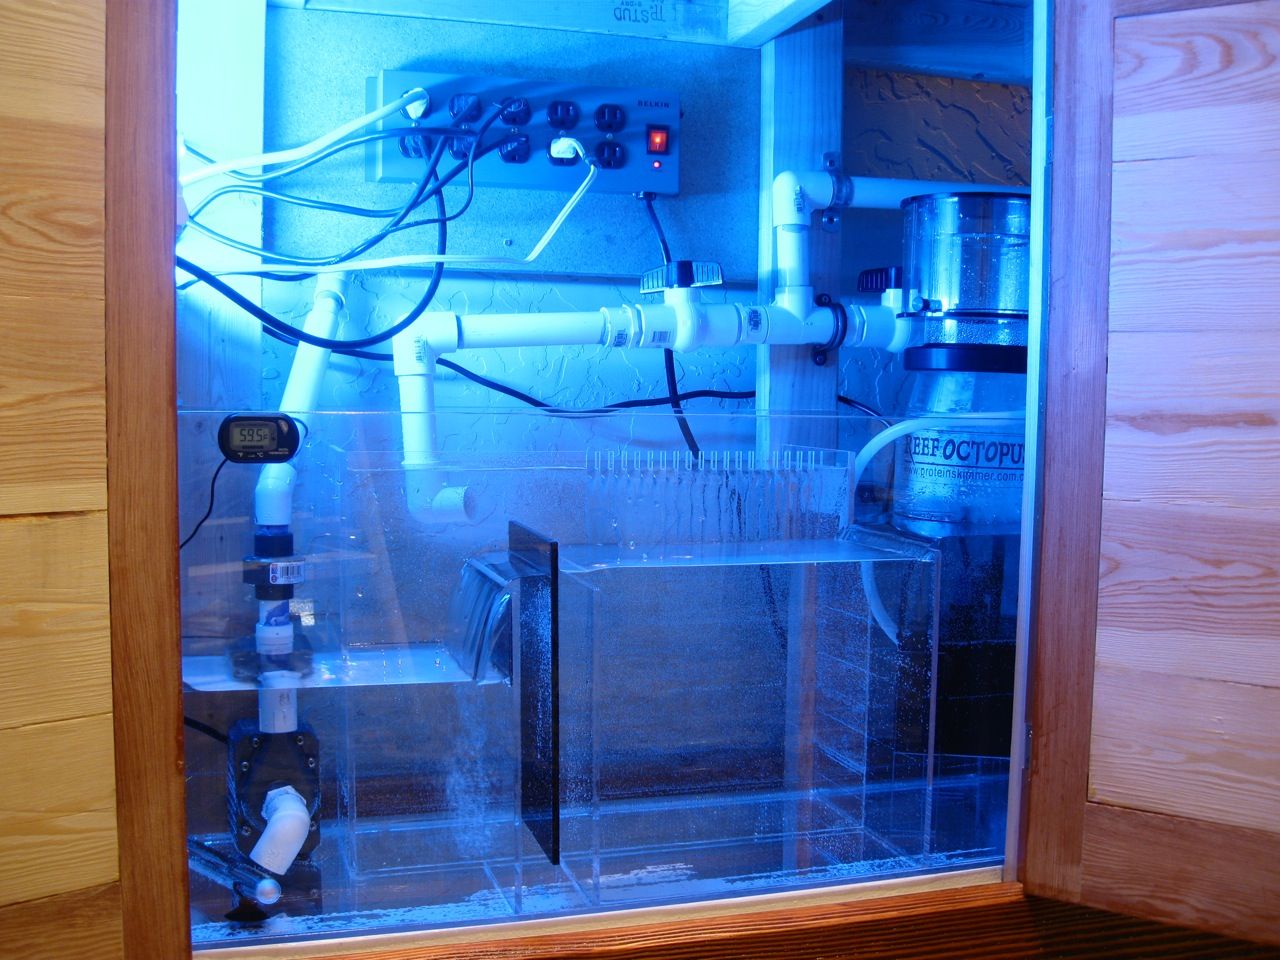
Sump so far. Still need to zip tie or organize the coords somehow and mount the lights.
The only thing I don't like so far is the noise coming from the sump... the plumbing lines I believe. Will need to try to find ways to make it more quiet.
|
|
100 gal reef. 180 gal build starting
|
|
Idaho-Tank
Guest
Joined: November 03 2010
Location: McCall, Idaho
Status: Offline
Points: 26
|
Post Options
Thanks(0)
Quote Reply
Posted: November 03 2010 at 10:27am |
So yesterday I finally was able to pick up the live rock & sand.
We pulled it all out of a nice 75 gallon tank and the rock was then transported completely submerged to my house. I kept a thermometer in with the rock and it never even fluctuated more than 5 degrees the entire time so I am hoping for little or no die off. I didn't weigh the rock but according to the guy I bought it from I have about 150lbs of live and about 40lbs of base rock.
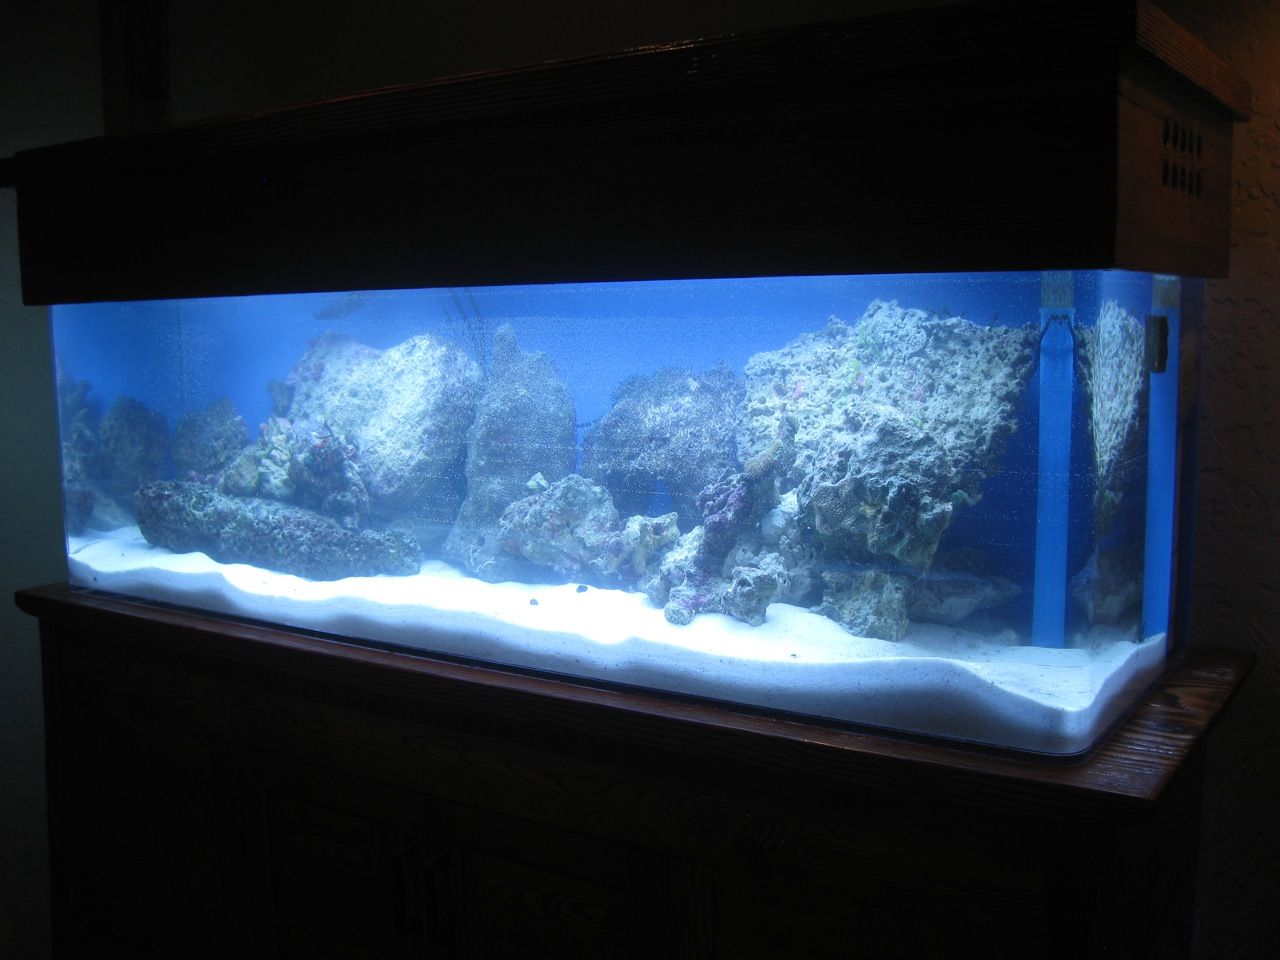
After giving the base rock two really good baths I put it in first... then the sand and finally the live rock.
A couple of the pieces of the live rock were really big. I tried my best to set it up so that the rock faced the same way in my tank as in the previous tank but there are a few rocks that have a side or two exposed that probably weren't before. Several pieces of the rock has star polyps and mushrooms on them. There are large quantities of tiny tube worms too. I also noticed about 10 brittle stars, a couple snails, a few hermits and a couple tiny white starfish that snuck in with the rock. Oh, and unfortunately I noticed three small Aiptasia anemones. Once the tank becomes somewhat stable I will be injecting them with lemon juice or be looking for a peppermint shrimp. The rock has no visible nuisance algae which I was happy about.
I also bought two nice pieces of live rock that had some caulerpa growing on it. Both of those pieces went into the sump - I put one in the "live rock chamber" and then one into the refugium. I also put some cheto in the refugium. The guy I got all of this from was taring down his tank so the algae was free - hope it lives.
I am hoping with all this live rock that my cycle is a very small one.... we will see.
As far as the sand goes - I took about 150 pounds of aragonite from him. I kept out about 4 cups worth and then rinsed the rest really well for a long long time. Found lots of bristle worms and copepods in the sand. After completely rinsing it I put it into the tank and refugium. Ended up about 2-3 inches deep. I also added a tiny bit of the live sand as well to hopefully help seed the sand.
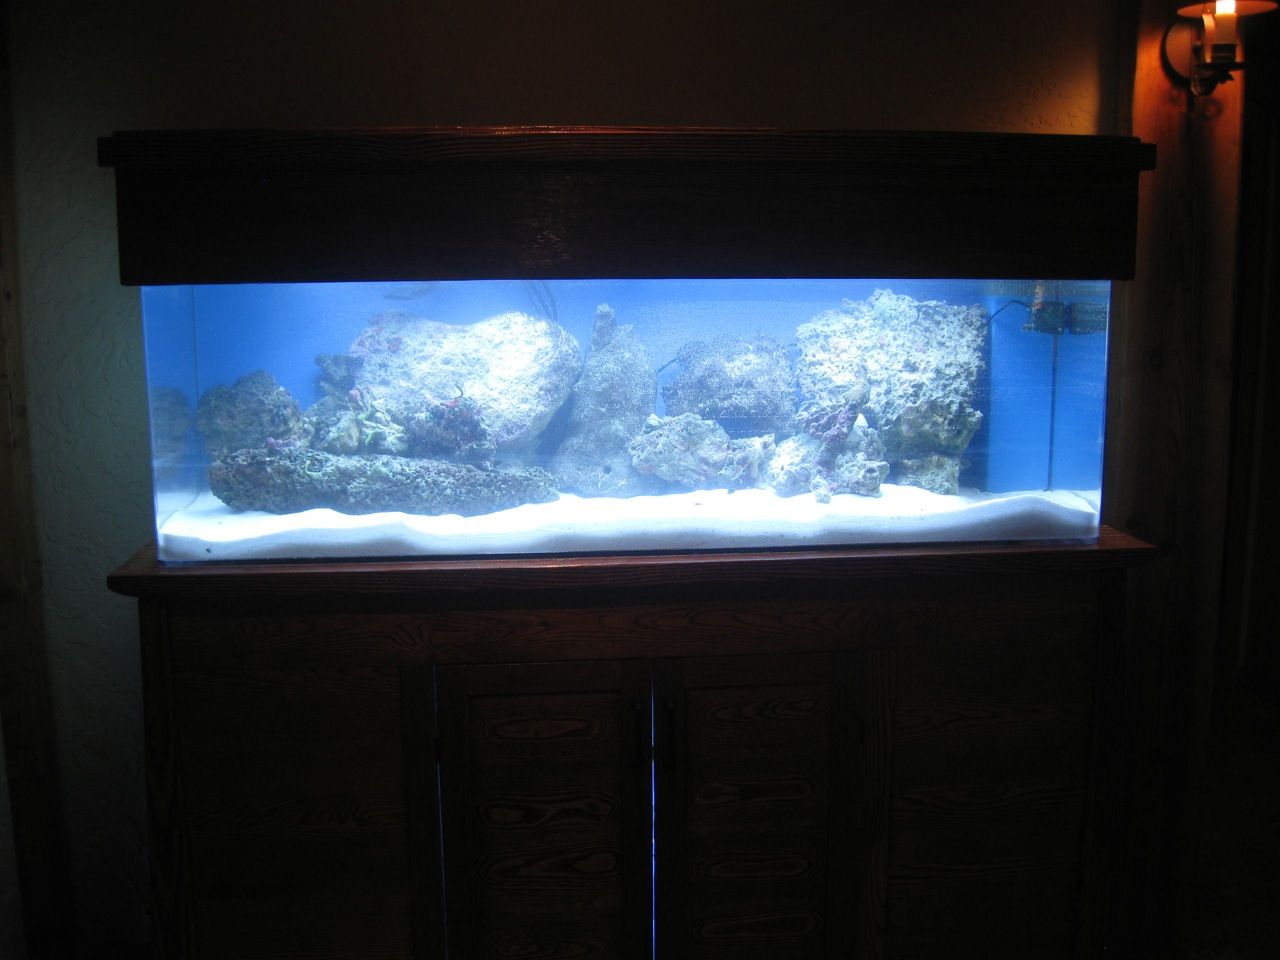
Almost there!
About 2 hours after putting it all in I turned on the lights. I expected things to be cloudy but all things considered the water was really clear and is crystal clear this morning 15 hours later.
I did the best I could with the aquascaping. There are lots of openings for good flow and plenty of shelves etc.. for adding future corals.
5 hours after putting in the rock and sand - my water tests:
SG = about 1.025 (my refractometer has not showed up yet so this measurement is from my hydrometer) Temp = 78 Ammonia = .5 PH = 8.1 Nitrate = 0 Nitrite = 0
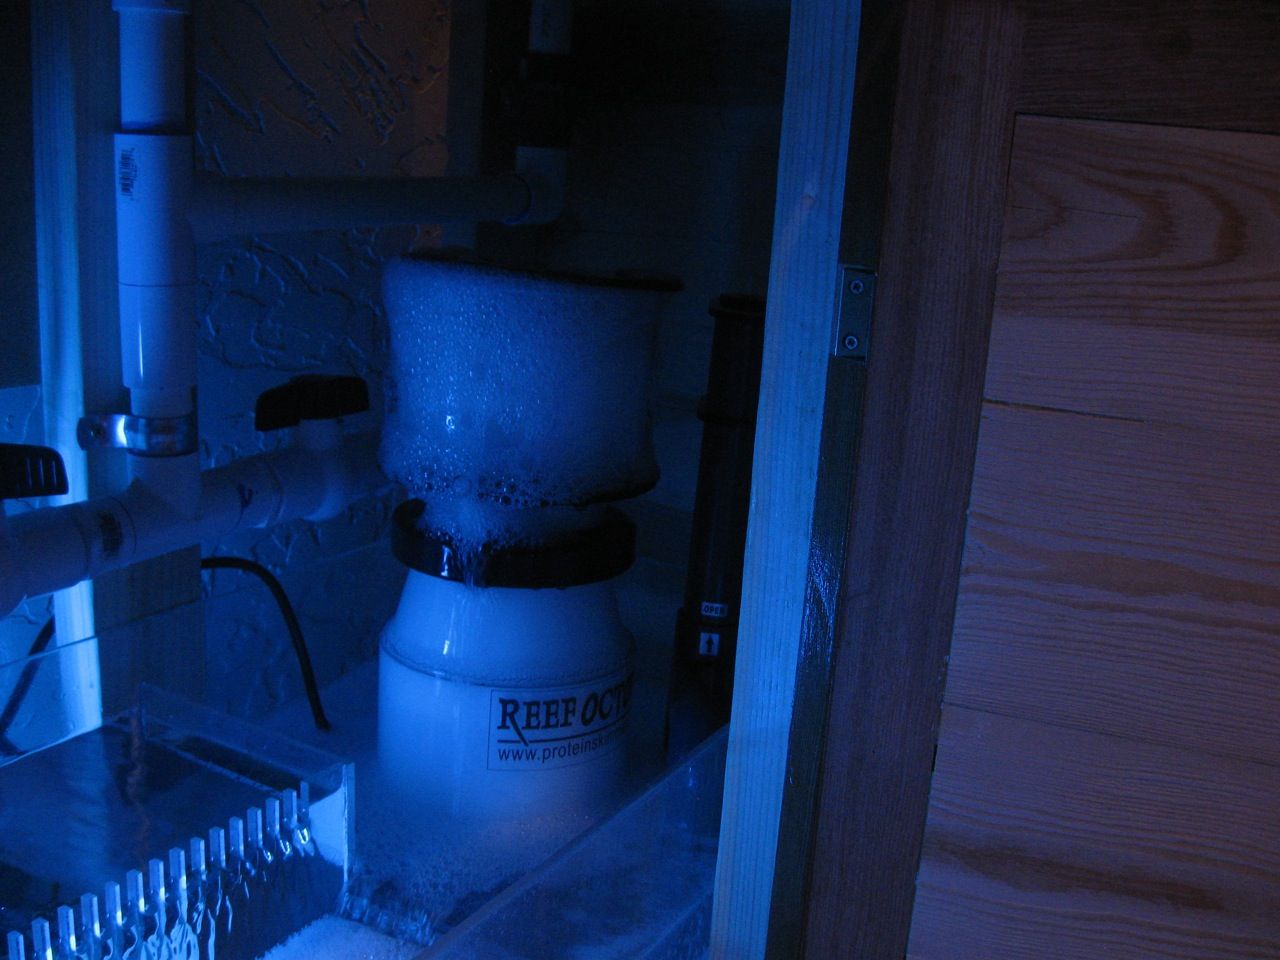
My skimmer is not broken in yet I guess... thing is producing so many micro bubbles that I have opened it up all the way yet still get it foaming over.
|
|
100 gal reef. 180 gal build starting
|
|
Idaho-Tank
Guest
Joined: November 03 2010
Location: McCall, Idaho
Status: Offline
Points: 26
|
Post Options
Thanks(0)
Quote Reply
Posted: November 03 2010 at 10:32am |
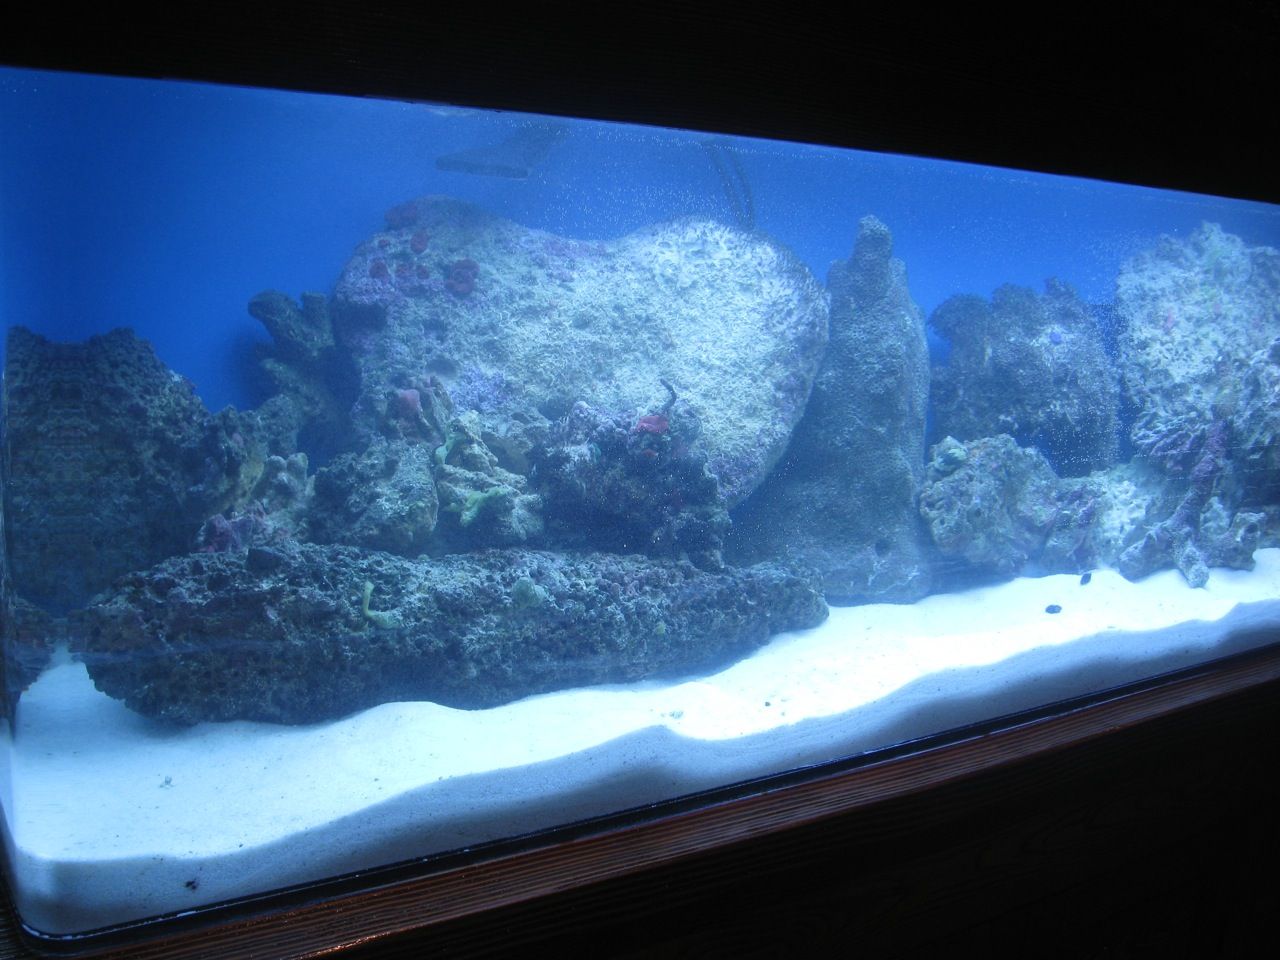
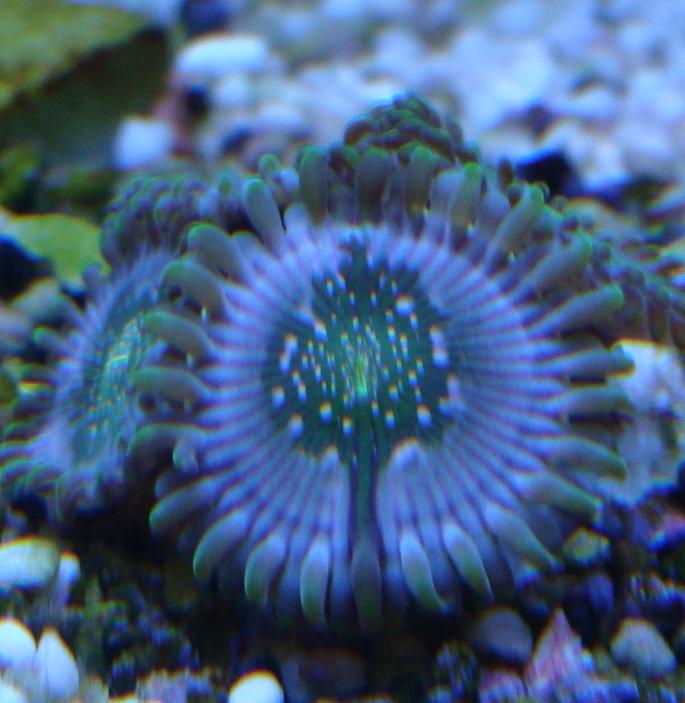
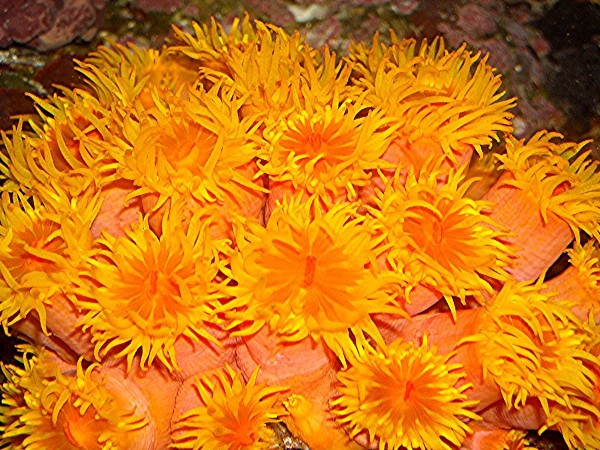
Fast forward 3 months... and :
I am looking for suggestions for what to do/add next. I am also looking to start my 180 build soon.
Edited by Idaho-Tank - November 03 2010 at 2:35pm
|
|
100 gal reef. 180 gal build starting
|
|
badger126
Guest
Joined: January 28 2010
Location: Idaho Falls
Status: Offline
Points: 358
|
Post Options
Thanks(0)
Quote Reply
Posted: November 03 2010 at 11:13am |
|
How did you get the lights in the canopy and still be able to get inside the tank? I have a canopy but I never use it because it keeps me from being able to reach the bottom of my tank.
|
|
Idaho-Tank
Guest
Joined: November 03 2010
Location: McCall, Idaho
Status: Offline
Points: 26
|
Post Options
Thanks(0)
Quote Reply
Posted: November 03 2010 at 11:22am |
|
^good question. Actually the T5 fixture just lays on top of the tank and is not connected to the hood. Fortunately the hood is fairly light wight as I have to pull it off every other day for maintenance, feeding etc... Trying to decide what to do on my 180 for lighting still... I don't have a hood yet and will need to build one - really want to design/build something that is easier to deal with.
|
|
100 gal reef. 180 gal build starting
|
|
Jeffs_little_ocean
Guest
Joined: October 04 2009
Location: Kaysville
Status: Offline
Points: 869
|
Post Options
Thanks(0)
Quote Reply
Posted: November 03 2010 at 11:24am |
|
That is a great build thread. I really like the sump. I spent about 20 minutes just looking at that part. That is a really neat design. Corals look great as well....and to think I thought all you Idahoan's knew how to grow was taters lol.
|
|
Life is good....right?
|
|
badger126
Guest
Joined: January 28 2010
Location: Idaho Falls
Status: Offline
Points: 358
|
Post Options
Thanks(0)
Quote Reply
Posted: November 03 2010 at 11:27am |
|
Oh haha I see you haven't thought of a solution either.... that's exactly what I was doing when I had the canopy on. I just left it off eventually lol. I've been meaning to cut the front off the canopy and put hinges on it so it flips up - but I'm not super handy and I haven't decided if it's worth the work. maybe you should try it and I'll watch you do it first haha
|
|
Idaho-Tank
Guest
Joined: November 03 2010
Location: McCall, Idaho
Status: Offline
Points: 26
|
Post Options
Thanks(0)
Quote Reply
Posted: November 03 2010 at 11:35am |
Thanks Jeff! Starting to think about the sump design for my 180. It will be much bigger and hopefully more complicated ;)
Badger, yeah I considered a front flip up style hood but went this route because it was easier. In hindsight I probably should have tried it. I was most concerned with the appearance - this tank is in the entrance to my home so it (stand & hood) needed to look good. I think I would have had a tougher time building a front flip up type of hood.
At this point Im going to live with it as is and focus on making the hood for my 180 easier to deal with.
|
|
100 gal reef. 180 gal build starting
|
|
SGH360
Guest

Joined: April 04 2010
Location: Centerville, UT
Status: Offline
Points: 1786
|
Post Options
Thanks(0)
Quote Reply
Posted: November 03 2010 at 11:43am |
that is a darn good looking tank 
what kind of lights are you running?
Edited by SGH360 - November 03 2010 at 12:14pm
|
|
Shane H
Presidency


Joined: March 09 2003
Location: Brigham City
Status: Offline
Points: 7921
|
Post Options
Thanks(0)
Quote Reply
Posted: November 03 2010 at 12:36pm |
Great build thread!
Welcome.
|
|
Idaho-Tank
Guest
Joined: November 03 2010
Location: McCall, Idaho
Status: Offline
Points: 26
|
Post Options
Thanks(0)
Quote Reply
Posted: November 03 2010 at 12:46pm |
SGH - Thanks Nova Extreme 8 bulb 48" T5 HO light fixture. 432 watt http://www.marineandreef.com/Nova_Extreme_T5_Aquarium_Lighting_Current_USA_p/rcu01123.htm
Shane - Thanks!
|
|
100 gal reef. 180 gal build starting
|
|