| Author |
 Topic Search Topic Search  Topic Options Topic Options
|
knowen87 
Guest

Joined: March 17 2012
Location: Logan, UT 84321
Status: Offline
Points: 385
|
 Post Options Post Options
 Thanks(0) Thanks(0)
 Quote Quote  Reply Reply
 Topic: Big Tank Little House Topic: Big Tank Little House
Posted: November 20 2012 at 3:28pm |
Well my wife and I are moving to a 400 square foot house
soon and we have to downsize. Well everything but the tank that is :)! I must
have a great wife because she is letting me upgrade to a 150 gallon tank. I think that she likes the fish. It is also
one of the few hobbies that I have tried that I have stuck with.
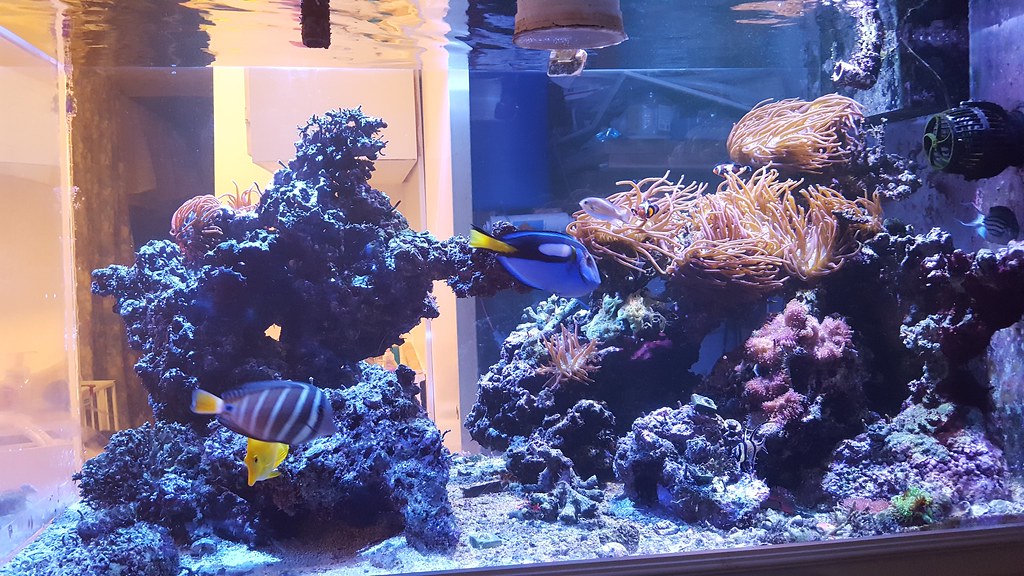
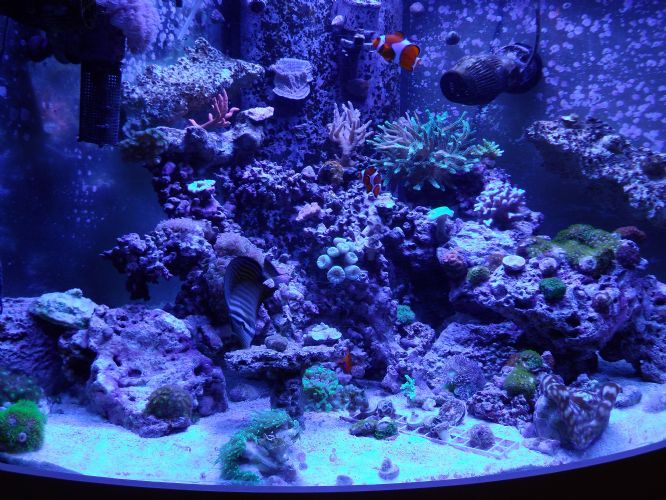
Our current tank is a 90 gallon corner and there is a
picture of it below. I have 2 clowns, a flame angel and a redsea sailfin. I
have about 60 different types of coral including a redplanet, green birdsnets
and a couple of plating montis. I also have quite the zoa garden (which my wife
loves)
As far as Equipment am using 2 rapidled triple puck lights that
I assembled myself. They are controlled by an apex jr. I have a vertex skimmer
and my sump is 50 gallons in the basement.
A couple of days ago I got the 150 gallon tank. It is
acrylic and has very few scratches except for one side that was dragged on the
floor by the previous owner. I needed a
tank that was less than 72†in order for it to fit in the new house and this
tank works perfect. It is 51x27x26 so it is deeper and taller than a normal
tank. 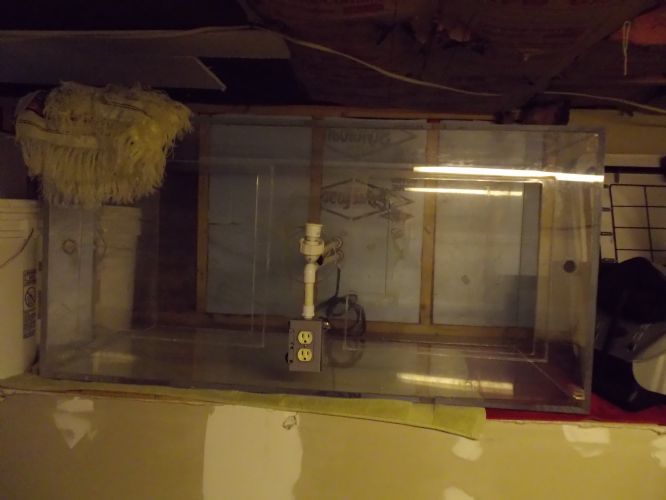
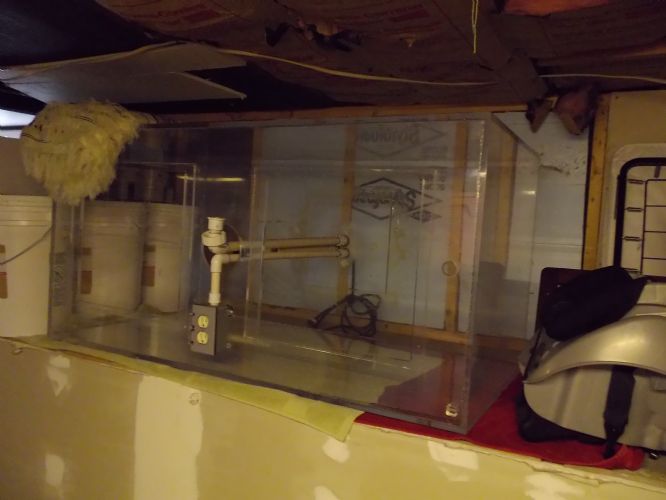
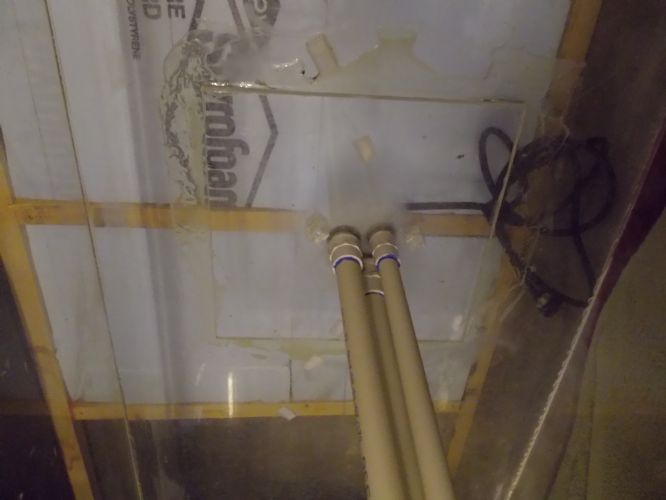
One issue that I have is that the overflow is in the center
of the tank. The tank will be in the wall so I need to move the overflow to one
of the corners. I am thinking that I will drill new holes in the corner and
make my own overflow. Then I will cover the holes from the center overflow with
a piece of acrylic to seal up the bottom.
|
 |
tfmreefs 
Guest


Joined: March 29 2012
Location: Heber City
Status: Offline
Points: 1496
|
 Post Options Post Options
 Thanks(0) Thanks(0)
 Quote Quote  Reply Reply
 Posted: November 20 2012 at 4:23pm Posted: November 20 2012 at 4:23pm |
|
Dude, its looking great!
|
|
"The early bird might get the worm, but only the second mouse gets the cheese."
|
 |
knowen87 
Guest


Joined: March 17 2012
Location: Logan, UT 84321
Status: Offline
Points: 385
|
 Post Options Post Options
 Thanks(0) Thanks(0)
 Quote Quote  Reply Reply
 Posted: December 10 2012 at 10:35am Posted: December 10 2012 at 10:35am |
My wife and I closed on the house the other day. After measuring it all out the interior dimensions only give us 330 sf but I guess that is okay. Here are a few pics of the view and the house.  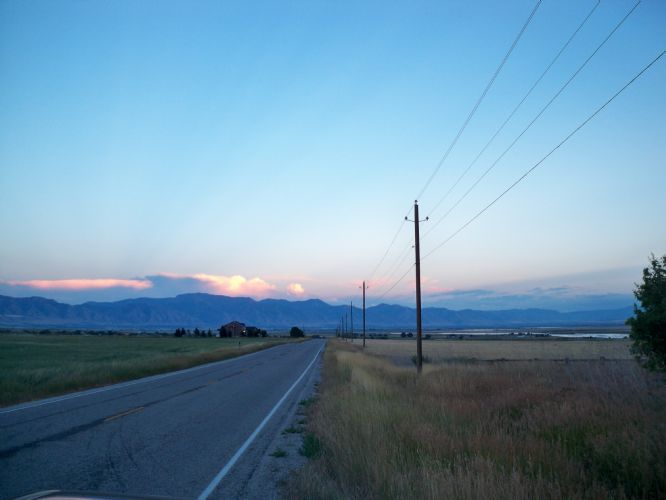 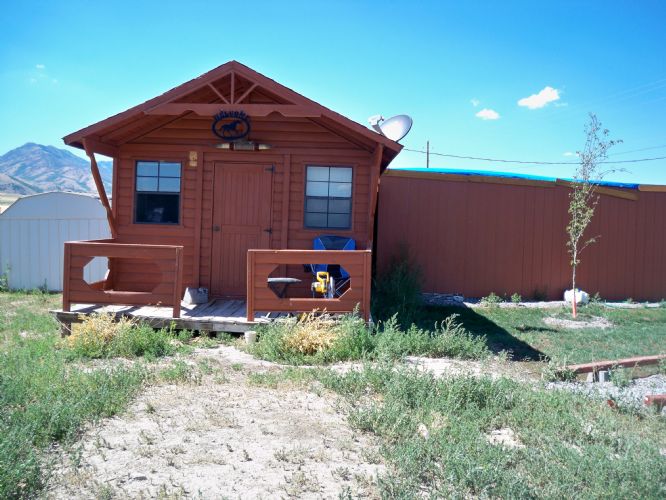 Id show you the inside but its not so great. I will keep you all posted on the build
|
 |
Molli 
Guest

Joined: June 28 2012
Location: Bountiful, Utah
Status: Offline
Points: 1109
|
 Post Options Post Options
 Thanks(0) Thanks(0)
 Quote Quote  Reply Reply
 Posted: December 10 2012 at 10:50am Posted: December 10 2012 at 10:50am |
|
Hey that's a cute little house! Looks like you have plenty of room to expand if and when you want to! Do you plan to have horses, cattle, farm, etc.?
|
 |
ReefOn 
Pet Store

Joined: March 25 2011
Location: Midvale
Status: Offline
Points: 1011
|
 Post Options Post Options
 Thanks(0) Thanks(0)
 Quote Quote  Reply Reply
 Posted: December 10 2012 at 11:27am Posted: December 10 2012 at 11:27am |
|
It looks like your "overflow" is just a stand pipe. Was there an overflow box around it? There are not even bulkheads in the bottom, looks like it was glued using silicon, this will make it reall hard to get a perfect seal. Love the dimensions of the tank, just looks like a lot of work to make sure it doesn't leak, and is setup the way you want it.
|
 ReefOn 7563 S Main St (700W) Midvale, Uta
|
 |
knowen87 
Guest


Joined: March 17 2012
Location: Logan, UT 84321
Status: Offline
Points: 385
|
 Post Options Post Options
 Thanks(0) Thanks(0)
 Quote Quote  Reply Reply
 Posted: December 10 2012 at 12:42pm Posted: December 10 2012 at 12:42pm |
|
Molli - Yea it is cute, at least that's what my wife says. I will be
very small but it is just the two of us for now. We have six acres and
plan on raising cattle as a hobby. It is a perfect piece of land and
will take our house payment from $1000/ month to $200/month. In a few
years we will build our dream home on the back of the property.
Reef On -Yea I know, I am still trying to figure it out. Look at my next post to see what I have thought of so far.
|
 |
knowen87 
Guest


Joined: March 17 2012
Location: Logan, UT 84321
Status: Offline
Points: 385
|
 Post Options Post Options
 Thanks(0) Thanks(0)
 Quote Quote  Reply Reply
 Posted: December 10 2012 at 1:05pm Posted: December 10 2012 at 1:05pm |
So here are some of the Ideas that I have been kicking around. to understand I will tell you how I want to have the tank set up. I have added some really basic, but mostly to scale drawings of how this will fit in the house. 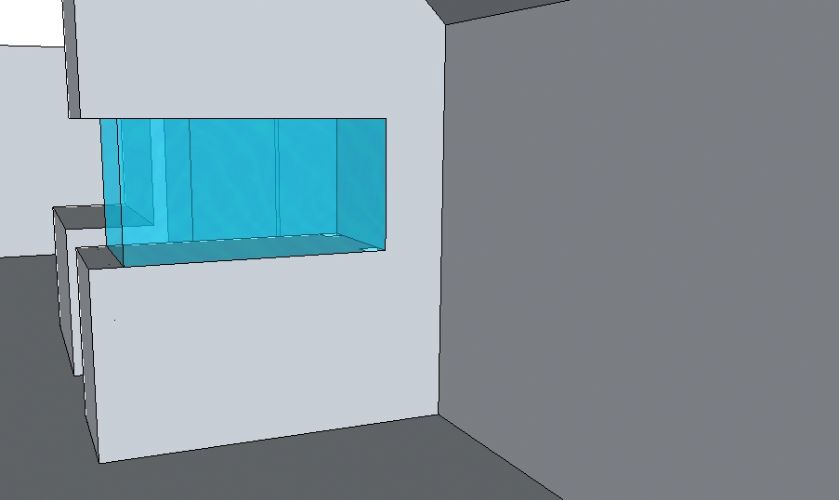 I want it to be in the wall. It will be viewable from 2 full sides and about a 1 ft section from the back. There will be a small "fish room behind the tank. this second picture will show you the view that you would see from the hallway. 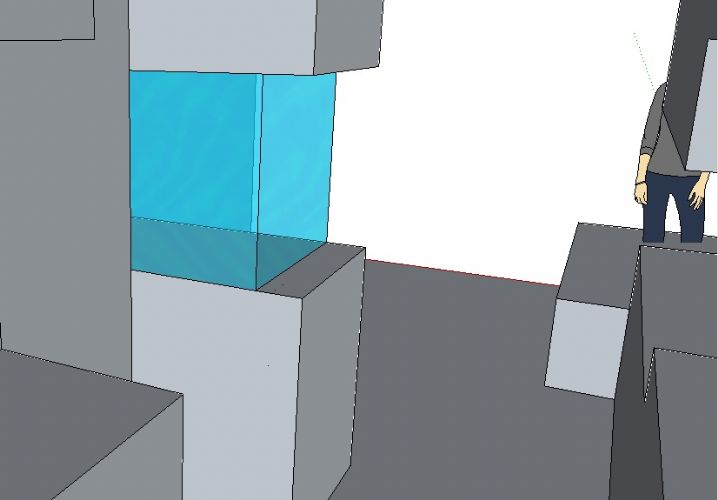 Now comes the problem with the tank. The pipes are in the middle of the tank and one of them has an electrical wire in it. I for one don't like mixing water and electricity so that is gone for sure but the pipes that are currently in there are 1/2 in which is way too small for how much water will need to go through the tank. ReefOn was right. they are just siliconed on there and I really done want to have to tear the tank apart later because the silicone degrades or the seal breaks so I am thinking of just removing all of the pipes form the middle. I would take a piece of 3/4 acrylic and "patch" the holes with the piece of acrylic and some weld on or other acrylic bonding agent. The patch could be covered with sand so that views don't see it. Then I would add a new overflow to the top side of the tank and drill new holes in the side of the tank. This puts the bulkheads on the side of the tank and makes them easily accessible if I ever need to work with them. PS pics were drawn in paint sorry for the quality. 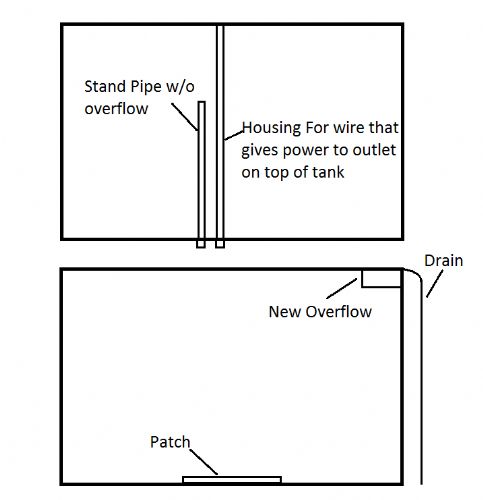 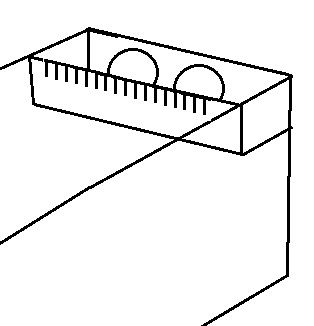
|
 |
rufessor 
Guest

Joined: January 25 2011
Location: Salt Lake CIty
Status: Offline
Points: 566
|
 Post Options Post Options
 Thanks(0) Thanks(0)
 Quote Quote  Reply Reply
 Posted: December 10 2012 at 3:35pm Posted: December 10 2012 at 3:35pm |
Although I am certain its possible to get a side mount overflow to work to move enough water (150 gal + sump) to get some real exchange in the tank but with that size I would seriously consider adding two of the more typical overflows with the acrylic chamber surrounding the through drilled holes in the bottom using a Durso or Herbie method for the standpipe. I have a 70 with Durso and one of the first things people say when they come visit is that the tank is dead silent, so if noise is a concern- it does not need to be if you work on the plumbing. They are really easy to do especially if you have an empty dry tank. Also, since you already have holes in the bottom, have you considered a closed loop with a dry pump (cuts down on the heat exchange into the water) you could use both holes functionally that way.... MANY options, almost none bad.... just thoughts.
One thing I would consider though, whats the return pump going to push in terms of gallons per hour after you account for the head height and the way you plumb it (consider flex SPA) and then work out how many and how big your return pipes need to be to handle it. If you have a box of super nice in tank programmable powerheads you care less about circulation through the sump as a supply of tank water movement... but if I do this again and upgrade to something over 100 gallons, I am going closed loop all the way- Power heads are big ugly expensive beasts- a simple closed loop is awesome for lager tanks.
|
|
Everything should be made as simple as possible, but not simpler -A.E.
57 Gallon RImless build in progress check the thread before if becomes boring and just full of nice pictures of colorful coral!
|
 |
knowen87 
Guest


Joined: March 17 2012
Location: Logan, UT 84321
Status: Offline
Points: 385
|
 Post Options Post Options
 Thanks(0) Thanks(0)
 Quote Quote  Reply Reply
 Posted: February 24 2013 at 10:03pm Posted: February 24 2013 at 10:03pm |
Just thought id give a little update on the tank. I have gotten a lot closer to being done with the cabin but it is hard to get out there with school and work. I should be setting up the tank with water sand and dry rock here soon. My RODI system is coming in this week. Here is the wall framed up. I will add some before and after pics soon. 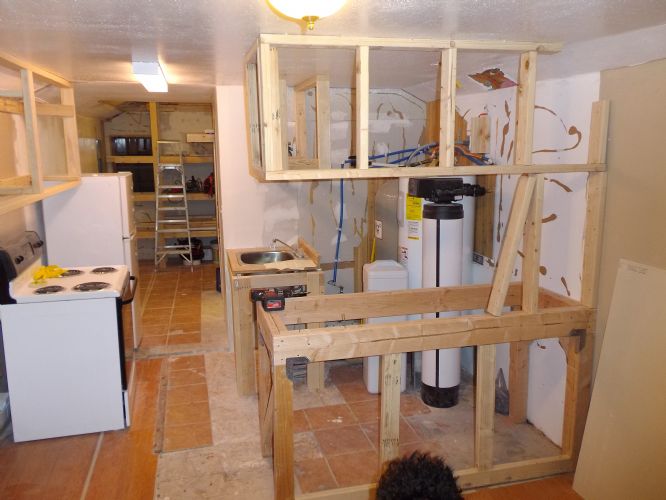 Here is the wall with some sheetrock up. To give you some perspective, the ladder is in the back of the house and I was in the front. It will definitely be a downsize but not for our tank. 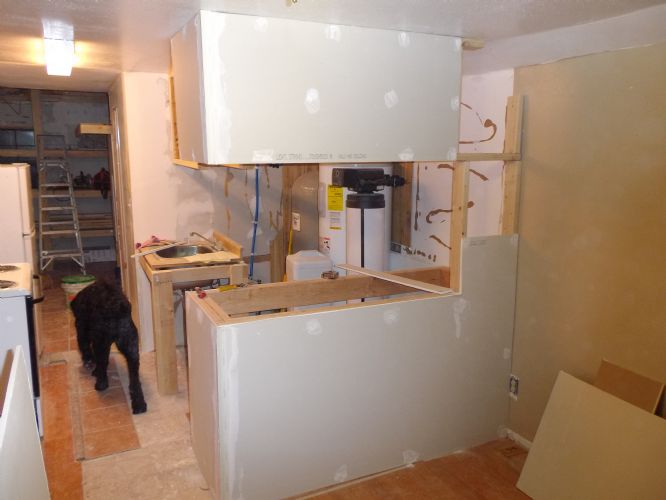
|
 |
Larobley 
Guest


Joined: April 14 2013
Location: Ogden
Status: Offline
Points: 131
|
 Post Options Post Options
 Thanks(0) Thanks(0)
 Quote Quote  Reply Reply
 Posted: June 19 2013 at 11:34pm Posted: June 19 2013 at 11:34pm |
|
Yery nice and I like the little house.
|
|
76G half circle
JBJ 12G
|
 |
Mike Savage 
Guest


Joined: July 15 2005
Location: Murray
Status: Offline
Points: 19173
|
 Post Options Post Options
 Thanks(0) Thanks(0)
 Quote Quote  Reply Reply
 Posted: June 20 2013 at 6:17am Posted: June 20 2013 at 6:17am |
|
Great house, I like it! Have you thought about how you are going to deal with the humidity from the tank in a small area like that?
|
|
|
 |
knowen87 
Guest


Joined: March 17 2012
Location: Logan, UT 84321
Status: Offline
Points: 385
|
 Post Options Post Options
 Thanks(0) Thanks(0)
 Quote Quote  Reply Reply
 Posted: August 06 2013 at 1:44pm Posted: August 06 2013 at 1:44pm |
Its been a long time since I have updated you guys on my tank build. First off, Mike, we have thought about the humidity. We have a dehumidifier that we used in our house before this. It kick on when the humidity gets high. It worked really well in our old house and kept the walls from condensating. I will update you by month and I will start off with March/April.
March/April - I was still a student and I was in the heat of my final semester as a graduate student. My wife was teaching 5th grade and she also was very busy with standardized tests that are in April. Needless to say, very little got done on the cabin. We did spend a little time out there hthough and the dogs enjoyed the open space. 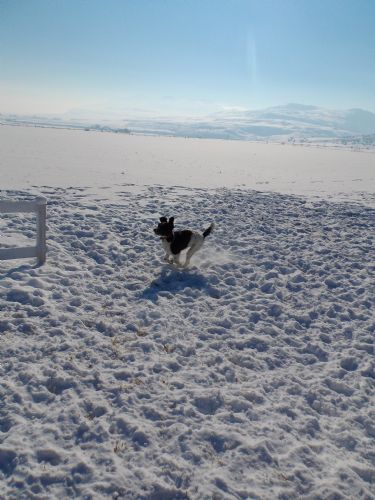

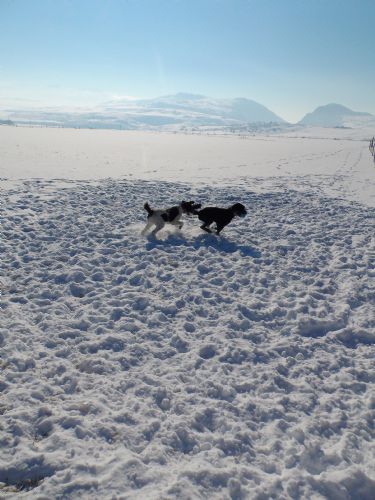
May - In May I graduated with my masters in civil engineering. I was lucky enough to get a job here in Logan. All through the month of May we worked very hard at the cabin. We would get home from work at 6 and head up to the cabin and work until 12 or 1 every day. It was exhausting but we made it. By the end of the month we had finally moved out to the 330sf of the cabin. Here are some pics of what we did. (P.S. All of the before pics are of the house just before the previous owner moved out. Before. 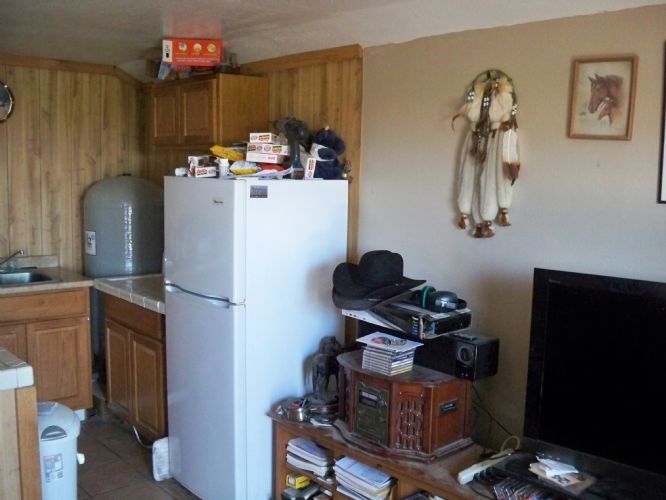
After 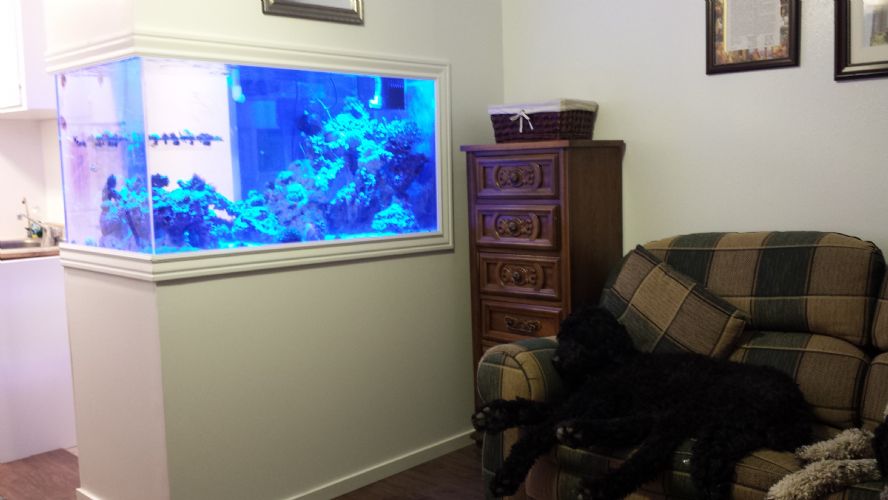
-------------------------------------- Before 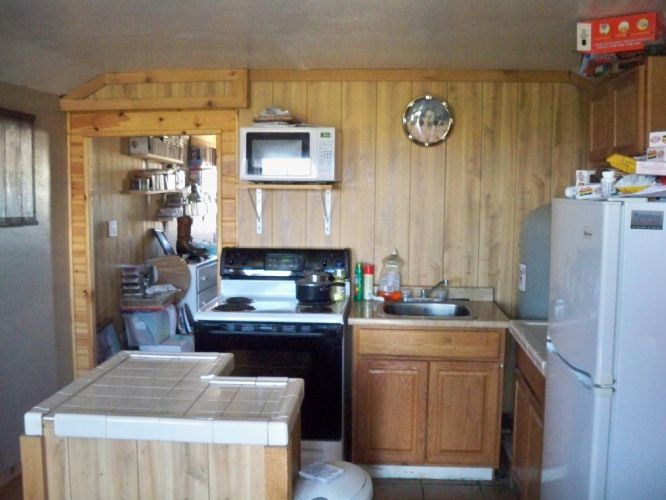
After 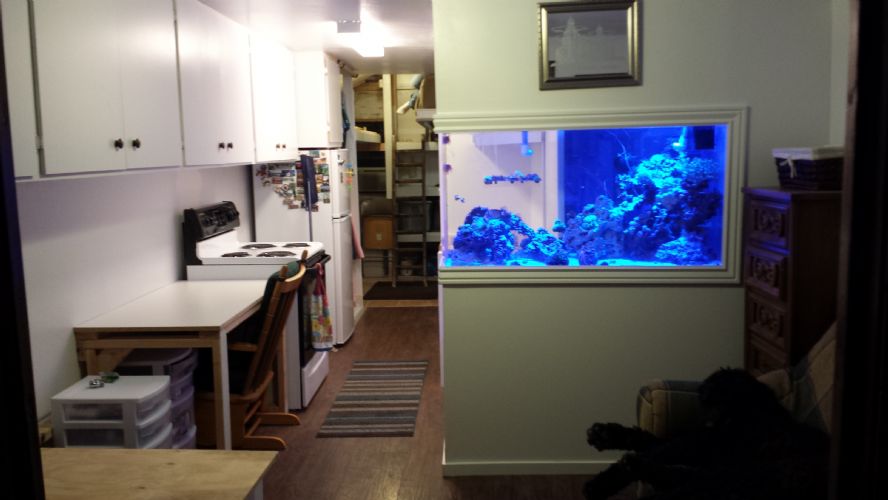
The ladder in the back is how we get up to the loft where we sleep. It is at the back of the house. The house is 10 feet by 32 feet total. Under our bed is our "storage unit" it is about 6ft high and allows us to keep 25-30 18 gallon totes for all of our stuff.
|
 |
knowen87 
Guest


Joined: March 17 2012
Location: Logan, UT 84321
Status: Offline
Points: 385
|
 Post Options Post Options
 Thanks(0) Thanks(0)
 Quote Quote  Reply Reply
 Posted: August 06 2013 at 2:02pm Posted: August 06 2013 at 2:02pm |
Oh yeah and I almost forgot. We Love Our Little Piece of Paradise 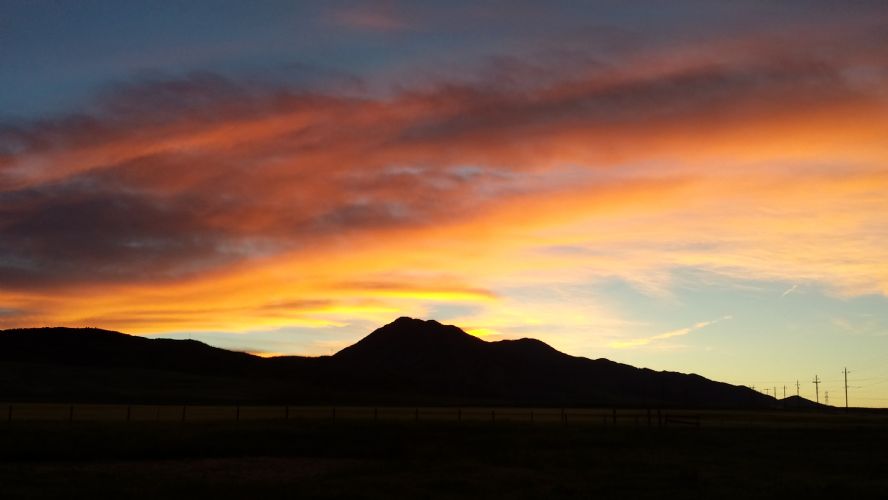
And some of the most intense rainbows i've ever seen
Edited by knowen87 - August 06 2013 at 2:03pm
|
 |
Mike Savage 
Guest


Joined: July 15 2005
Location: Murray
Status: Offline
Points: 19173
|
 Post Options Post Options
 Thanks(0) Thanks(0)
 Quote Quote  Reply Reply
 Posted: August 06 2013 at 5:34pm Posted: August 06 2013 at 5:34pm |
What a beautiful home, I really like what you have done with it. Congratulation on getting your Masters and the new job too!
Oh, I almost forgot, the tank looks pretty good too. Maybe you can take some closer photos of it.
Mike
|
|
|
 |
knowen87 
Guest


Joined: March 17 2012
Location: Logan, UT 84321
Status: Offline
Points: 385
|
 Post Options Post Options
 Thanks(0) Thanks(0)
 Quote Quote  Reply Reply
 Posted: August 06 2013 at 6:16pm Posted: August 06 2013 at 6:16pm |
|
More info on the way that is for sure. I still have lots to show you guys.
|
 |