| Author |
 Topic Search Topic Search  Topic Options Topic Options
|
Luckedout 
Guest


Joined: October 11 2009
Location: Layton
Status: Offline
Points: 1495
|
 Post Options Post Options
") Thanks(0) Thanks(0)
 Quote Quote  Reply Reply
 Posted: January 06 2010 at 7:38pm Posted: January 06 2010 at 7:38pm |
|
The pump is pushing about 700gph. It's not extreme by any means. I think overall it'll be ok. I just like having the ball valves in place if I need to adjust things. I didn't have that option with my current tank and it's something that has really irked me.
|
|
-Ben
90g Mixed reef
www.body-balancechiropractic.com
|
 |
bfessler
Guest

Joined: March 13 2009
Location: Lehi
Status: Offline
Points: 1708
|
Post Options
Thanks(0)
Quote Reply
Posted: January 06 2010 at 7:48pm |
Well an $8 ball valve and a little PVC is cheep peace of mind. You can also use it to do water changes and diverting water for other uses that might come up. 
|
Burt
An equal opportunity reefer,
I support all hobbyists and organizations involved in Marine Aquarium Keeping.
[email protected]
|
|
Luckedout
Guest
Joined: October 11 2009
Location: Layton
Status: Offline
Points: 1495
|
Post Options
Thanks(0)
Quote Reply
Posted: January 07 2010 at 7:01pm |
Plumbing is glued and the sump is finished. Finally! Again I apologize for camera phone picks, but when it's up and running I'll steal my wife's SLR and take some good shots. As you can see, I returned the sump to it's original design. I figured it's something different so I'll give it a shot. The Overflow return pipes come down and drain at the 2 far ends of the sump. The far right will house the skimmer and a small carbon reactor. The far left will house the refugium with DSB, rock rubble and chaeto. 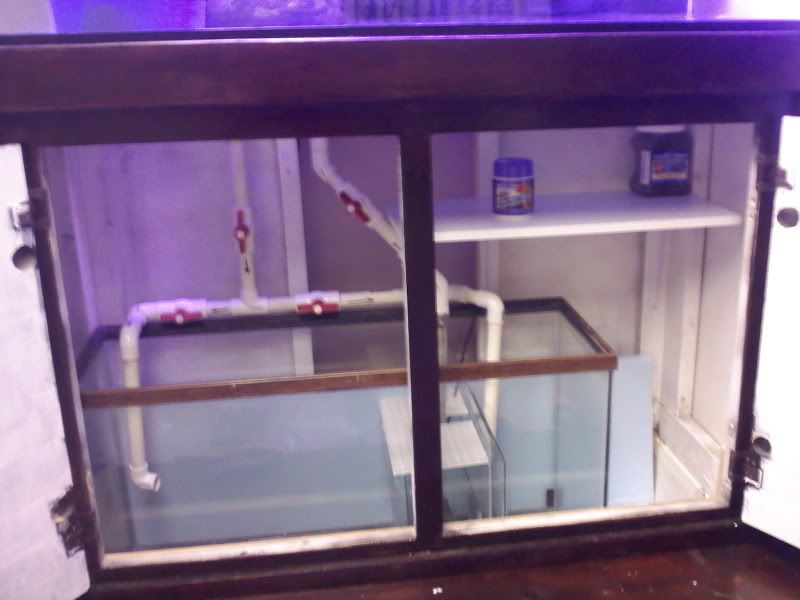 The far end tube was not glued going down into the refugium. I decided to leave it this way and built a second 6 foot long pipe. This way I can do water changes a little bit easier. We'll see how it works. I personally don't do large water changes since it's in my office, so I think it will handle the smaller water changes just fine. 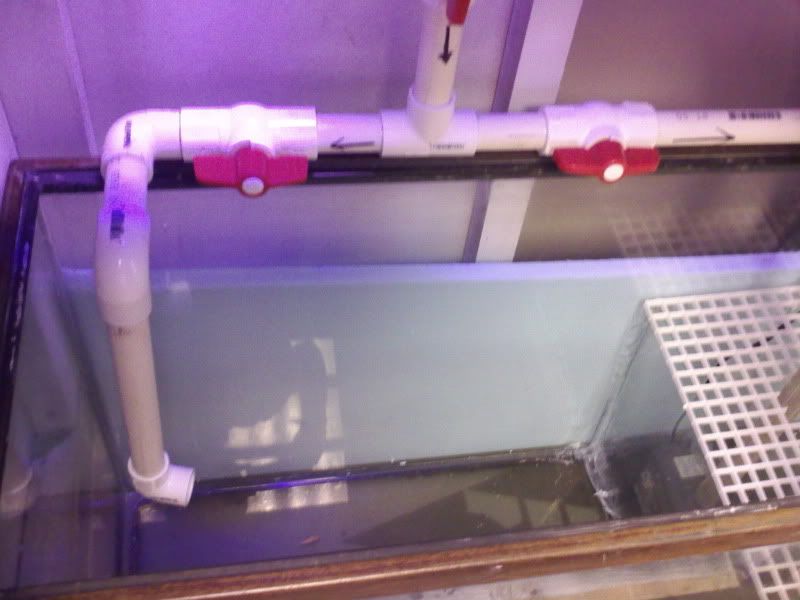 Skimmer and return pump area. Egg crate helps keep big stuff from getting out of the refugium. 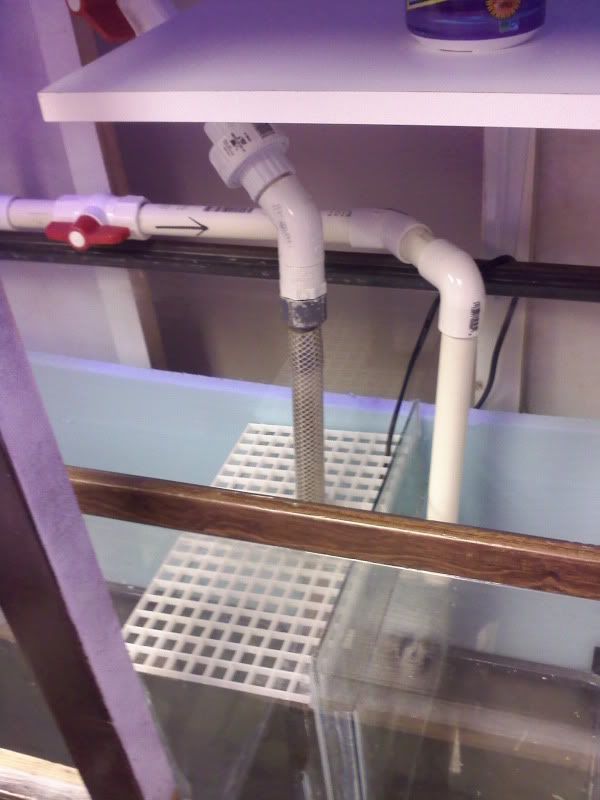 I installed a small shelf to hold my stuff. My tank has been just a big cluttered area with everything, so this will help keep it neat. 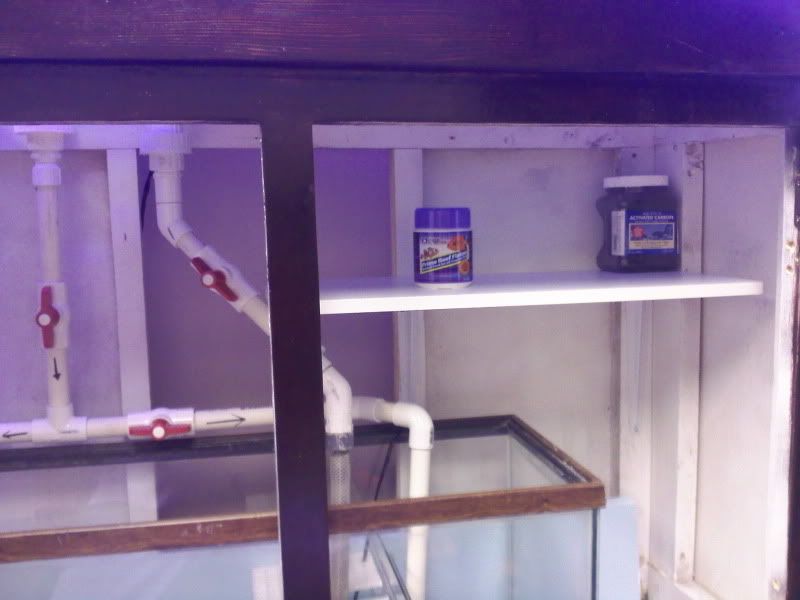 I set up the 3 VHO bulbs that the tank came with. I purchased an acitinic bulb to get a bluish tint. I will also have 2 150w MH pendants. Initially I'm going to use a 10k and 20k bulb, but if I don't like the color I'll switch it out for a Phoenix 14k. 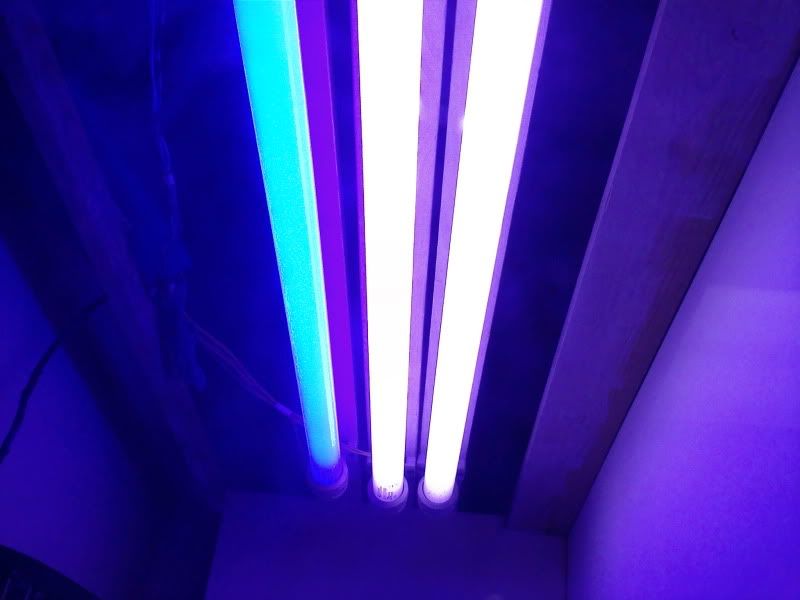 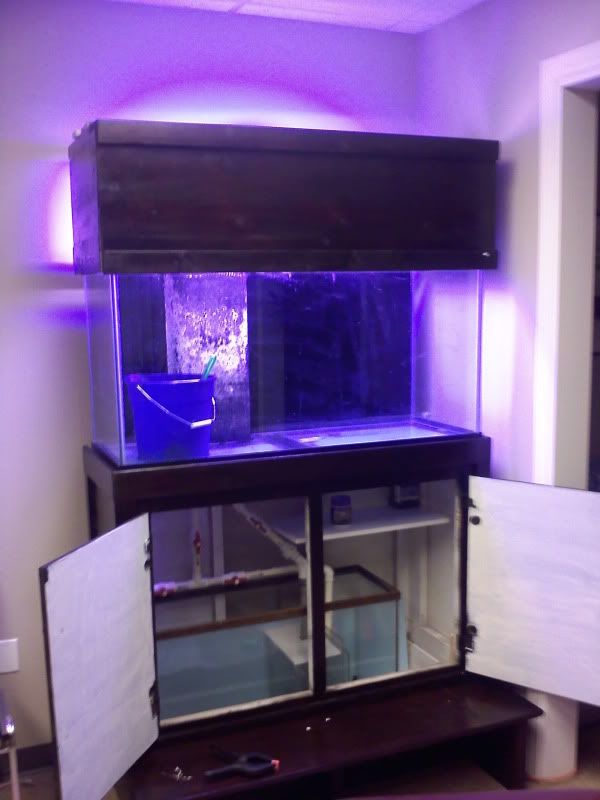 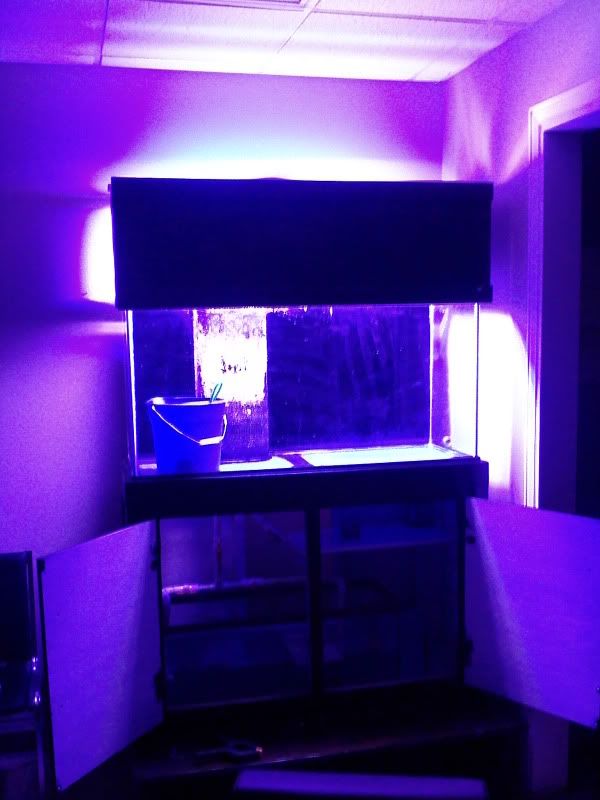 I'm actually pretty impressed with the amount of light put out by the VHO's. I was thinking that the 150w's wouldn't be enough for the 90g but with those VHO's and the 150's I think I'll be just fine.
|
|
-Ben
90g Mixed reef
www.body-balancechiropractic.com
|
|
tileman
Guest
Joined: November 05 2003
Location: Murray
Status: Offline
Points: 5368
|
Post Options
Thanks(0)
Quote Reply
Posted: January 07 2010 at 7:08pm |
Looks great, I think you will have plenty of light also. Phoenix bulbs
|
|
335G Reef
TOTM.
http://www.advancedaquarist.com/2015/2/aquarium
ReefKeepers TOTM Feb. 2012
http://reefkeeping.com/joomla/index....k-of-the-month
&
|
|
jwoo
Presidency

Joined: April 29 2009
Location: Alpine
Status: Offline
Points: 3603
|
Post Options
Thanks(0)
Quote Reply
Posted: January 07 2010 at 10:50pm |
|
Plumbing looks good. It's very neat which I dig!
|
|
None at the moment
Soon: 72 Gallon Bowfront
|
|
bfessler
Guest
Joined: March 13 2009
Location: Lehi
Status: Offline
Points: 1708
|
Post Options
Thanks(0)
Quote Reply
Posted: January 07 2010 at 10:54pm |
|
Glad to see you got it all set up. Now the fun starts.
|
Burt
An equal opportunity reefer,
I support all hobbyists and organizations involved in Marine Aquarium Keeping.
[email protected]
|
|
Luckedout
Guest
Joined: October 11 2009
Location: Layton
Status: Offline
Points: 1495
|
Post Options
Thanks(0)
Quote Reply
Posted: January 08 2010 at 12:00am |
|
Tomorrow I'm going to put in some water and I need to design my rocks. I'm thinking of doing a tower in front of the overflow and a small pile to the right. I want to keep some open spaces, but at the same time have something very unique. We'll see what I can come up with.
I really only have LBTR to work with which doesn't have fancy shapes as most....
Edited by Luckedout - January 08 2010 at 12:07am
|
|
-Ben
90g Mixed reef
www.body-balancechiropractic.com
|
|
Luckedout
Guest
Joined: October 11 2009
Location: Layton
Status: Offline
Points: 1495
|
Post Options
Thanks(0)
Quote Reply
Posted: January 09 2010 at 8:19pm |
Today was the move. I moved my fish and corals into a container and swapped out water and sand. My lawnmower blenny decided to hop out of the large cup I was moving him with and landed on the floor. I managed to scoop him right up and put him in, so I hope he's ok. Darwin I guess if he doesn't. Stupid fish should know better.  Everything was still super murky so I put a filter sock on and turned on the pump.... and the pump didn't work. Pulled it out and took it apart, it had gotten a little sand in it somehow, so I cleaned it and it fired right up. I also hooked up a small skimmer and left it. I'm about to head back and see if it's cleared up enough to place the rocks/corals/fish etc. It's been about 5 hours, so it won't be crystal clear, but I'd like to get the fish out of the bucket asap. I'll take some picks and post later tonight.
|
|
-Ben
90g Mixed reef
www.body-balancechiropractic.com
|
|
Luckedout
Guest
Joined: October 11 2009
Location: Layton
Status: Offline
Points: 1495
|
Post Options
Thanks(0)
Quote Reply
Posted: January 11 2010 at 10:05pm |
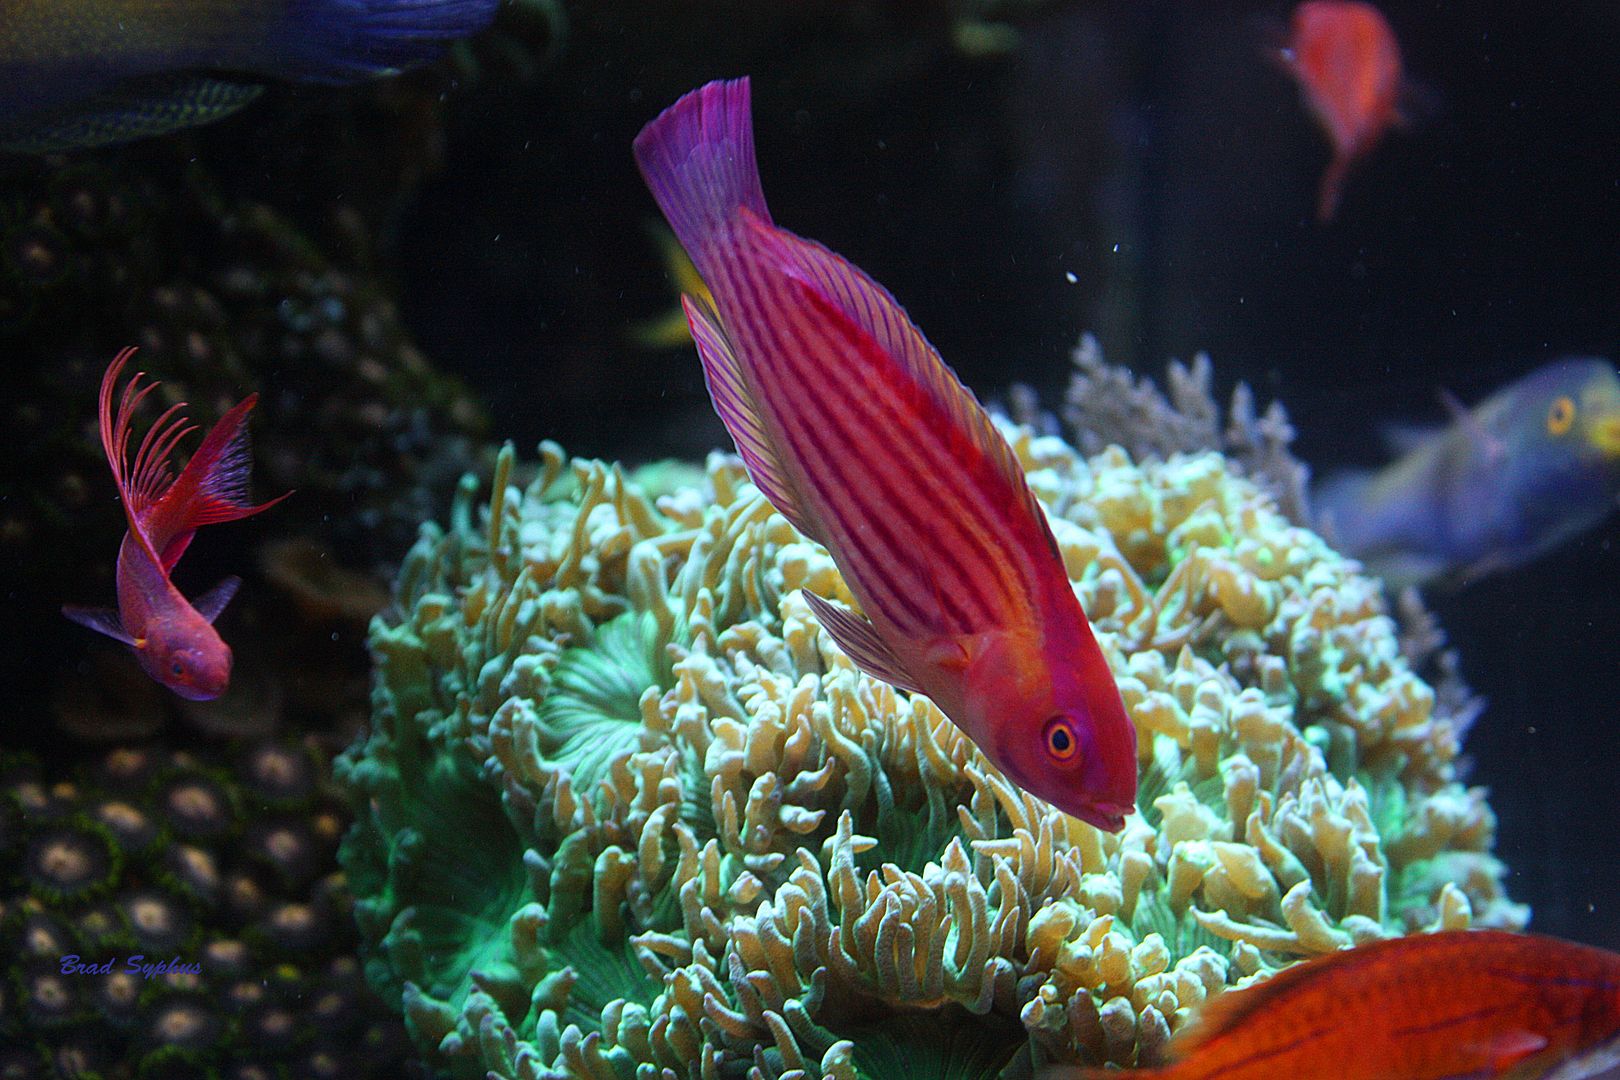
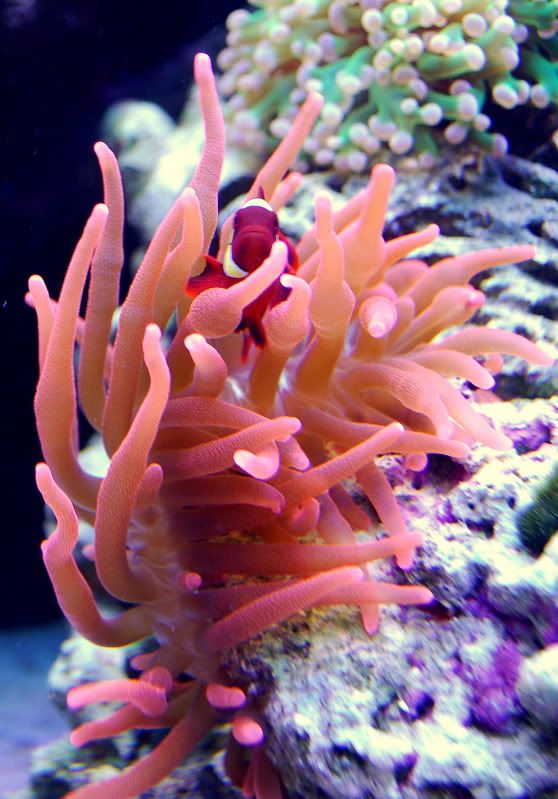
Ok. I totally underestimated the amount of work it was going to take to move my livestock and everything over. Granted I spent too much time on my rock work, but also some of my fish decided that moving was not for them. Apparently there was a lot of complaining about making new friends and being at a different church...  Anyhow. Moving your livestock and corals from a 54g corner to a 90g tank makes your realize how much you don't have. This tank is looking bare right now, but hopefully it will start to fill out in the months ahead. I added fresh oolitic sand and then put in some crushed coral and finished it off with live oolitic sand from my tank. I'm assuming the finer sand will make it's way through the crushed coral to the other sand bed and hopefully leave some good bugs and stuff on it's way. Here's my tank with the sand in and my rock formations. 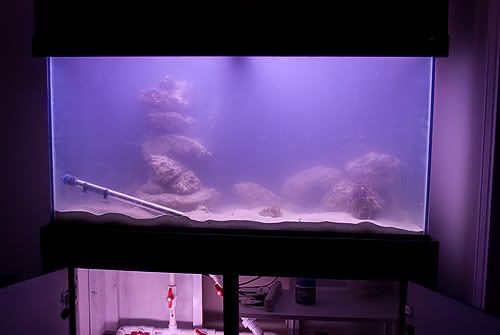 Ok. So initially I was going to build 2 towers of rocks, but then I decided that just one was needed to cover the overflow. I took a 1/2" drill and drilled through all the rocks. I used a 3/8" acrylic rod to brace the rocks in the stack. I then placed 3 small rocks at the base with just a little sand underneath. I then have the base stone on top of these. It worked well because even though it looks like it's on the the sand my hermits and starfish were going back and forth underneath it. I like how it turned out. It took me about an hour just to get this how I wanted it and make sure that it's stable enough. It's not going anywhere. 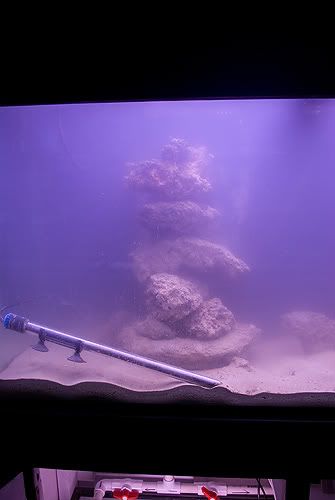  I decided to leave the other side fairly open. I want lots of room for fish and coral growth, but it also leaves me room to upgrade the structure if I see a need. 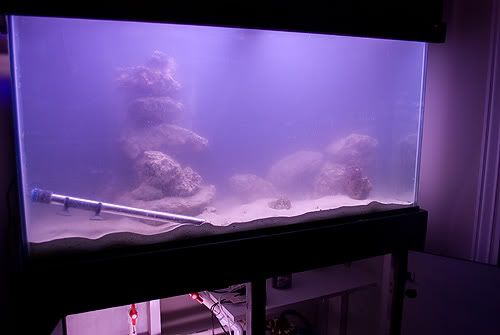 My sump. I noticed today I'm getting micro bubbles so I'm going to have to figure out where they're coming from.  Tank today with it's new inhabitants. As you can see.... lot's of empty space! We'll see how my frags start to grow out, but I'm in need of some fish too. 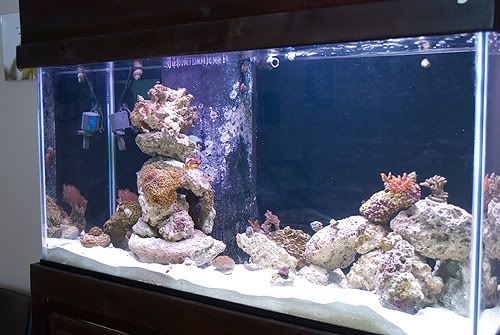 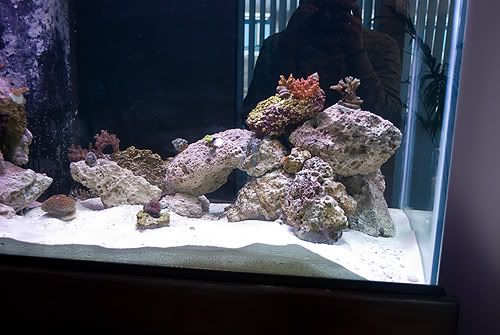 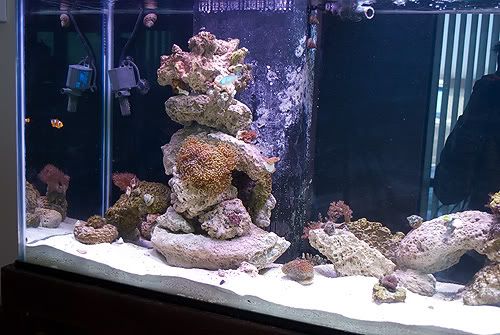 I also divided up my tank slightly. Softies will dominate the left side of the tank. This I will keep more shaded. The right side of the tower and the right rock formation will be a mixture of LPS and SPS. Nemo's just happy his frogspawn made it over. 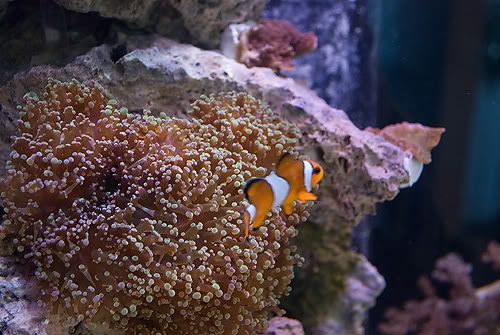
I'll share more equipment photos later. I'm just happy to have everything moved over. The only thing I lost was my royal gramma. Otherwise it was a pretty successful move! I like the tank a lot better and I've been getting a lot of good comments on it from my patients! Let me know what you think!
|
|
-Ben
90g Mixed reef
www.body-balancechiropractic.com
|
|
bfessler
Guest
Joined: March 13 2009
Location: Lehi
Status: Offline
Points: 1708
|
Post Options
Thanks(0)
Quote Reply
Posted: January 12 2010 at 9:27am |
|
Looks great Ben. I like all the open space. It makes it hard to wait till I can set up a bigger tank.
|
Burt
An equal opportunity reefer,
I support all hobbyists and organizations involved in Marine Aquarium Keeping.
[email protected]
|
|
Luckedout
Guest
Joined: October 11 2009
Location: Layton
Status: Offline
Points: 1495
|
Post Options
Thanks(0)
Quote Reply
Posted: January 12 2010 at 11:50am |
|
Thanks! My next goal is to set up an auto-top off. I have a lot more lights on this tank so I lose a lot more water to evaporation. I'm looking around at various DIY auto top offs... seeing what works.
|
|
-Ben
90g Mixed reef
www.body-balancechiropractic.com
|
|
bfessler
Guest
Joined: March 13 2009
Location: Lehi
Status: Offline
Points: 1708
|
Post Options
Thanks(0)
Quote Reply
Posted: January 12 2010 at 6:30pm |
Do you have a RO unit in your office? Looking at your stand it doesn't look like you have much room for storage of top off water inside near the sump.
I use 3 different ATO's, 1 is a JBJ ATO you can but at most any fish store or on-line, I also have a DIY setup that uses float valves and a relay that powers an Aqualifter pump to deliver Top Off water to my Clown Tank and the third unit is a DIY gravity fed unit that I made from a 7 Gallon Poultry Waterer. The one you will want to use will depend on where the Top Off water is coming from.
I get nervous about floods while I am away so I store my Top Off water in 5 Gallon buckets and pump it to the tank with aqualifter pumps. They are cheap and deliver a slow steady stream of water. Because I store the water in 5 gallon buckets I will never have more than 5 gallons pumped into the tanks should the pump stick in the on position for any reason.
Edited by bfessler - January 12 2010 at 6:31pm
|
Burt
An equal opportunity reefer,
I support all hobbyists and organizations involved in Marine Aquarium Keeping.
[email protected]
|
|
Luckedout
Guest
Joined: October 11 2009
Location: Layton
Status: Offline
Points: 1495
|
Post Options
Thanks(0)
Quote Reply
Posted: January 12 2010 at 6:34pm |
|
Yeah I have an RO unit in my office. I'm tempted to just run a line through the drop ceiling over to the tank and just use a small plastic toilet float valve to turn it on and off. I think the simpler I can keep it the better. Do you see any problem with setting it up like that?
|
|
-Ben
90g Mixed reef
www.body-balancechiropractic.com
|
|
bfessler
Guest
Joined: March 13 2009
Location: Lehi
Status: Offline
Points: 1708
|
Post Options
Thanks(0)
Quote Reply
Posted: January 12 2010 at 6:37pm |
If you have a RO unit in your office you might be interested in a Level Loc ATO. You simply connect the output of your RODI unit to the ATO and set it up in your sump. http://www.bulkreefsupply.com/store/level-loc-auto-top-off-unit-for-ro-systems.html
|
Burt
An equal opportunity reefer,
I support all hobbyists and organizations involved in Marine Aquarium Keeping.
[email protected]
|
|
bfessler
Guest
Joined: March 13 2009
Location: Lehi
Status: Offline
Points: 1708
|
Post Options
Thanks(0)
Quote Reply
Posted: January 12 2010 at 6:46pm |
|
This could work OK but occasionally those valves start to leak which could be a problem. Also mounting the toilet valve in your sump could be difficult. For a sump mounted ATO connected directly to your RO unit I like the ones like the Level-Loc unit. It's simple and has backup safety features built in.
|
Burt
An equal opportunity reefer,
I support all hobbyists and organizations involved in Marine Aquarium Keeping.
[email protected]
|
|
Luckedout
Guest
Joined: October 11 2009
Location: Layton
Status: Offline
Points: 1495
|
Post Options
Thanks(0)
Quote Reply
Posted: January 12 2010 at 7:37pm |
|
The big problem there is cost. Telling my wife I'm buying a hundred dollar glorified toilet float valve would not fly after setting up the new tank.... so if I could get away with setting up something simple until things settle down, that would be ideal.
Also, why do they have trouble leaking? Algae?
|
|
-Ben
90g Mixed reef
www.body-balancechiropractic.com
|
|
bfessler
Guest
Joined: March 13 2009
Location: Lehi
Status: Offline
Points: 1708
|
Post Options
Thanks(0)
Quote Reply
Posted: January 12 2010 at 8:00pm |
I don't have any experience using a toilet flush valve as an ATO but I have had many of them leak in my home and at my business which causes water to slowly fill the tank till it runs down the overflow tube. I would assume the same situation would exist in a reef tank.
All you need to do is get a piece of acrylic and drill a hole in it to mount the valve then position it in your sump at the appropriate level, Connect the 1/4" tubing to it and your done.
|
Burt
An equal opportunity reefer,
I support all hobbyists and organizations involved in Marine Aquarium Keeping.
[email protected]
|
|
fishoutawater
Guest

Joined: March 23 2009
Location: Herriman
Status: Offline
Points: 639
|
Post Options
Thanks(0)
Quote Reply
Posted: January 12 2010 at 8:44pm |
|
I would also recommend using a container to limit the amount of water that can be topped off is something goes wrong, sooner or later something will. A friend of mine plumbed his ro line directly to his sump with a float valve. For about 3 years he had no problems. Then one night a snail or something got stuck in the valve and it flooded his sump and front room.
|
|
Luckedout
Guest
Joined: October 11 2009
Location: Layton
Status: Offline
Points: 1495
|
Post Options
Thanks(0)
Quote Reply
Posted: January 12 2010 at 9:22pm |
|
Burt, would a regular drill bit work ok on thin acrylic if I go slow?
|
|
-Ben
90g Mixed reef
www.body-balancechiropractic.com
|
|
bfessler
Guest
Joined: March 13 2009
Location: Lehi
Status: Offline
Points: 1708
|
Post Options
Thanks(0)
Quote Reply
Posted: January 13 2010 at 5:44am |
Yes a regular drill bit will work or you can use a spade bit. If using a spade bit you still want to drill at high speed.
I agree with Fishoutawater, especially for float valves placed directly in the sump. I use one on my RO Reservoir but there are no critters to bother the valve and I have an overflow plumbed into a floor drain. That $40 - $100 for a ATO with additional safety features is cheap compared to dealing with a flood.
If your RO is upstairs then the aqualifter and electronic float switches isn't an option. The water will siphon through the aqualifter even after it shuts off. You would be better off with a unit like the Level-Loc that has a float valve and a solenoid to stop flow and make sure to clean and test the system frequently as part of regular tank maintenance.
Before I put in my overflow to the floor drain I had a piece of tubing that stopped the float valve from shutting completely. It flooded the basement for most of a day before I found it. Fortunately the basement isn't finished and the floor drain limited the flood to about 1/4" over a 100 square foot area but it would be a real mess in a finished office.
If you're going to go with the float valve only, I would recommend you create a box around it with small holes for the water to escape but that will keep snails and such out and consider a better ATO when you can afford it. Floods aren't fun.
Oh and I wouldn't connect the tubing straight to the RO unit. Use a 5 to 10 gallon container and an Aqualifter to start the siphon. Then if you do have a flood it will be small, in fact the sump may contain most of the water if the float valve fails. Not only will this contain the flood it will also prevent your water from being overly diluted.
|
Burt
An equal opportunity reefer,
I support all hobbyists and organizations involved in Marine Aquarium Keeping.
[email protected]
|
|


