| Author |
 Topic Search Topic Search  Topic Options Topic Options
|
jdinchak 
Presidency

Joined: July 06 2009
Location: Sandy
Status: Offline
Points: 4600
|
 Post Options Post Options
 Thanks(0) Thanks(0)
 Quote Quote  Reply Reply
 Topic: jdinchak 180g build thread Topic: jdinchak 180g build thread
Posted: March 21 2012 at 9:15am |
|
I have always enjoyed a good build thread and decided to do one for our 180. The first posts are long as I wanted to give more detail on our choices and some background on us. As I had a lot of non-fish friends and family ask about this tank I put in extra details to help them understand a bit more. Love to hear your comments, please enjoy! – Pictures at bottom
Intro
We began our salt water journey almost 3 years ago. That was when my wife called me at work out of the blue telling me that Petco had this amazing sale on aquariums. I was under the assumption that we would be starting with freshwater and use what supplies came with the kit. That was when I was informed we were going salt water, as my wife put it “why get into it and then have to start over if salt is where we want to beâ€. So I started researching and learned that they were hard and not so hard all at the same time. Meanwhile my wife had visited every fish store she could find to gather information. When I got home we started building. Sump – what’s a sump, nah don’t need one of those, lights – the ones for coral are expensive, this one came with free lights lets just do fish only. Live rock, we have to spend $8 a pound of rock – we need how much rock! Well, within a 3 day period we immersed ourselves in research and the scope of our project kept growing. At first, we thought we only needed a fluval, some powerheads, some live rock, sand and a heater. We quickly discovered that we needed better lights because the Aquarium guy talked us into doing a reef. We needed to make sure we had a skimmer (a skimmer removes the waste products out of the water by taking tank water and creating tiny bubbles that separate the waste. If you ever see a bunch of foam in the ocean around the rocks, it is nature’s skimmer) along with many other items we weren’t sure about. In our excitement to get this tank moving we bought fast and in many cases not smart. We threw it all on the credit card only to see what I thought was going to be $300 turn into way more than that. I even remember those first fish and coral, so big in the store, so small in your tank. But we were hooked. We hated staring at an empty tank during the cycling process but the tank cycled relatively quickly and we started our livestock with some clown fish (how original). Well, after 3 years and two other tanks (as well as 2 Dart Frog tanks) you can say we have a passion for saltwater. Our dream was always to have a bigger tank, a 180 or 225 that would allow us more real estate and the most important part more FISH.
As we became more educated and researched more on the forums, we realized we greatly overpaid for a lot of the stuff we had. There were killer deals on the secondary market and we needed to have more patience for our next “big†tank. We also wanted to keep our money with the club as much as possible. That idea started off well in theory. We picked up an awesome brand new drilled corner overflow 180g tank from Disneymania on the boards. We had Bruce deliver it to our house and there it has lived on our floor for almost a year, untouched. Late last Spring, I returned from working in LA for a year and our priority was to resume our tank build. At that time Tyler (EliteAquatics) was running a sale and we got in touch with him about our skimmer. I knew from past experience that you don’t cheap out on the Protein Skimmer so we bought a really nice one from Tyler. I had a bit of sticker shock from seeing the price of the skimmer but after seeing the quality of work I was blown away. I really can’t wait to see this thing in action.
So far so good. We had a good idea of what we wanted and what we wanted to do with this tank. Next came picking a stand. My wife and I had differing opinions on the stand. I wanted a nice stand (possibly even second hand) that we could spruce up but not break the bank. My wife figured this tank would be a show piece so we might as well get a custom stand which had all the features we wanted and would be an attractive addition to our fish room. We decided to seek out quotes for a custom design. We knew we wanted a black stand (goes with everything) that was taller than usual (we didn’t want to bend down to look into the tank and the location would require standing to adequately see the tank) and we wanted to somehow see if a bar or table could be incorporated into the design. We ended up having Dion create our stand and we were thrilled with the result. Dion came up with a wonderful design where a bar top slides into the stand. When the bar piece is in the stand, it looks like it is all one piece, and when out of the stand you couldn’t tell there was supposed to be a bar. We splurged a lot on the stand which also caused us to splurge more on the “fish†room. The room which was going the house the tank was a room that we hadn’t really been using so we decided it was time to spruce it up. We painted the room using gloss paint for where the fish tank would be and a satin paint for the rest of the room. We painted our fireplace, added new lighting, updated our bar and redid the electrical.
Electrical
When it came time to dealing with the electrical upgrades, our project got a little delayed. We got a bit lazy and a bit intimidated by what we needed (as well as lazy for all the work we needed to do to the room before we could start on the tank). We got a recommendation for an electrician from the forum and he came out and looked at want we wanted to do. He seemed competent so we were looking forward to getting the work done. Well, he ended up never returning our calls so we had to find somebody else. We finally hired a local electrician who was willing to add additional lighting to our room and add 4 20 amp circuits to that room. 1 for our other 55g tank, and 2 for our new 180 (with 1 to spare). I loved the idea of having all of our tanks on independent circuits, it was a bit overkill, but to me it was worth the money. Unfortunately, we later learned that our panel was too small (100 amp) for these additions and was already overloaded. The panel was also faulty, it had a burn in the main panel that would have eventually caused us a big problem. So after a few days with new circuits in place our lights started going crazy and we ended up having to replace the panel (upgrading to 200 amp). I am glad we found this out before we had the fish up and running, but having to spend that extra amount pretty much sucked the wind out of us and pushed back our schedule. It was also an interesting way to talk to your neighbors, asking if you could borrow power with a 100ft extension cord so you could keep your fish tanks going.
Plumbing
We finally finished the room (always with a promise to have water in the tank the next month) in December. We love the room and the fish tank will compliment it greatly (when we get it started). Our nemesis has always been plumbing. Throughout the whole experience the plumbing was the part we were the most nervous about. We have had such bad luck doing any thing even remotely related to plumbing; even the simple stuff had caused issues. I will admit, past experience caused us to delay starting the plumbing for a long time, too long. At one point I was going to pay someone to do it for us but my wife had the smarter idea of doing it ourselves so we would know our system. She researched sumps and plumbing and decided that the ultra quiet herbie method was the best for us. For those not familiar with the herbie method you only use one main drain line with a gate valve connected to the draining pipe so you can control the flow. Then you put the pipe at the bottom of your sump and let it create a siphon, this results in a silent draining of water. You have to keep an emergency drain a bit higher in case a snail decides to commit suicide and then you have two returns. We won a pump at the WMAS reef-fest and had just planned on using that. We were originally going to go 1.5 inch pipe and fixtures but learned that the difference in price between 1†and 1.5†was almost double. In some ways I regret not going 1.5†but I will go over that a bit more in mistakes and lessons learned.
We checked out bulk reef supplies website, which had great videos and product reviews. We learned a lot about what plumbing pieces we should use. We weren’t sure what the difference between schedule 80 and 40 were but bulk reef supply really pushed the 80. So one night we loaded up our cart with everything we thought we needed and when we went to check out we had over 450 dollars in plumbing supplies. That freaked us out a bit, so we only ordered what we knew we needed (cement, bulkheads and some netting). We did more research and saw that 1.5†for drains would be best but we had 1 inch bulkheads (how it was drilled when we bought). To use 1.5†pipes, we would have had to use a lot of pricey adapters which we also felt would just create more areas of weakness for potential failure. We thought about buying our piping from Home Depot but we knew that for us, it would be an all day venture trying to find all the correct parts we needed in the correct sizes. This is where our plumbing nervousness was showing. Even small plumbing jobs would send us to Home Depot several times for several hours trying to find the correct parts. We made the decision to buy from Bulk Reef Supply and that we would streamline our piping by making everything 1†(if I could redo the piping in 1.5†I probably would but I still stand by my decision). This way we could point and click all the pieces we needed rather than digging through bins of parts that all look the same. I got advice from this board to not do Schedule 80 but to be honest I got lazy. If I used schedule 80 I could pick everything online and the reviews on the unions, ball valves and gate valves were amazing. We didn’t want to have to replace anything anytime soon (plumbing nervousness) and I was blown away by the reviews of the ball valves and gate valves. Going 1†also dropped the price quite a bit. So we clicked the buy button and eagerly awaited its arrival.
Originally we designed a football goal post type setup for the returns and 2 separate drain lines, one on each side of the tank. We decided that we wanted unions for added flexibility and they allowed you not to have to completely cut up your system if you needed to change something or needed access to something. Unions unscrew and allow you to take apart that section of pipe. We added 2 Cepex ball valves (with unions included on both sides) and a gate valve. I will say the quality from Bulk Reef Supply on these parts were incredible. The valves opened with such ease! We also learned on Bulk Reef supply the value on street 90 elbows (they have one end a bit smaller so they fit right into the next connection). We also decided to use spaflex for the last 2 feet of our drains which would allow us to easily move the spa flex where we needed it instead of having to worry about being totally precise with the hard plumbing. We glued each spa flex to a union so if we needed to adjust (or remove) we could. We used threaded bulkheads and bought male adapters for each fitting. Those allow us to adjust or remove our drain and returns if needed as well as easier access to connecting our plumbing (more on that later). We ended up buying some additional Schedule 40 pieces (which killed the cool looking grey motif) mostly unions and ball valves (so we could have future expansion and tap off of our main line if needed) from Home Depot. The ball valves at Home Depot take about everything you have to close where the Bulk Reef Supply ones are very smooth. If I didn’t have to wait the 5 days to receive the parts from BRS I would have probably ordered more. We’ve been knocked down a bit for using schedule 80, kind of like we were suckers but I have to tell you I really like the fittings and the parts just seemed to fit together a bit smoother. Knowing what I know now, I would probably have just bought the ball valves, unions and gate valve from BRS and used Home Depot for everything else, but I would 100% recommend all ball valves and unions from BRS.
We were almost done with gluing all the plumbing and it was going more smoothly than expected until I did some further research on pumps and realized that the one we had just wasn’t powerful enough. I asked around and was told a Mag24 would be great. So I set off to buy one. Asking another question on the forum led me to calling FireShrimp who gave me some really good advice and had me rethink what I was going to do. He convinced me to go with an external pump (particularly the reeflo pumps). I had never planned to go external because it required more plumbing and I would have to drill my sump (another comfort zone thing). He stressed the importance of more flow from the pump and more turnover using Tilemans system as an example. Doing a bit more research on pumps (which I should have done before starting any plumbing), I found the reeflo to be the best option. It had the same watts usage and seemed more reliable and a lot more quiet then any other internal pump. Plus it would give me flow for the future. My big issue was figuring out head loss. On Reefcentral’s head loss calculator it showed I had a huge head loss and the main culprit was the 1†pipe, but at this time replacing the pipe would be too expensive compared to just buying a bigger pump. I was confused which reeflo pump I needed so I called the company. I ended up getting the more costly hammerhead/barracuda combo but am very happy with my choice. Based on Fireshrimps recommendation (using unions and a ball valve so we could do easy maintenance) we plumbed in the pump and were ready to finish. The addition of an external pump changed our plumbing alignment and also killed a lot of space in our stand. It took us about 10 hours total (between checking and rechecking and gluing and putting together) to finish the new design and we had to use a couple of 90’s more than we wanted to but we finally got the plumbing complete. When it warms up this next week we will hook up my hose and give it a freshwater test cycle. We also need to measure out our drains and return so we can get the draining action the way we want it.
Todo
We have to do a test run and tweaking on the plumbing. Then do our rockwork, setup the electrical and controller and then we can add water and begin the cycle. We are going to go the Tony Vargas method of letting the tank fully cycle for 90 days to limit our algae blooms. We liked his club presentation. Nothing can seem to get a person out of the hobby like massive algae blooms and losing livestock. Having experienced a massive algae bloom, we are not keen to repeat it. We are going to modify his plan a bit by adding some coral once the tank has done its basic cycle. We have been buying and storing coral in our 55g tank waiting for this one to be built and our coral are not so happy being cramped. With the lack of fish or heavy feeding the bioload should be very light. We are also going to add a GFO/Carbon reactor as well as a Biopellet reactor once the fish are in. Future expansion is to include UV and Calcium reactor once the tank gets a bit more established. We also will be adding another Energy Bar 8, Breakout box and some water and float sensors to our Apex.
Lessons Learned –
I was proud of the prep work we did, we had what we wanted listed out and other than a few items did not have unexpected expenses like our last tank (because of poor planning). Redoing our fish room was not part of our original plan, but I am happy we did it. We have already gotten a ton of value out of it. I really wish we had planned the pump into the system first, this was a big mistake on our part. If we had known the limitations of our pump, we probably would have gone with the 1.5†pipes (we lost a ton of flow and head pressure because of using 1â€). We will be fine with the pump we bought, but we had to buy a massive pump simply because of the size of the piping (although some of our unions and valves would have been a nightmare to put in, the space between the stand and bulkheads was extremely tight).
We had some hiccups with the plumbing. The first major one was when we were connecting the plumbing for the pump (which already had everything glued with no margin of error) and we left the screw for the union off. This would have been about 3 hours worth of work (and about 40 dollars in parts) that we would have had to cut off and throw away. Luckily we came up with the bright idea to shave down the lip of the union enough that it would fit back on and still be functional. We also didn’t plan how we were going to screw in the male adapters to the bulk heads once everything was glued together. Fortunately our use of unions saved the day and allowed us to disconnect the piping enough to screw the parts into the bulkheads.
We also had an issue with trying to get exact measurements with our pipe. If we pushed them in all the way together while dry (to get the most accurate measurement), they were a nightmare to get apart. We ended up pushing the connections mostly together and then doing our best to account for the extra centimeters. Using this method we achieved the best mistake. After careful measuring and gluing of all parts, when we went to put the final two pieces together, the union was an inch apart. That was heart breaking. Luckily for us we bought extra unions to have just in case and were able to cut another pipe in half and add another union. This time we carefully controlled how far we pushed the pipe in on that final connection to ensure both pieces of the union would meet.
Most of our costs were accounted for (except the pump). But we did find ourselves nickel and dimed with extra things we didn’t think about (locline, extra plumbing parts, plumbing parts we didn’t need, vinyl for the backing, acrylic glue).
We had Dion make our stand tall, we love being able to stand up and look into the tank without having to bend down. The negative to this is how much of a pain it is going to be to do maintenance; everything will require a ladder now. We did know from the start this would be a con for this style tank but it still ended up being a tad taller than even we expected. Top to bottom the tank is about 6 feet high.
With our first tank we thought cleanup crew was important but that we didn’t possibly need as many snails and crabs as the sites recommended. Wrong. The massive algae bloom in our first tank was mainly due to not enough clean up crew, especially when crabs and snails died and weren’t replaced. Much easier to have more then enough to begin with and then to keep adding new ones all the time hoping they can prevent the algae from getting out of control in the first place. Clean up crew members are a planned continual expense for this tank.
Unions are your friends!
The other big control to our expenses was using base rock instead of live rock. We have the patience now to wait for it to spread without the joy of hitchhikers. We bought some really great pieces of Utah rock (a rock that doesn’t have any of the trace metals most other rock have and can be used in aquariums for a lot less then live or base rock) from Mark Peterson for next to nothing and I won some of the awesome (but really expensive) real reef rock. It is its own calcium buffer as well as comes in great shapes and is already colored purple. That was a great win at the Reefgeek table at Max 2011.
Most important – WE PAID CASH, another reason this tank build took so long is we saved up to buy each item we needed. We bought when items were on-sale or we had extra money for it. I will be thrilled to have this tank complete with zero debt.
Equipment:
180g Marineland Corner overflow tank 72†X 24†X 24â€
2 – Koralia Magnum 7’s (2800 gph)
2 – Koralia Magnum 1050’s (1050 gph)
We wanted our power heads to be controllable and after having a long chat with the hydor people at Max 2011 I decided the Koralia was the best option for us. We will have them alternate on our controller to produce maximum flow. I love the vortech’s, they are amazing but I can’t justify spending $800’s on two MP40s when I could get 4 Koralias for around $200.
2 - 200 watt heaters
Custom Skimmer from Elite Aquatics (thing is about 2 feet tall). Love the design of this skimmer. Very happy I spent the money on it.
48X 20 X 20 Sump from Dion – Had to have it (ReefOn did it) shortened from 5’ to 4’ to get it to fit in the stand better. Could have shaved another 6-10†off of it.
Elite Aquatics GFO/Carbon reactor (won at the raffle at reeffest)
2 little fishies biopellet reactor (also won at the raffle).
Grounding probe (I only have one, not sure if I will need one for sump and tank)
60†ATI Sunpower T5 light fixture
This one took a ton of research and thought into. We knew it was the best t5 fixture out there and as my wife would say over and over again it looks sexy. We thought of going the LED route but for the size of the tank, the cost was just too high. I know eventually the t5 bulb replacement cost will even up the cost but in my opinion LEDs are just not as trust worthy as T5’s. T5’s and Metal Halides are very proven. I was worried about which LED fixture to buy and also worried in 1-2 years I would totally regret my purchase when something cheaper and more badass came out. With the ATI I am not worried about that. For the LED effect I plan on eventually adding some stunner strips to compliment the lighting. For now I am thrilled with the light that the ATI produces and fully expect a nosy neighbor to think we are up to no good! Got bulbs from Arthuriv
Using an Apex controller, I want to add an extra energy bar 8 so that I can make the best use of my controller. I am also going to add a break out box to connect a high and low water sensor as well as a “water on the floor†sensor so I can turn off my pump if there is an issue. I love what the Apex can do once I figure it out. I can’t wait to check my phone app and see what my tank is doing or controlling it remotely.
1 Monoprice switchable power strip – For non controlled ports
150 pounds of Utah rock, 35 pounds of Real Rock and about 10 pounds of CaribSea rock
E.S.V Salt mix – never used it before but like the exact dosing. Was a bit expensive but had great reviews. Our other choices were Red Sea Pro (but heard too many weird stories with it) and DDH20.
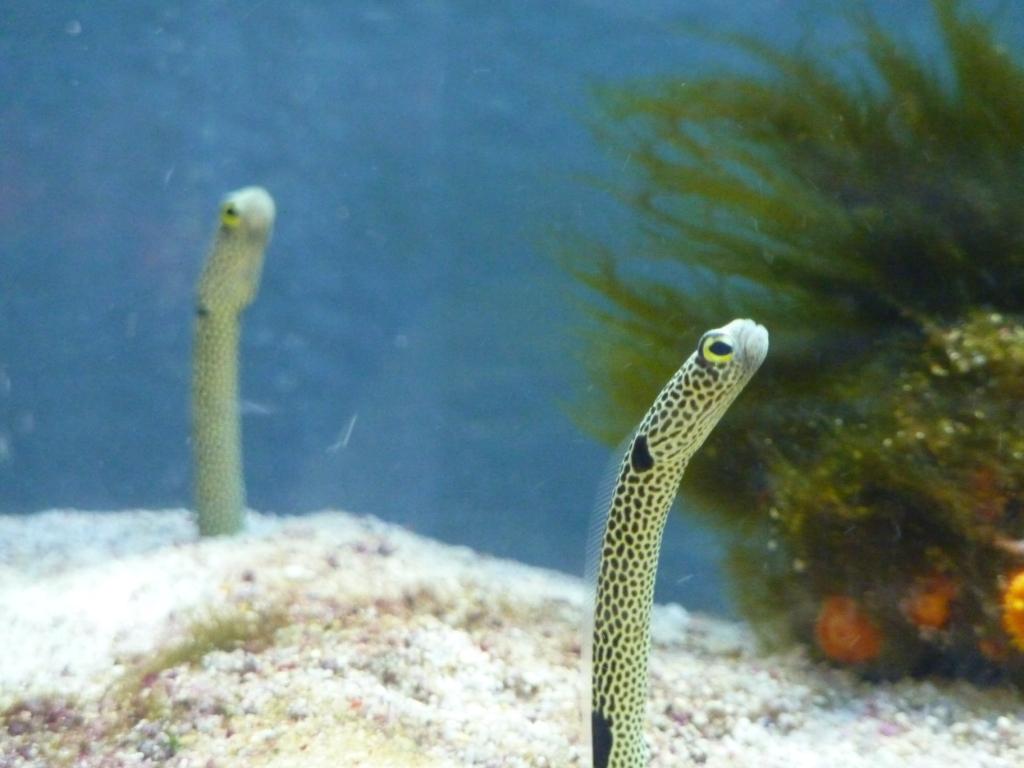
Our next challenge will be reef-scaping, we want to allow more sand space, have more negative spacing to have corals on the sand as well as more sand dwelling fish. If we can, I would hope to have enough room for a small ray as well as a snowflake eel. We hope to complete that this next week.
Below are pictures of the build so far and I will be adding to it as the tank continues to get closer to completion.
Edited by jdinchak - March 21 2012 at 10:59am
|
 |
jdinchak 
Presidency


Joined: July 06 2009
Location: Sandy
Status: Offline
Points: 4600
|
 Post Options Post Options
 Thanks(0) Thanks(0)
 Quote Quote  Reply Reply
 Posted: March 21 2012 at 9:15am Posted: March 21 2012 at 9:15am |
Our tank once it was delivered. This is were it sat for quite some time.  Obligatory kid in tank shot 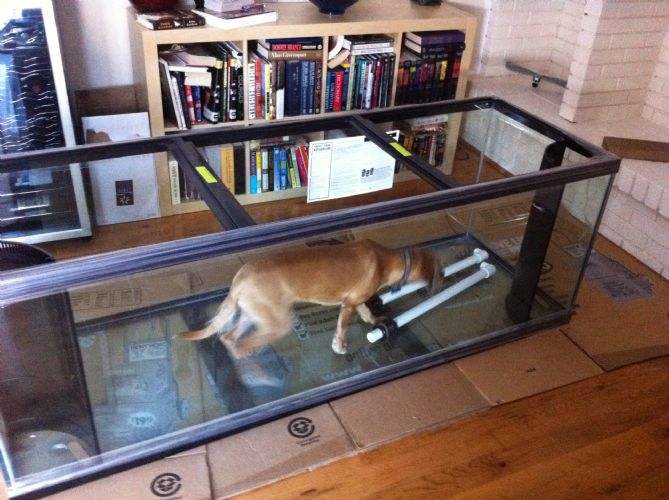 The next piece of equipment we got was our skimmer. Love this thing.  Our custom stand from Dion - It too had to wait with the skimmer and tank in the lonely room.  Our mess of a room before we decided to spruce it up to match our awesome tank and stand  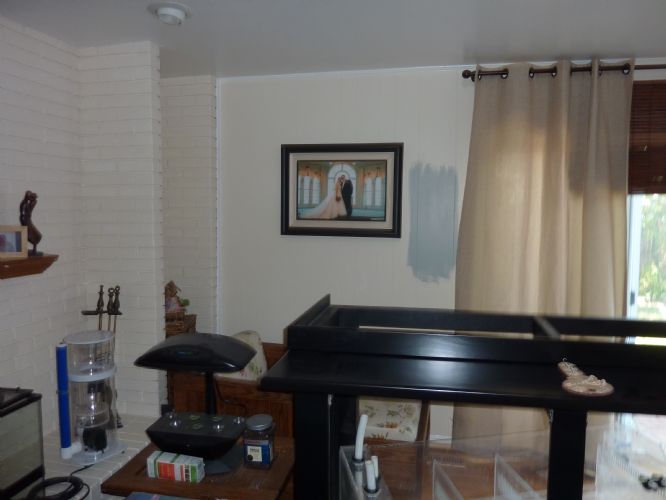 The first thing we did after our electrical was to paint the tank area with a glossy finish of the same color the rest of the room is to be. We wanted this so we could just wipe down the salt creep. Salt on walls is bad :)  Once finished we could move at least part of the stand over to that area. You can see our new circuits as well. We had them put one up high but not sure we will be using it now that we are going more ports on our APEX.  After a lot of hard work the room is done. Also the cleanest it will look once the rest of the tank build begins. 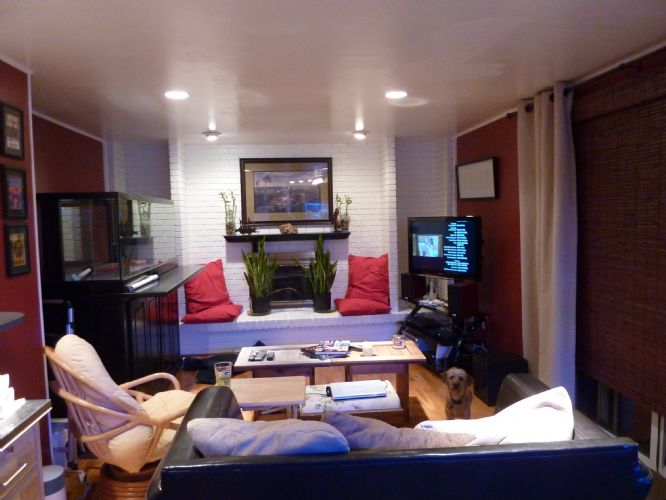 A big thanks to my friend Mike Carver for helping us lift the beastly tank onto the stand.    Time to add some lights!   We made some screens for the top, thanks to the forums recommendations. No jumping fish for us.  My wife enjoying the stand! 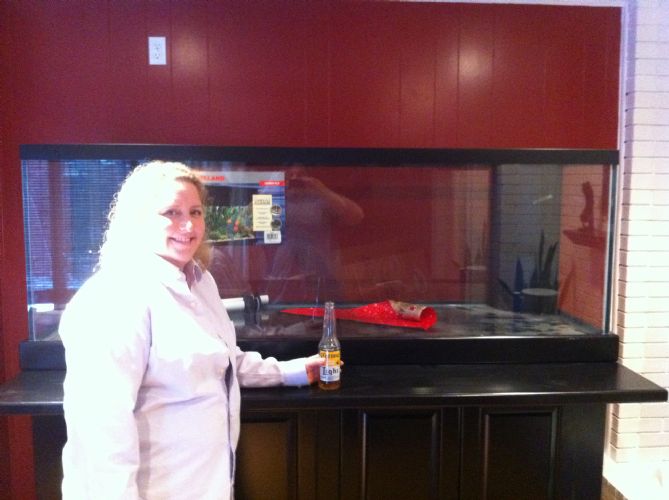
Edited by jdinchak - March 21 2012 at 10:15am
|
 |
jdinchak 
Presidency


Joined: July 06 2009
Location: Sandy
Status: Offline
Points: 4600
|
 Post Options Post Options
 Thanks(0) Thanks(0)
 Quote Quote  Reply Reply
 Posted: March 21 2012 at 9:15am Posted: March 21 2012 at 9:15am |
|
|
 |
jdinchak 
Presidency


Joined: July 06 2009
Location: Sandy
Status: Offline
Points: 4600
|
 Post Options Post Options
 Thanks(0) Thanks(0)
 Quote Quote  Reply Reply
 Posted: March 21 2012 at 9:16am Posted: March 21 2012 at 9:16am |
Bonus picture - Tanuki made this for us last year. I thought they were cool.  Most of our stuff has come slowly but thanks to our second plumbing order and free shipping on salt, our UPS guy loved us this day. Over 200 pounds of boxes. Thanks UPS guy! 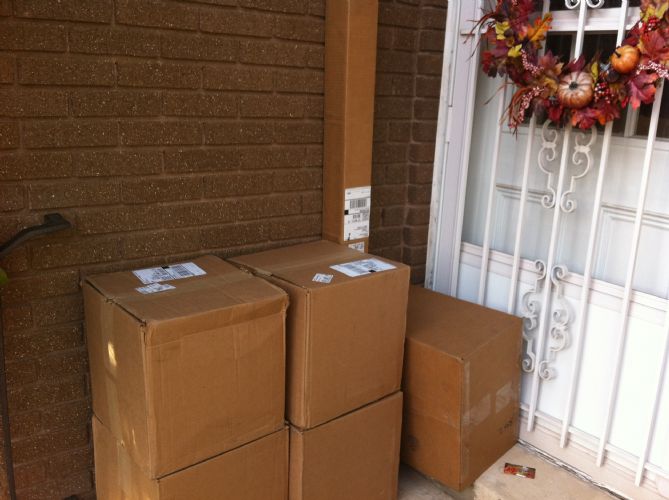 A picture from Reef-fest. We had a great long chat with Scott Fellman after the show last year. He gave us lots of praise on our aquascaping (as well as his bad beat stories - he told us we were a half an inch off) and helped give us the confidence to do something great. Now we have the pressure on us to do great things with our aquascaping.  Next up is a water test, then adding rock and sand and then working our RO/DI to death to get us the 200+ gallons we need to get salt in there. Hoping to have this puppy cycling soon.
Edited by jdinchak - March 21 2012 at 10:51am
|
 |
Adam Blundell 
Presidency


Joined: June 24 2002
Location: Davis County
Status: Offline
Points: 18526
|
 Post Options Post Options
 Thanks(1) Thanks(1)
 Quote Quote  Reply Reply
 Posted: March 21 2012 at 9:21am Posted: March 21 2012 at 9:21am |
|
Awesome looking placeholder!
Adam
|
|
Come to a meeting, they’re fun!
|
 |
Jeremyw 
Guest


Joined: April 09 2009
Location: Utah County
Status: Offline
Points: 8513
|
 Post Options Post Options
 Thanks(1) Thanks(1)
 Quote Quote  Reply Reply
 Posted: March 21 2012 at 9:28am Posted: March 21 2012 at 9:28am |
|
SWEET! I was wondering what you did with that tank! Im excited to see pictures! (secretly sometimes I regret selling it! But SHHHHH dont tell anyone)
|
 |
jdinchak 
Presidency


Joined: July 06 2009
Location: Sandy
Status: Offline
Points: 4600
|
 Post Options Post Options
 Thanks(0) Thanks(0)
 Quote Quote  Reply Reply
 Posted: March 21 2012 at 9:30am Posted: March 21 2012 at 9:30am |
 disneymania wrote: disneymania wrote:
SWEET! I was wondering what you did with that tank! Im excited to see pictures! (secretly sometimes I regret selling it! But SHHHHH dont tell anyone) |
Uploading the pictures now, may take a while! Yep, your tank has been put to good use.
|
 |
troyholl 
Guest


Joined: March 05 2006
Location: United States
Status: Offline
Points: 717
|
 Post Options Post Options
 Thanks(1) Thanks(1)
 Quote Quote  Reply Reply
 Posted: March 21 2012 at 9:40am Posted: March 21 2012 at 9:40am |
|
|
|
Troy Hollingsworth
Riverton, Utah
270 Gallon "Custom" Tank
|
 |
BobC63 
Admin Group

Joined: January 17 2007
Location: Lehi, UT
Status: Offline
Points: 8968
|
 Post Options Post Options
 Thanks(1) Thanks(1)
 Quote Quote  Reply Reply
 Posted: March 21 2012 at 9:53am Posted: March 21 2012 at 9:53am |
Looking forward to this thread, Jon -
Lots of equipment pics for techno geeks like me, please  |
|
- My Current Tank: 65g Starfire (sitting empty for 2+ years) -
* Marine & Reef tanks since 1977 *
|
 |
jdinchak 
Presidency


Joined: July 06 2009
Location: Sandy
Status: Offline
Points: 4600
|
 Post Options Post Options
 Thanks(0) Thanks(0)
 Quote Quote  Reply Reply
 Posted: March 21 2012 at 10:59am Posted: March 21 2012 at 10:59am |
|
Anywhere I added a hyphen - or " it seems to have replaced it with some odd characters. Anyone know how to fix that?
|
 |
BobC63 
Admin Group


Joined: January 17 2007
Location: Lehi, UT
Status: Offline
Points: 8968
|
 Post Options Post Options
 Thanks(1) Thanks(1)
 Quote Quote  Reply Reply
 Posted: March 21 2012 at 12:00pm Posted: March 21 2012 at 12:00pm |
Wow -
Just one question?
How come it looks like Bacot is doing ALL the work??? 
(Actually, that is super cool that she is so involved... my wife is good with helping to pick out corals - and that's where it ends  )
|
|
- My Current Tank: 65g Starfire (sitting empty for 2+ years) -
* Marine & Reef tanks since 1977 *
|
 |
jdinchak 
Presidency


Joined: July 06 2009
Location: Sandy
Status: Offline
Points: 4600
|
 Post Options Post Options
 Thanks(0) Thanks(0)
 Quote Quote  Reply Reply
 Posted: March 21 2012 at 12:04pm Posted: March 21 2012 at 12:04pm |
|
Great observation Bob - a lot of that is because I was the one taking pictures. She did do all of the plumbing gluing. Once she got the hang of it I just let her keep on going. She is a hard worker thats for sure. We are both very active in this hobby which is wonderful. It makes things like "hey can we buy that $100 thing" easier. Sometimes too easy.
|
 |
jwoo 
Presidency


Joined: April 29 2009
Location: Alpine
Status: Offline
Points: 3603
|
 Post Options Post Options
 Thanks(1) Thanks(1)
 Quote Quote  Reply Reply
 Posted: March 21 2012 at 12:11pm Posted: March 21 2012 at 12:11pm |
|
Wow looks great! This build looks super nice. Can't wait to see it with some water!
|
|
None at the moment
Soon: 72 Gallon Bowfront
|
 |
Melissa 
Guest


Joined: May 26 2011
Location: Draper
Status: Offline
Points: 263
|
 Post Options Post Options
 Thanks(1) Thanks(1)
 Quote Quote  Reply Reply
 Posted: March 21 2012 at 12:46pm Posted: March 21 2012 at 12:46pm |
That is awesome. I join the jealous that you are both into it club, but from the other side than usual

|
 |
jdinchak 
Presidency


Joined: July 06 2009
Location: Sandy
Status: Offline
Points: 4600
|
 Post Options Post Options
 Thanks(0) Thanks(0)
 Quote Quote  Reply Reply
 Posted: March 22 2012 at 10:16pm Posted: March 22 2012 at 10:16pm |
|
Ran our water test today and I have some questions for the group.
First we found that the Hammerhead was just way too much flow (we literally made it rain in our house). It had to be turned down 90% for it to be able to stay even with the drains. Our gate valve was wide open. So we switched it out with the Barracuda and even that is still pretty powerful.
We are doing the herbie method, while filling it up and doing our test runs it took it forever to get a siphon and be quiet, while doing that it was the loudest most obnoxious thing I have ever heard. I can go down about another inch on my drain before my my sump would overflow (with power off) and will be doing that, is there anything to else to look for while it is gurgling and sucking water down? Not sure how far people have their drains in their tank.
Also I noticed there just isn't enough water draining with just the one, I don't want to have to valve back my pump to 70%. If I used my emergency drain as a normal drain, no gate valve (other one would have the gate valve) would that be acceptable? I would like to give this a try but not sure if there are any reasons not to. It would be just these two mostly flowing free, no restrictions.
Also the reeflo pump was a lot louder then I had anticipated, I was told these were pretty quiet, is there things that cause them to be a bit louder? I have pads under it and that helps but it is still pretty loud. One reason I bought this was it was supposed to be pretty quiet.
The male adapter that goes out of the pump is leaking. I have tried it all the way in and mostly in and it still leaks. The manual says to use teflon dope but I can't seem to find any of that. I was using teflon tape but that is not helping? Any ideas? Where can I get the teflon dope (guys at home depot said they don't have it)?
Another thing we had was with our loc-line, when we would turn the pump off it would cause a huge siphon (much better then our actual drain) from our return, we about drained half the tank before we figured this out the first time. Should we drill a small hole at the end of the loc-line to break the siphon?
Today was a nice way to knock the wind out of your sails. Hoping to get these few issues resolved then I will let the tank run for a few days. Any suggestions are appreciated.
Thanks
Jon
|
 |
jdinchak 
Presidency


Joined: July 06 2009
Location: Sandy
Status: Offline
Points: 4600
|
 Post Options Post Options
 Thanks(0) Thanks(0)
 Quote Quote  Reply Reply
 Posted: March 25 2012 at 4:51pm Posted: March 25 2012 at 4:51pm |
|
We have had a few up and down plumbing issues.
We learned (I kind of feel stupid about it honestly) more about the herbie method this week. I assumed my gate valve would just restrict flow if I had too much and since I didn't feel I had too much I left it open. Well by closing it we were able to get the siphon we wanted (nice and quiet) and super fast, faster then wide open. We also did a test and tried running both drains with siphon and it worked great. It actually allowed us to have our pump full blast. So that was great. We have another gate valve on order and some additional unions (also decided to pick up the last reactor needed) so we will see how that works out.
The two issues we still have had is leaking -
We have a new leak on the threaded male adapter to the bulkhead. My guess is screwing in and out the returns and drain messed that up. Hoping to get that tightened. Do the bulkheads tend to do that?
We fixed our threaded male adapter leak coming out of the pump (we used pipe dope) as well as our union leak (was more alignment) but now the other (intake) of the pump has a slight leak on its male threaded. We tried putting some pipe dope on it and it didn't help, we even tried silicone on the outside. My concern is the way the pump situated in the stand I can't turn the threads in more, it will need to be about the same level it is now. If I add pipe dope will it require it to be turned in more? Can you use teflon tape and pipe dope? The leaks are getting frustrating. Like one step forward and two back.
Also when turning off the pump we are still getting siphon from the loc-line - can I drill a small hole anywhere on that to break the siphon or is there other suggestions?
Thanks for your help!
|
 |
jdinchak 
Presidency


Joined: July 06 2009
Location: Sandy
Status: Offline
Points: 4600
|
 Post Options Post Options
 Thanks(0) Thanks(0)
 Quote Quote  Reply Reply
 Posted: March 31 2012 at 2:49pm Posted: March 31 2012 at 2:49pm |
So we have made progress - Did a fresh water test of the system to find and fix leaks. Set our water levels (will redo when we have salt and rock in there). Waiting for the fill, happy to finally have some water in it.  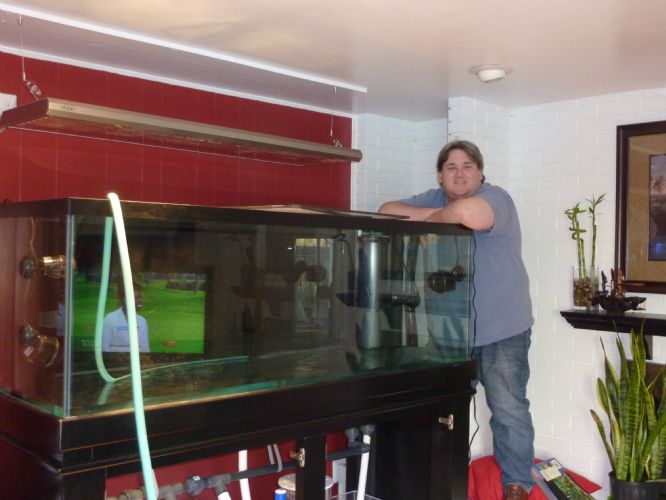 We then realized our Hammerhead was just too powerful, so we took it apart and put in the Barracuda impeller.  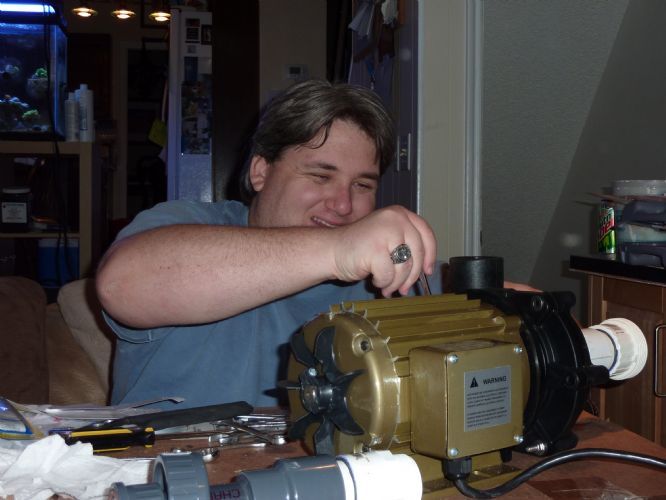 Bacot is deeply looking at the housing, trying to figure out how the o-ring goes back on.  Got our loc-line completed (man those were hard to get together, had no idea)  Moved the tank in place - that was a fun tug of war. Love seeing it back in its rightful place without towels in it.  Doors definitely make it nicer. 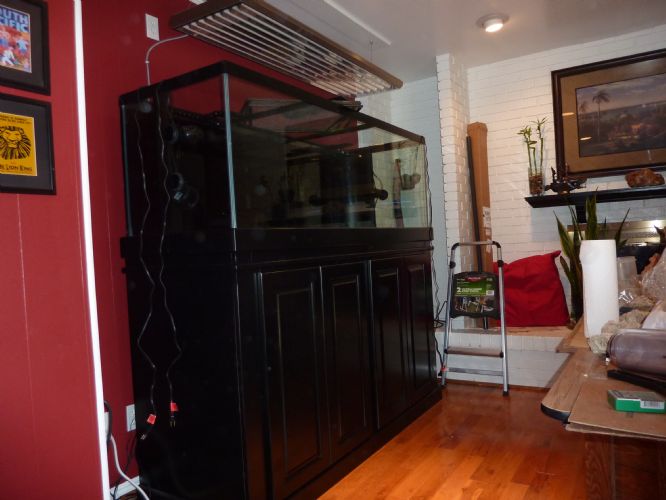 Lately with my dog - wherever there is a cushion she is there. 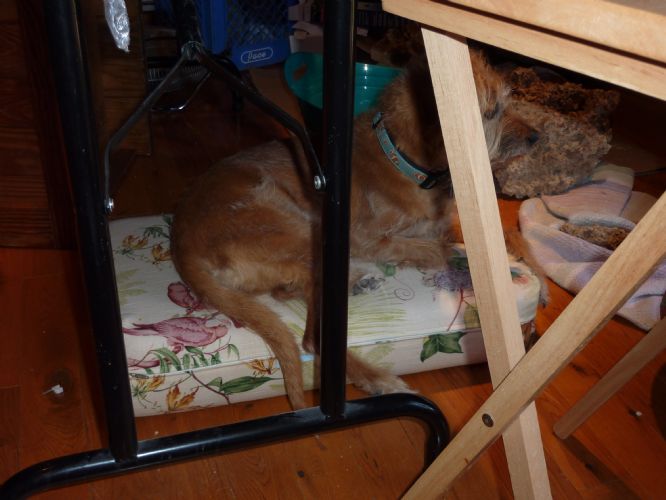 Gluing a small piece of acrylic to plug a hole at the top of the sump, we needed those extra two inches of space. 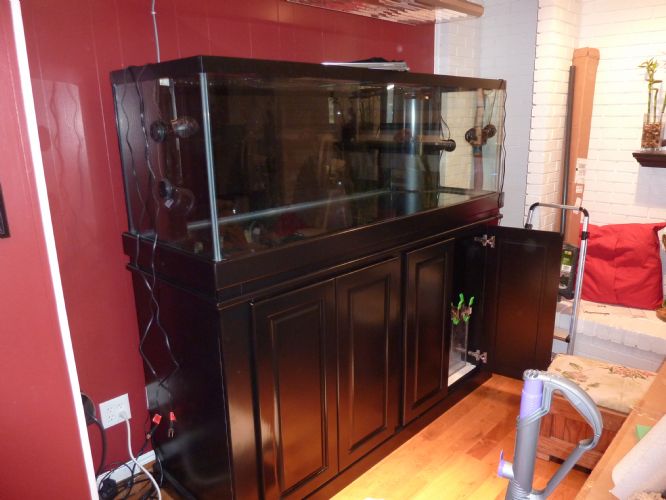 For the equipment lovers - our new BRS Reactor, its nice and sleek. We are also adding a gate valve and unions to our other drain, we will have two full siphon drains running. It allows our pump to be at max flow. 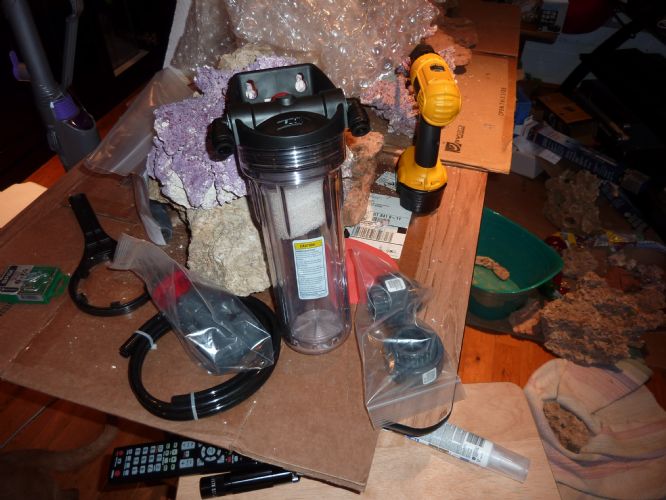 Apex breakout box, two float switches (will be turning off the pump if water level is too low) and some calibration fluid. 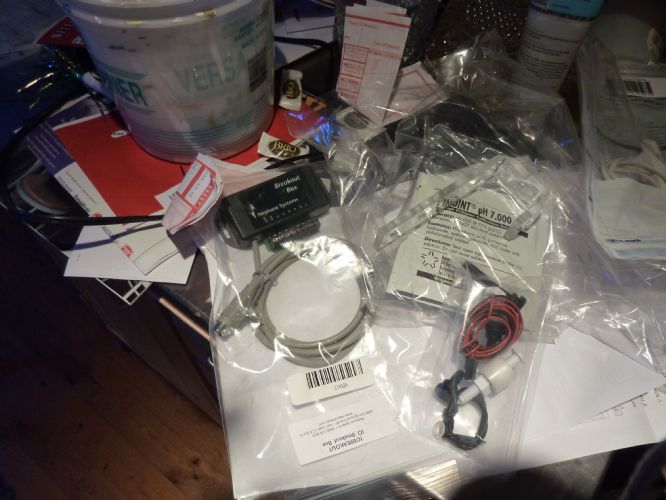 Will also be adding two water on the floor sensors to turn off the pump if we flood. Our Energy Bar 8 is on backorder so we are waiting for that before we start configuring our Apex system.  And who doesn't love a nice picture of salt. This is the E.S. V salt mix.  Now that the tank is in its final position, we just have to add the gate valve to our second drain, hook up our sensors and do some patchwork silicone to the overflows (a couple of pinpoint leaks) then add rock and sand. We will start making RODI water daily once the rock work is in so we can mix our salt.
|
 |
08TRDOFFROAD 
Guest


Joined: March 16 2011
Location: Herriman
Status: Offline
Points: 352
|
 Post Options Post Options
 Thanks(1) Thanks(1)
 Quote Quote  Reply Reply
 Posted: March 31 2012 at 8:16pm Posted: March 31 2012 at 8:16pm |
If you haven't resolved the siphon issue on the return yet, you need to fill the tank, let it run at operating level. Find the portion of the loc-line that is just barely below the water surface. Once you figure that out, take it off and drill a small hole where you determine and re-install with the newly drilled hole pointed down towards the bottom of the tank just below the water surface. Problem solved. I just did this myself, I didn't want to rely purely on my check valve to prevent back siphoning. Works like a charm! 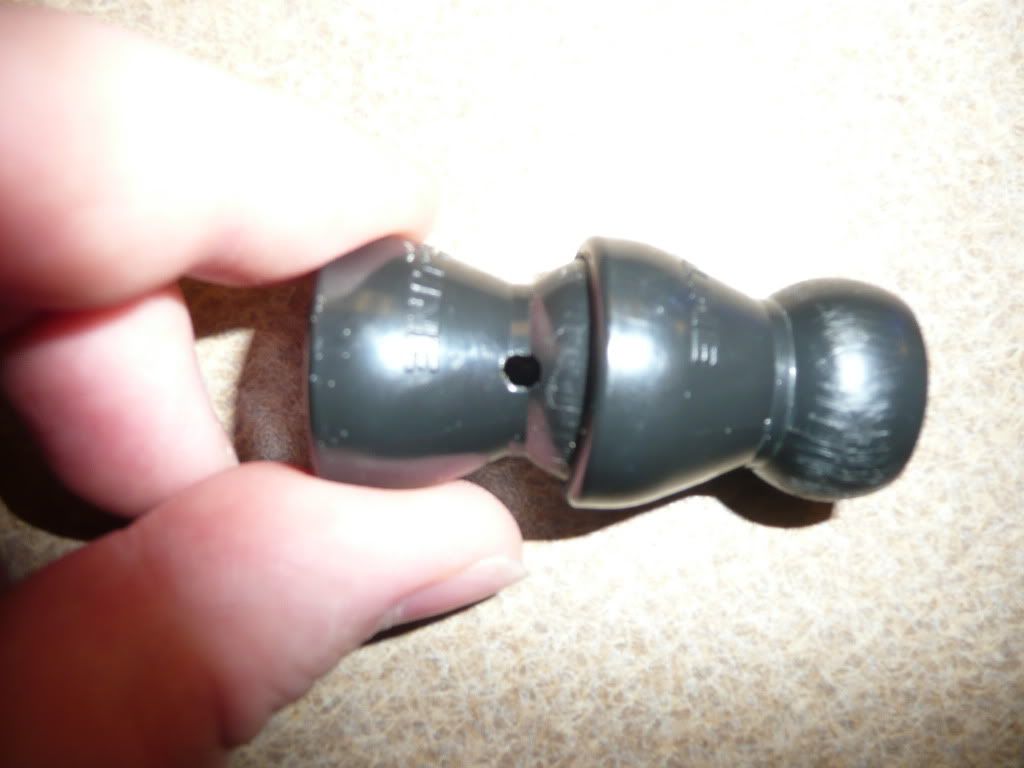
Edited by 08TRDOFFROAD - March 31 2012 at 8:20pm
|
 |
troyholl 
Guest


Joined: March 05 2006
Location: United States
Status: Offline
Points: 717
|
 Post Options Post Options
 Thanks(0) Thanks(0)
 Quote Quote  Reply Reply
 Posted: March 31 2012 at 9:11pm Posted: March 31 2012 at 9:11pm |
I think I'm going to have the same issue on the Hammerhead Gold being a bit too much pump. Where/how did you get the kit to change it to a Barracuda impeller?
|
|
Troy Hollingsworth
Riverton, Utah
270 Gallon "Custom" Tank
|
 |
Laird 
Guest


Joined: December 27 2009
Location: South Weber
Status: Offline
Points: 1593
|
 Post Options Post Options
 Thanks(1) Thanks(1)
 Quote Quote  Reply Reply
 Posted: March 31 2012 at 9:13pm Posted: March 31 2012 at 9:13pm |
|
You guys are doing a terrific job, it's going to be an amazing set up.
|
|
Indefinite hiatus from sw aquariums.
Once I have my glorious return I'll set back up the following.
50 Gallon rimless cube.
180 Gallons mixed reef paradise
|
 |