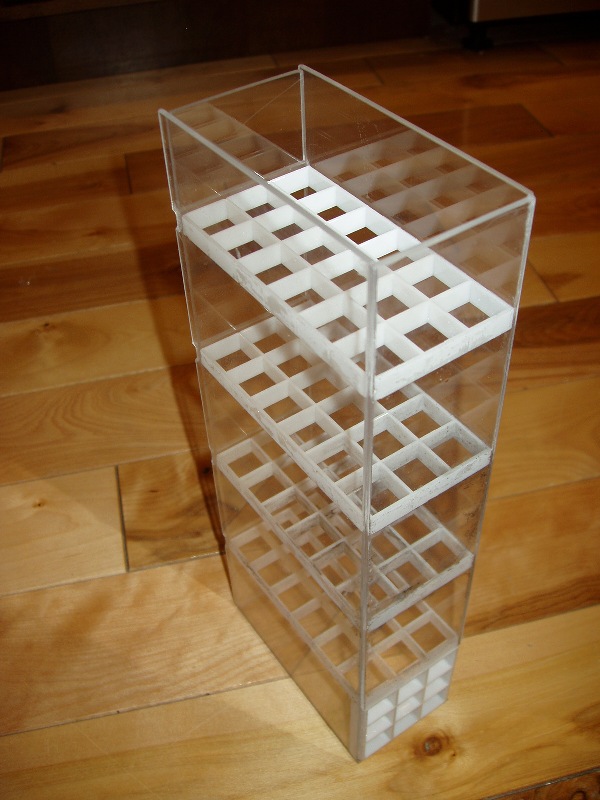
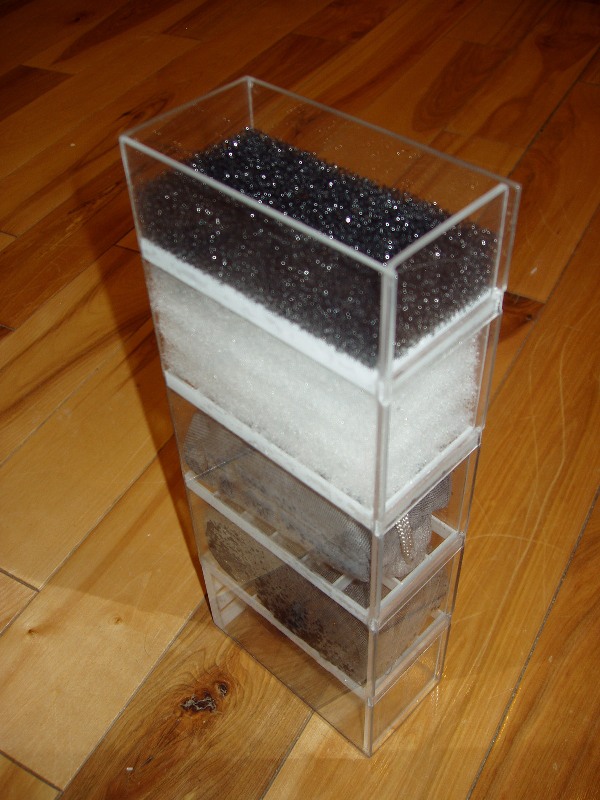
Mini-fuge/media filter rack for Oceanic Bio-Cube 14.
Modify size of fuge for other applications. I apologize that I did not take pictures during assembly. Pics of the finished product is attached for reference. if you have any questions, feel free to ask.
Parts needed:
Eggcrate (2'x4' fluorescent light baffle/diffuser) - Home Depot lighting aisle
12x24 .093 clear lexan sheet - Home Depot
Superglue gel
Metal straight edge
Utility knife and 3-4 replacement blades
File for cleaning up cut lexan edges
Assembly:
1. Cut (1) 3x3 section and (4) 3x6 sections of eggcrate.
2. Cut the following pieces of lexan:
door (1) 2" x 10 3/4"
end (1) 2-3/16" x 9-1/8"
sides (2) 4-1/2" x 10-3/4"
bottom (1) 2-3/16" x 4-9/16"
door retainers (4) 1/4" x 2-3/16"
Cutting lexan with a utility knife takes patience and a sharp blade. Score the lexan repeatedly (a lot) on both sides. Bend to break along score lines. Sometimes it won't cooperate. I had to recut a couple pieces. File all edges smooth and remove burrs.
3. Lay the 3x3 eggcrate and the lexan end piece end to end and glue together. The lexan is wider than the eggcrate. Center the eggcrate so that the lexan extends the same amount on both sides. This eggcrate will direct water out the bottom of the fuge and into the third compartment where the pump is located.
4. Glue one side to the end assembly glued in step 3.
5. Layout where you would like the shelves to go. I set mine 2" apart starting just above the eggcrate in the end assembly. Shelves must fit tight against the end assembly to allow room (about 1/8") for the door on the other end. Glue shelves in place.
6. Glue the other side in place.
7. Glue the bottom in place adjacent to the 3x3 eggcrate.
8. Cut or file 1/16" x 1/4" notches in both side pieces at each shelf so that the door retainers will sit flush with the side pieces. Glue door retainers in place. Door should slide easily in from the top, fitting without much clearance between the door retainers and the shelves.
9. HBH 3"x8" filter media bags, filled halfway and folded over fit well. Gently coerce the filled media bag into the desired chamber. It will be snug, which is good as it will force the water through the media rather than allowing it to go around. I used two different grades of filter floss in the top two chambers.
10. Remove the stock top and bottom shelves and the bio balls from the BioCube. I had to use a paper clip to get between the slats and pull out the bottom shelf. Discard the bottom shelf and the bio balls.
11. Test fit the mini-fuge into the center chamber of the BioCube. Trim the rear lip as necessary with the utility knife.
12. Install mini-fuge and reinstall the stock top shelf over the mini-fuge. The stock top shelf helps to direct the water into and trough the mini-fuge rather than allowing water to bypass the mini-fuge around the sides.

