My 225g Build Thread
Printed From: Utah Reefs
Category: Main
Forum Name: Tank Threads
Forum Description: A place to show off your tank build.
URL: http://www.utahreefs.com/forum/forum_posts.asp?TID=24146
Printed Date: November 22 2024 at 12:11am
Software Version: Web Wiz Forums 12.03 - http://www.webwizforums.com
Topic: My 225g Build Thread
Posted By: BobC63
Subject: My 225g Build Thread
Date Posted: March 03 2008 at 1:53pm
|
I figured I might as well start this now; before I start setting things up and forgetting to post about it...
STEP 1: Getting the Tank in the House
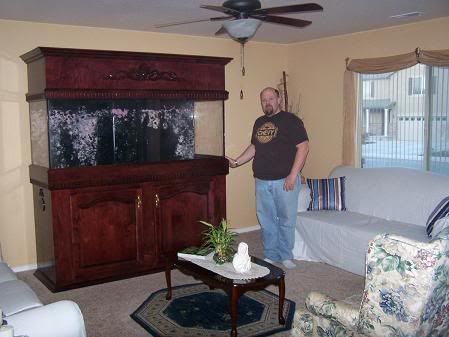
So far, we have managed (barely avoiding hernias, BTW) to get the 225g tank / stand / canopy into the house and set up in the Front Room. Here is a shot of me next to the tank - keep in mind I am 6 foot 1 in tall ; I feel 'small' next to it :
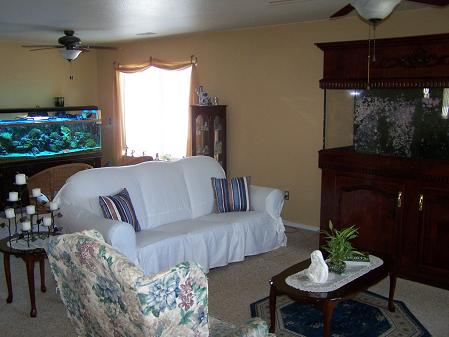
 Even though the 225 is the same length (6 ft) as the 125, it just looks so much bigger due to the taller / deeper tank and the total height of the thing. Here is a pic showing the 125 and 225 in the same view to show the size difference:
 Other than setting it in the room, the only thing I have done so far is work on the lighting...
STEP 2: Lighting the Tank
I am going to use my existing 3 X 250 MH fixture when I take the 125 down. However, the
fixture was exactly 72" (6 feet) long and would not fit inside the new canopy which is 70.5" inside length
What I did was remove the endcap from the fixture, relocate the PC ballasts inside the fixture, then use a coping saw to remove 2" of the aluminum fixture housing. It took almost an hour to cut off the 2" piece; I'm sure it would have gone alot faster with a power tool but I was worried about cutting wires or not making a straight cut.
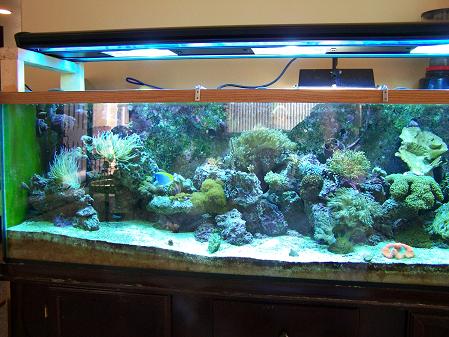
It ended up just fitting inside the new canopy... however, when I went to put it back onto the 125, the shortened fixture now doesn't allow the legs to reach over the 125 frame
So, I ended up removing the legs all together and I made a couple of wood braces to hold up the fixture:
 Next up, I will probably build the plenum and then add sand and base rock.
I also have to go downstairs and put in a few joist supports for the floor... ------------- - My Current Tank: 65g Starfire (sitting empty for 2+ years) - * Marine & Reef tanks since 1977 * |
Replies:
Posted By: bannshy
Date Posted: March 03 2008 at 2:01pm
| take pictures while your setting up the plenum. I am interested to see how its done. if you could post instructions along with picts, I would sure appreciated it. |
Posted By: hairmonkey
Date Posted: March 03 2008 at 2:33pm
|
bob, that is a monster. it is going to be sweet! i look forward to seeing it come together. ------------- "Logic is your friend" west side salon 250-5314 8370w 3500s magna. |
Posted By: TriggerHappy
Date Posted: March 03 2008 at 4:33pm
|
That tank should be really nice when you're done. I'm looking forward to doing this sometime soon, (wife says new house=new tank) so keep the pictures flowing!
------------- 210 gallon Mixed Reef |
Posted By: MadReefer
Date Posted: March 03 2008 at 4:49pm
| It looks like a lot of fun. |
Posted By: thathiep
Date Posted: March 03 2008 at 4:59pm
|
Cool! Can't wait to see them fill up with water/rocks/corals. Keep the pics coming. |
Posted By: Mike Savage
Date Posted: March 03 2008 at 6:19pm
|
It's looking good Bob. I really like the height of the stand too. Mike -------------  |
Posted By: soundsurfer
Date Posted: March 03 2008 at 6:20pm
| Wow, that tank looks familiar. So are the ceilings high enough to open the canopy. HA. Looks great. Keep the posts on the stuff you do with it. I am very excited to see what becomes of it. |
Posted By: sukie
Date Posted: March 03 2008 at 6:26pm
|
Nice score Bob!! I can't wait for the updates. . take a picture of yourself in the tank like: 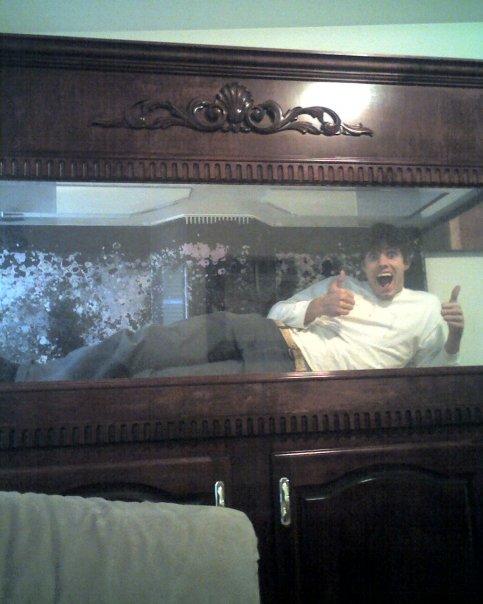 |
Posted By: Jeff Morrill
Date Posted: March 03 2008 at 6:28pm
|
Thats a monster tank!!! How fun for you.. ------------- WHAT KINDA GUM????... Give em 2 sticks. |
Posted By: BobC63
Date Posted: March 03 2008 at 6:28pm
|
The ceiling is 8 ft so I can open the canopy. I will need to fabricate some kind of hinge or prop to hold it open, as it is such heavy wood construction that it is hard to hold it open and do any kind of work on the tank at the same time... ------------- - My Current Tank: 65g Starfire (sitting empty for 2+ years) - * Marine & Reef tanks since 1977 * |
Posted By: BobC63
Date Posted: March 03 2008 at 6:30pm
|
Amy, I think that even if I managed to get inside the tank I wouldn't be able to get back out ------------- - My Current Tank: 65g Starfire (sitting empty for 2+ years) - * Marine & Reef tanks since 1977 * |
Posted By: sukie
Date Posted: March 03 2008 at 6:32pm
Okay just stuff your kids in there. .  totally kidding! totally kidding!I'm jealous of the big tank!!! |
Posted By: BobC63
Date Posted: March 03 2008 at 6:33pm
Will do, Jeremy... it is actually quite easy to set a plenum up - you'll see ------------- - My Current Tank: 65g Starfire (sitting empty for 2+ years) - * Marine & Reef tanks since 1977 * |
Posted By: BobC63
Date Posted: March 03 2008 at 6:34pm
I told my wife when the time comes she can bury me in it ------------- - My Current Tank: 65g Starfire (sitting empty for 2+ years) - * Marine & Reef tanks since 1977 * |
Posted By: john hill
Date Posted: March 03 2008 at 10:11pm
|
you suck just kiddin but i did want that tank BAD looks great and will be alot of fun to see it come to life ------------- out with the large and in with the nano |
Posted By: BobC63
Date Posted: March 04 2008 at 8:26pm
Today I got started on the extra support for the floor below the set up... I went and ordered a pair of these:
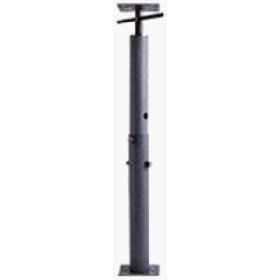 "Floor jacks", "Basement jacks", whatever you want to call them... they adjust up to 7.5 feet tall and are rated at 16,000 lb each @ 36" extension and 11,000 lb each at 72" extension - so 2 jacks at around 84" extension should be able to support maybe 18,000 lb total - way more than the tank will weigh out when full. I used 4 X 4 wood supports only for my 125; I thought these would be a better long-term solution to deal with the added loads the 225 will put on the floor...
It was actually kind of hard to find these out here in UT. Back east, these supports where commonplace and you could just go out to HD and get them locally. No such luck here, had to order them online. Not too bad though, $75 for the pair (including shipping)... they should be here in about a week. Then I'll just pick up 2 of those preformed concrete "deck supports" (they kind of look like a pyramid with a flat top) to put under the jacks, and a decent 8 ft 4 X 4 to use as a header between the top of the jacks and the floor joists.
If my joists are 16" on center, then the 6 ft tank should span 4 joists as they run perpendicular to the length of the tank along the wall it is set up next to. I'll use the 2 jacks cat the 2.5 ft and 5.5 ft points of the 4 X 4 to keep the downforce weight of the tank spread out as evenly among the 4 joists and the supports as possible.
Once they arrive, it should only take maybe an hour or 2 to set them up. Once I do I'll post a pic for anyone interested in seeing how to set them up...
------------- - My Current Tank: 65g Starfire (sitting empty for 2+ years) - * Marine & Reef tanks since 1977 * |
Posted By: Mike Savage
Date Posted: March 04 2008 at 9:34pm
|
It looks like a great solution for peace of mind.
Mike -------------  |
Posted By: cl2ysta1
Date Posted: March 04 2008 at 9:34pm
|
i'm guessing they arent offered out here b/ cit seems basements are few and far between. everyone out east has a basement though ;) ------------- I <3 Boxers Achilles tang lover |
Posted By: BobC63
Date Posted: March 12 2008 at 8:20pm
|
It seems that while I was away this weekend in California on business my floor jacks arrived via UPS... so today, once I woke up (since I just got home at 1 AM from the airport), I went over to HD and picked up 2 of those solid concrete supports and a 4X6 header post (8 ft long). Not taking any chances with only a 4X4 post (especially since the price difference was only 3 dollars...) Properly set up, should support maybe 18 - 20,000 lb. which is prob 5X the tanks weight when full Hopefully I will have the time Thursday to bring it all downstairs, set up the jacks and the supports, and snap a pic or 2 of how it turns out.
The good news is - once that is done - I can start planning on the more "fun" stuff; plenum building, sump set up and plumbing, rock & sand collecting / cleaning... and then filling the tank
------------- - My Current Tank: 65g Starfire (sitting empty for 2+ years) - * Marine & Reef tanks since 1977 * |
Posted By: Danner
Date Posted: March 12 2008 at 10:46pm
|
you always have the coolest threads i enjoy reading them keep it up. Ryan |
Posted By: Kynneke
Date Posted: March 13 2008 at 7:22am
| Beautiful tank! I just wanna know how you are going to aquascape, can you actually reach the bottom?? |
Posted By: BobC63
Date Posted: March 13 2008 at 4:33pm
|
I'm kicking around a few ideas on an aquascaping design ------------- - My Current Tank: 65g Starfire (sitting empty for 2+ years) - * Marine & Reef tanks since 1977 * |
Posted By: BobC63
Date Posted: March 13 2008 at 6:33pm
|
STEP 3: FLOOR SUPPORT 101
Today I took on the task of shoring up the flooring underneath the setup.
Opened up the floor jacks and started to pre-assemble them:
Simple enough; a couple of carriage bolts and a heavy duty screw riser for each jack post. I prepped everything I would need for the job - brought in my 2 concrete support blocks, the 8 ft 4X6 header post, a large wrench to turn the screw risers, a spotlight in case the single bulb down there wasn't bright enough (it wasn't).
Went down inside the basement (technically a "crawlspace" since there is no floor other than dirt - but it's 7.5 feet deep down there) and discovered an issue I hadn't considered. The tank is sitting parallel to the floor joisting instead of perpendicular as I had (incorrectly) thought. That meant the entire weight of the setup would be spread over only 1 or maybe 2 joists
 instead of 4 or 5... It also meant I would have to rethink the application of the single header post in a different direction. instead of 4 or 5... It also meant I would have to rethink the application of the single header post in a different direction. What I decided was to cut the post into (2) 4 ft sections and run those perpendicular to the affected joist(s) and support each post with 1 floor jack. The floor joist closest to the wall is actually set upon the concrete foundation and fully supported its entire length, so I didn't have to worry about adding support to that one. The 2nd joist is 16" away and would bear the majority of the dead weight as it is the only joist directly under the setup. The 3rd joist is another 16" apart (32" from the foundation wall) and so ended up clearing the actual "footprint" of the stand by about 3 inches (the 24" wide stand is about 5" from the wall behind it), but having a 4ft post section meant I could support that joist as well. In all, I would be able to distribute the load stress over 3 joists using the posts and jacks vs. having almost 100% of the load on only 1 joist if I did not add any support... and IMO putting close to 2 tons of load on only 1 joist without any added support would be a bad, baaaad idea
The end result looks like this:
There are 3 joists total; the 1st is hidden by the foundation wall but is also fully supported by that wall. The 2nd is the major load-bearer because the tank is over that single joist alone. The 3rd clears the stand by maybe 3 inches but I have it supported by the header posts anyway since it will function to "assist" with bearing some of the stress. The floor jacks are not directly under the 2nd joist; they are offset about 2 inches because that is the measurement of the center of the tank (front to back) - but I may rethink that placement since the joist is the actual "contact point" for the load, and it might be smarter to orient the jacks directly under that 2nd joist rather than the exact numerical center of the load where there is no joist). The jacks are spaced 2 feet apart, meaning they are under the tank at the 2 ft mark and the 4 ft mark of the 6ft long tank... I got the distances by simply measuring the location of the tank upstairs and then marking it out on the foundation wall directly underneath.
The bottom of the jack posts are set upon 2 heavy concrete supports as shown here:
Here is a final shot of the whole set up:
All together I spent about 90 minutes setting everything up and tightening the screw risers and carriage bolts, and the total cost was under $100. I figured it's money well spent for peace of mind...
------------- - My Current Tank: 65g Starfire (sitting empty for 2+ years) - * Marine & Reef tanks since 1977 * |
Posted By: Mike Savage
Date Posted: March 13 2008 at 10:38pm
|
Thanks for the pictures and the explanation.
Mike -------------  |
Posted By: troyholl
Date Posted: March 13 2008 at 11:16pm
|
Sounds like you have it covered... you should be okay...
------------- Troy Hollingsworth Riverton, Utah 270 Gallon "Custom" Tank |
Posted By: BobC63
Date Posted: March 20 2008 at 1:38am
|
Well not much has happened in the past week...
However, it looks like it's a "go" for a Utah Rock / Sand run this weekend - sunny w/ temp around 50 for Saturday...
Looking to score basically as much rock & sand as I can get into the back of my SUV...
With a little luck I should be able to build / install the plenum, sandbed & rock over the weekend (all with pics, of course
------------- - My Current Tank: 65g Starfire (sitting empty for 2+ years) - * Marine & Reef tanks since 1977 * |
Posted By: Corey Price
Date Posted: March 20 2008 at 6:49am
|
Alright, I feel like I better make a suggestion-
Please, please throw some blocking of the same depth that your joists are at the supports/shores you just installed. It will mean that you will need to pull some of the insulation out to get to it, but it will be better than having a joist roll over on that support. The blocking could basically be a 2x10 or 2x12 cut to fit perpendicular to the joists, depending on the joist depth. You only would want them at the joists you've shored up. |
Posted By: Mike Savage
Date Posted: March 20 2008 at 8:27am
|
Great idea Corey. I wouldn't have thought of that.
Mike -------------  |
Posted By: BobC63
Date Posted: March 20 2008 at 4:41pm
|
Actually a very good idea Corey - Thanks!
I'll get back with the results...
------------- - My Current Tank: 65g Starfire (sitting empty for 2+ years) - * Marine & Reef tanks since 1977 * |
Posted By: fj40fax
Date Posted: March 20 2008 at 5:54pm
|
Looking good! You guys are welcome to use my trailer for the sand run if you can find someone with a hitch. You have way more funriture than the last time I was there,  Fax ------------- Fax 318-3632 90g 2x250W 14kK MH Sump, Fuge, G3, UV, O3, ACIII Pleasant Grove, UT Across State Street from the Purple Turtle Adjustments and Massages for Frags! |
Posted By: BobC63
Date Posted: March 20 2008 at 7:03pm
Guys, take a look at this pivc and tell me what you think:
http://i213.photobucket.com/albums/cc244/carlso63/New%20Tank%20Pics/Paintpic.jpg - http://i213.photobucket.com/albums/cc244/carlso63/New%20Tank%20Pics/Paintpic.jpg
The red outline represents the approx. footprint of the tank & stand. As you can see, the tank actually sits directly over only 1 joist
The green lines represent where you suggest adding blocking to shore up the joists, correct?
The yellow lines represent what I was thinking of adding in addition to your suggestion. I was thinking of building 2 X 4 "U frames" on both ends of my header posts to provide support directly to the ground. I am worried that the single metal screw jack on each side may function like a lever on the header posts and cause them to exert an upward force on either end of the posts. And this way I 'll have 6 contact points with the basement floor and 6 places to disttribute the weight instead of only 2...
And then adding additional 2 X 10 blocking close to the ends of the footprint - just to be safe.
What do you think? Overkill, or a good idea?
What I am really trying to avoid is having to relocate the tank upstairs to run perpendicular to the joists unless I really have to for safety...
------------- - My Current Tank: 65g Starfire (sitting empty for 2+ years) - * Marine & Reef tanks since 1977 * |
Posted By: Corey Price
Date Posted: March 20 2008 at 7:21pm
| I think what you have done is fine as it is, just throw some blocking in where you were showing it. The tributary load to each joist is different, so centering the screw jacks on the tank footprint would only help. The jacks with blocking will probably be just fine- you're forgetting that the floor joists are stiff enough to prevent the lever arm you're thinking about. |
Posted By: BobC63
Date Posted: March 20 2008 at 7:29pm
|
OK, cool, I appreciate the suggestions -
I'm not worried that the tank would literally "fall through the floor"; I am concerned that the stress would show up as a sagging floor or excess deflection, or even a crack in the wall behind the tank ------------- - My Current Tank: 65g Starfire (sitting empty for 2+ years) - * Marine & Reef tanks since 1977 * |
Posted By: DeepFriedOprah
Date Posted: March 21 2008 at 12:59am
| PM Sent |
Posted By: BobC63
Date Posted: March 24 2008 at 8:19am
Here's a couple of pics of the "upgraded" reinforcement of the floor:
 This one's a little clearer
 You can see where I added 2 additional 6 foot 2X12s to serve as extra joists under the tank... this means there are now 3 joists under full load (instead of just the 1) and 2 more joists under partial load, for a total of 5 supporting joists. I also added 2X12 'blocking' perpendicular to the joists to prevent any joist twisting or rolling under the load (as Corey had suggested)
Looks like we can move on to the next step in the build...
------------- - My Current Tank: 65g Starfire (sitting empty for 2+ years) - * Marine & Reef tanks since 1977 * |
Posted By: BobC63
Date Posted: March 24 2008 at 9:22am
|
Step #4: Installing a Plenumed Sandbed
Now that the floor is adequately supported, I can start adding weight to the tank.
First thing that goes in (all my tanks, anyway
A few have asked me to "show how to make a plenum", so here goes...
A) Parts List
- 'Eggcrate' (flourescent light diffuser panels) 48" X 24"; Home Depot, $11.89 each
- Fiberglass window screen, not aluminum or "pet screen"; Home Depot, $6.49 a roll
- PVC elbows, either 1/2", 3/4", or 1" diameter (depends on tank size); Home Depot, $1.79 / bag
I'm sure Lowe's or Ace Hardware would carry all the supplies you need as well.
So, in my case, the plenum for my 225g cost around $40. Smaller tanks are (of course) cheaper to do; a 4' X 2' X 2' 120g (or smaller) is usually under $25...
Here's a pic of all the parts:
B) Place PVC elbows on tank bottom to act as 'supports' for the plenum base. I like to use elbows rather than straight PVC because they can't roll around the bottom and don't need to have any holes drilled into them to allow for water to flow... the diameter depends on tank size and how high / deep a plenum space you want under your sandbed. On a large tank like this, I use full 1" elbows. On tanks of 75 - 125g, I would use 3/4"... less than 75g I would use 1/2" elbows. Arrange your elbows about 5" apart to make sure you have adequate and even support for the eggcrate (which acts as your plenum base). Some folks use plastic ties to secure their PVC to the eggcrate; again, if you use elbows instead you don't need to do that. Just arrange them like this:
C) Next, cut your eggcrate to fit your tank bottom. A regular rectangular tank is a pretty easy fit. This tank, with the "Reef Ready" overflow built in, was a little more work. You can use any type of tin snip or heavy scissor to cut the eggcrate. Just measure carefully and cut slowly so you don't snap the eggcrate. Place the eggcrate right on top of your PVC elbows:
I needed to use 2 pieces on the 225. Here is the completed plenum base:
D) Now, roll out your fiberglass screening and cut to fit over the plenum base. You want to leave an extra inch or so on all sides to allow the screen to hang over the base and prevent any of the sandbed from getting under the base and filling in the void space you are making between the plenum base and the tank bottom glass. Again, the "Reef Ready" tank is a little more complicated than a normal rectangular tank... just take your time. Fit the screening right over the eggcrate like so:
E) Now add your clean rinsed sand right over the screening. Don't let it "plop in" as you don't want to move or bunch up the screening:
I use what is called a "bilayer plenum" which means 2 separate layers of sand with screening in between. You can use 2 different granule sizes of sand if you like; a coarser aragonite for the first (lower) layer, with a finer grained sand up top. I used the same Utah oolitic sand for both layers (cause I got plenty of it for free - and I'm cheap
F) Once the bottom layer is in and relatively flat, cut a 2nd layer of screening to go over the bottom layer of sand. This screen does not need to be oversized at all; it just separates the 2 sand layers like so:
The function of this second screen is to keep all your crabs, snails, stars, cukes, burrowing fish, etc. - anything larger than a baby pod, basically - keeps them from disturbing the bacteria in the bottom sand layer or introducing detritus into that sand... This lower layer ends up becoming full of that elusive denitrifying bacteria that turns your nitrates into free nitrogen, fed via the low oxygen, very low flow water that moves through the "void space" under your plenum base.
G) After installing the second screen, add another 2" or so of sand as your final layer:
H) The finished plenumed sandbed. In my case, about 4.75" of sand over a 1.5" total plenumed space - or close to 6.25" total depth from top of sandbed to tank bottom glass:
Properly installed, this plenumed sandbed should last basically forever... No need to replace or "recharge" any of the sand like a DSB. And no worries about any possible hydrogen sulfide (HS2) buildup. Ever. because with a plenumed bed it just isn't possible...
Maintenance-wise, there isn't much to it... should your fish or inverts burrow down to that second screen, you can just cover it back up... Some folks who advocate vacumming sandbeds would vacuum out that top layer periodically; you can if you want to - just be careful not to disturb that bottom layer... that's your dentrifying "money maker" , IYKWIM
Any questions?
------------- - My Current Tank: 65g Starfire (sitting empty for 2+ years) - * Marine & Reef tanks since 1977 * |
Posted By: MadReefer
Date Posted: March 24 2008 at 1:03pm
| Very informative. Great pictures. You make it look easy. The only question I have- Is it better to leave it dry as you build it? To me it seems like you would have added some water after you add each layer. |
Posted By: BobC63
Date Posted: March 24 2008 at 5:37pm
|
If the sand was "live" sand then, yes, you would need to kept it wet (aged SW, of course) otherwise the beneficial bacteria would die off...
With the "dead" sand I am using there is no need for water...
------------- - My Current Tank: 65g Starfire (sitting empty for 2+ years) - * Marine & Reef tanks since 1977 * |
Posted By: BobC63
Date Posted: March 26 2008 at 8:41pm
|
Today I started toying with rockwork and thinking about ideas for aquascaping... I did place some rock and took a few pics - but I think I'll wait until it is all done to post them.
Originally , I was thinking of doing a "suspended Reef" (ala Dion) to but then I decided to modify it a bit and go for a "semi-suspended" look using only rock for support and no eggcrate or PVC "pillars". The goal being minimal contact between the rock and the sandbed. With the abundant supply of rock I collected I think I can make it work. Right now the rockwork "footprint" covers probably 60% of the bottom of the tank but the supporting rockwork actually contacts less than 10% of the sandbed (maybe as low as 5%)... this will create an even water flow throughout the sandbed and maximize the denitrifying potential as well - which means a higher sustainable bioload
But here is where things will start to slow down on this build... since the objective is to transfer everything from the 125 to the 225, that means I still have to finish certain things before a transfer can take place. Meaning I have to plumb the tank, buy a sump, return pump, skimmer, and then I can fill the 225 and add salt, bring up the temp, align the water parameters to those of the 125, and then tranfer over all the livestock and be done with it.
Unfortunately right now the budget isn't there to fund all these purchases for maybe a month or two... so, barring an unforseen windfall, I can't go much further at the moment.
The good news is that when the funding does come through then I will probably be doing everything hardware-wise and filling the tank all within a few days. So, I just have to be patient until then...
------------- - My Current Tank: 65g Starfire (sitting empty for 2+ years) - * Marine & Reef tanks since 1977 * |
Posted By: tileman
Date Posted: March 26 2008 at 9:42pm
|
That's the hard part. I know when I started putting together my 225g it took me almost 3 months to get everything I wanted before I could get it started. It seemed like an eternity.
But its best to get all the right equipment the first time instead of trying to always upgrade. ------------- 335G Reef TOTM. http://www.advancedaquarist.com/2015/2/aquarium ReefKeepers TOTM Feb. 2012 http://reefkeeping.com/joomla/index....k-of-the-month & |
Posted By: chris.rogers
Date Posted: March 26 2008 at 10:07pm
|
Let me see if I've got this right (pardon the tangential derail...) Plenums offer the thick layer of sand for beneficial bacteria surface area, but don't charge up with crud because the water at the deepest layer is able to freely flow through the sand and that keeps the build up from happening? Do I have it right? Incidentally, I like the tank so far. Lookin' good. ------------- Ils sont fous, ces Romains! |
Posted By: BobC63
Date Posted: March 26 2008 at 10:24pm
|
Pretty much Chris.
Though the "void space" at the bottom under the plenum also functions as a "low oxygen / low flow" zone - exactly the perfect environment for the denitrifying (turns nO3 to free gas and out!) bacteria, too...
And thanks for your compliment
------------- - My Current Tank: 65g Starfire (sitting empty for 2+ years) - * Marine & Reef tanks since 1977 * |
Posted By: chris.rogers
Date Posted: March 26 2008 at 10:40pm
|
~chuckles~ You said 'gas'... ------------- Ils sont fous, ces Romains! |
Posted By: BobC63
Date Posted: March 27 2008 at 7:29pm
|
STEP #5: AQUASCAPING
Since I am short on the dough I need to buy anymore hardware right now
Here are some "foundation" shots for my aquascaping design idea. (Our site uploader is crapping out again so I went to photobucket)
I say "foundation" because I have over 150lb of critter-infused LR in my 125 that will end up being placed over / on top of most of what I have placed in the 225 so far; sort of like the foundation of a house.
My goal is to try and keep as much of the rock off the sandbed as possible. I started with some small pieces to act as "pillars" and hold everything else up:
  Then I added some flatter pieces of LBTR over that to act as the "floor":
   Here's a couple of fuller shots. I only went about halfway up the tank; again, to leave room for all the 125's LR to be place higher up.
  I should end up with basically 2 "islands" of rock; the left side will be the larger and is shaped more like a teardrop (seen from above), while the right side is smaller and more of a rounder shape to it. Both have alot of open sandbed underneath them; overall, I would say the rock islands will fill up maybe 50% of the overall tank space inside (once completed with the rock from the 125) - but less than 10% of the sandbed surface will be covered by rock.
So...Kind of a "semi - suspended Reef"...
Whaddya think?
------------- - My Current Tank: 65g Starfire (sitting empty for 2+ years) - * Marine & Reef tanks since 1977 * |
Posted By: john hill
Date Posted: March 31 2008 at 5:54pm
|
now you have me thinking what does a plenum do for keeping your tank alge free i am going to be setting up a tank soon i hope and have lots of ? ------------- out with the large and in with the nano |
Posted By: cl2ysta1
Date Posted: March 31 2008 at 7:05pm
|
looking nice! ------------- I <3 Boxers Achilles tang lover |
Posted By: BobC63
Date Posted: March 31 2008 at 7:08pm
A plenum is another way of addressing the buildup of nitrates and phosphates in your tank. So - indirectly - a plenum does help to reduce the amount of algae in your tank; by reducing the nO3 and pO4 levels in your water... ------------- - My Current Tank: 65g Starfire (sitting empty for 2+ years) - * Marine & Reef tanks since 1977 * |
Posted By: rebekwl
Date Posted: March 31 2008 at 7:22pm
|
looks good ------------- 92 corner w/ 30 gal sump Mantis tank coming soon "Ain't nobody got Time for that" |
Posted By: BobC63
Date Posted: April 12 2008 at 11:10pm
|
OK - I haven't given an update in quite a while...
But I have been busy
I ordered a skimmer... I went with a Reef Octopus NW200. A little "undersized", perhaps, but there is a simple mod thread over on RC that gets you 40 scfh from this unit... and you just flat out can't beat the price. I mean, an 8" diameter body and an 850 gph Octo Needlewheel pump for under $200...?!!! At this price, if I do the RC mods and still feel it's not enough - I could just buy a 2nd one, right
And, in keeping with the whole "Budget build up / DIY / I'm a cheap #$%!" theme of this thread... I will be designing my sump around a 54g Rubbermaid Brute tote container. I figure I will run this "sump" with about 10 inches of water, so the actual sump water volume should be around 40g... I picked the tote up from HD for a whopping 18 bucks...
Being a cheapskate is SO AWESOME sometimes
Of course, once the skimmer arrives I will put up plenty of pics of the whole plumbing install... I will DIY my own Dursos for the overflow (makes no sense to buy them), and then that basically leaves me just a return pump, a couple of heaters, and 2 buckets of Reef Crystals away from (finally!) filling this sucker UP!!!!!!!!!!!!!!!!
------------- - My Current Tank: 65g Starfire (sitting empty for 2+ years) - * Marine & Reef tanks since 1977 * |
Posted By: tileman
Date Posted: April 12 2008 at 11:20pm
|
I talked to Eric about the Octopus skimmers and he thinks they are awsome. Built just like the euroreefs at half the cost. You'll be happy with it. ------------- 335G Reef TOTM. http://www.advancedaquarist.com/2015/2/aquarium ReefKeepers TOTM Feb. 2012 http://reefkeeping.com/joomla/index....k-of-the-month & |
Posted By: Andreason
Date Posted: April 13 2008 at 8:27pm
|
This is going to be such a fabulous tank! Keep those pics coming! Where did you get the stand and canopy? Beautiful.
Wendy ------------- Andreason's |
Posted By: Corey Price
Date Posted: April 14 2008 at 9:13am
My Octopus skimmer is not bad. I'd like to do the meshwheel mod and get more airflow through it. |
Posted By: BobC63
Date Posted: April 14 2008 at 10:40pm
Wendy -
Got it HERE on the Buy / Sell thread
The fit, finish & craftsmanship really are outstanding - and it was way heavy, too
Another Lehi - er (ite?) I see -
Coooooool
When it's finally up and running you (and everybody else) can come check it out... I'm right by the Smith's near Redwood Rd
P.S. If we keep getting more and more UT Co. people here then maybe we'll finally get our own "Reef Tour" this year
------------- - My Current Tank: 65g Starfire (sitting empty for 2+ years) - * Marine & Reef tanks since 1977 * |
Posted By: BobC63
Date Posted: April 14 2008 at 10:51pm
Corey -
over on RC there is a large thread about doing just 3 mods (meshwheel / enlarge venturi line / bore out the output "elbow") that will get you 40 scfh / 195 lpm of air into a NW200 ------------- - My Current Tank: 65g Starfire (sitting empty for 2+ years) - * Marine & Reef tanks since 1977 * |
Posted By: BobC63
Date Posted: April 14 2008 at 10:54pm
|
DOH!
I totally forgot why I was posting here in the first place
My skimmer didn't come today - but the Fedex update says it arrived from Kentucky to the North Salt Lake Depot at 4 PM today...
which means delivery tomorrow
And I'm off work tomorrow
------------- - My Current Tank: 65g Starfire (sitting empty for 2+ years) - * Marine & Reef tanks since 1977 * |
Posted By: Andreason
Date Posted: April 14 2008 at 11:08pm
|
I didn't notice you were in Lehi, glad to see you are supporting that floor lol we are gonna have water out there this year! We are just down the street from Wing. You got the tank from a person on here huh. Smart :) I got mine from a former member I think, they referred us here. We have a show 90, that was because we did not feel our floor could take the 210. We are now wishing for a 120 (125?) long since we are both so short we can't reach the bottom of the tank lol. ------------- Andreason's |
Posted By: BobC63
Date Posted: April 14 2008 at 11:15pm
|
Well - I'll be selling my 125g tank / stand / canopy cheap as soon as I get the 225 up and running - and you can definitely reach the bottom on it for sure If you run your tank perpendicular to the floor joists you can probably get away without extra support... in my case, where I wanted to put the 225 the joists ran parallel; so without extra supports all that weight would have been on only a single floor joist...
Not a good idea at all
------------- - My Current Tank: 65g Starfire (sitting empty for 2+ years) - * Marine & Reef tanks since 1977 * |
Posted By: sukie
Date Posted: April 15 2008 at 10:23am
| Love the rock work! Keep postin' pictures and updates Bob! |
Posted By: Andreason
Date Posted: April 15 2008 at 11:46am
|
Keep us in mind for your 125, we are inerested!
Did the FedEx man keep his promise? ------------- Andreason's |
Posted By: BobC63
Date Posted: April 15 2008 at 10:13pm
|
Welllllllllllllllllllllllllllllllllllllllllllllllllllllllllll............................. Fedex did not disappoint
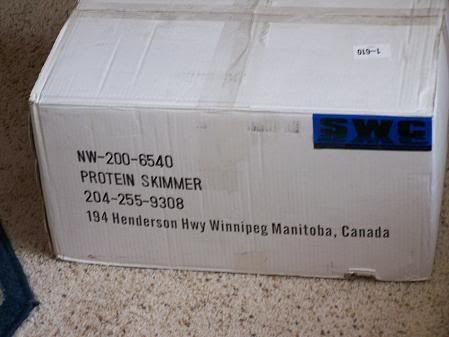 The sump it will call "home":
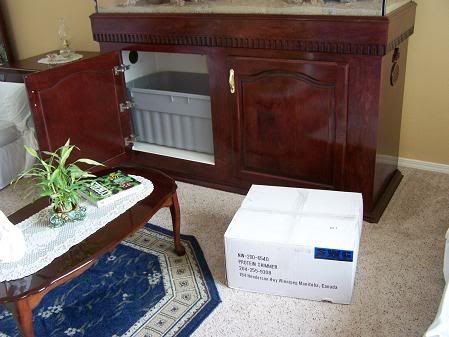 Ready to put together:
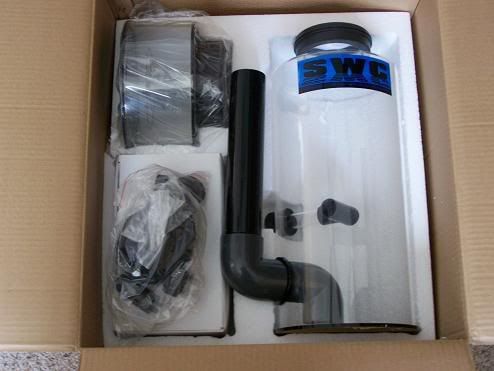 Finished and ready to install
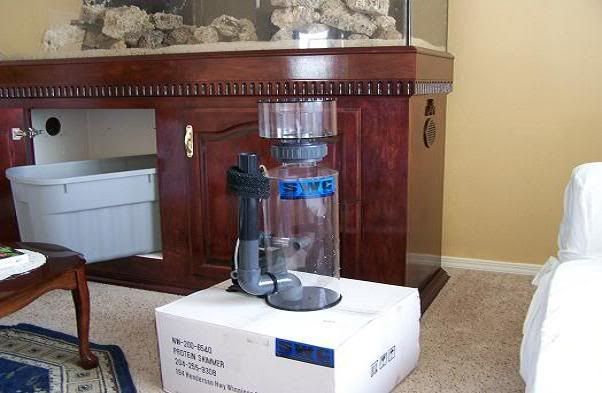 And I 've still got time to do a meshwheel mod and enlarge the venturi and input elbow
fitting to boost this Octo up to around 40 scfh !!!!
------------- - My Current Tank: 65g Starfire (sitting empty for 2+ years) - * Marine & Reef tanks since 1977 * |
Posted By: Mike Savage
Date Posted: April 15 2008 at 10:14pm
|
Cool!
Mike -------------  |
Posted By: BobC63
Date Posted: April 15 2008 at 10:31pm
|
Thanks Mike !
We are getting close now !!!
------------- - My Current Tank: 65g Starfire (sitting empty for 2+ years) - * Marine & Reef tanks since 1977 * |
Posted By: Andreason
Date Posted: April 15 2008 at 10:34pm
|
Wendy ------------- Andreason's |
Posted By: BobC63
Date Posted: April 15 2008 at 10:42pm
The water circulates under the sandbed very verrry slowly but it is not pumped or forced like with undergravel filters... it is basically driven by temperature and density changes.
And someday I'll get a pair of canopy rods or props; I just use the wood because I have it handy.
And right now I'm about 90% sure I will have my return pump as of tomorrow
So that just leaves heaters and salt...
------------- - My Current Tank: 65g Starfire (sitting empty for 2+ years) - * Marine & Reef tanks since 1977 * |
Posted By: soundsurfer
Date Posted: April 15 2008 at 10:53pm
| Everything is looking good. Im jealous, my landlord finally sold our condo and I am thinking about getting the 210.....again. Ha. So lame, I saw one on ksl but it sold so quickly. I am really really missing that Canopy and stand you have though. It was so solid and pretty. and the finish was sweet. Im am going to have to make my own, and its going to look like turd for sure, especially compared to yours. Well, until my dreams come true im going to have to live vicariously through your posts so keep em coming. |
Posted By: BobC63
Date Posted: April 16 2008 at 7:00pm
|
STEP #6 - PLUMBING THE OVERFLOW AND SUMP (Part 1)
Now that I have the skimmer and sump I figure it's high time I get to work on the plumbing
First thing I did was go over to Aquatica and get me 3 1.75" bulkheads - 2 for the drains to the sump and 1 for the return.
Then I hit Home Depot for all the misc. PVC piping, valves and fittings to set up dual Dursos in the overflow and a 4-point overhead return set up:
 First I installed the bulkhead fittings inside the overflow:
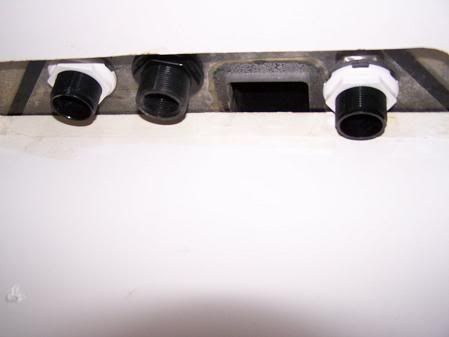 Then I built the Dursos:
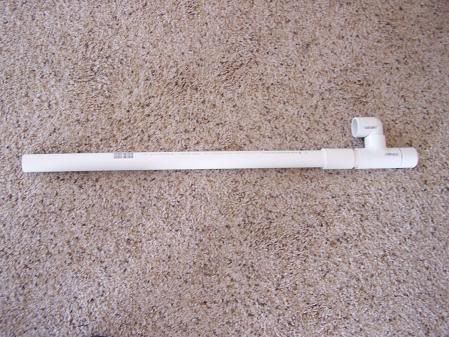 Here's a couple shots of the finished "top end" showing the tops of the Dursos
(yes, I drilled the caps
to return water to the display tank:
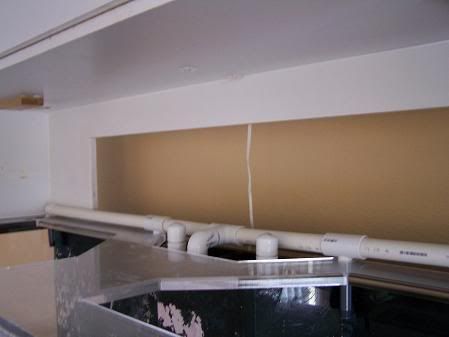 Closeup of the overflow plumbing:
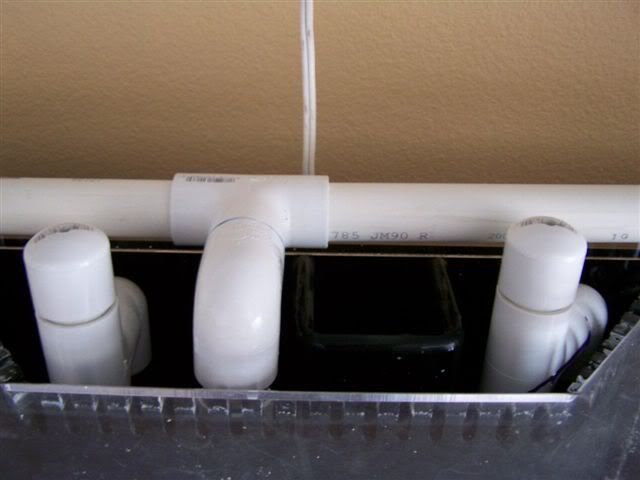 Next up, Part II: Plumbing the sump and return pump
Looks like we're finally getting somewhere
 ------------- - My Current Tank: 65g Starfire (sitting empty for 2+ years) - * Marine & Reef tanks since 1977 * |
Posted By: BobC63
Date Posted: April 16 2008 at 7:57pm
|
Mini Update:
Just got my return pump - delivered, at work! Thanks Mike (RockStarFish)
Things are looking UP !!!
------------- - My Current Tank: 65g Starfire (sitting empty for 2+ years) - * Marine & Reef tanks since 1977 * |
Posted By: BobC63
Date Posted: April 18 2008 at 7:05pm
|
STEP #6: Plumbing the Overflow and Sump (Part II)
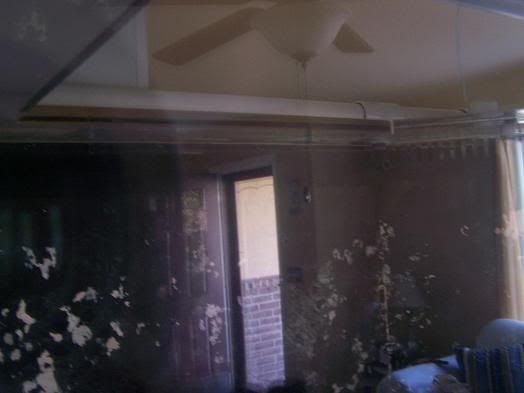
Today I completed the plumbing install for the overflow and sump. First thing I had to do was put in "nozzles" on the returns inside the display tank. I ended up with (4) 1/2" returns feeding off of the 1" main return pipe. In this pic you an just make one out in the upper rear corner of the tank (sorry about the reflection). Each return is only about 1.5" into the water so there is not much hardware to see inside the tank itself - which I think is a good thing:
 Next, I set up the 2 overflow pipes to flow into the left side of the sump. I put a ball valve on each one so I can control the flow rate of each Durso pipe indivdually. Then I placed the skimmer and return pump in and that's pretty much it - just have to add in a "baffle" to regulate the water level on the skimmer side. I'll get to that sooner or later
Here are some shots of the finished sump setup:
(Well, there were gonna be some photos... seems the uploader here is on the "fritz" again ------------- - My Current Tank: 65g Starfire (sitting empty for 2+ years) - * Marine & Reef tanks since 1977 * |
Posted By: BobC63
Date Posted: April 18 2008 at 7:32pm
|
Let's try that again, shall we?
Here is how I hooked up the 2 overflow pipes; one to the front and one to the rear of the sump:
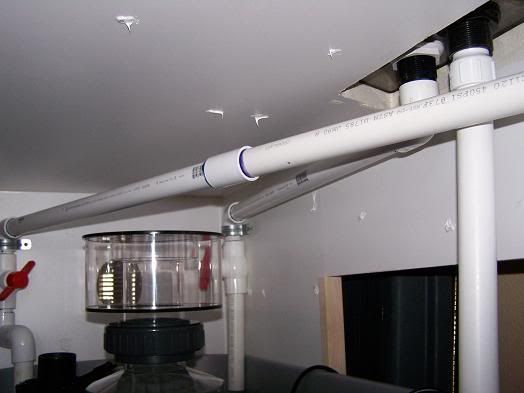 The ball valves will control each standpipe individually and I'll throw a filter sock on each of the discharges:
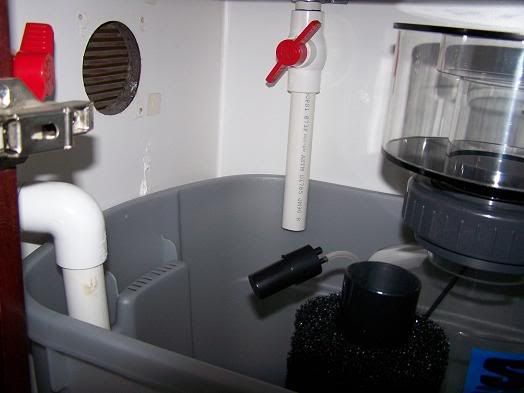 Here's where the return pump is hooked up to the piping:
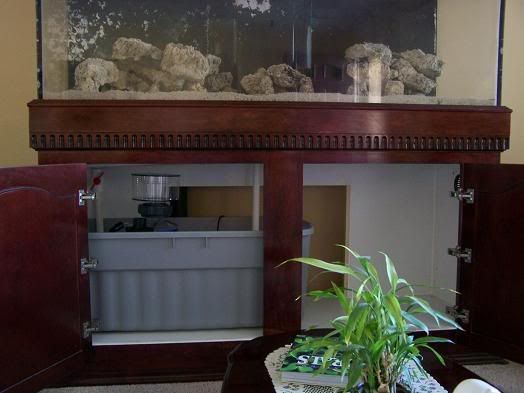
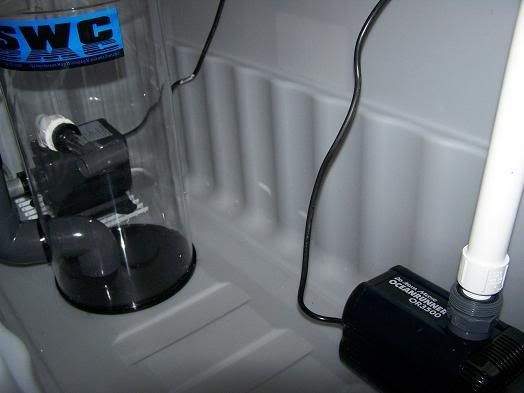 Here's a full shot of the completed sump and plumbing:
 I may just enclose the skimmer inside a smaller tote container as a way to regulate the water level around the skimmer; it would probably be easier than tying to glue in some kind of standard baffle into a Rubbernmaid tote.
My return is an Ocean runner 3500. Accodring to the Aquamedic site I will still get around 675 - 750 gph out of it even @ 5.5 feet of head (I am running a little over 5 feet) so that would mean around 3X total water volume turnover / hour through the sump - and that's about what I am looking for. My 3 Korallias alone will net me over 10X total volume turnover so I think I am good on flow. I would actually like the display to be a little less "chaotic" in terms of current than my 125g is now so that some of my LPS would open up a bit more than they do now.
I also ordered a float valve setup for auto top-off purposes and a refill for my DI resin cartridge. Right now I have to manually fill up a 5 gal reservior that sits on top of my entertainment center and runs a drip line into the sump of my 125. There have been a couple of times where I turned my RO / DI on to fill the reservior and forgot to shut it off - needless to say the missus was not pleased to find water dripping down the stereo and soggy carpet in the area
Next, on to the heaters...
After that it's basically just salt and then fill 'er up time!
------------- - My Current Tank: 65g Starfire (sitting empty for 2+ years) - * Marine & Reef tanks since 1977 * |
Posted By: MadReefer
Date Posted: April 18 2008 at 7:51pm
| Do you have a hole through the floor for future additions? It would be nice to have a big fuge in the basement. Also you could setup a full wet room and just have the display upstairs. |
Posted By: Mike Savage
Date Posted: April 18 2008 at 8:40pm
|
I think the smaller tote container for the skimmer would be a good way to go.
Mike -------------  |
Posted By: sumostorm
Date Posted: April 20 2008 at 9:04am
|
WHAT?? No more? More more more more more. Give me more!!!
I just found this thread and am freaking out that there is no more info or pics and its been two days!!
|
Posted By: Mike Savage
Date Posted: April 20 2008 at 12:48pm
|
Yeah, Bob. What's up with that!
Mike -------------  |
Posted By: Andreason
Date Posted: April 20 2008 at 3:17pm
|
Get your salt! ------------- Andreason's |
Posted By: BobC63
Date Posted: April 20 2008 at 7:17pm
|
Part #6: Plumbing the Overflow and Sump (Part III) On Saturday I added the skimmer "compartment" to the sump... Basically, a tote within a tote. Here are a couple of shots so you get the idea:
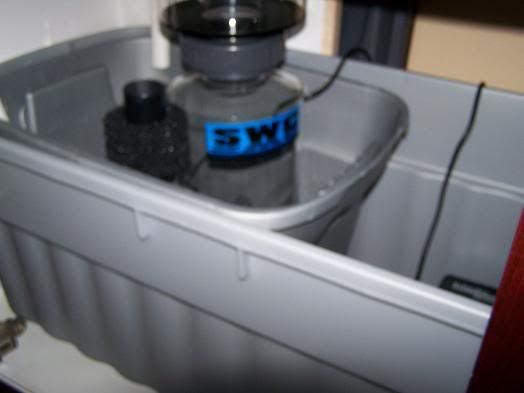 This one shows the opening where the water will leave the inner compartment into the rest of the sump... The basic idea is that the water level in the skimmer compartment has to rise to the level of the exit opening in order to escape; this means that with a steady flow of incoming water from the overflow pipes the water level inside the skimmer compartment will always be at the exact level of the exit opening - in cases of evaporation loss the water level will fluctuate in the outside compartment rather than the inner compartment:
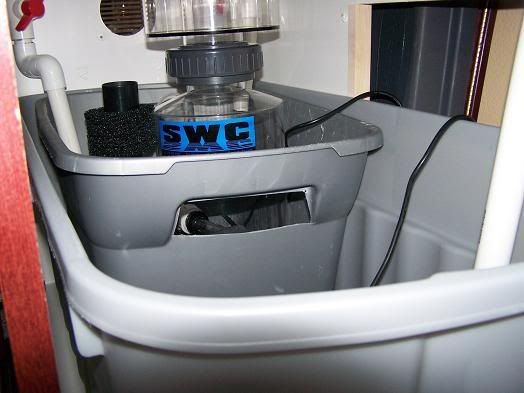 BTW the height on that exit starts at 10 inches from the bottom - the recommended water level height for this Octopus Skimmer. I figure to run the rest of the sump right around the same height and plumb my RO/DI topoff right into the sump; in fact, my float valve came in the mail Saturday (and I only ordered it Thursday afternoon - man, that's fast service
--------------------------------------------------------------------------------------------------------------
On a side note, I also went out and bought a 200g bucket of the Kent Marine salt advertised up in the commercial posts... I figured A) $35 for 200g of salt is a pretty good deal and B) Although I usually use Reef Crystals, & ordinarily I get my salt online when there is free shipping, the 160g bucket of Reef Crystals online is around $37 and that's even with free shipping.
So, I figure to use the Kent mix in the initial fillup (plus I still have almost half a bucket - 80g worth?- of Reef Crystals salt left as well) and then just go back to Reef Crystals for WCs doing probably 30g at a time (once a month)... I guess I need to pickup a pair of new 30g - ish garbage cans (one for newwater and one for the waste water...)
So, long story short, it looks like I'm just a couple of heaters away from the fill up now
Thinking of going with these Hydor models:
http://www.drsfostersmith.com/product/prod_display.cfm?c=3578+3743+11368&pcatid=11368 - http://www.drsfostersmith.com/product/prod_display.cfm?c=3578+3743+11368&pcatid=11368
What I like about these - beside the design - is they come in up to 400w models... right now I have (2) 300w heaters in the sump of my 125g... so I figure (2) 400w heaters should keep things nice and toasty all year long...
Whaddya think?
------------- - My Current Tank: 65g Starfire (sitting empty for 2+ years) - * Marine & Reef tanks since 1977 * |
Posted By: Andreason
Date Posted: April 20 2008 at 8:38pm
|
Go man go! This is like a soap opera, we are addicted. Glad you got your salt, and yeah those are some sweet heaters. We just got a 300 Watt hydor for our 90 and it was not easy to find. ------------- Andreason's |
Posted By: sumostorm
Date Posted: April 21 2008 at 2:02am
|
As the 225 turns. Thanks for the update! more soon I hope! |
Posted By: BobC63
Date Posted: April 22 2008 at 12:06am
|
Just wanted to let everyone know I just ordered my 2 Hydor "Theo" 400w heaters from ThatFishPlace.com... they beat FostersandSmith's price by 50 cents a heater (Hey, a buck's a buck Should be here (hopefully) by the weekend
I guess I better get started on running that water line as I could start filling the tank once they arrive
Hmmm....should I ???
------------- - My Current Tank: 65g Starfire (sitting empty for 2+ years) - * Marine & Reef tanks since 1977 * |
Posted By: soundsurfer
Date Posted: April 22 2008 at 12:13am
| EEEEEEE....im so excited. Yeah, Im going to go home for a weekend to my parents house and start building a stand and canopy for my future 210 AGA tank. Yours is looking sweet. Im ready to see that thing filled and you in there with a snorkel. :) I think half the fun about threads is the build. I like yours is spaced out just enough to make us want more but not too long in between where we are bored. |
Posted By: Mike Savage
Date Posted: April 22 2008 at 8:07am
|
Absolutely you should. It's time to get water in that thing!
Mike -------------  |
Posted By: john hill
Date Posted: April 22 2008 at 10:26pm
|
fill er up ------------- out with the large and in with the nano |
Posted By: BobC63
Date Posted: April 23 2008 at 1:36am
|
OK guys, here's the plan...
Let me know if I am overlooking anything, OK?
I figured what I would do is once the heaters arrive I'll start to fill the display up with RO/DI, only up to the overflow line, but leave the sump empty and just open up the drain valves on the Durso's. Throw in my heaters and a powerhead or 2 into the display, and mix up the SW. Once that is ready, salinity / temp / pH matching that of the 125 and sits for a day or 2, then I'll start adding in the LR from the 125... as the LR goes in, the water level should rise and the excess water will go into the overflow and down into the sump. This way I don't have to worry about flooding the floor with 10 gallons of "spillover" from rock displacement or constantly emptying water from the display everytime I put another piece of LR in ...
Once all the LR is in I'll just fill the sump the rest of the way using some tank water from the 125 to make up the difference; basically "seeding" the 225 with LR and live water from the 125 - and I'll put maybe 20 lbs of LS from the 125 into the "fuge" section of my sump, and maybe a few cups of LS into the display as well, all to help "seed" the new sandbed in the 225. Once that is all done, then I can turn on the skimmer and return pumps, move over the Korallias and turn them on, move over the lighting, unplug the heaters and place them in the sump instead of in the display, siphon out most of the remaining water in the 125 so it is easier to catch the fish in there, and then move all the fish and corals to the 225 (acclimating them first, of course) From there I just let everything in the 225 settle down while I spend the rest of the day tearing down the 125... That's basically the plan. And, if my heaters get here by Friday I may start this all on Saturday...although it will take probably 3 1/2 days of running the RO /DI just to fill the display. or Maybe I should start sooner?
 ------------- - My Current Tank: 65g Starfire (sitting empty for 2+ years) - * Marine & Reef tanks since 1977 * |
Posted By: Mike Savage
Date Posted: April 23 2008 at 7:22am
|
I say start sooner. The heaters can be installed Saturday.
Mike -------------  |
Posted By: Jeff Morrill
Date Posted: April 23 2008 at 8:56am
|
Im with Mike, Sooner is better. ------------- WHAT KINDA GUM????... Give em 2 sticks. |
Posted By: Jeff Morrill
Date Posted: April 23 2008 at 8:58am
|
Oh yeah, you forgot to turn on your lights.... ------------- WHAT KINDA GUM????... Give em 2 sticks. |
Posted By: tamortman
Date Posted: April 23 2008 at 9:23am
|
use all the water in the 125 then you don't have to make as much plus you have water in there that your fish like. ------------- 210/75g inwall reef 1500-2000g pond Herriman |
Posted By: Andreason
Date Posted: April 23 2008 at 9:29am
|
Definitely start sooner. I don't think we can wait that long!
Question though, with all the new sand and rock won't the tank need to cycle for a long time like a new tank? How do you know when it is ready for fish etc? ------------- Andreason's |
Posted By: fj40fax
Date Posted: April 23 2008 at 11:52am
|
I'm with tamortman. the more water you use from the 125 the easier it will be on 'dem fishies
------------- Fax 318-3632 90g 2x250W 14kK MH Sump, Fuge, G3, UV, O3, ACIII Pleasant Grove, UT Across State Street from the Purple Turtle Adjustments and Massages for Frags! |
Posted By: BobC63
Date Posted: April 23 2008 at 5:54pm
|
Yeah, you have point, guys...
Although if I am putting in 150+ lbs of active LR and maybe 5 - 10 lbs of live sand into the display, plus another 20 - 25 lbs of live sand in the sump / fuge, plus at least 20g of live water in the sump...
I don't think - given I only have like 10 small fish and some corals - I wouldn't expect to have to endure a "hard" cycle in the 225 once up and running. Do you think I am too optimistic about that?
However, since the total water volume in the 125 setup is probably around 135g (including sumps) maybe I would be better off if I filled the 225 halfway with new SW (like 100g worth), then on "moving day" I can first drain my 30g sump from the 125 into the 225 (now up to 130g of water inside the 225 at this point), then add about 70g from the 125 to fill the 225 all the way... (Just thinking out loud here
Continuing from there with the relocation of the LR from the 125, then adding a little sand, then filling the remainder of water into the 225 sump (maybe another 30g)...
That would leave the 125 empty except for maybe 25g of water, most of the sandbed and the fish and corals of course. Considering I could pump the water from the 125 straight into the 225 with my Oceanrunner pump it shouldn't take more than about 10 minutes to pump over the 100g from 1 tank to the other; so water cooling / stagnation / O2 depletion in the 125 shouldn't even be an issue in that short time...
Doing it like that also relieves me of having to dispose of 100+ g of SW as well. Seems like a good idea, guys...
As far as heating that new SW, I guess I could pull 1 of the 300w heaters from the 125 sump and use it to heat the new SW for the 225 - a 300w heater should be able to get the water temp up to around 78F in 100 g of water, right?... I do also have a small 75w heater that I could throw in the 125 sump to help keep the 125 temp stable until moving day...
I have spare powerheads so I'll just put a couple into the half -filled 225 to circulate the water and homogenize the salinity and water temp...
Hmmmmm... something to think about for sure.
-------------------------------------------------------------------
On a side note, I still need to get myself over to HD and pick up a needle valve or 2 so I can relocate my RO / DI from the kitchen to the Front Room inside that storage table that came with the tank. If I can get that done by Friday I can start filling the 225 up; at least to around 100g worth so I can make up the new SW I will be needing...
------------- - My Current Tank: 65g Starfire (sitting empty for 2+ years) - * Marine & Reef tanks since 1977 * |
Posted By: cl2ysta1
Date Posted: April 23 2008 at 6:23pm
|
i very highly suggest waiting 24 hours before placing fish and corals in the new tank. Every tank i've ever moved has a mini cycle that goes on the first 24 hours with an ammonia spike. which very well can kill your fish. JMO ------------- I <3 Boxers Achilles tang lover |
Posted By: Mike Savage
Date Posted: April 23 2008 at 9:35pm
|
I've not had that problem. I would do a water change on the 125 to help start the 225. I like the idea of live water to help with that active live rock. Two or 3 days later you can use the 125 to finish filling up the tank.
Mike -------------  |
Posted By: BobC63
Date Posted: April 23 2008 at 9:39pm
Well, then "there's the rub!" as Shakespeare would say ...
This is one of the reasons I figured to mix up a whole (225 gal) tankful of new water - so that I could put some LR / LS in it and then let is sit for several days before adding the livestock...
So then the question becomes -
To those suggesting I "reuse" the 125s water in the 225 - How do you propose I remove the water from one tank to the other without removing the livestock shortly thereafter? I mean, I can't drain 3/4 of the water out of the 125 and leave corals and fish in the remaining 1/4 and expect to have functional heating / filtration / water movement in 6 inches of water...?
To Crsytal, just some clarification... when you moved tanks and got your spike, did you move a sandbed along with it? Did you move all the LR as well? How high was the bioload of the tank you moved? Right now I have only 10 fish (largest at 3 in long) in my 125; along with a decent amount of coral, 3 clams, 1 shrimp and some hermits / snails - I would consider my current bioload on the low side in my 125 and will be even lower when moved into the 225...I guess what I am asking is if I decided to move my 150+ lbs of LR and maybe 30 lbs of live sand and 30g of established "live" tank water into an otherwise sterile 225 with a sterile sandbed and sterile base rock...what would be driving a spike? The bioload of 9 fish? (I'm not putting my YT Damsel into the 225) You don't think that the 150 lbs of seasoned LR would be able to handle the load?
I don't disagree with your idea of avoiding a spike, but I'm wondering (judging by photos I have seen of your very nice setups) if your spiking issues were not due to the amount of bioload in the tanks you were moving more than the moving itself?
------------- - My Current Tank: 65g Starfire (sitting empty for 2+ years) - * Marine & Reef tanks since 1977 * |
Posted By: Mike Savage
Date Posted: April 23 2008 at 9:47pm
|
In that case I would do as large a water change as you feel comfortable with on the 125 and use that water to "seed" the 225. Maybe 30-40 gallons?
Mike -------------  |
Posted By: BobC63
Date Posted: April 23 2008 at 9:55pm
I was kind of leaning in that direction, too, Mike...
A) Fill the 225 halfway with new SW. Let it run for a couple of days to get temp / salinity / pH / etc to match the environment in the 125. After first 24 hrs gently scoop out maybe 10 lbs of LS from the 125 display and add to the 225 display to "seed" the sandbed. Maybe add some "water change" water from the 125 at this time as well...
B) Then (all on the 3rd day):
1) Turn off all pumps, filters, heaters in the 125. Transfer the 30g of 125 sump water + maybe 75g of 125 display water to the 225 to fill it to the top.Leave the sump empty but open the overflow ball valves to allow excess water displaced by the addition of LR to enter the sump, rather than overflow the tank and flood the floor
2) Transfer all the LR from the 125 to the 225
3) Fill up the 225 sump with another maybe 20 -30g of 125 display water. Remove another 20 lb of LS from the 125 and place in the fuge portion of the 225 sump. Once sump water clears up (from adding the sand) start up the return pump, skimmer, etc
4) Transfer the Korallias from the 125 to the 225 and start them up
4) Remove all corals from the 125 and transfer to the 225
5) Remove the 9 fish from the 125 and transfer to the 225
6) Transfer the lighting from the 125 to the 225 but leave them off for the rest of the day
7) Let the 225 settle down while I dismantle the remainder of the 125 (sumps, filtration, remove the other 200 lbs of live sand, etc
Right now I am of the mindset that following this plan should not result in any noticeable "spike" since I would be adding established live sand and a large quantity of established live rock - not to mention more than 50% of the toal water volume would be "live" water - all to offset a very light bioload in terms of only 9 small fish in probably 235g of total water volume...
------------- - My Current Tank: 65g Starfire (sitting empty for 2+ years) - * Marine & Reef tanks since 1977 * |
Posted By: Mike Savage
Date Posted: April 23 2008 at 9:59pm
|
You will get a spike but it should be minimal. You should also get a short lived diatom bloom. Have you tested the system with plain water yet to make sure everything works and there are no leaks?
Mike -------------  |
Posted By: BobC63
Date Posted: April 23 2008 at 10:06pm
|
Not yet Mike... I figure that once I move my RO / DI I'll start filling... and first I'll put maybe 3 gal into the overflow compartment to make sure the bulkheads don't leak... then I'll fill the overflows completely, leaving the ball valves closed, to test all the discharge pipng for leaks... next, I'll open the valves and let water run into the sump. I'll fill the sump halfway up and turn on the return pump briefly to check the return system for leaks. If all goes well then I'll just leave the RO / DI line in the tank until it gets to the halfway point; then add salt, heaters, and a couple of powerheads and let it all mix up for 48 hrs ...
I know I'll see a minor spike just due to the change in enviroments, but I would not anticipate a major ammo problem causing fish death(s)...
------------- - My Current Tank: 65g Starfire (sitting empty for 2+ years) - * Marine & Reef tanks since 1977 * |
Posted By: Mike Savage
Date Posted: April 23 2008 at 10:42pm
|
An amonia spike would come from die-off. If the rock is well cured and there is little to no die-off then I would expect little to no amonia spike. Mike -------------  |
Posted By: BobC63
Date Posted: April 23 2008 at 10:45pm
|
I'm thinking if I am using the LR that is currently in my 125 there should (hopefully) be zero die-off from that rock, No?
------------- - My Current Tank: 65g Starfire (sitting empty for 2+ years) - * Marine & Reef tanks since 1977 * |
Posted By: tamortman
Date Posted: April 23 2008 at 11:29pm
If you put water in the 225 then sand from you 125 you are not going to be able to see anything as if it isn't hard enough to get the rock right when you can see what you are doing in both my tank moves i never had a spike i did it all in one day i even mix my salt water the same day i had like 5 totes of the rock and fish all the live stuff then put all the live water in the totes cleaned the sand i was afraid that would give me the spike. Then put in old and new sand rock and then all the old water and then new water floated the fish and they all did great. that is what has worked for me twice i'm sure there is a few ways that will be just fine. I don't care how you do it just do it i am sick of waiting for pic's in both my tank moves i never had a spike i did it all in one day i even mix my salt water the same day i had like 5 totes of the rock and fish all the live stuff then put all the live water in the totes cleaned the sand i was afraid that would give me the spike. Then put in old and new sand rock and then all the old water and then new water floated the fish and they all did great. that is what has worked for me twice i'm sure there is a few ways that will be just fine. I don't care how you do it just do it i am sick of waiting for pic's ------------- 210/75g inwall reef 1500-2000g pond Herriman |
 bannshy wrote: