| Author |
 Topic Search Topic Search  Topic Options Topic Options
|
Chad 
Guest

Joined: July 06 2006
Location: West Valley
Status: Offline
Points: 3260
|
 Post Options Post Options
") Thanks(0) Thanks(0)
 Quote Quote  Reply Reply
 Topic: LED build thread Topic: LED build thread
Posted: May 08 2010 at 10:47pm |
So I got my LED's and drivers today and I am going to post my progress in this build thread. First off I need to thank The fu for all of his help with answering all of my questions and helping me figure out what to use and where to get them. If you are reading this Terrance Thanks again and I hope I wasn't too much of a pain with all of my questions.
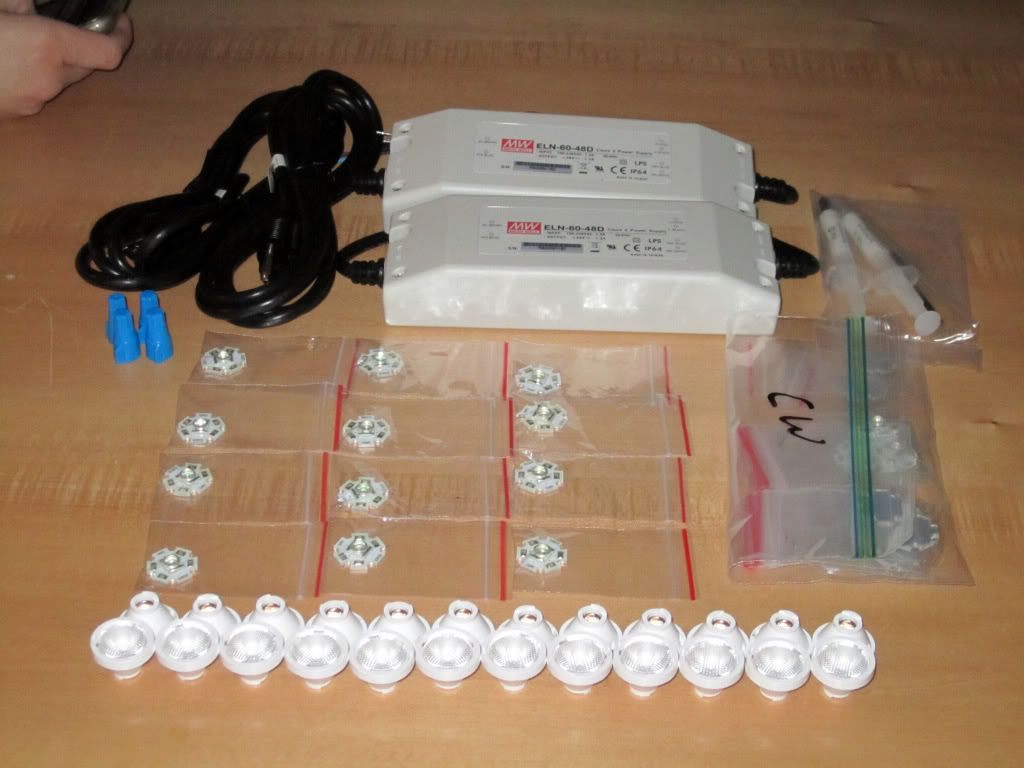
So here are some pics of the kit but I don't have my heat sink yet so I won't be able to start the actual build until it arrives but I wanted to start the thread and update it with a lot of pics as I put it together.
So here are my drivers (mean well eln 60 48D dimmable drivers)
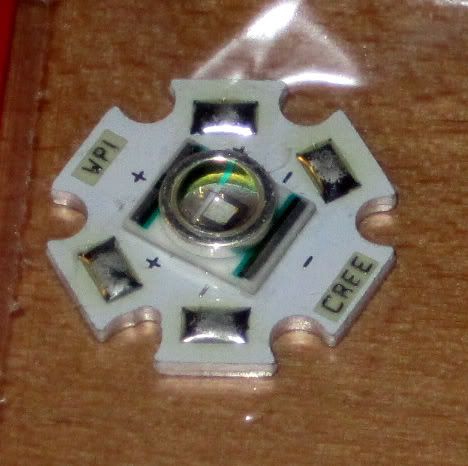
Here are the Cree XR-E LED's 12 Royal Blue and 12 Cool White
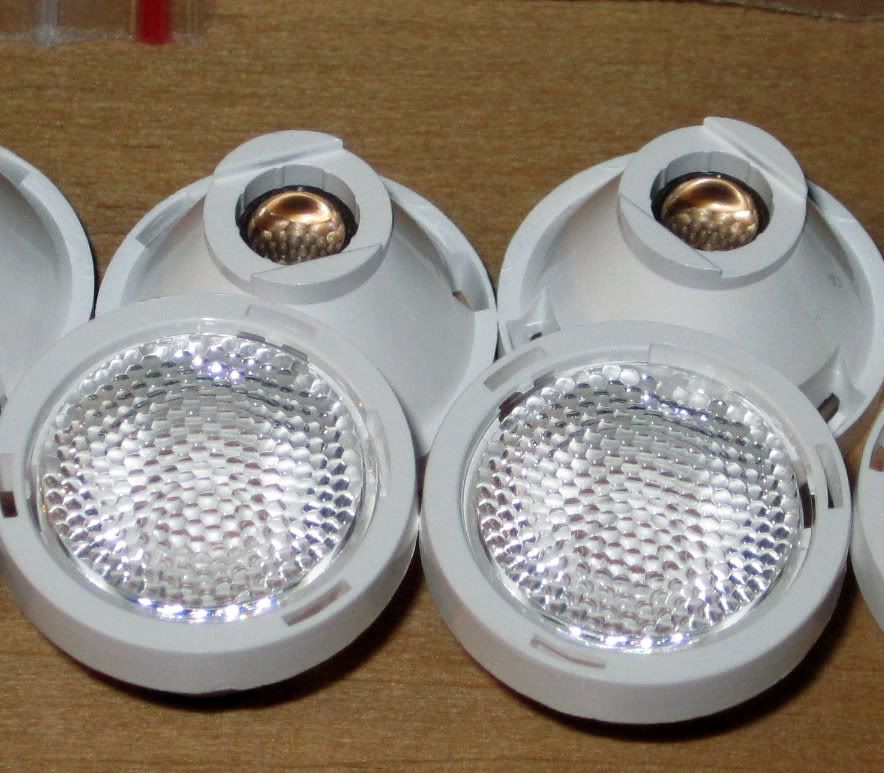
Here are the 60 degree optics
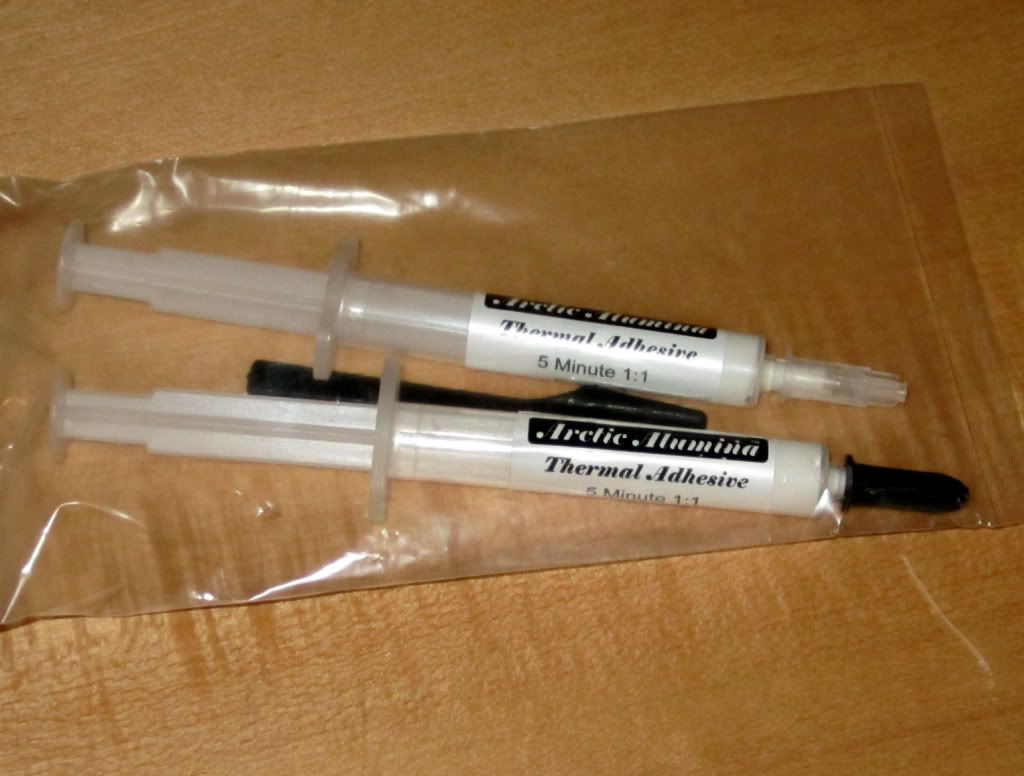
Thermal adhesive to attach the Star Plates to the heatsink
I am still waiting for my heatsink, power supplies and dimmers to arrive and then I will update with new pics and my progress with the build.
Feel free to post comments and ask questions. Thanks, Chad.
Edited by Chad - May 08 2010 at 10:48pm
|
|
What?! You pooped in the refrigerator, and ate the entire wheel of cheese?! I'm not even mad.... That's actually amazing!
|
 |
Chad
Guest
Joined: July 06 2006
Location: West Valley
Status: Offline
Points: 3260
|
Post Options
Thanks(0)
Quote Reply
Posted: May 08 2010 at 10:59pm |
Not sure if I am going to use the thermal adhesive or not yet. I might still order some Berquist thermal pads instead of the thermal adhesive but I already have the thermal adhesive so I might use it just because I have it.
Also I have the plugs to hook up to my power supply although I might be a 10v power adapter that plugs right into the wall rather than wiring this wires to a power supply. Again I'll post more info and pics as I start to work on the project a little more.
Chad.
|
|
What?! You pooped in the refrigerator, and ate the entire wheel of cheese?! I'm not even mad.... That's actually amazing!
|
|
Aquarium Creations
Pet Store

Joined: August 20 2003
Location: DRAPER
Status: Offline
Points: 3234
|
Post Options
Thanks(0)
Quote Reply
Posted: May 08 2010 at 11:23pm |
|
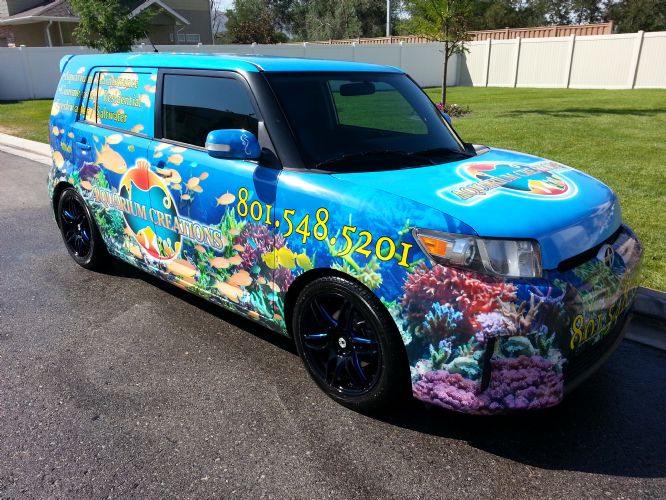
How much are you into all of this? Where ii you get the supplies from?
|
Aquarium Maintenance,Consulting,Custom Built Glass Aquariums Rimless/Euro,24Hr Emergency Service 8015485201 Www.UtahAquariumDoctors.com [email protected]
|
|
DanhNgo
Guest

Joined: January 04 2009
Location: West Valley Cty
Status: Offline
Points: 1013
|
Post Options
Thanks(0)
Quote Reply
Posted: May 09 2010 at 12:37am |
Awesome Chad. I'll be checking this thread regularly. I would like to do one for my little nano soon.
Danh
|
|
200 Gal Reef
25 Gal Nano Reef
|
|
Chad
Guest
Joined: July 06 2006
Location: West Valley
Status: Offline
Points: 3260
|
Post Options
Thanks(0)
Quote Reply
Posted: May 09 2010 at 4:13am |
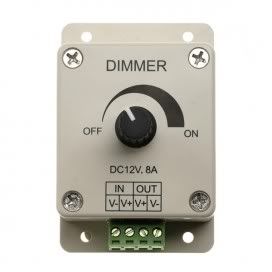
Here are the dimmers I ended up going with
I also found some really cheap wall adapters to get my power to the 10V supply that I needed for the drivers. For 2 of them I paid $13 after shipping.
So far I am into the whole project $399.55, but I still need to get some solid core wires to wire up the LED's and I need some heat shrink wrap when I wire up my dimmers and power supply to the drivers but I don't think that stuff will cost me much more.
The heat sink is kinda what is killing me on the price it was $95.55 just for the heat sink from heat sink usa. It didn't sound too bad until I found out I had to pay a cut charge and because it's big and heavy the shipping was another $25.
|
|
What?! You pooped in the refrigerator, and ate the entire wheel of cheese?! I'm not even mad.... That's actually amazing!
|
|
bugzme
Guest

Joined: May 22 2004
Location: West Jordan
Status: Offline
Points: 4815
|
Post Options
Thanks(0)
Quote Reply
Posted: May 09 2010 at 7:33am |
|
What size tank are you building this for?
|
|
Jeff
125 tank
50 gallon sump
T-5 lighting
Rum drinker, Carbon User
I KNOW ROCKS THAT ARE YOUNGER THEN ME!! I AM A Realist! I write what I think!!
|
|
Chad
Guest
Joined: July 06 2006
Location: West Valley
Status: Offline
Points: 3260
|
Post Options
Thanks(0)
Quote Reply
Posted: May 09 2010 at 7:39am |
|
36" x 18" x 18"
|
|
What?! You pooped in the refrigerator, and ate the entire wheel of cheese?! I'm not even mad.... That's actually amazing!
|
|
sterling18
Guest

Joined: December 29 2008
Location: West Jordan
Status: Offline
Points: 600
|
Post Options
Thanks(0)
Quote Reply
Posted: May 09 2010 at 9:08am |
|
How big of a heat sink do you need? I might be able to help you with heat sinks in the future. I wished we talked about this yesterday. I know where to get surplus heat sinks, not in the size you're looking for but I think you can fabricate it from smaller units using thermal paste an or aluminum housing.
With server going virtual these days and the average life cycle of servers, there are tons, and I mean tons of surplus server grade parts floating around.
Let's chat.
Edited by sterling18 - May 09 2010 at 9:09am
|
|
Aquarium Creations
Pet Store
Joined: August 20 2003
Location: DRAPER
Status: Offline
Points: 3234
|
Post Options
Thanks(0)
Quote Reply
Posted: May 09 2010 at 11:01am |
|
What are the watts on the led?
|
Aquarium Maintenance,Consulting,Custom Built Glass Aquariums Rimless/Euro,24Hr Emergency Service 8015485201 Www.UtahAquariumDoctors.com [email protected]
|
|
badfinger
Guest
Joined: May 18 2009
Location: Murray, UT
Status: Offline
Points: 2079
|
Post Options
Thanks(0)
Quote Reply
Posted: May 09 2010 at 12:30pm |
|
Chad can correct me if I am wrong but I belive cree x-re's are 5 watts
|
|
Chad
Guest
Joined: July 06 2006
Location: West Valley
Status: Offline
Points: 3260
|
Post Options
Thanks(0)
Quote Reply
Posted: May 09 2010 at 5:33pm |
They are actually 3 watt's each led. Peter, that would be awesome, I am hoping to be able to build a few more of these throughout the rest of this year and if you can help me save some money on heat sinks that would be great! Did you get the MH hung and ready to go? Thanks again. Chad.
|
|
What?! You pooped in the refrigerator, and ate the entire wheel of cheese?! I'm not even mad.... That's actually amazing!
|
|
sterling18
Guest
Joined: December 29 2008
Location: West Jordan
Status: Offline
Points: 600
|
Post Options
Thanks(0)
Quote Reply
Posted: May 09 2010 at 6:56pm |
 Chad wrote: Chad wrote:
They are actually 3 watt's each led.Peter, that would be awesome, I am hoping to be able to build a few more of these throughout the rest of this year and if you can help me save some money on heat sinks that would be great! Did you get the MH hung and ready to go? Thanks again. Chad. |
As for the light, not even close, maybe in about 2 weeks. I just finished my stand today. Yea, let's catch up on the heat sinks I'm sure between the two of us we can figure something out.
|
|
Chad
Guest
Joined: July 06 2006
Location: West Valley
Status: Offline
Points: 3260
|
Post Options
Thanks(0)
Quote Reply
Posted: May 10 2010 at 2:55pm |
Got my heat sink in today and I am going to start putting stuff together, as soon as my power supplies and dimmers get here I should be ready to fire these guys up.
Edited by Chad - May 11 2010 at 1:37am
|
|
What?! You pooped in the refrigerator, and ate the entire wheel of cheese?! I'm not even mad.... That's actually amazing!
|
|
bugzme
Guest
Joined: May 22 2004
Location: West Jordan
Status: Offline
Points: 4815
|
Post Options
Thanks(0)
Quote Reply
Posted: May 10 2010 at 4:46pm |
|
Pic doesn't show up
|
|
Jeff
125 tank
50 gallon sump
T-5 lighting
Rum drinker, Carbon User
I KNOW ROCKS THAT ARE YOUNGER THEN ME!! I AM A Realist! I write what I think!!
|
|
Nick801
Guest

Joined: July 03 2008
Location: Sandy
Status: Offline
Points: 4155
|
Post Options
Thanks(0)
Quote Reply
Posted: May 10 2010 at 6:40pm |
|
Chad can't wait to see this thing up and going =) I might need a few tips on my build once my parts show up I've received the leds and thermal pads but thats about it
|
|
|
|
Chad
Guest
Joined: July 06 2006
Location: West Valley
Status: Offline
Points: 3260
|
Post Options
Thanks(0)
Quote Reply
Posted: May 11 2010 at 1:50am |
So I started putting everything together, I don't have my power supplies or dimmers yet but everything else is done and ready to go.
So here's what I did:
First I got my layout on the heat sink and figured out where I wanted my LED's to go. I decided to space them 2.5" each way from each other. I think in the future I might add a 3rd row to the back of the heat sink to make this fixture even that much brighter.
|
|
What?! You pooped in the refrigerator, and ate the entire wheel of cheese?! I'm not even mad.... That's actually amazing!
|
|
Chad
Guest
Joined: July 06 2006
Location: West Valley
Status: Offline
Points: 3260
|
Post Options
Thanks(0)
Quote Reply
Posted: May 11 2010 at 1:56am |
I used 2 part 5 minute cure thermal adhesive to mount my LED's to the heatsink just mix equal parts of the adhesive and smear some on the back of the LED's and stick them in place and press them down tight.
|
|
What?! You pooped in the refrigerator, and ate the entire wheel of cheese?! I'm not even mad.... That's actually amazing!
|
|
Chad
Guest
Joined: July 06 2006
Location: West Valley
Status: Offline
Points: 3260
|
Post Options
Thanks(0)
Quote Reply
Posted: May 11 2010 at 2:06am |
Then I cut out my solid core wires to the correct lengths and got some solder ready
Edited by Chad - May 11 2010 at 2:07am
|
|
What?! You pooped in the refrigerator, and ate the entire wheel of cheese?! I'm not even mad.... That's actually amazing!
|
|
Chad
Guest
Joined: July 06 2006
Location: West Valley
Status: Offline
Points: 3260
|
Post Options
Thanks(0)
Quote Reply
Posted: May 11 2010 at 2:15am |
Here is the first piece of wire I soldered in, this was my first time soldering so I won't try to give any advice in that area! The LED's are wired in a series meaning you go from the driver positive to the positive on the first LED and then from that LED's negative to the positive on the next LED and continue wiring the rest of the LED's like that then the last LED goes from the negative to the negative wire on the driver. So I had to criss cross my wires to get all of my white LED's on one driver and all of the blue's on the other driver so I can control them separately with my separate dimmers.
Edited by Chad - May 11 2010 at 2:20am
|
|
What?! You pooped in the refrigerator, and ate the entire wheel of cheese?! I'm not even mad.... That's actually amazing!
|
|
Chad
Guest
Joined: July 06 2006
Location: West Valley
Status: Offline
Points: 3260
|
Post Options
Thanks(0)
Quote Reply
Posted: May 11 2010 at 2:22am |
|
I don't have a pic of just the led's not running wired in series so I will get a pic of them tomorrow and post so it's easy to see how they are running.
|
|
What?! You pooped in the refrigerator, and ate the entire wheel of cheese?! I'm not even mad.... That's actually amazing!
|
|