400 Gallon Starphire Build - Mixed Reef
Printed From: Utah Reefs
Category: Main
Forum Name: Tank Threads
Forum Description: A place to show off your tank build.
URL: http://www.utahreefs.com/forum/forum_posts.asp?TID=66993
Printed Date: April 19 2024 at 5:44am
Software Version: Web Wiz Forums 12.03 - http://www.webwizforums.com
Topic: 400 Gallon Starphire Build - Mixed Reef
Posted By: love2skiutah
Subject: 400 Gallon Starphire Build - Mixed Reef
Date Posted: October 07 2013 at 6:15pm
|
I had completely given up on this tank more than once with it being broken 2 times and another delay during the Summer. If I did not had the support of several fish store owners and handful of other local hobbyists keeping my spirits up, this would have never happened and I would be out of the hobby completely. For that, I thank you and you know who you are. Well, here we go... Been in the hobby since 2000. I've had nanos and a 120 mixed reef. This is going to be a mixed reef build focusing on mainly SPS and some  . I'm sure I will run into some bumps, but I've got a lot of advice from local hobbyist's and store owners. Anyway, thanks for following and enjoy. . I'm sure I will run into some bumps, but I've got a lot of advice from local hobbyist's and store owners. Anyway, thanks for following and enjoy.So I've basically come up with some guidelines for myself I want for my tank now and as time goes on. I've taken what I like from some of the best tanks in the world and pieced together this build. Here is what I've come up with. With my White sand bed... No crabs or snails No corals in the sand, everything will be attached to the rock Every piece of rock structure will be 4 inches away from any wall. I want fish to be able to swim in front and behind. Quarantine every piece of livestock for 3-4 weeks I've seen many tanks successfully ran this way, so I'm going to try it. I put the tank on the stand last weekend and hopefully I will get to start plumbing it this weekend. Leemar 96 X 30 X 32 - Starphire - 399 gallons (Yes, I'm rounding to 400. haha) - My original build was only going to be 24 tall, but after seeing Tilemans tank at 36 tall, I didn't care how hard it was to reach the bottom and work. I wanted that awesome view. I got a quote from Leemar on 36 tall and they had to go 3/4 inch glass with the quote. The price was outrageous. They told me that 3/4 will double the price of pretty much any custom tank build they do that large. So I asked them how tall I could go with 5/8 so I could keep the cost down a little bit and they told me 32 high was the max. So that's how I ended up with that odd height. My stand was done by Dion and I absolutely love it. He exceeded my expectations, it was done on a timely manor and the quality is fantastic. I had them seal in the bottom of the stand with silicone as well. Custom Sump - Elite Aquatics is building a custom sump for me. 60 long and 17 inches wide with about a 9 inch water level. This was the biggest I could go because of the small space I have sliding it through the doors. I will have a chamber for my drains, then filter socks with emergency over flow, a place for my skimmer, refugium and then return. This sump will have lids and a place for my 1/4 inch tubing from my dosser and probes. Sump will be done this week. Skimmer - Reef Octopus Lighting - 4- Ecotech Radion Pros - I've always been a metal hallide/T5 guy, but since this is a new build, I wanted to try Reactors - I picked up a Vertex reactor and I'm going to try doing bio pellets this time. Why? I don't know. I just want to see how they work and again, this is a new build, so I wanted to try some new things I haven't tried before. If I'm unhappy, I will go back to Return Pump - I picked up 2 Reef Octopus DCS 10500 return pumps. My original thought was to run both of them at the same time and turn the variable speed down to about 50%. After speaking to a handful of people on various forums and groups, I decided to just go with 1 return pump and keep 1 for back up. Plumbing - Schedule 80 - I just like the way it looks, so I'm going with it. I'm doing durso drains in the over flows and keeping them high with 1 emergency drain in each over flow. I have 4 holes in each overflow, so I will have 2 return lines coming up each side of the overflow. Dosing - I'm going with the Vertex Libra. Elite Aquatics is making me a box with 3 chambers in it. Each chamber will have 2.5 gallons of space. Tyler is going to build a custom shelf that sits on top of the box for my Libra to sit on top of. I will then take the 1/4 inch tubing from the Libra directly into the chambers and then into the sump. Flow - I'm putting 3 MP40 Vortech's on the back wall in each space and then putting an MP60 on each end of the tank. If the flow is not enough, I will add 2 more MP40's. Controller - Neptune - I will do the typical PH, Live Sand - I will be adding about 200 lbs of the special grade arag alive sand for about a 2 inch sand bed. I think I calculated it right... Live Rock - I really wanted to try Ceramic rock this time, but some of you kind of talked me out of it. So I have about 300 lbs of live rock from my 120 I'm going to use and I'm currently hunting for another 150 lbs of the larger rock. Most of the stuff I have now is the typical 3-5 lb rock. UV - Leaning towards an Emperor Aquatics High Output UV 80 watt Ozone - I'm not sure yet, any suggestions would be appreciated. This tank was placed in my front room. You can see it from the street when you drive into my circle. Everyone at night time in my neighborhood would stand in the street staring at my 120 because of how awesome it looked with that glow. Wait until they see this thing Here is a shot of my tank about a day before I sold it. http://s118.photobucket.com/user/love2skiutah/media/CF551DD6-5224-412C-9858-D94D518C348F-3493-00000310E1737BE9_zps20e3d6c7.jpg.html" rel="nofollow"> 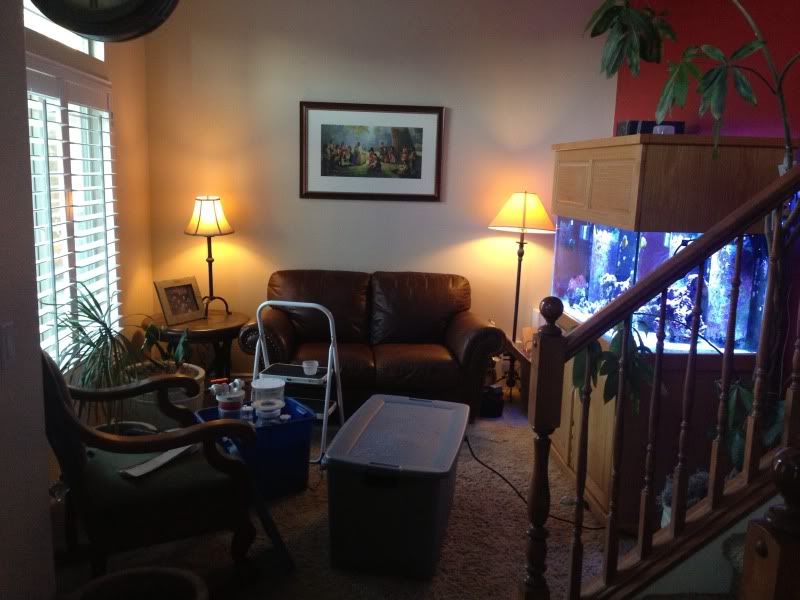 Allen helped me tear this thing down. I ended up selling the livestock to some of you in here and the tank to a couple down south. http://s118.photobucket.com/user/love2skiutah/media/CA7A8304-028D-4E44-BED4-21C58DB77E9A-3493-00000310FE3BBF64_zps3b1ce086.jpg.html" rel="nofollow"> 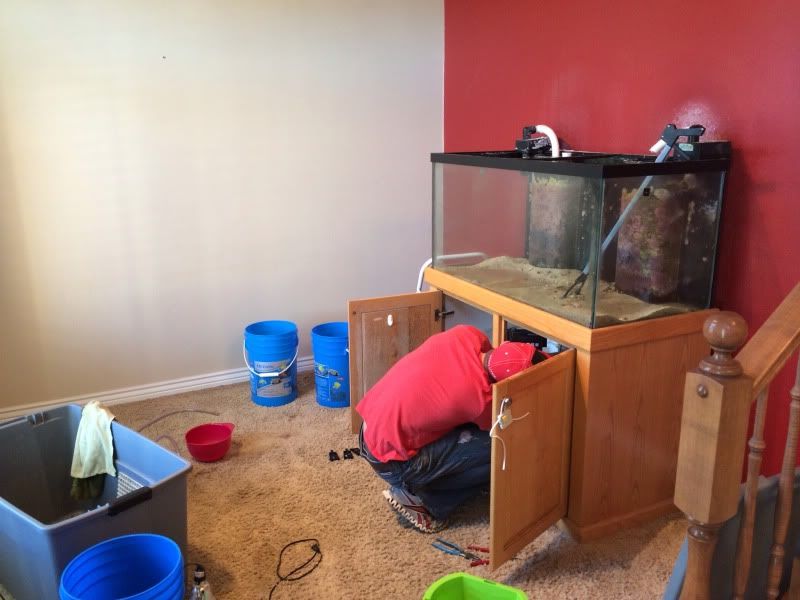 http://s118.photobucket.com/user/love2skiutah/media/684CA8C0-60F8-4519-8DF7-017FE0D25240-3493-0000031128EA7CC2_zps6a6481a7.jpg.html" rel="nofollow"> 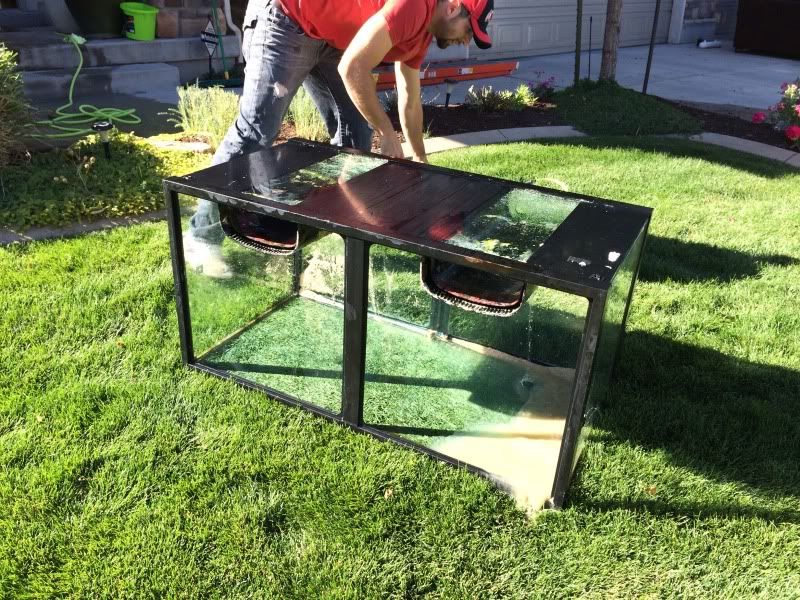 All clean and ready for the new owners. http://s118.photobucket.com/user/love2skiutah/media/9A97BCD3-68D9-4C87-9D00-59BEE3ED84DC-3493-00000311483EFD1D_zps2f81ecac.jpg.html" rel="nofollow">  I needed to keep the rock alive, so I filled up bins and put sand in the bottom from my tank, light, pump, etc. This one is currently in my laundry room. My wife LOVES having my stuff all over the house. yeah right... http://s118.photobucket.com/user/love2skiutah/media/72611960-AF03-4D69-B347-97E63576363F-3493-000003113678FC18_zpsc24b77ba.jpg.html" rel="nofollow"> 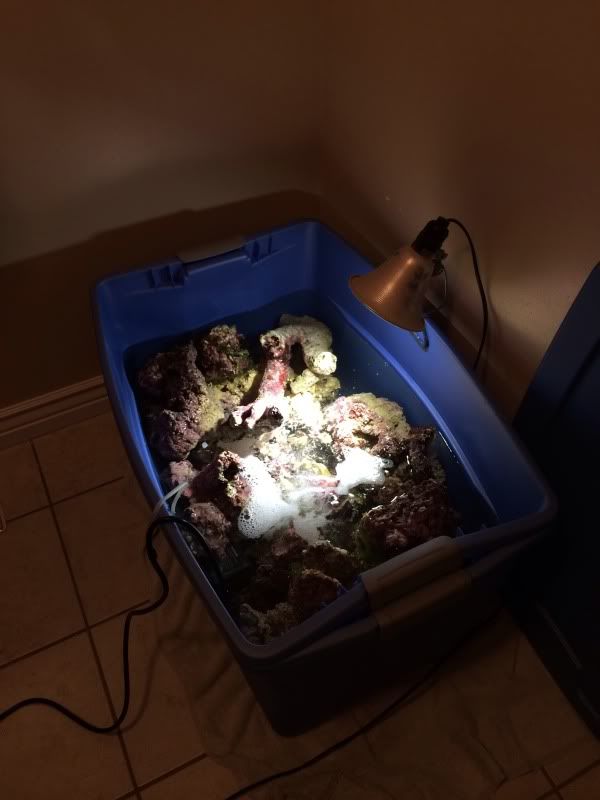 I ended up ripping out the carpet and getting rid of that stupid red wall. http://s118.photobucket.com/user/love2skiutah/media/C46E9D0F-C17E-4B40-95F2-8A5DB4B182A6-3493-000003115EFA09A9_zps19df78f9.jpg.html" rel="nofollow"> 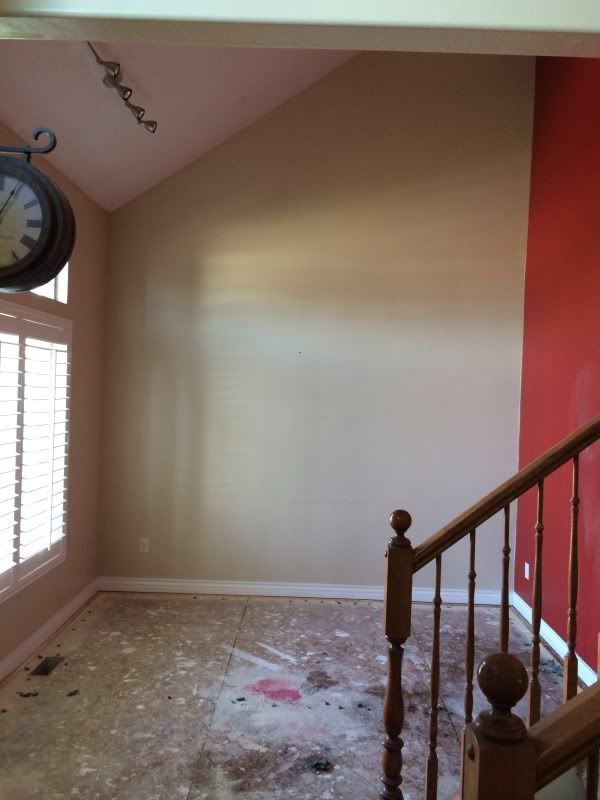 Here is a shot of the final paint job and the stand with the canopy on top of it. http://s118.photobucket.com/user/love2skiutah/media/79D118E1-670E-4BA2-B666-94F58F73D492-2097-000001DC33F46E55_zps29c8df4e.jpg.html" rel="nofollow"> 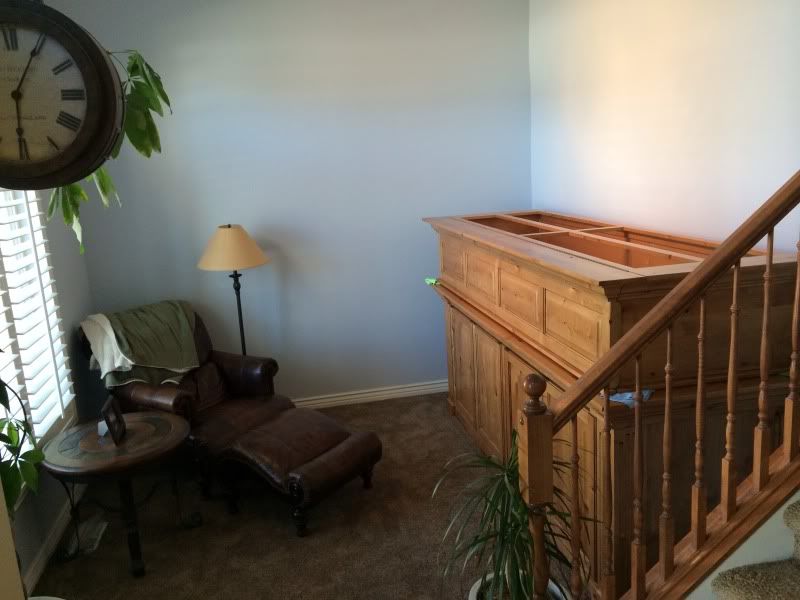 Getting this into the house was not fun. It took 8 guys. My door was 34 3/4 wide. The stand was 34 5/8, so I had 1/8 of an inch to spare. I ended up taking good old duct tape and put it around the crown molding so it didn't scratch it up. We damaged the door a little bit, but it's all for the cause, right? 8 feet long and you can see how big it is with this shot. http://s118.photobucket.com/user/love2skiutah/media/35A9D684-C36F-4B22-81EC-6C1525615C64-2097-000001DC1DC2EADF_zps0433844e.jpg.html" rel="nofollow"> 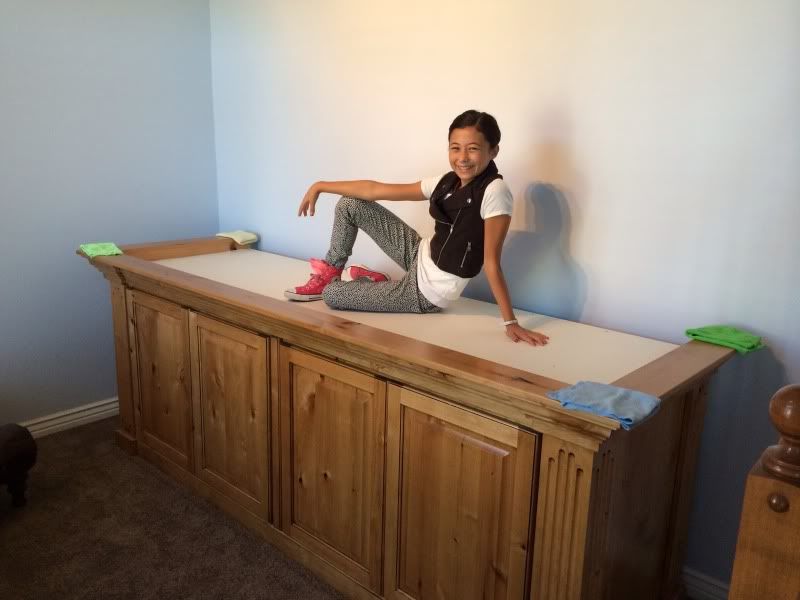 http://s118.photobucket.com/user/love2skiutah/media/E307D520-C1DD-4808-926B-5840A9D00811-2097-000001DC2A88D6D9_zps3d0f9302.jpg.html" rel="nofollow">  Here is a shot of the tank. http://s118.photobucket.com/user/love2skiutah/media/FE959E64-0187-4798-B4F1-35D40B7D9305-9931-000008C19886FA6F_zpsbb1b0b30.jpg.html" rel="nofollow"> 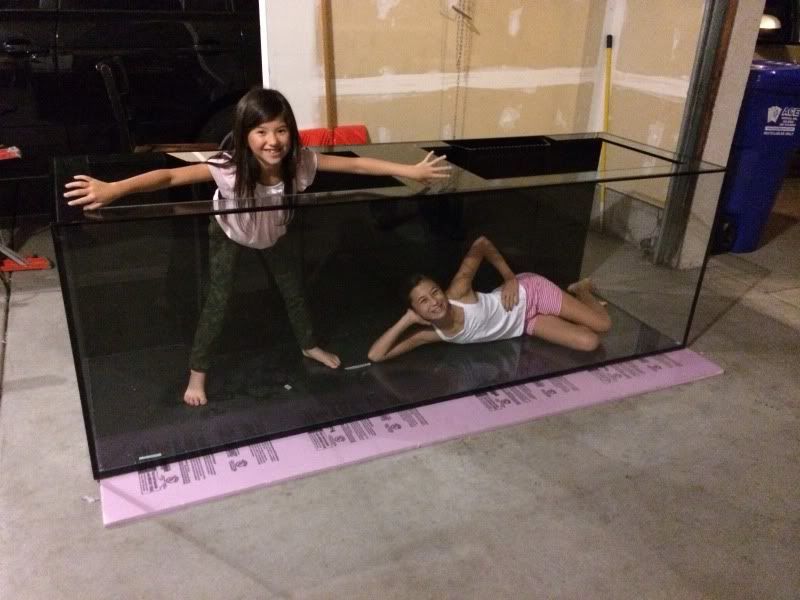 And my 14 year old Weimeraner http://s118.photobucket.com/user/love2skiutah/media/A3007F7C-42E5-4E58-AB3D-2144B09E61F3-11240-00000965BE7A90F7_zpsef15808d.jpg.html" rel="nofollow"> 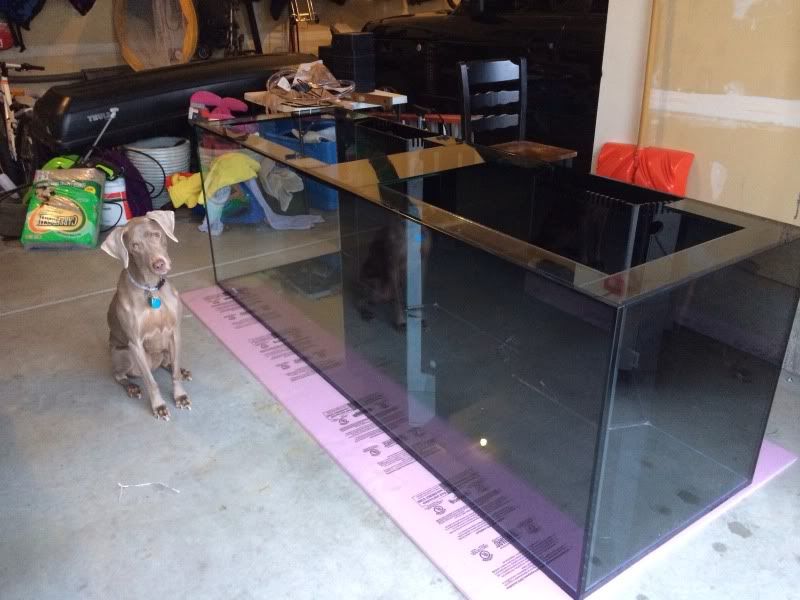 http://s118.photobucket.com/user/love2skiutah/media/741F3841-0823-4CFA-9F8B-3723250D4DCE-420-0000003BD820E0DF_zpse614d46f.jpg.html" rel="nofollow"> 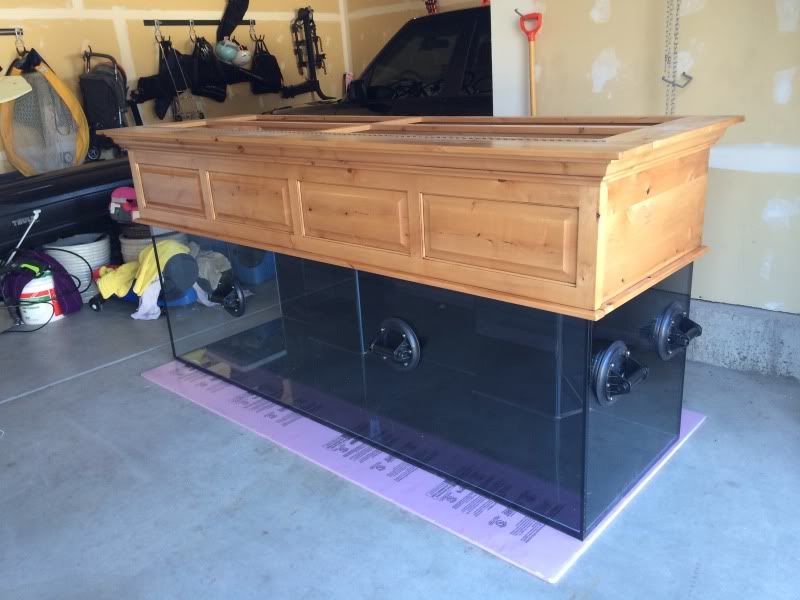 http://s118.photobucket.com/user/love2skiutah/media/E1837D46-13F3-4E8E-B1BA-B0CF84029640-11240-00000965DD8FBEE2_zps91d232a2.jpg.html" rel="nofollow"> 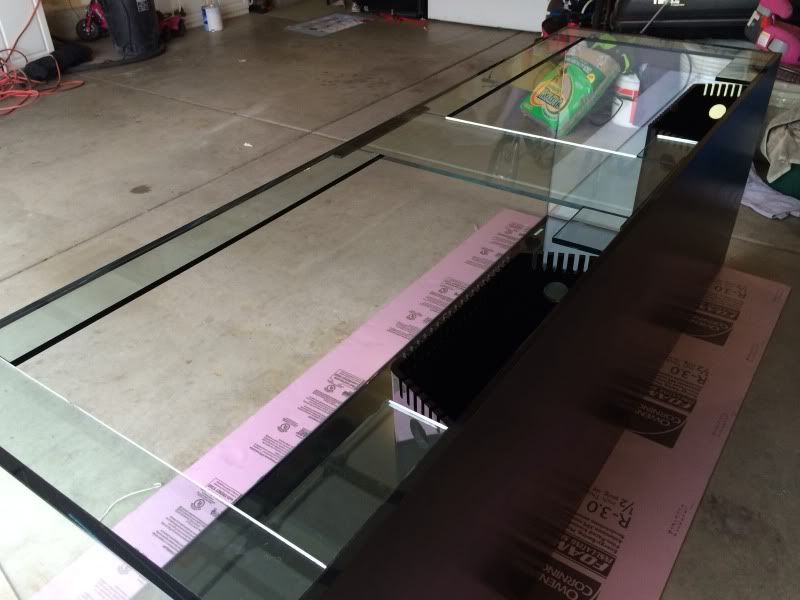 |
Replies:
Posted By: love2skiutah
Date Posted: October 07 2013 at 6:16pm
|
Cutting the holes for the returns and drains... http://s118.photobucket.com/user/love2skiutah/media/F8F0427D-E25F-460E-8C23-B7054BDBC65E-15484-00000A2B38EBFF6B_zpsb2007098.jpg.html" rel="nofollow"> 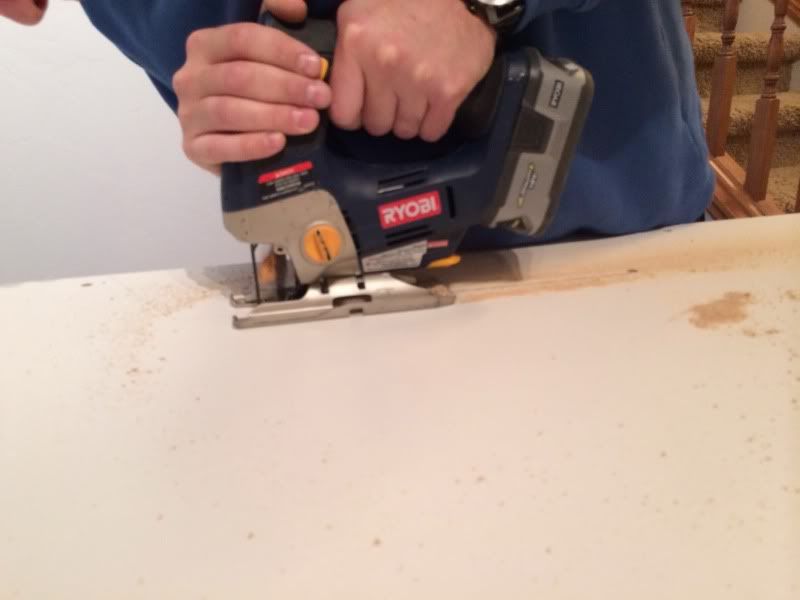 http://s118.photobucket.com/user/love2skiutah/media/607F31F7-42CD-4C9B-9536-4DCDABAFEF94-15484-00000A2B42084109_zpscf90c71a.jpg.html" rel="nofollow"> 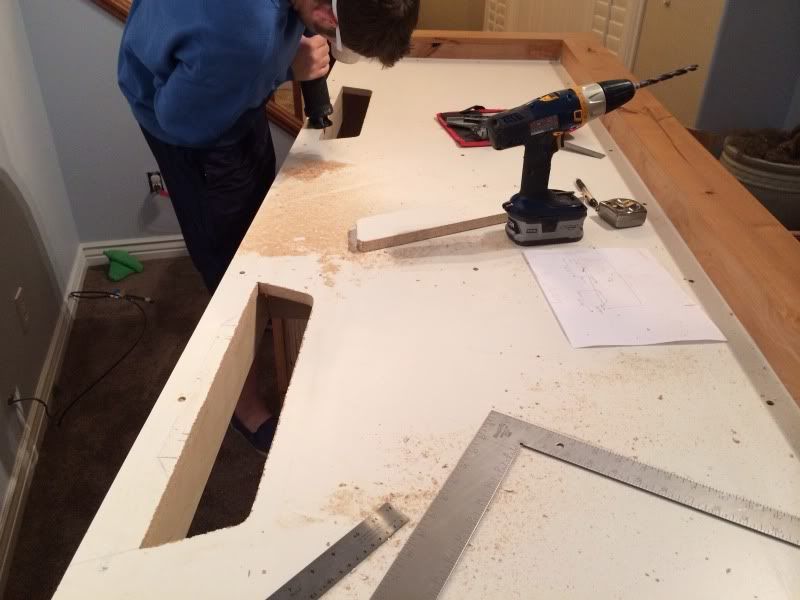 I ended up putting a 1/2 inch piece of foam down on top of the stand. Picked it up from Home Depot for about $15 http://s118.photobucket.com/user/love2skiutah/media/9CEAFAFA-1F3D-4124-A511-F070EEF08D46-15484-00000A2B4708223A_zps8cf83d74.jpg.html" rel="nofollow"> 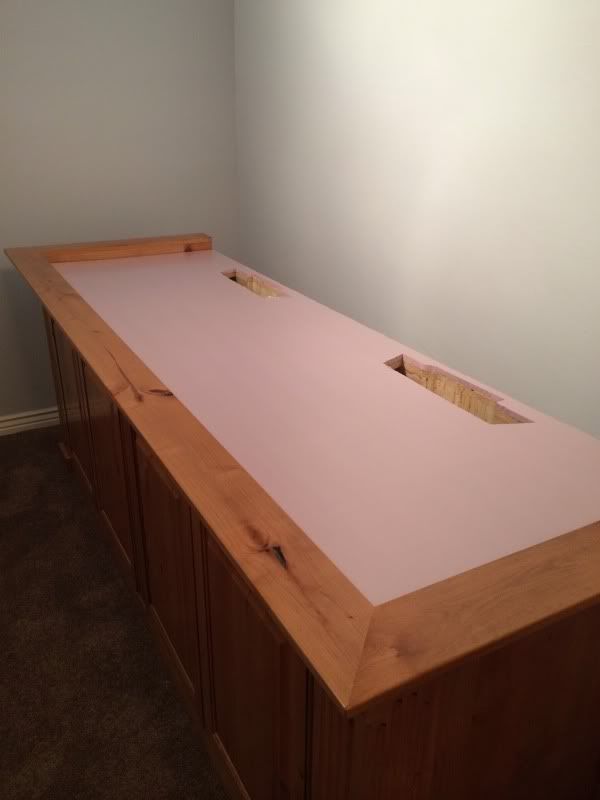 |
Posted By: love2skiutah
Date Posted: October 07 2013 at 6:20pm
|
We tried to get it onto the stand with 8 people and could not do it. We recruited 4 more guys and were able to get it up and onto the stand. http://s118.photobucket.com/user/love2skiutah/media/FEDBA559-D1C8-422E-ABFD-56183B9234E7-420-0000003BC6B0A559_zpsa66253f6.jpg.html" rel="nofollow"> 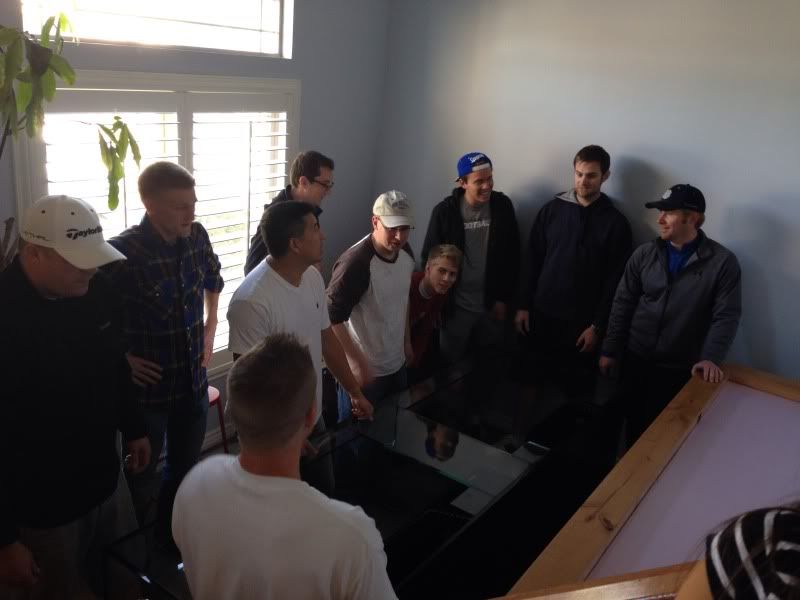 And here she is... http://s118.photobucket.com/user/love2skiutah/media/A44935AE-AA5F-4576-8424-A0EE28EA6A15-420-0000003BD1D7A603_zps52a1b237.jpg.html" rel="nofollow"> 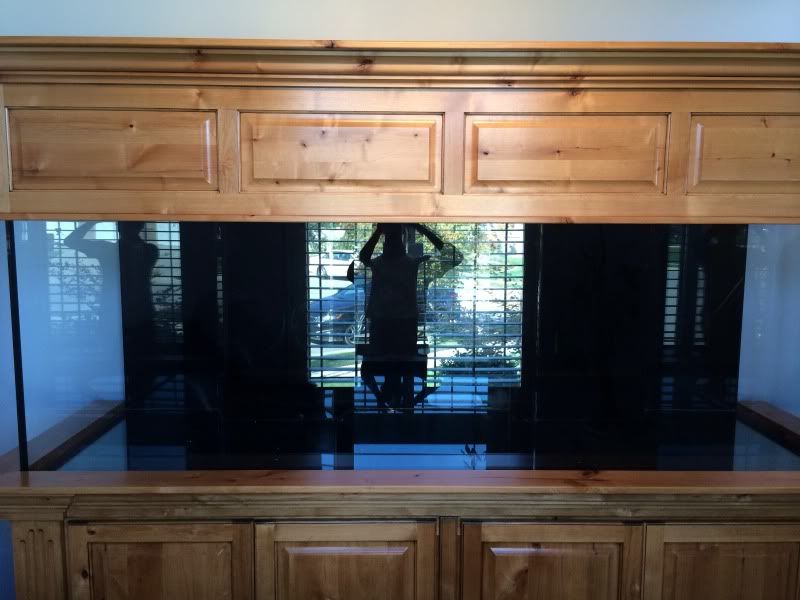 Final shot of the new room and tank on the stand. http://s118.photobucket.com/user/love2skiutah/media/32AC108F-1144-4008-ABA4-EAF3631C7566-420-0000003BEFDFA2D8_zps4ec6a858.jpg.html" rel="nofollow"> 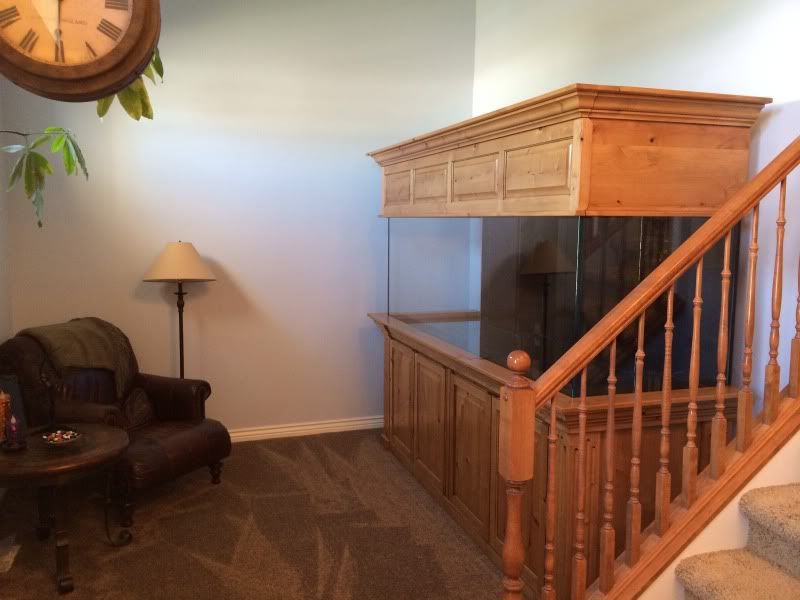 The tank is so tall, that I can't even open up my canopy without a step stool. I DON'T THOUGH, CARE CAUSE I LOVE IT. http://s118.photobucket.com/user/love2skiutah/media/3EACDA85-07EC-4DE8-9B75-23F253219F4C-663-0000006480399487_zps19894702.jpg.html" rel="nofollow">  |
Posted By: love2skiutah
Date Posted: October 07 2013 at 6:23pm
|
1/4 inch line ran directly from my 6 stage RODI unit downstairs. This will go into the sump with a float valve. http://s118.photobucket.com/user/love2skiutah/media/BFE6019D-CDD5-4027-8A6D-E3648295C39B-663-000000648802A5DE_zps1e209e2c.jpg.html" rel="nofollow"> 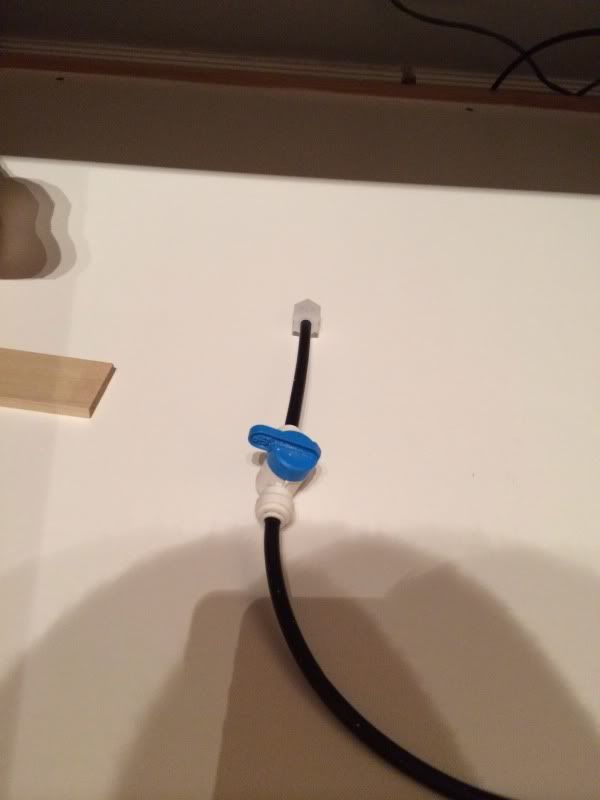 I've got more Ecotech on the way... http://s118.photobucket.com/user/love2skiutah/media/D2E8F16F-86DD-4B3A-B15D-AB087D285909-663-000000648DCA90C5_zpsf582b08b.jpg.html" rel="nofollow"> 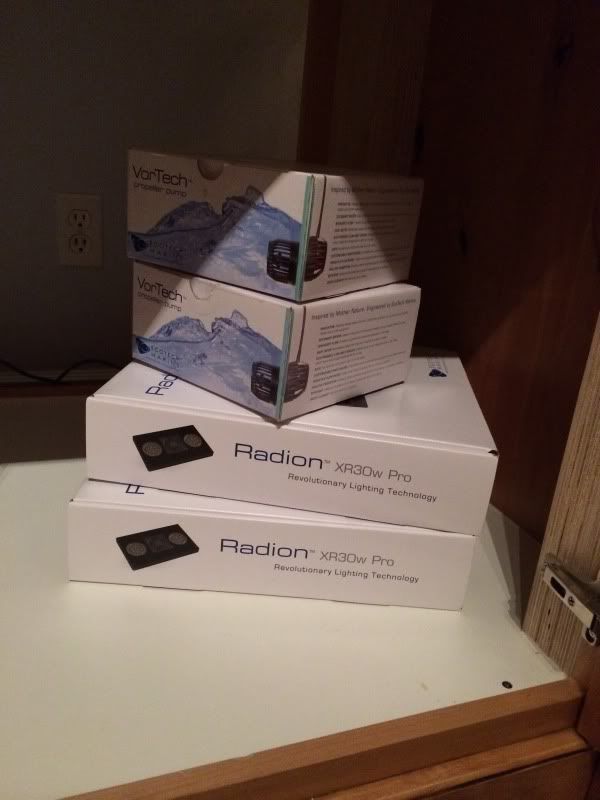 I got this from Ryan at Aquatic Dreams. This thing is huge. Will be running the BRS bio-pellets. http://s118.photobucket.com/user/love2skiutah/media/8458C555-E040-4ECF-9A92-946451012903-663-0000006493325DE6_zpsd11ade02.jpg.html" rel="nofollow"> 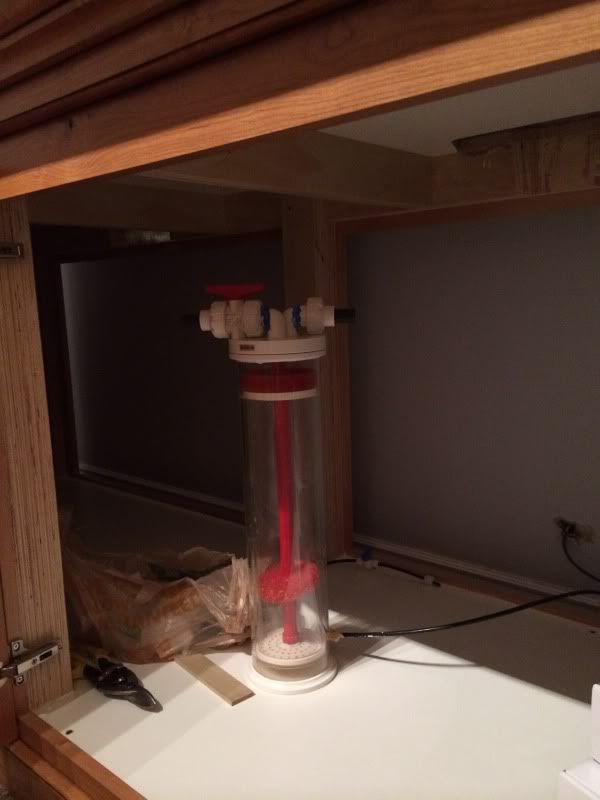 For my refugium and night time mode... http://s118.photobucket.com/user/love2skiutah/media/10DAFDEA-EDD6-4B4F-B71D-7F0EB9D1E942-663-0000006498ABEE0F_zps0231ba43.jpg.html" rel="nofollow"> 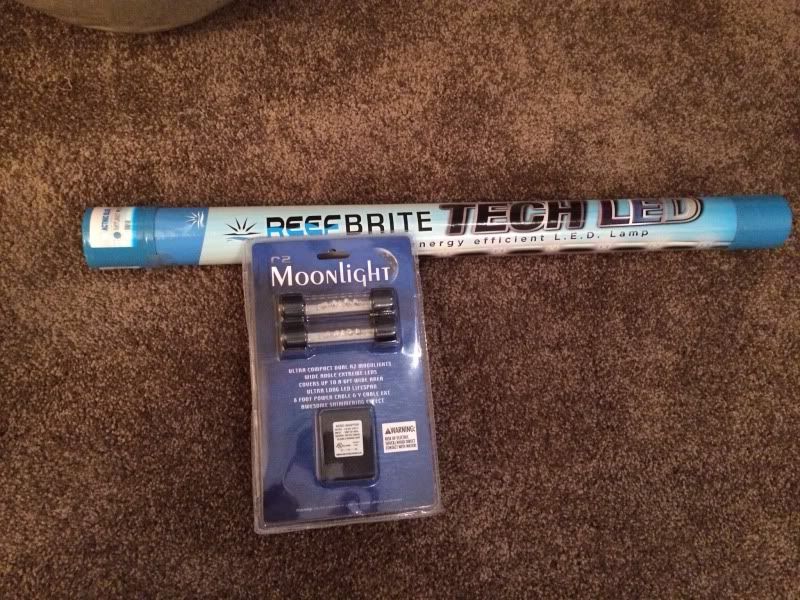 Tyler just sent me a pic of my sump. Should be finished with all the extras later this week. http://s118.photobucket.com/user/love2skiutah/media/CACD1E9F-0B9E-46A1-9397-7D1ED734DCCE-1782-00000227B623A152_zps443eb536.jpg.html" rel="nofollow"> 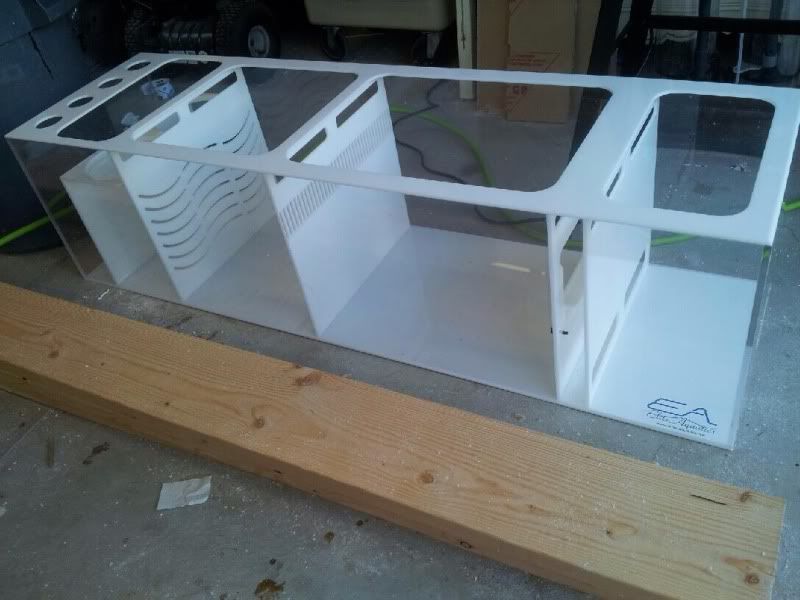 |
Posted By: ch3tt
Date Posted: October 07 2013 at 6:26pm
|
Looks amazing! Looking forward to watching this one come together! ------------- Red Sea Reefer 625 XXL |
Posted By: DLindquist
Date Posted: October 07 2013 at 6:30pm
|
Congrats! I love (large) tank builds. Watching these things go together is as beautiful as a full blown reef. Many people like to forgo the "cycle" but I for one love the process. I long to build another large system but my wife pleasantly let me know there will not be another tank build without another house build. Looks like it will be awhile. Keep us updated with lots of pictures. ------------- A government strong enough to give you everything you want, is powerful enough to take everything you have. |
Posted By: jdinchak
Date Posted: October 07 2013 at 7:17pm
|
Wow nice!
------------- 180G Mixed Reef Tank 170G Dart Frog Tank |
Posted By: Jeepkid
Date Posted: October 07 2013 at 7:36pm
|
Wow I wish I had the room and budget to take on something like this! Very jealous, looking forward to seeing more of this build! ------------- Brian. "It's a Jeep thing!" |
Posted By: Mike Savage
Date Posted: October 07 2013 at 7:40pm
|
Beautiful! I look forward to watching this grow! -------------  |
Posted By: Scott B
Date Posted: October 07 2013 at 8:18pm
|
Sweet, cant wait to see it come together. Taking notes for my build ------------- 28g jbj led nano, 150 g mixed reef, skimz skimmer, AI blue sol's, Reef Angel controller, wp40's, aquamedic reef doser |
Posted By: derekgurney
Date Posted: October 07 2013 at 8:26pm
| This is going to be a sick setup! Keep posting the updates! |
Posted By: lskurys
Date Posted: October 07 2013 at 8:34pm
|
Looks really good I can wait to see it it person! ------------- 220g , large elite aquatics sump. 3 Radion Pro Gen 3 lights 3 Mp 40's |
Posted By: Dion Richins
Date Posted: October 08 2013 at 2:58pm
|
Looking awesome!!!!! ------------- http://www.customaquariumfurniture.com" rel="nofollow - Bad "censored" Cabinets Best quality in the valley! He is one sexy bald guy, even with out a finger!(MAC) |
Posted By: Boxerboy
Date Posted: October 08 2013 at 11:37pm
|
Very inspiring! Hope to see it in person! ------------- 120G's Radion/T5 Combo Vertex 150 Skimmer Apex Controlled SPS LPS & Softies |
Posted By: phys
Date Posted: October 08 2013 at 11:52pm
| Looks great!!!!! I hope you'll be on the reef tour next time around. |
Posted By: Fatman
Date Posted: October 09 2013 at 12:34am
| . |
Posted By: love2skiutah
Date Posted: October 09 2013 at 10:46am
| I'm in Centerville, so if anyone is ever in the area, just message me. You're always welcome to come check it out. I want to have water in it next weekend and hopefully I'm cycled by Thanksgiving. |
Posted By: BobC63
Date Posted: October 09 2013 at 2:39pm
|
Aaron -
That tank looks "Fan - Flippin - Tastic!!!
------------- - My Current Tank: 65g Starfire (sitting empty for 2+ years) - * Marine & Reef tanks since 1977 * |
Posted By: love2skiutah
Date Posted: October 09 2013 at 8:42pm
|
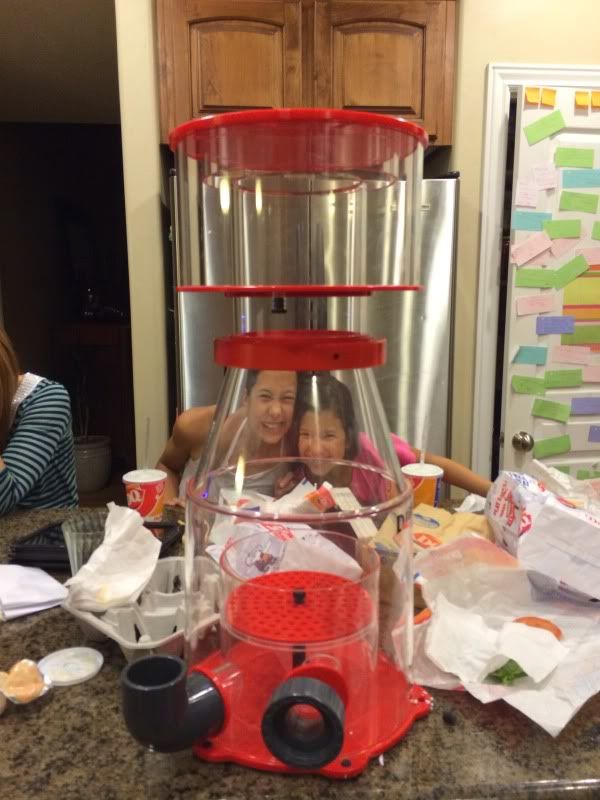
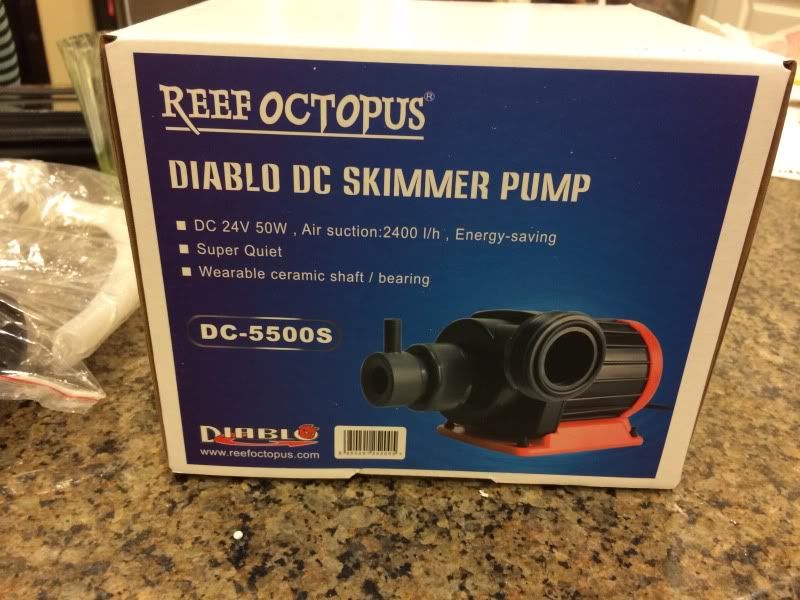
The box for this skimmer was so flipping big, it took up my entire front seat on the way home. http://s118.photobucket.com/user/love2skiutah/media/81252682-4257-4E9B-BC6C-335893DB229B-4529-0000049E31BFB0CA_zps8967d36b.jpg.html" rel="nofollow"> 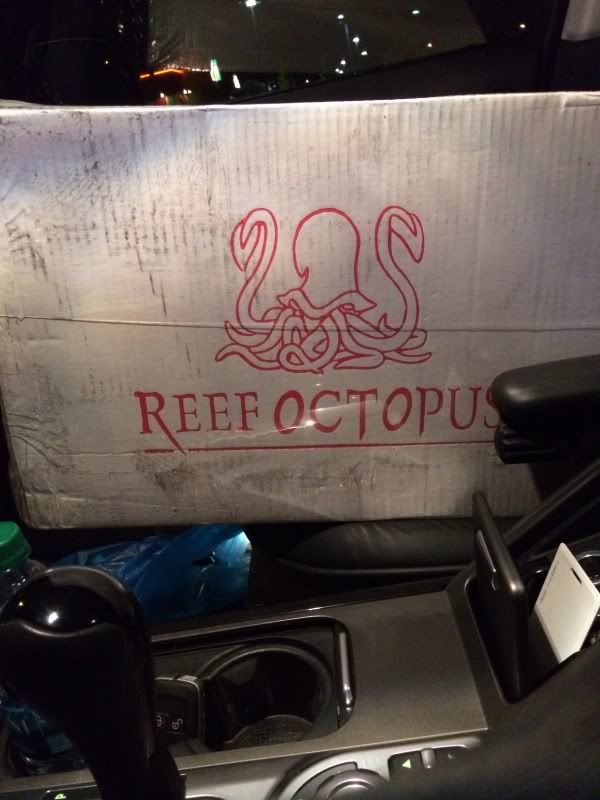 This thing is huge compared to my skimmer for the 120. And YES, we had Dairy Queen for dinner. Sorry about the messy pic. haha http://s118.photobucket.com/user/love2skiutah/media/6F768C29-DF4A-4576-BD79-2DCDC671DD16-4529-0000049E39F631EA_zps669b1c27.jpg.html" rel="nofollow">
 |
Posted By: love2skiutah
Date Posted: October 09 2013 at 8:43pm
|
I'm really excited to try these DC pumps out. This pump has a variable speed controller so that I can adjust the flow into the skimmer. http://s118.photobucket.com/user/love2skiutah/media/FA5A64AC-0AA5-4227-8A90-B364BD005EAC-4529-0000049E40B379DD_zpse068d447.jpg.html" rel="nofollow">
 |
Posted By: love2skiutah
Date Posted: October 09 2013 at 8:45pm
|
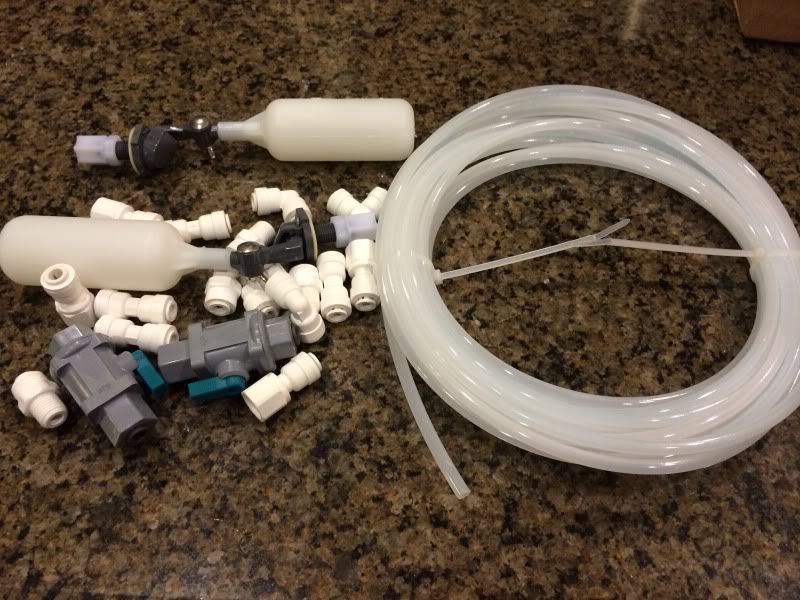
$150 for these flipping Loc-line parts. Why didn't I invent this? http://s118.photobucket.com/user/love2skiutah/media/05731121-85A6-4FD5-8361-C8D26404EA2D-4529-0000049E45EB6EB8_zpsa39845b6.jpg.html" rel="nofollow"> 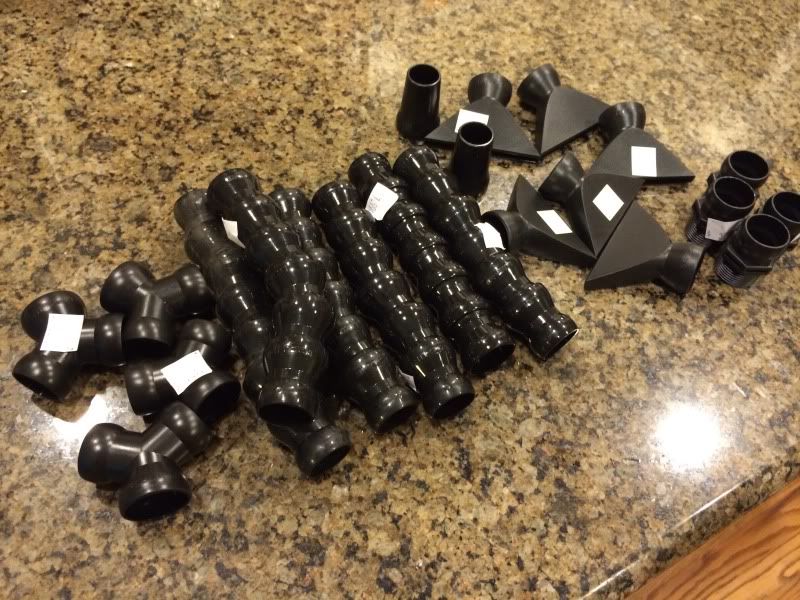 Got a small shipment from Bulk Reef Supply today. 1/4 inch tubing for my Vertex Libra dosser. A couple of float valves for the R/O line that will drip into the sump. http://s118.photobucket.com/user/love2skiutah/media/F5793521-B445-4100-BFE6-0A3DE1617A9F-4529-0000049E50219431_zpsaf941dd5.jpg.html" rel="nofollow">
 |
Posted By: tileman
Date Posted: October 09 2013 at 10:31pm
|
I must say Aaron. Your passion for this is great to see. I'm sure this will be a very beautiful reef soon. You have made all the right moves by going around and seeing other aquariums and taken all the steps to build Your tank with all the equipment that you believe to be the best for your tank. You have spent many hours researching, and talking to many experts in the trade, so that you could put together a special system that you can enjoy for many years to come. Your patience is commendable , the trouble you have gone through the last 8 months would surely discourage many others, but you stuck with it and it is finally going to come true. Bravo my man, Bravo.  ------------- 335G Reef TOTM. http://www.advancedaquarist.com/2015/2/aquarium ReefKeepers TOTM Feb. 2012 http://reefkeeping.com/joomla/index....k-of-the-month & |
Posted By: Mark Peterson
Date Posted: October 10 2013 at 8:07am
|
+1
------------- Reefkeeping Tips, & quick, easy setup tricks: www.utahreefs.com/forum/forum_posts.asp?TID=9244 Pay it forward - become a paid WMAS member 
|
Posted By: love2skiutah
Date Posted: October 10 2013 at 8:32am
Thanks for the kind words Brad. Your tank is very inspiring. Hopefully I can achieve what you have some time down the road. Your posts every weekend on Facebook KILL ME. haha - I just can't wait to start handpicking all the livestock. This should be a lot of fun.
|
 tileman wrote:
Posted By: Krazie4Acans
Date Posted: October 10 2013 at 10:31am
Aaron this is amazing! Dion did an awesome job on that stand. I loved seeing it in your garage but it looks even better in the house! You weren't kidding when you said it was going to take up that whole wall. Can't wait to see what you do with this things! It's going to be a ride for sure! Gorgeous! Krazie
------------- My ocean. 90g (yup, won it!), 40g, 28g, & 10g Systems PADI Advanced Open Water http://utahreefs.com/forum/forum_posts.asp?TID=63568&title=krazies-nano-paradise" rel="nofollow - Tank Thread: |
Posted By: love2skiutah
Date Posted: October 10 2013 at 5:03pm
|
Got my schedule 80 pipe today. This is what happens when you don't have a truck :) http://s118.photobucket.com/user/love2skiutah/media/1D374E50-45B5-4DC9-864F-5F661D2177D1-5449-0000057283D0AE53_zpsae037dc8.jpg.html" rel="nofollow"> 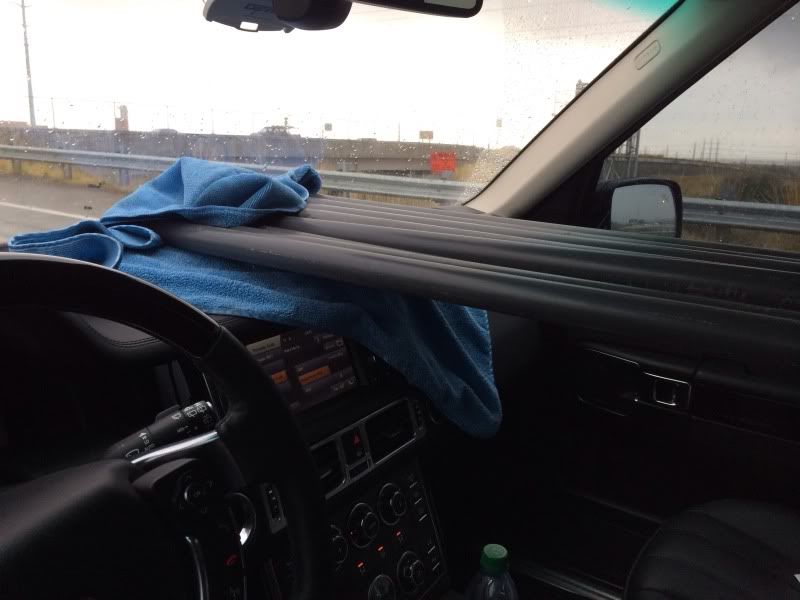
|
Posted By: love2skiutah
Date Posted: October 10 2013 at 5:05pm
|
Got my return pumps today. I keep changing my mind on this, but I decided to go back to using 2 returns and then turning the variable speed down on them. http://s118.photobucket.com/user/love2skiutah/media/09C4CF83-AEC8-44F8-AA9B-D7783B964363-5449-00000572885DE3C9_zpsd80c829c.jpg.html" rel="nofollow"> 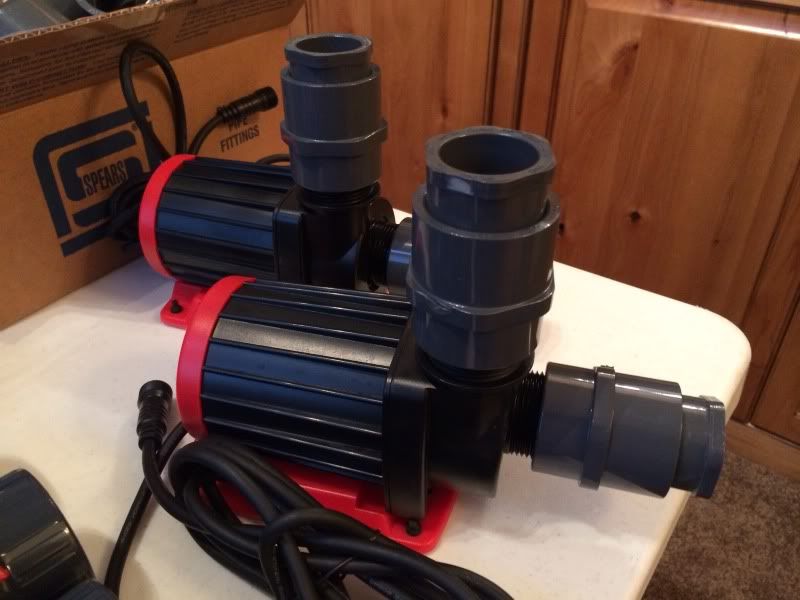 http://s118.photobucket.com/user/love2skiutah/media/5D945330-7145-461C-946C-9769CAFB8D2E-5449-000005728CE58F50_zpsef9cfd9e.jpg.html" rel="nofollow"> 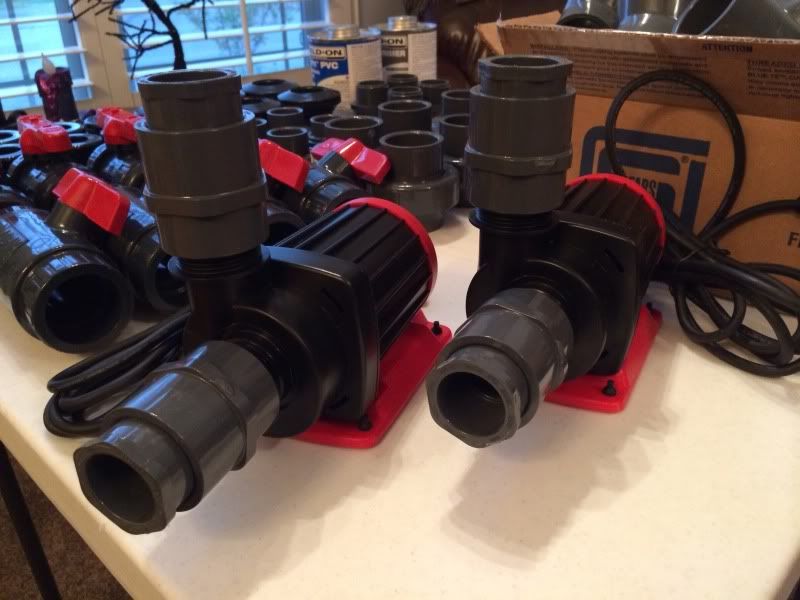
|
Posted By: love2skiutah
Date Posted: October 10 2013 at 5:14pm
|
Schedule 80 fittings and valves! I realize schedule 40 will work, but I really like the look of the 80. Check out these ball valves out. I noticed that several of the aquariums here in the states use this exact valve, so I decided to copy them :) These are very expensive valves and probably overkill for my system, but they work great. I tried 8 different valves out in the plumbing store and these were the highest quality and easiest to open and close. http://s118.photobucket.com/user/love2skiutah/media/F7A84683-856E-4AEC-9290-6BCF95B89A6B-5449-00000572912BF172_zps4bf97690.jpg.html" rel="nofollow"> 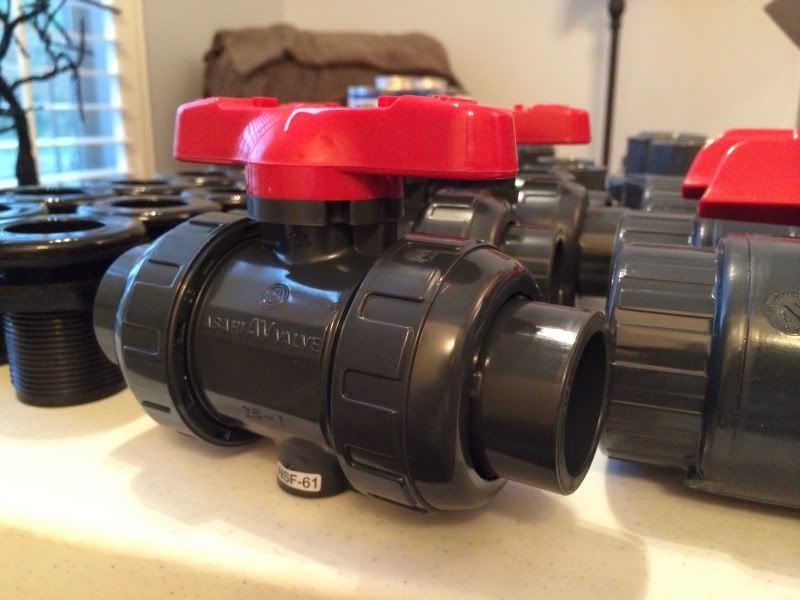 8 Ball Valves, 12 unions and 14 bulkheads are going to get the job done. http://s118.photobucket.com/user/love2skiutah/media/81D82A46-F968-4A23-8859-999430120DA8-5449-0000057296D55083_zps0a68fc30.jpg.html" rel="nofollow"> 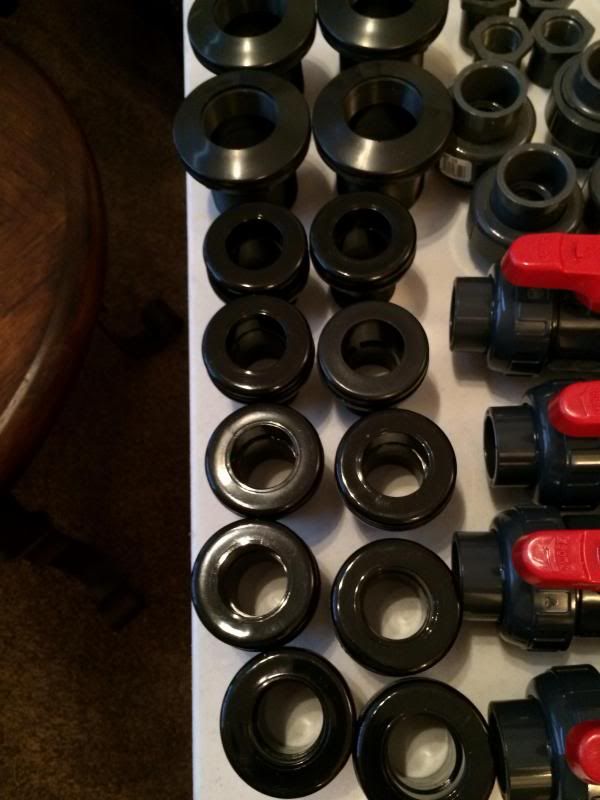 http://s118.photobucket.com/user/love2skiutah/media/575ED860-7ACF-4E07-B5D3-885B0F341905-5449-000005729AD6A6C3_zpsbaf9cdcc.jpg.html" rel="nofollow"> 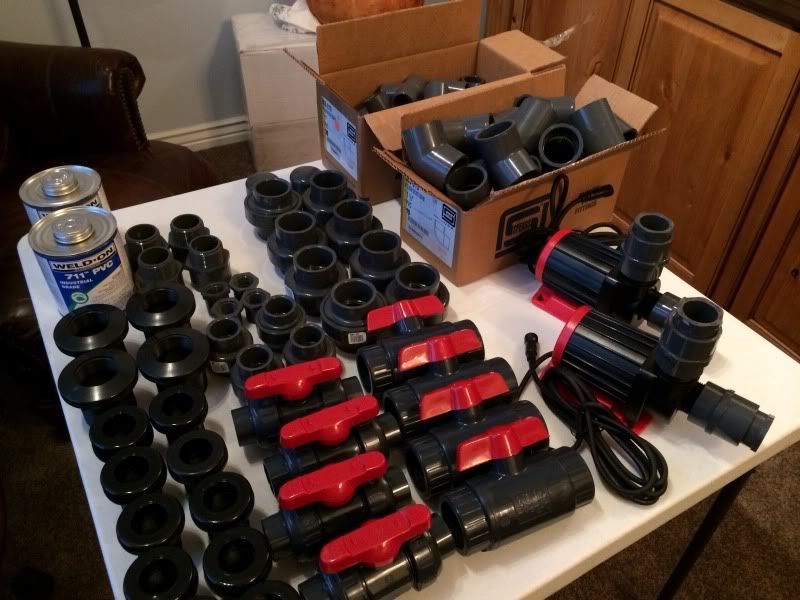
|
Posted By: love2skiutah
Date Posted: October 12 2013 at 9:32am
|
Last night I decided to get my returns and drains down in the overflow boxes. The wife was out of town, so I figured it was a good time so she wouldn't see the mess ;) http://s118.photobucket.com/user/love2skiutah/media/71692DE7-ED20-4594-A180-CDADC3DDFEA9-7385-00000778168A740B_zps6823e91f.jpg.html" rel="nofollow"> 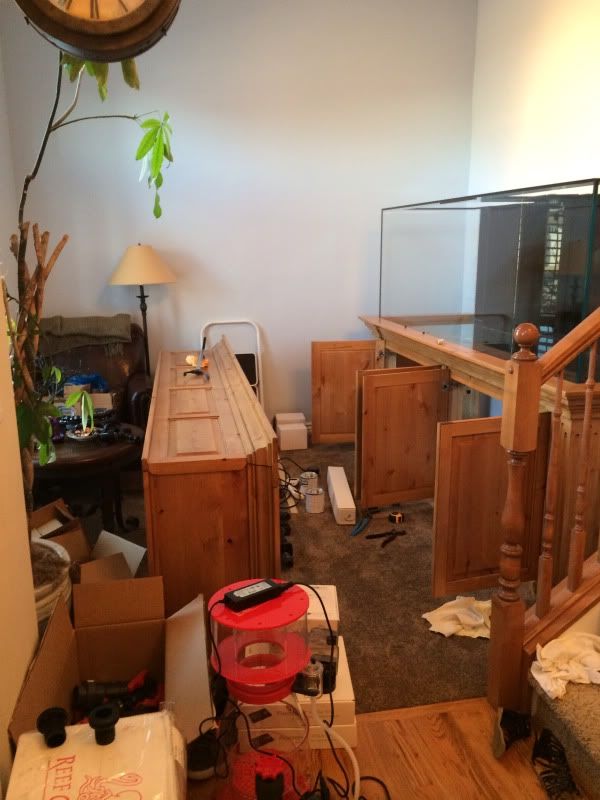 The nice thing about this tank is that when you are inside, you have plenty of room. ha http://s118.photobucket.com/user/love2skiutah/media/6255A4DE-DBF2-4F2C-83EE-2BC7D722F6A6-7385-000007781BD91D41_zps52ecc1c4.jpg.html" rel="nofollow"> 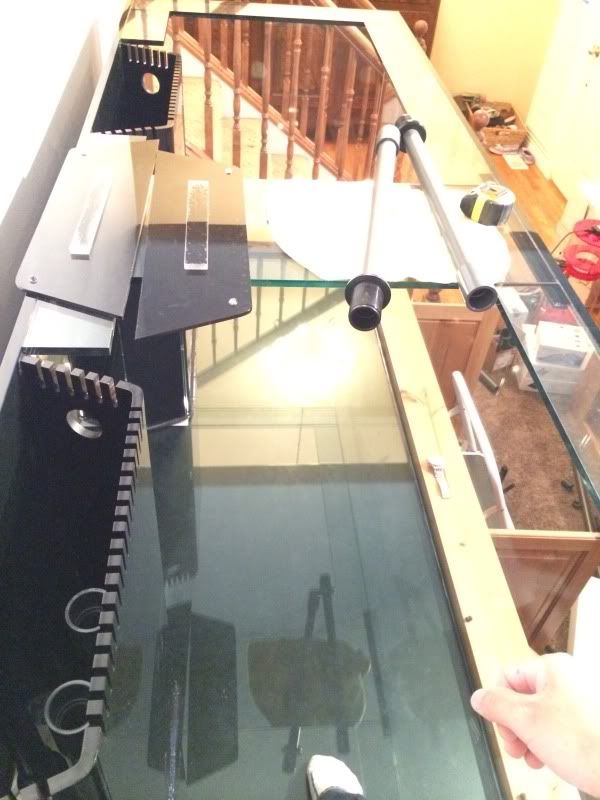 Bulkheads under the cabinet were easier than I thought to deal with. I had the perfect amount of room and I felt like I was able to get the nut on the bulkheads nice and snug. http://s118.photobucket.com/user/love2skiutah/media/BEB503C5-C762-4623-AB53-F7F7B718A9DE-7385-0000077811F0E6E4_zps02e81977.jpg.html" rel="nofollow"> 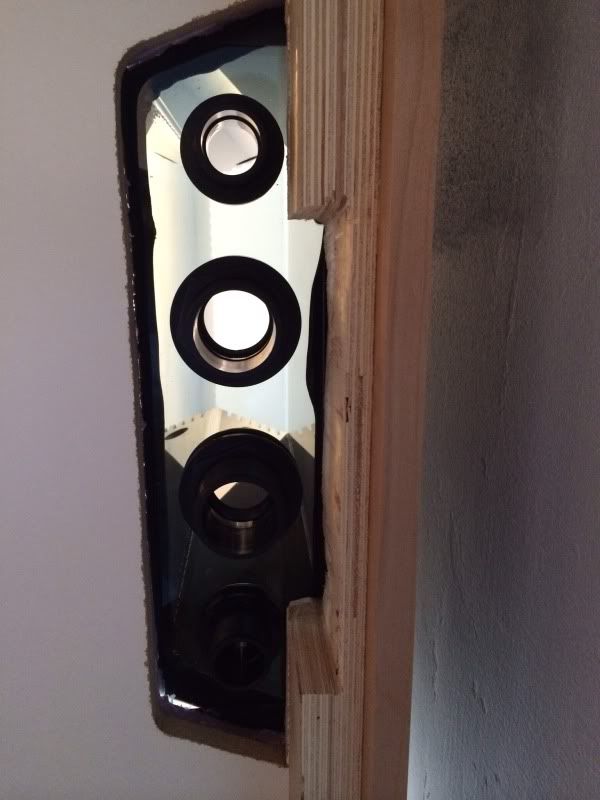 I wish I would have had some shorter bulkheads for my overflow boxes, but I was able to get it done. I did not glue anything down in these boxes. This schedule 80 is so tight and hard to work with anyway. I ended up doing an emergency drain about 1.5 inches from the top and my Durso's were about 3 inches below the emergency. I decided to not do herbie, because I wanted the ambient noise of the water flowing through the tank. http://s118.photobucket.com/user/love2skiutah/media/82F9FB09-B4CE-4785-A5AC-BA35A5B9ADA0-7385-0000077820293C09_zps7a8367c6.jpg.html" rel="nofollow"> 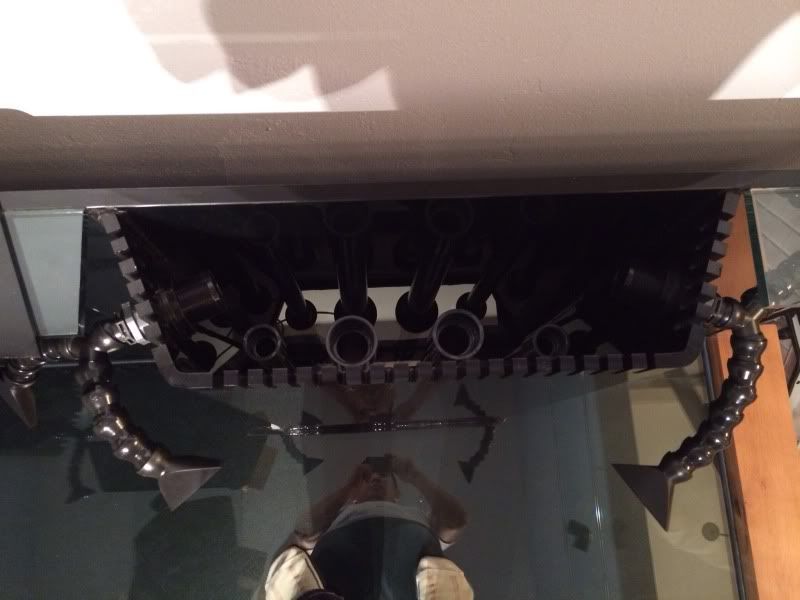 I'm going to shorten up these Loc-Lines up a bit tonight. They ended up being a little too long. http://s118.photobucket.com/user/love2skiutah/media/479F3634-2749-4DC0-9D45-1D60731E6F25-7385-0000077828EA24F8_zps6d84b602.jpg.html" rel="nofollow"> 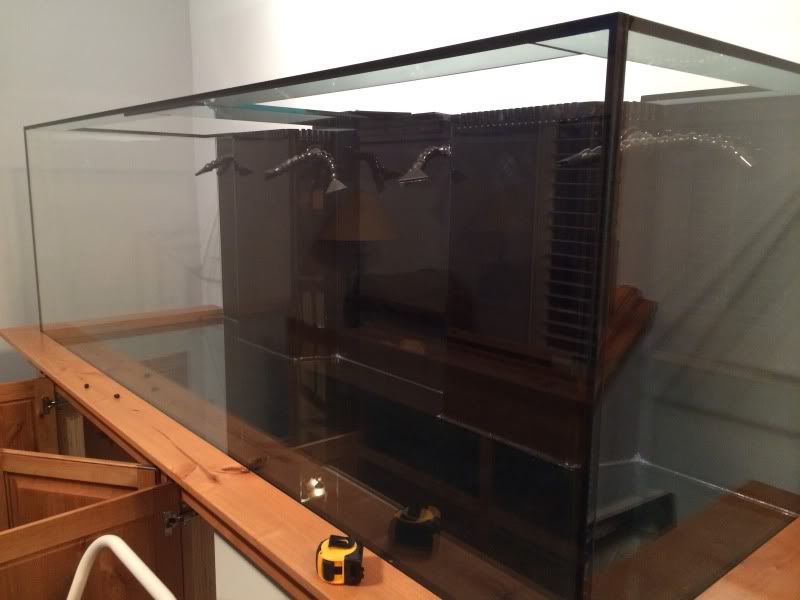 I don't know how many of you have worked with schedule 80, but it's a PAIN in the rear to pipe. Just dry fitting everything and then trying to get it apart was very difficult. I'm NOT a plumber, but growing up I installed commercial refrigeration equipment my entire life, so I get the basic concepts because I've worked in construction. My previous PVC experience has only been schedule 40, this 80 stuff was not very fun to work with. And yes, I screwed up on my length, so that's why I have a coupler there :) http://s118.photobucket.com/user/love2skiutah/media/759A5CA9-7D81-4E30-B31B-1FB72E0C869B-7385-000007782D2319D8_zps5d660687.jpg.html" rel="nofollow"> 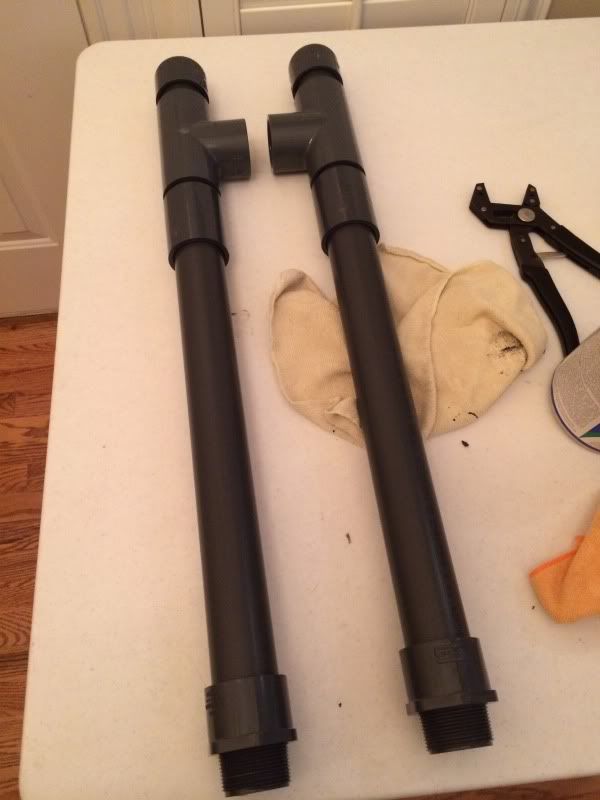 |
Posted By: Scott B
Date Posted: October 12 2013 at 10:18am
|
Gotta love the plumbing, lol. Your plumbing cost more than my whole set up!! ------------- 28g jbj led nano, 150 g mixed reef, skimz skimmer, AI blue sol's, Reef Angel controller, wp40's, aquamedic reef doser |
Posted By: love2skiutah
Date Posted: October 12 2013 at 10:22am
It's not about the money, it's about the passion, right
 ? You will love your new set up. It's coming along very nicely and I want to come see it when it's all done. ? You will love your new set up. It's coming along very nicely and I want to come see it when it's all done. |
Posted By: Mike Savage
Date Posted: October 12 2013 at 10:38am
|
Fantastic build! I'm the same way when the wife is gone it is time to work on the tank. To me it is not a "mess" it is progress. ------------- |
Posted By: Scott B
Date Posted: October 12 2013 at 11:13am
Passion for sure! But for some of us, money is a little concern . It will be awhile for me to get up and running but you are more than welcome to come see it, and of course i want to see yours also!------------- 28g jbj led nano, 150 g mixed reef, skimz skimmer, AI blue sol's, Reef Angel controller, wp40's, aquamedic reef doser |
Posted By: love2skiutah
Date Posted: October 12 2013 at 9:56pm
|
I had a few small pieces of rock that has been dried and sitting in a bin. I rinsed it off earlier this morning and just placed a few pieces in the tank. I will do my aquascape hopefully Friday. http://s118.photobucket.com/user/love2skiutah/media/7FE5266E-695F-4162-AA25-C587AE7E3CE5-7882-0000083751107E9F_zpsca8a6980.jpg.html" rel="nofollow"> 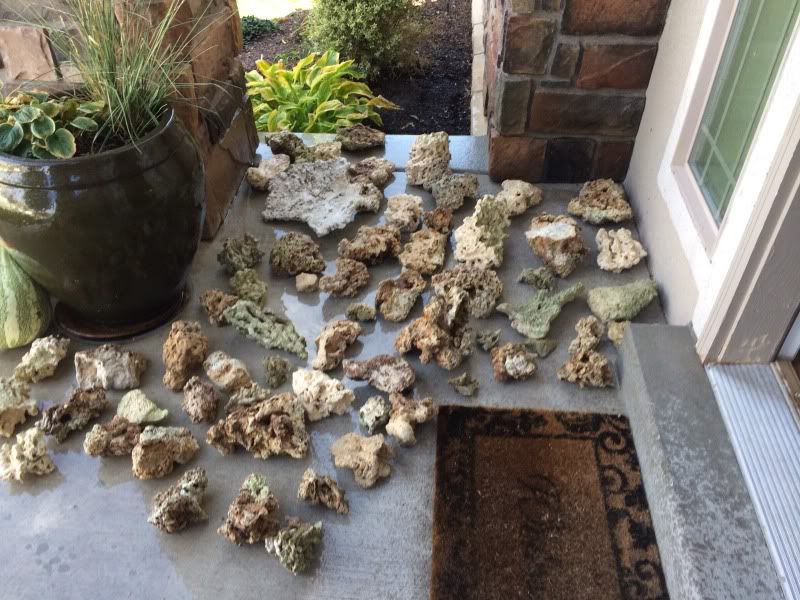 http://s118.photobucket.com/user/love2skiutah/media/1A840EDB-26A7-4574-AE81-9FC011CFA474-7882-00000837563F178A_zps01c61c2b.jpg.html" rel="nofollow">
 |
Posted By: love2skiutah
Date Posted: October 12 2013 at 10:01pm
|
So check this out. Elite Aquatics built this custom box for me. Ca, Alk, Mag - 2.5 gallons each - I had him build this shelf for my Vertex Dosser to sit on. He text me these pics. I will pick them up next week and post a couple more pics with the sump. http://s118.photobucket.com/user/love2skiutah/media/B1062CD8-052B-4A29-ACDE-8E2839773F37-7882-000008375CA64B20_zpsfdb1c1a5.jpg.html" rel="nofollow"> 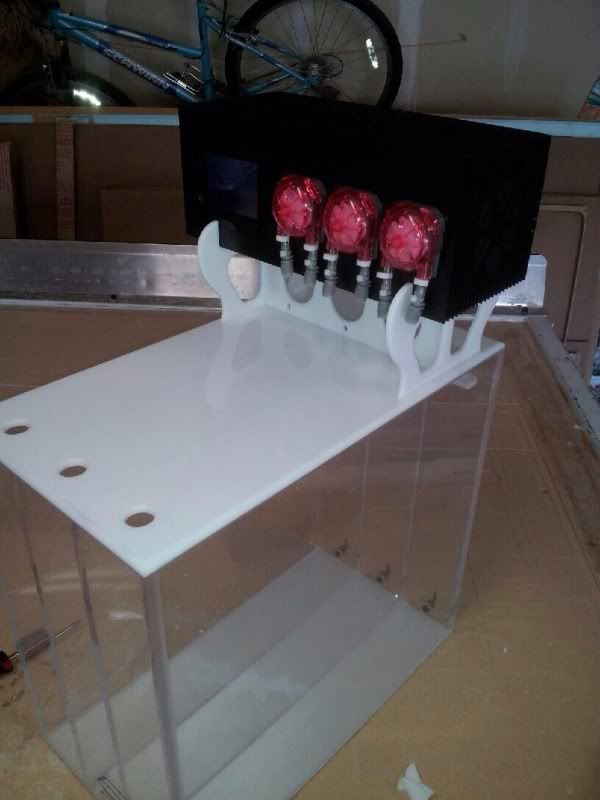 http://s118.photobucket.com/user/love2skiutah/media/FAEF10A9-A6F7-4526-AC14-257A3CC44111-7882-0000083762D33928_zps48ade95f.jpg.html" rel="nofollow"> 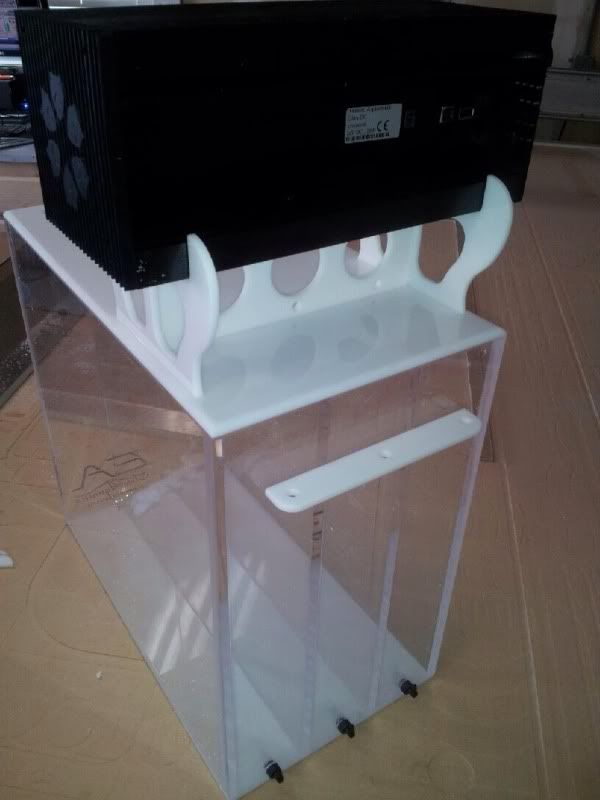 I didn't want to mount all my Apex and Ecotech controllers on the sides of my cabinet, so I had them build me a custom plate to mount them to. I will be able to slide it around and in and out of the way if needs be. The controllers will be mounted down each side with the cords going through the middle holes. http://s118.photobucket.com/user/love2skiutah/media/4FD7BD75-45C7-4BB0-BA42-66B23922A400-7882-0000083775F0A329_zps028dae1c.jpg.html" rel="nofollow"> 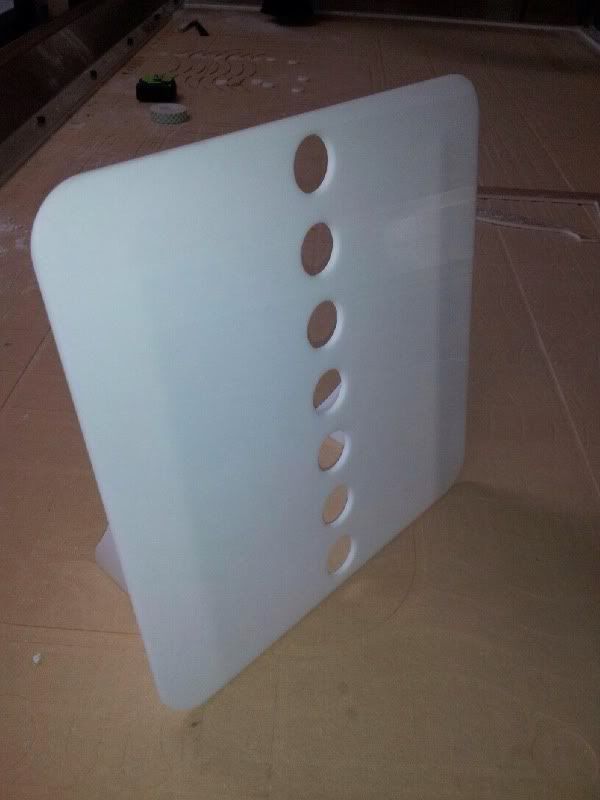 http://s118.photobucket.com/user/love2skiutah/media/0483A21C-133A-4E3E-9480-B407A6F59495-7882-0000083771CB322B_zps07dc7a81.jpg.html" rel="nofollow"> 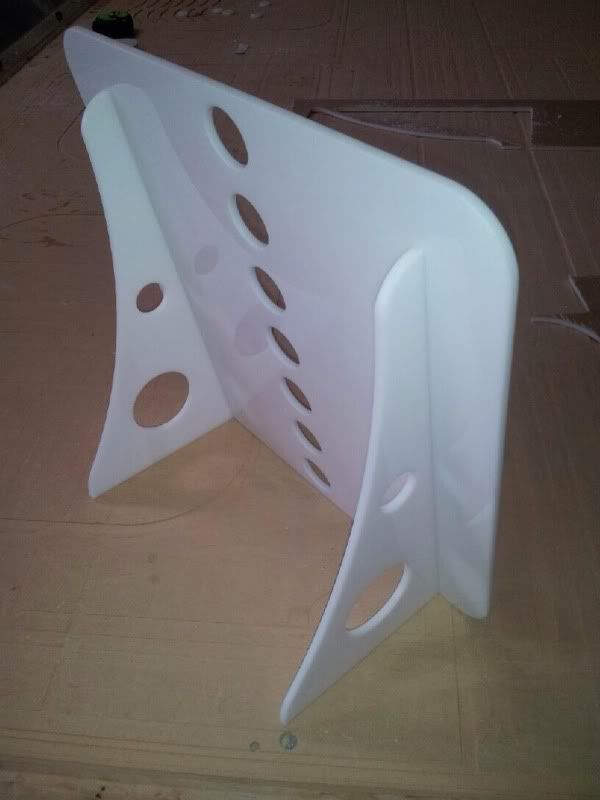 It's pretty cool when I can give him an idea and he just builds it.
|
Posted By: Dion Richins
Date Posted: October 13 2013 at 4:26pm
|
Those are awesome brackets!!!!!! ------------- http://www.customaquariumfurniture.com" rel="nofollow - Bad "censored" Cabinets Best quality in the valley! He is one sexy bald guy, even with out a finger!(MAC) |
Posted By: Akira
Date Posted: October 14 2013 at 9:31pm
| Aron it was great to meet you and this Bigger than I could imagine tank. You have great vision and can't wait to see it full of fish coral etc. For those who have not seen it this is a must see!!!!! But my kid still wants to know where your wife got those boots....I'm looking at tanks and she just wants to be stylish . Go figure? |
Posted By: Teknik777
Date Posted: October 14 2013 at 10:17pm
Kurt you came down without stoping by! Yes this is a very excited tank and has amazing potential.
------------- 220 G SPS Display. |
Posted By: Akira
Date Posted: October 15 2013 at 2:19am
| Sorry Allen it was the middle of the day and I had live stock and the family in tow . Next time I will plan a visit to your place before my pick ups as it left me kinda rushed . Had to visit Aquatic and Bird world while I was North and there is never enough time to be all the places I want to see in one afternoon. |
Posted By: Mark Peterson
Date Posted: October 15 2013 at 6:40am
Aloha Aaron, Thanks for having me over to look at your setup and to offer suggestions.  The shorter bulkhead is called a UniSeal. It is simple and works well. http://www.uniseal.co.nz/" rel="nofollow - http://www.uniseal.co.nz/ http://www.bulkreefsupply.com/uniseal-5.html" rel="nofollow - http://www.bulkreefsupply.com/uniseal-5.html  Another advantage of the Uniseal over typical bulkheads is that the Uniseal allows some wiggle room. Typical bulkheads leak when the pipe is wiggled. Note 1. For matching the Return pipe in the overflow to the pipe coming through the Uniseal bulkhead, when flaming and bending the PVC pipe to make the jog, do one bend at a time. ____ _____ / Note 2. I'm thinking a reducer 90 glued at the top, with a 3/4" S/T coupler inserted through the Uniseal into which the Lockline is threaded... will have to check what fits through the Uniseal. Note 3. ABS pipe and fittings are black and they are compatible with PVC primer and glue. Black PVC pipe and fittings are available online. Gray PVC pipe and fittings are used as electrical conduit, available at hardware stores. Exposed white pipe and fittings can be painted gray, with PVC cement, or black, with ABS cement. Expand your possibilities. Think outside the box. Find alternative solutions.Question  With those Return Lines leading through the overflow wall so far below the water line, how will the siphon break when the Return Pump stops? Is one side of the "Y" Lockline going to be bent up and along the water surface? Question With the lack of adequate working space at the bottom underside of the overflow, did you get a wrench, like this Rainbird Nelson Wrench I found for $8 at Ace Hardware, for dealing with the installed bulkhead nuts? Question What is the recommended flow rate for that skimmer? I hope it won't be moving water faster than the flow rate through the Sump/Refugium. BTW, most bugs go through a skimmer without ending up in the skimate. 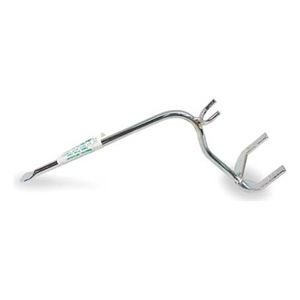 Mahalo again for letting me come over and offer suggestions, Mark  ------------- Reefkeeping Tips, & quick, easy setup tricks: www.utahreefs.com/forum/forum_posts.asp?TID=9244 Pay it forward - become a paid WMAS member
|
Posted By: love2skiutah
Date Posted: October 15 2013 at 7:51am
hmmm... Those are interesting seals. I'll check into them a little more. Thanks for the link. As far as breaking the siphon, If the return pumps are off, the tank stops pushing water, therefore the siphon stops? I guess I'm not understanding what you are saying there. The Loc-Line is about 1 inch below the teeth of the overflow box. The Skimmer has one of those DC variable pumps on it, which is the next smaller size, so I can bring the rate of the pump down if I need to. I got one of those tools from Home Depot a couple weeks ago. They work great
|
Posted By: Krazie4Acans
Date Posted: October 15 2013 at 8:24am
|
Aaron, I think what Mark means is that when your main pump shuts off the water from your main tank will begin to siphon back into the sump through your locline. If some air isn't introduced into the line to break the siphon, it will drain your main tank down to the level where the loc-line tip finally breaks the surface and air can be sucked into the line. Most of the time that is way more water than you want to have returning to your sump and may overflow the sump onto the floor. If you break the siphon earlier then it will limit the amount of water that returns to the sump. Some people put one end of the loc-line very close to the surface so that it breaks the siphon quickly. Others drill a small hole in the loc-line right by the bulkhead so that the hole is just below the water level of the tank. That way it's not spraying water into the air or out of the tank but as soon as the water level drops a small amount the air can get through the hole and stop the siphon. ------------- My ocean. 90g (yup, won it!), 40g, 28g, & 10g Systems PADI Advanced Open Water http://utahreefs.com/forum/forum_posts.asp?TID=63568&title=krazies-nano-paradise" rel="nofollow - Tank Thread: |
Posted By: love2skiutah
Date Posted: October 15 2013 at 8:30am
Ahh, I see what you are saying. I've actually never thought of it going back through the returns. I would have assumed it couldn't do it because of the returns pumps. I just measured and it's about 1 inch from the teeth of the overflow box. I guess I could have one of the loc-lines closer to the surface. I'll have to see where the water level is when those returns get shut off.
|
Posted By: Krazie4Acans
Date Posted: October 15 2013 at 8:42am
|
Don't be caught off guard. It will siphon backward even with the return pumps in the line. What I would do is get the plumbing all done and then fill it with tap water (to leak test and flow test) While it is full you can simulate a power outage by flipping the switch on the power strip for the return pumps. Then watch the level in the sump. If the siphon breaks before it gets too full then you are probably all right. If the sump starts to get too full them you can just turn the pumps back on and adjust. Personally I like the hole in the loc-line right by the bulkhead because that position cannot really be moved and you don't have to remember about it. If you rely on the position of the loc-line ends to break the siphon then you have to re-test the power outage every time you move the loc-line. You also have to remember this after months of not having to worry about it. Not very fail safe and we are talking about a lot of water with your new setup. ------------- My ocean. 90g (yup, won it!), 40g, 28g, & 10g Systems PADI Advanced Open Water http://utahreefs.com/forum/forum_posts.asp?TID=63568&title=krazies-nano-paradise" rel="nofollow - Tank Thread: |
Posted By: Williams
Date Posted: October 15 2013 at 9:47am
| Awesome set up. Would love to see it sometime.got a fish list ur stocking it with? |
Posted By: Mark Peterson
Date Posted: October 15 2013 at 7:09pm
|
Drilling a siphon break hole in the return line may seem like a nifty solution, but Murphy's Law rules supreme. A snail will be sitting directly on the hole when the power goes out, causing great distress for hobbyist and spouse .   Please feel free to search the annuls of this forum to verify the validity of this Murphy's Law Fact. How can this be fixed There are a few Cardinal Rules about a pump pushing water into an elevated holding tank. A siphon can and will start, spilling water out of its boundaries. Designing the system to prevent this disaster is one of those Cardinal Rules. This rule cannot be ignored or pushed aside. It must be on the mind of the hobbyist during all maintenance activities. I would be happy to help you avoid disaster with your system design. If these design suggestions are followed, a tap water test run is superfluous. Aloha, Mark ------------- Reefkeeping Tips, & quick, easy setup tricks: www.utahreefs.com/forum/forum_posts.asp?TID=9244 Pay it forward - become a paid WMAS member
|
Posted By: love2skiutah
Date Posted: October 15 2013 at 7:12pm
Those loc-lines are so close to the surface anyway, I'm going to just bring 2 of them near the water level. I thought about check valves, but I don't want to risk the valves failing, so I ruled that out as well. |
Posted By: Mike Savage
Date Posted: October 15 2013 at 7:42pm
|
I do not trust check valves either. You have the right solution having at least one of the returns close to the surface. ------------- |
Posted By: Dion Richins
Date Posted: October 16 2013 at 8:32am
|
I've ran check valves for 6+ years now. Knock on wood I've never had a fail. ------------- http://www.customaquariumfurniture.com" rel="nofollow - Bad "censored" Cabinets Best quality in the valley! He is one sexy bald guy, even with out a finger!(MAC) |
Posted By: kody72
Date Posted: October 16 2013 at 9:06am
|
I've also ran check valves and never had one fail. Very nice build Aaron looking forward to to seeing the end product. ------------- http://www.utahreefs.com/forum/forum_posts.asp?TID=60612&title=kody72-fishroom" rel="nofollow - KODY72 FISHROOM BUILD 281g DT 187g Rimless Frag ATI PM lighting SRO DSCR-300ext 8013908179 |
Posted By: icenine
Date Posted: October 16 2013 at 10:00am
This is why I drill TWO siphon break holes into my lock lines.
|
Posted By: Krazie4Acans
Date Posted: October 16 2013 at 10:05am
|
+1 ^Me too.
------------- My ocean. 90g (yup, won it!), 40g, 28g, & 10g Systems PADI Advanced Open Water http://utahreefs.com/forum/forum_posts.asp?TID=63568&title=krazies-nano-paradise" rel="nofollow - Tank Thread: |
Posted By: love2skiutah
Date Posted: October 16 2013 at 10:10am
Drill 2 holes and only have 1 snail?
|
Posted By: Bryce
Date Posted: October 16 2013 at 10:15am
|
+ 1 to two holes at the 1st loc-line near the surface to break the siphon, I would not trust just having the loc-line near the surface but that's just me, I also fully agree with a wet test of a power outage, I was amazed at how when I did this on my set up how wrong my initial assumptions were. From the skimmer starting when its almost fully submerged from the rise in water in the sump and totally overflowing ($12 manual reset portable GFCI plug that you have the skimmer plugged into solves that) to ATO's going off, to reactor pumps back siphoning....test your whole set up for "what could go wrong" would be my advice. Even planning out how maintenance will affect everything is a good idea, I have to pull my return pump and skimmer out for a cleaning every few months and its more of a pain in the butt than it should be had I had the opportunity to do my set up over and have thought about it more. ------------- 65g Reef |
Posted By: love2skiutah
Date Posted: October 16 2013 at 10:17am
Yeah, I was planning on just doing a couple holes and keeping the corner loc-lines up high as well. I've got 8 of them.
|
Posted By: Akira
Date Posted: October 17 2013 at 4:24am
| As there is no one way that is the all in one fail safe all of the above are great solutions . But for me in my limited experience is that anything mechanical that can go wrong will fail at some point in time. So a few simple tricks such as small anti siphon holes and a quick check of your overall system when doing water changes is a way to keep your overflow protection in the same working as your tank . But thats just my O2. |
Posted By: love2skiutah
Date Posted: October 23 2013 at 11:54am
|
Updated pics - Taking the time to properly measure things out and think things through has paid off. Elite Aquatics did an amazing job on the custom pieces I requested. 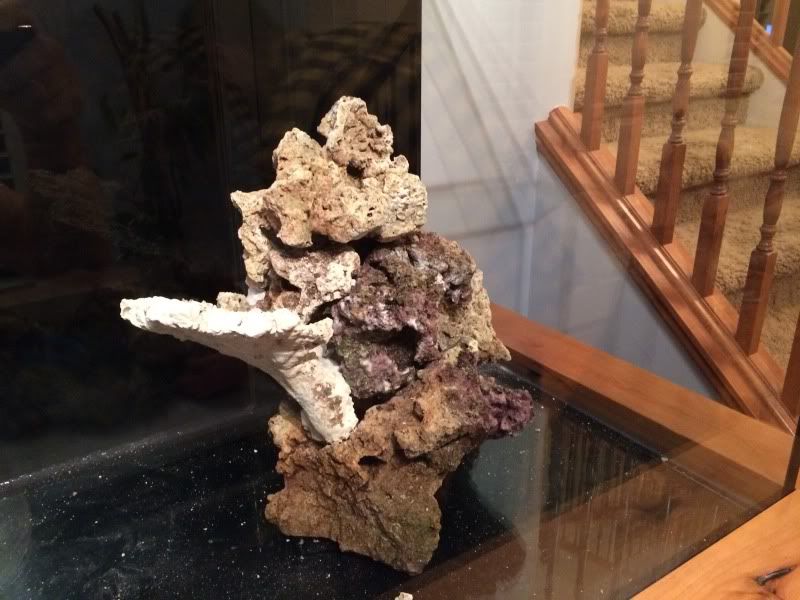
http://s118.photobucket.com/user/love2skiutah/media/6860323F-536A-441A-93EB-2EA90869F2A3-14121-00000DAB1D2FE692_zpsca6af758.jpg.html" rel="nofollow"> 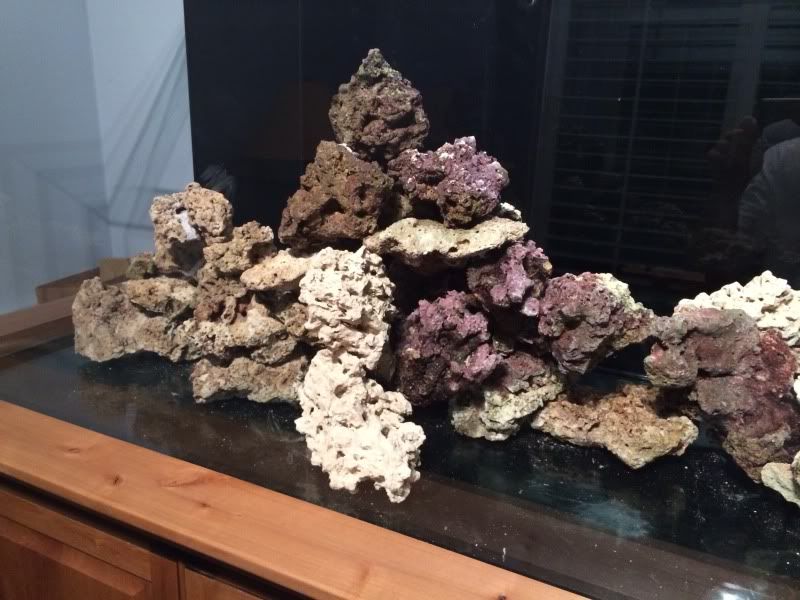 http://s118.photobucket.com/user/love2skiutah/media/1BB27F3F-C3F0-4AF2-BB77-FAE81E2674AD-14278-00000DBB2934DF4C_zpsa89608ab.jpg.html" rel="nofollow"> 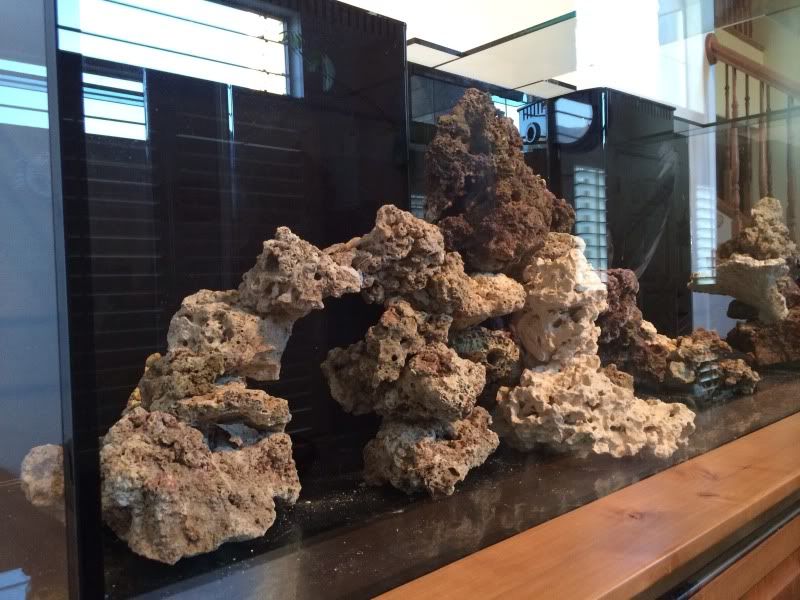 http://s118.photobucket.com/user/love2skiutah/media/9D5B80E5-F2F3-4C0C-919F-DFAA42DAE74C-17467-00000E7349D14CD1_zps5ff25c9f.jpg.html" rel="nofollow"> 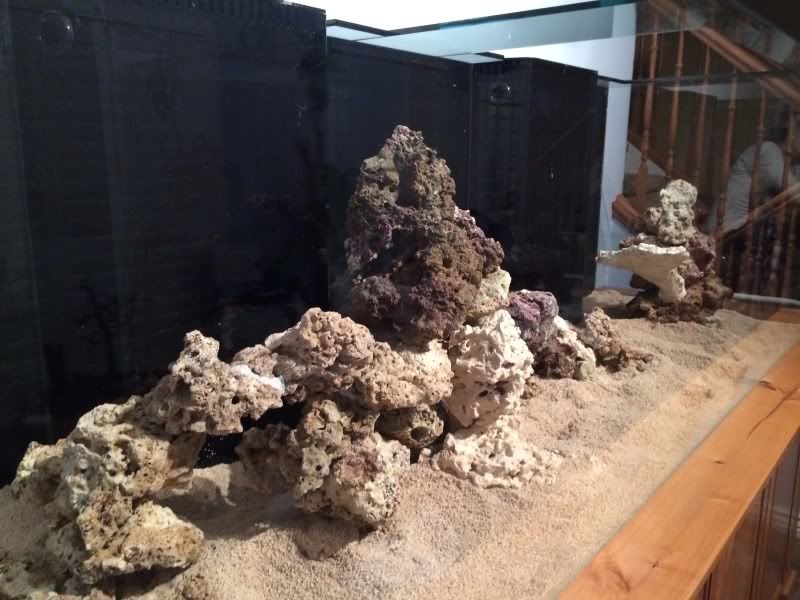 http://s118.photobucket.com/user/love2skiutah/media/9789BC8F-662C-4C66-A3BD-83B3A470FDCD-17467-00000E735B615C41_zps1fea167f.jpg.html" rel="nofollow"> 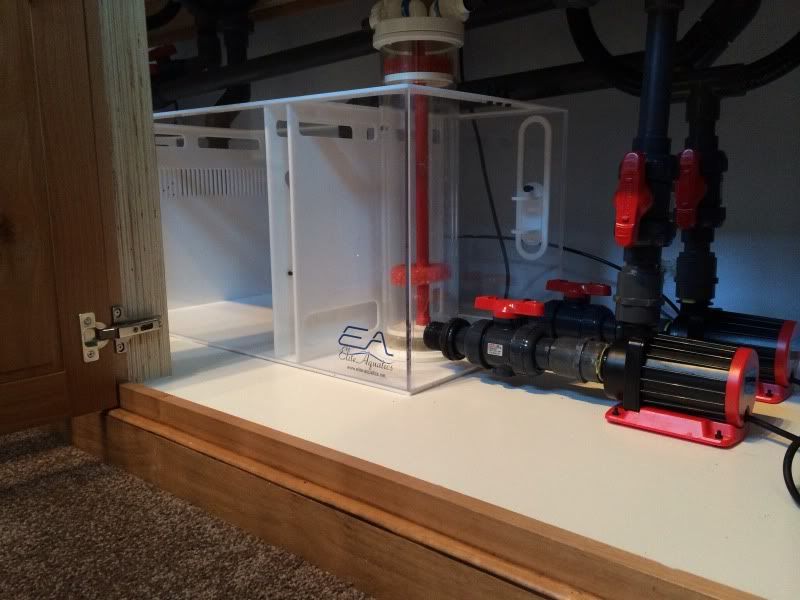 http://s118.photobucket.com/user/love2skiutah/media/EAC69968-BFD5-4480-9405-25EA66E9443F-18995-00000F7A62612A86_zps92f48cde.jpg.html" rel="nofollow"> 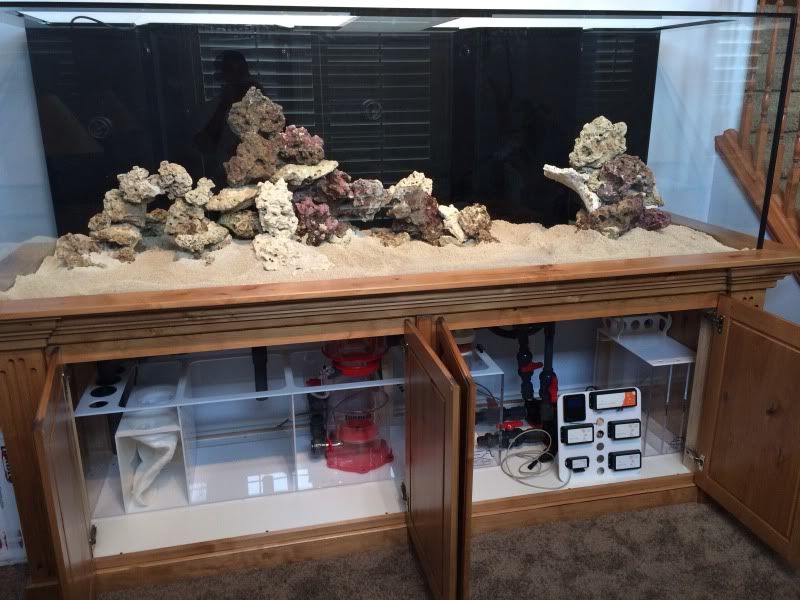 http://s118.photobucket.com/user/love2skiutah/media/423D941E-59FD-4443-8151-C19535EF33AC-915-000000D72D8C306D_zps0f113f0d.jpg.html" rel="nofollow"> 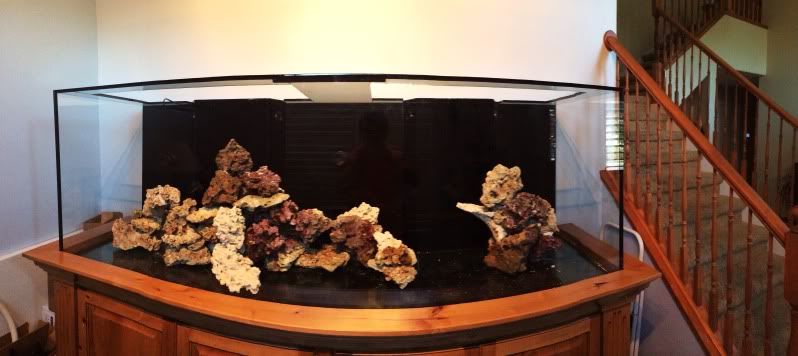 http://s118.photobucket.com/user/love2skiutah/media/9E0B064E-6F78-487B-82FD-9A068ECA4A9D-915-000000D712A09CAD_zpsbf70f25b.jpg.html" rel="nofollow">
 |
Posted By: Jeepkid
Date Posted: October 23 2013 at 12:09pm
|
That is looking clean ! ------------- Brian. "It's a Jeep thing!" |
Posted By: Krazie4Acans
Date Posted: October 23 2013 at 2:22pm
|
Amazing how much of the rock disappeared under the sand and yet the sand is still below the molding in many places. This thing is huge! Nice work. BTW, what brand are those return pumps?
------------- My ocean. 90g (yup, won it!), 40g, 28g, & 10g Systems PADI Advanced Open Water http://utahreefs.com/forum/forum_posts.asp?TID=63568&title=krazies-nano-paradise" rel="nofollow - Tank Thread: |
Posted By: love2skiutah
Date Posted: October 23 2013 at 2:27pm
Reef Octopus DC 10500 variable pumps - Not sure if I'd recommend, I've been having issues with them on the install. We will see when they get up and going.
|
Posted By: Krazie4Acans
Date Posted: October 23 2013 at 2:39pm
Good to know. I just like their size and how small the pump head is for the rating on them. Thanks for the info as always! Can't wait to see that Apex running! :) ------------- My ocean. 90g (yup, won it!), 40g, 28g, & 10g Systems PADI Advanced Open Water http://utahreefs.com/forum/forum_posts.asp?TID=63568&title=krazies-nano-paradise" rel="nofollow - Tank Thread: |
Posted By: DMower
Date Posted: October 23 2013 at 2:57pm
|
I am sure you will like the pumps after they are up and running. I run the reef octopus 5500 on my skimmer. Great pump so far. Everything is looking really good! ------------- 150 gal reef with 50 gal sump. Reef Octopus DCS-200 Skimmer. AI Sol Blues. |
Posted By: suiso man
Date Posted: October 23 2013 at 2:58pm
| wow I am so jealous!! I wish I had a tank that big. It looks awesome!! |
Posted By: love2skiutah
Date Posted: October 27 2013 at 7:08pm
|
If you've ever worked with Spaflex, it's kind of a pain. I used a hairdryer to get it warm and then zip tied it to a straight edge and it worked like a charm after it cooled down. http://s118.photobucket.com/user/love2skiutah/media/19FA0E90-62DA-45A7-B92E-26347DD0C6DB-3888-000003F0A1141F60_zps8b901770.jpg.html" rel="nofollow"> 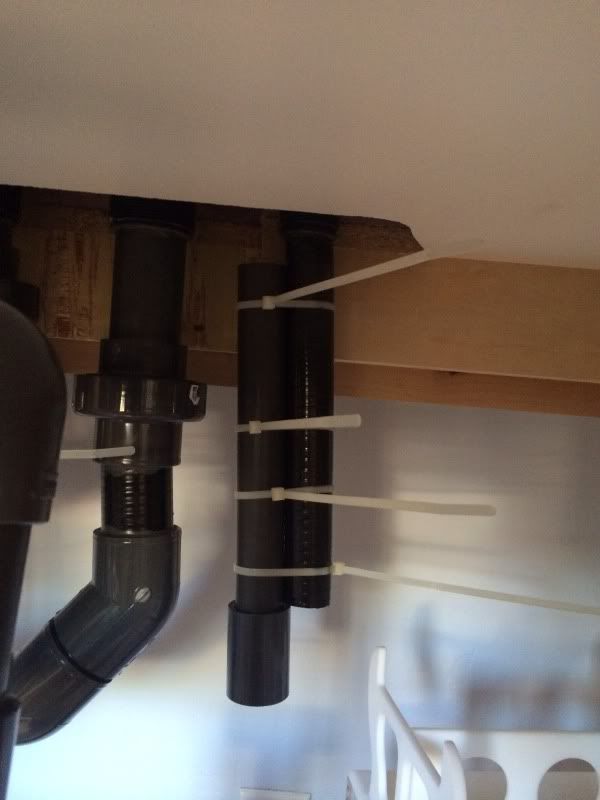 It took about about 30 min to fill up the display. I will be putting some type of a cage over those 90's that are in the sump for the returns. I did run into quite a few problems as we were filling up the tank and it took about 3 hours re-adjusting and re-doing some of the plumbing. http://s118.photobucket.com/user/love2skiutah/media/CB9D44BA-42BB-4E53-A626-A7F9E96E7E11-3888-000003F0C494A4A3_zps4e4603ac.jpg.html" rel="nofollow"> 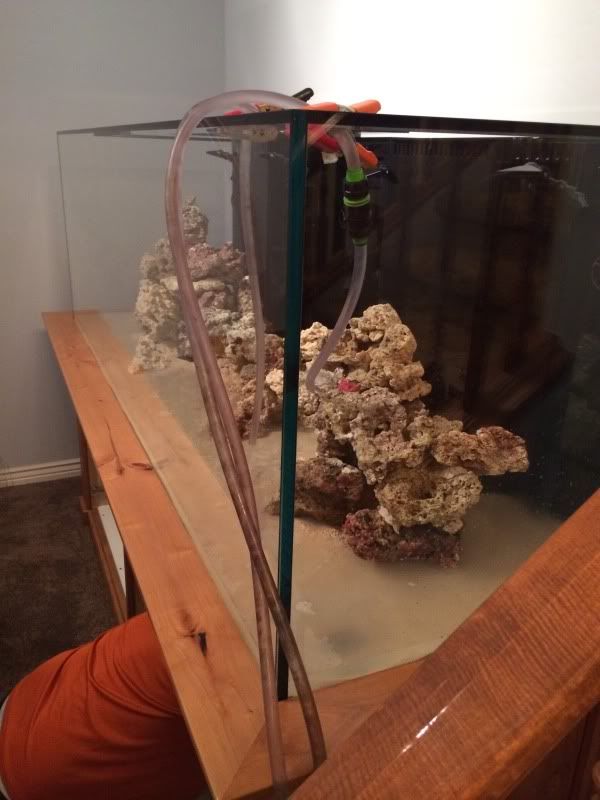 http://s118.photobucket.com/user/love2skiutah/media/013BE4BA-C89A-4D41-87FA-C2B3169FCEE9-3888-000003F0D4F42724_zps0d2ec25d.jpg.html" rel="nofollow"> 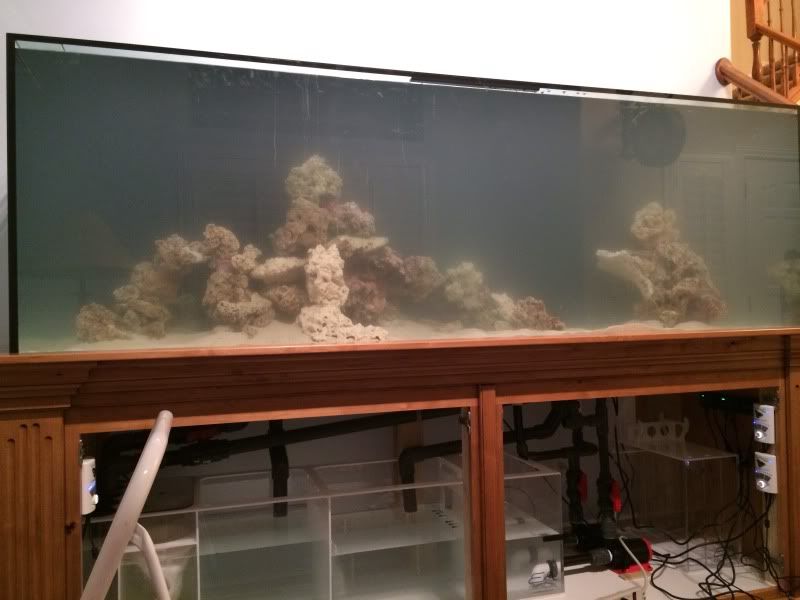 http://s118.photobucket.com/user/love2skiutah/media/58E5E6B4-D644-4500-83CA-0780FF8C07E5-3888-000003F0E7E28D08_zps8b1905f1.jpg.html" rel="nofollow"> 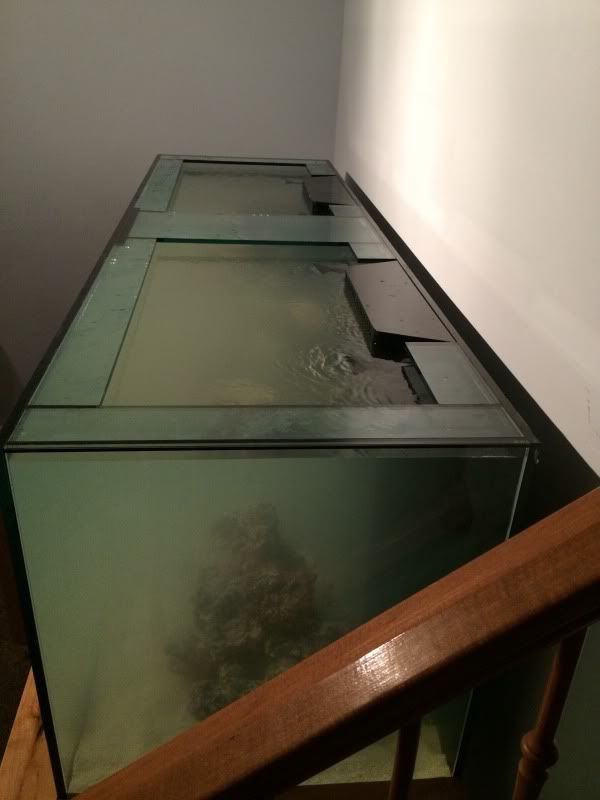 http://s118.photobucket.com/user/love2skiutah/media/548B29C6-DCB9-478D-9A47-40FEB7DD52F2-719-000000E5053D1108_zpsd65fd3a1.jpg.html" rel="nofollow">  http://s118.photobucket.com/user/love2skiutah/media/AF644A30-C8DA-4789-8330-3E87EDBD203B-719-000000E5093468A2_zps427c2126.jpg.html" rel="nofollow"> 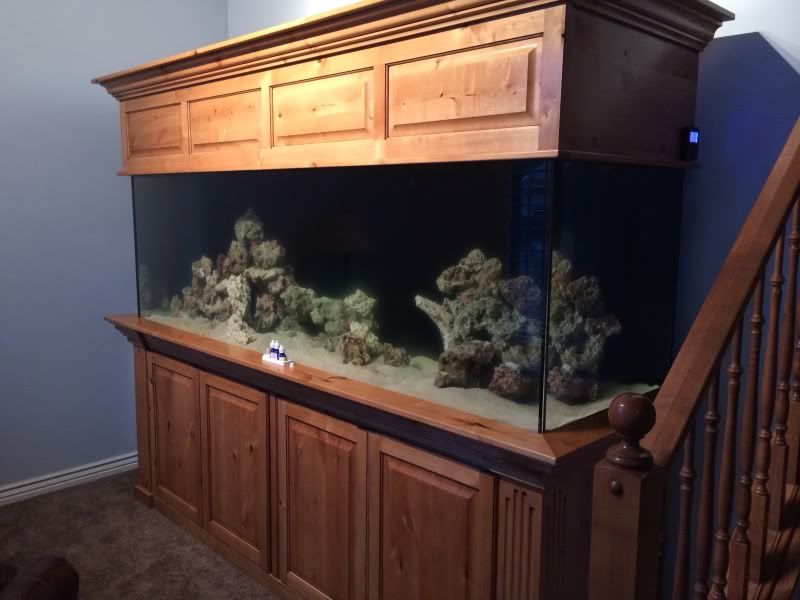
|
Posted By: Mike Savage
Date Posted: October 27 2013 at 7:10pm
|
Oh yeah, lookin' good! ------------- |
Posted By: love2skiutah
Date Posted: October 27 2013 at 7:15pm
|
I wanted to show you guys a close up of this stand and Dosser I had Elite Aquatics custom build for me. I was very tight on room, so this was a must. http://s118.photobucket.com/user/love2skiutah/media/617BC0C6-8C73-47C1-BAE9-F172824EE95B-719-000000E90C95A448_zps5fe83a3e.jpg.html" rel="nofollow"> 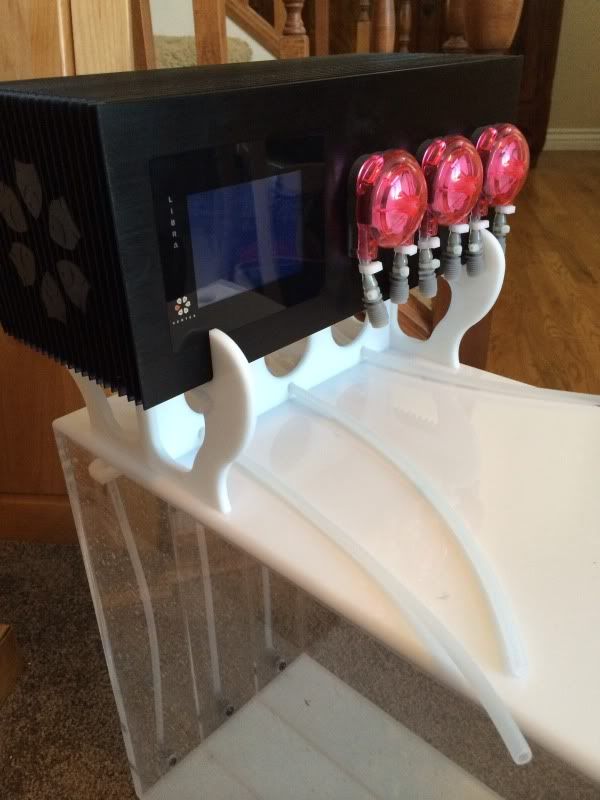 As you can see, the 1/4 inch tubing goes directly from the box to the Vertex and then over to the sump where I had the same connections installed. http://s118.photobucket.com/user/love2skiutah/media/A15C8BC1-8411-4F14-B11D-45AEEFD69256-719-000000E91213FC56_zps48ecdef4.jpg.html" rel="nofollow"> 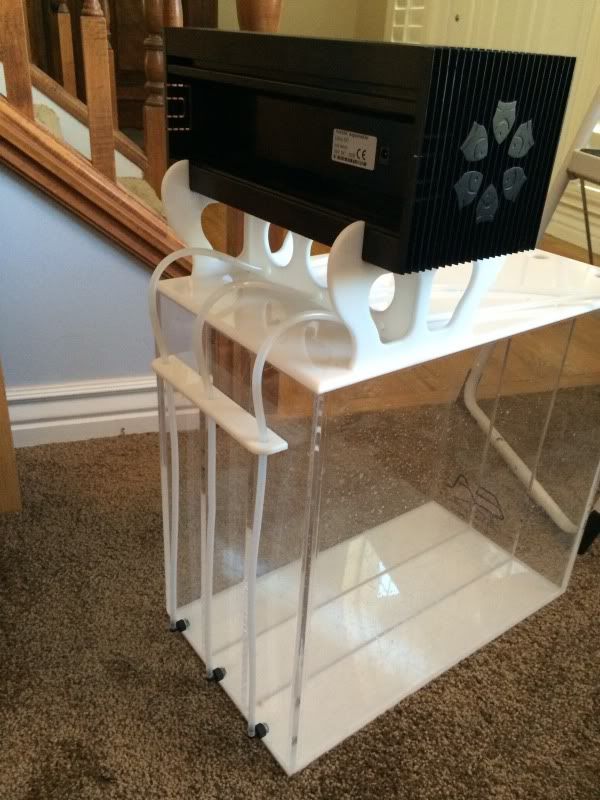 I have not zip tied all the cords yet because I have more Vortech's and all my Radion Pros that I have to add over the next couple weeks. But you can see how it fits nicely under the cabinet. http://s118.photobucket.com/user/love2skiutah/media/CFCB6BBF-6EA2-414E-A104-387E7131B729-719-000000E9210459D2_zps483a793b.jpg.html" rel="nofollow"> 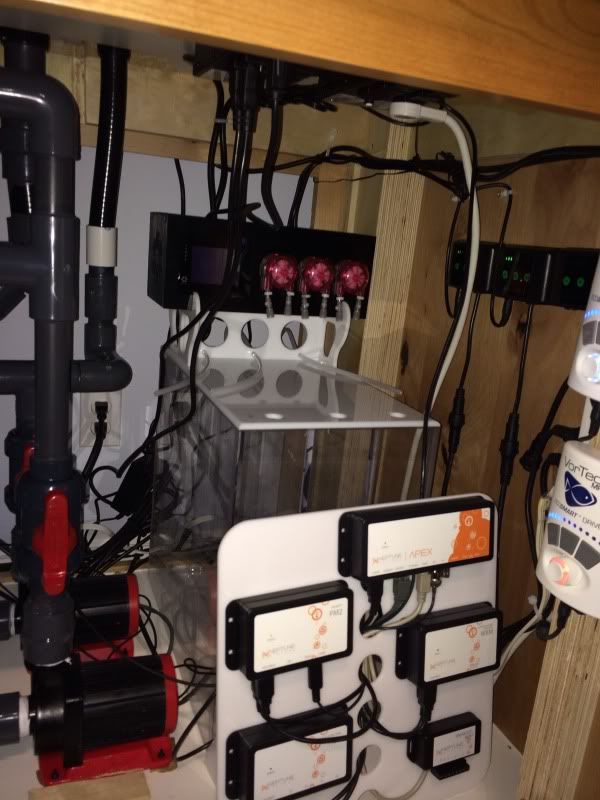 |
Posted By: ch3tt
Date Posted: October 27 2013 at 7:17pm
|
Looking good Aaron! I've got to come check this thing out soon. ------------- Red Sea Reefer 625 XXL |
Posted By: love2skiutah
Date Posted: October 27 2013 at 7:25pm
Come by anytime you are in the area
|
Posted By: Dion Richins
Date Posted: October 27 2013 at 7:45pm
|
Looking AWESOME!!!!!!!!!! ------------- http://www.customaquariumfurniture.com" rel="nofollow - Bad "censored" Cabinets Best quality in the valley! He is one sexy bald guy, even with out a finger!(MAC) |
Posted By: Akira
Date Posted: October 27 2013 at 9:41pm
| Wow !!! It just gets better and better. I really love the design of your dosing tank and how clean that turned out , so hands off to You and Tyler !! The imagination new ideas in builds never seems to end . |
Posted By: love2skiutah
Date Posted: October 28 2013 at 8:13pm
|
At least I got my 4 gallon Nano in my kitchen to get me by while I'm cycling. UGH http://s118.photobucket.com/user/love2skiutah/media/5D157D9B-0722-4FBF-B3E0-920D6B23A258-232-00000084E51D924B_zps48702bf7.jpg.html" rel="nofollow"> 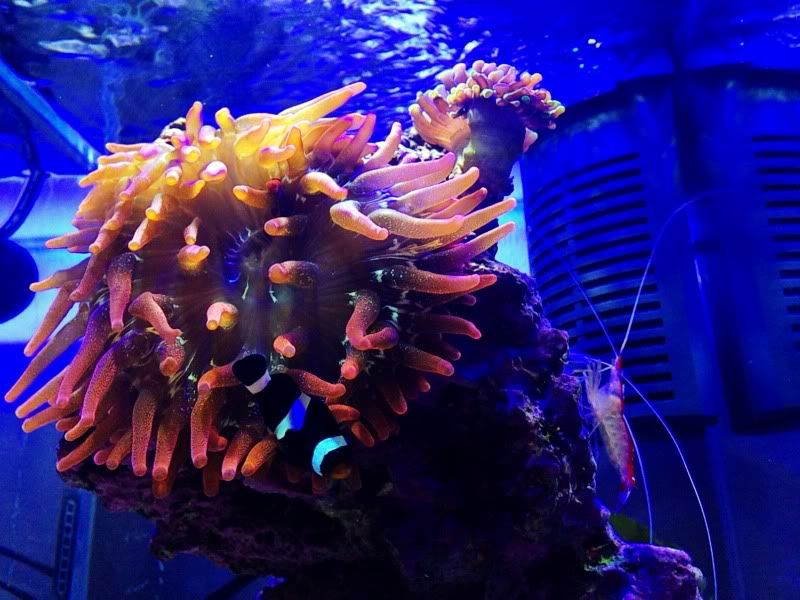
|
Posted By: Mike Savage
Date Posted: October 28 2013 at 8:21pm
|
Very nice. It is amazing how much another tank can help with patience while waiting! ------------- |
Posted By: love2skiutah
Date Posted: October 29 2013 at 11:44am
|
I'd like to point out one of the mistakes I made when I was installing, so some you plumbing noobs like me don't do the same thing. Okay, so ignore that I have a coupling in there, cause I was originally supposed to have a union, but I was short one. See the angle of the spaflex going up into the bulkhead? I installed all my bulkheads and tested them and no leaks. I then proceeded to glue the spaflex up into the bulkheads and I thought it was fine. It turns out that with the spaflex bent, it put pressure on the bottom of the bulkhead and basically squished the gasket and caused them to leak. I had to buy 4 new bulkheads with gaskets and redo some of the plumbing. I ended up coming straight down with the spaflex and then using a 90 to come over and into the main run. Ryan showed up with 400 gallons of water and ended up staying at my home past midnight helping me fix my screw up. So I guess the moral of the story is when you are using the spaflex, be super careful with those hard angles. It puts a lot of pressure on your plumbing. I was actually really annoyed because I spent so much time doing research and being what I thought was super careful on doing my plumbing with the bulkheads. Nice piece of humble pie for me Seriously though, Ryan from Aquatic Dreams bent over backwards and saved my butt that night be staying all night and helping me fix the problem. I appreciate everyone showing up at my house and giving me pointers though. I took a little bit of information from everyone to get this done. http://s118.photobucket.com/user/love2skiutah/media/5076EA28-6602-4A07-8AEB-412B38A4F495-2218-000002AE92606D60_zps37ad3816.jpg.html" rel="nofollow"> 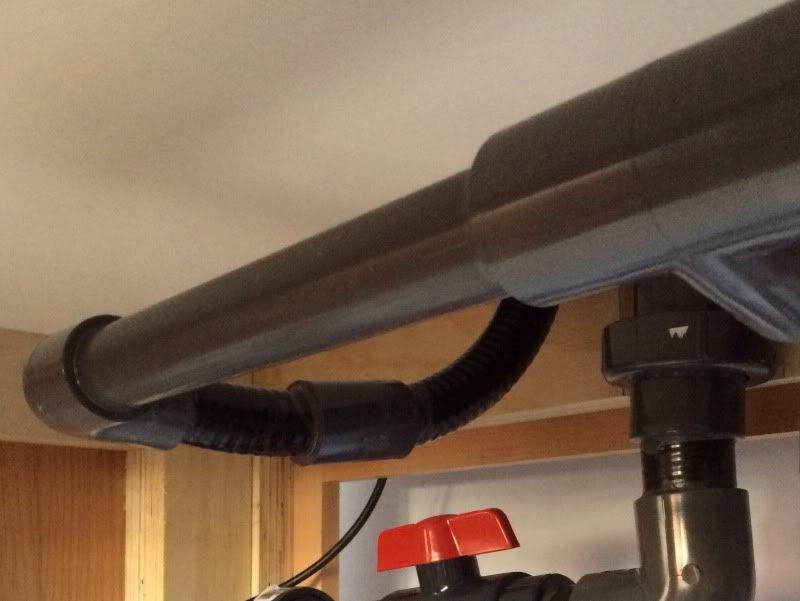 Here's one of the gaskets I ruined. http://s118.photobucket.com/user/love2skiutah/media/C68794C7-F4FC-4B25-8D4F-94DDC0843EBE-2218-000002AE0E481D75_zpsb43ead23.jpg.html" rel="nofollow"> 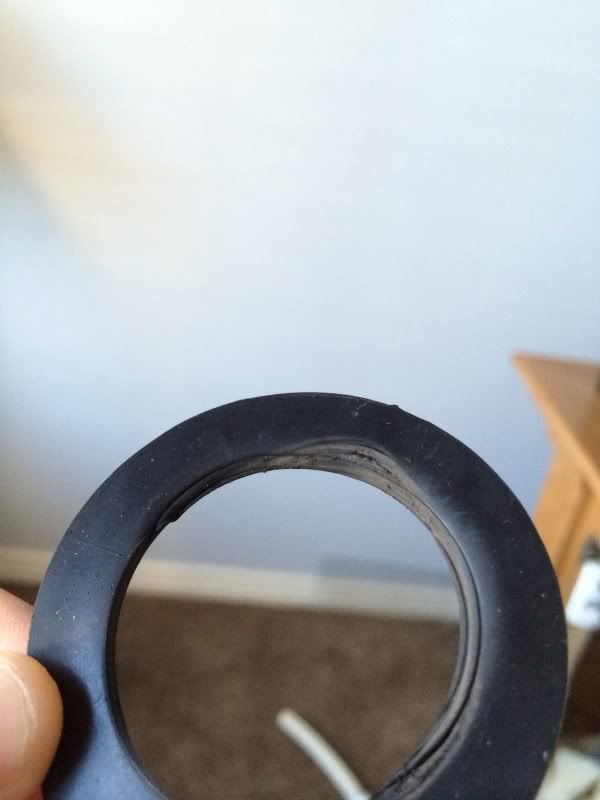 The second time, I heated the spaflex up with a hairdryer and then zip tied it to the straight edge until it cooled. http://s118.photobucket.com/user/love2skiutah/media/19FA0E90-62DA-45A7-B92E-26347DD0C6DB-3888-000003F0A1141F60_zps8b901770.jpg.html" rel="nofollow">
|
Posted By: love2skiutah
Date Posted: November 06 2013 at 7:43pm
|
Seriously. I hate cycling. I wanted to show you the difference between my 2 tanks. 
|
Posted By: Krazie4Acans
Date Posted: November 06 2013 at 7:58pm
|
Looks awesome Aaron. I know it's a bit late now but you can use the same technique of heating the spaflex and then bending it and holding it bent while it cools to take the stress off of the bulkheads as well. In either case that clean plumbing will pay off. I try to avoid 90 elbows in my plumbing as much as possible especially in the drains to keep the flow as unrestricted as possible. Glad you found another solution that works as well. ------------- My ocean. 90g (yup, won it!), 40g, 28g, & 10g Systems PADI Advanced Open Water http://utahreefs.com/forum/forum_posts.asp?TID=63568&title=krazies-nano-paradise" rel="nofollow - Tank Thread: |
Posted By: love2skiutah
Date Posted: November 06 2013 at 8:11pm
That was the whole point of using the spaflex, was to avoid the 90s. If you look at the picture above, I did heat it up, but the bend was still too tight. At the time, I assumed it was fine, but that small amount of pressure ruined those gaskets. Ryan spent 4 hours with me until almost 1 in the morning helpling me fix it :/ It's been a really fun project to work on this fall, but I'm ready to start filling it up. I've already got some orders in for some really special fish :) |
Posted By: speyside712
Date Posted: November 06 2013 at 11:51pm
| I live pretty close to you in centerville and would love to come check out your setup sometime. I'm in the middle of building a 90 system right now as well, maybe you can give me some pointers. |
Posted By: love2skiutah
Date Posted: November 07 2013 at 12:02am
You are more than welcome to stop by anytime. Evenings are best
|
Posted By: ksmart
Date Posted: November 07 2013 at 2:22pm
I want to come by some time too! ------------- |
Posted By: love2skiutah
Date Posted: November 07 2013 at 2:42pm
Anyone is welcome. Just PM me!
|
Posted By: Fishfinder07
Date Posted: November 08 2013 at 10:58pm
| I just wanna say I'm not sure I have ever seen a more Beautiful well thought out setup. I love everything about this build so far and will for sure be following it as it grows. Keep those updates coming! |
Posted By: love2skiutah
Date Posted: November 10 2013 at 9:59pm
Thank You - I've had a lot of time to think about it, so I think it's paid off.
|
Posted By: love2skiutah
Date Posted: November 10 2013 at 10:00pm
|
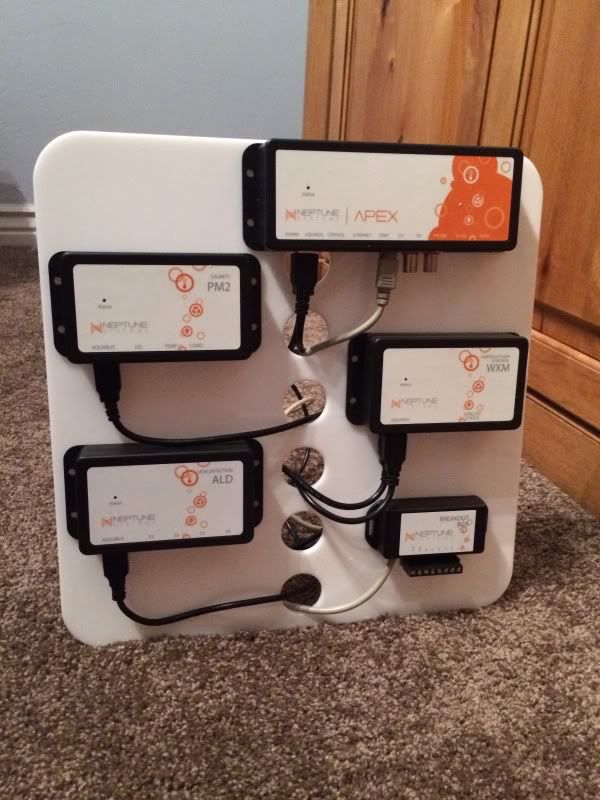
Day 16 of my cycle... Patiently waiting - Opened up my lights today and will get them mounted later this week. http://s118.photobucket.com/user/love2skiutah/media/168ACF14-BD40-4DEB-ACE0-E9501D10F6CF-1411-000001D98F0B2673_zps09c96f13.jpg.html" rel="nofollow"> 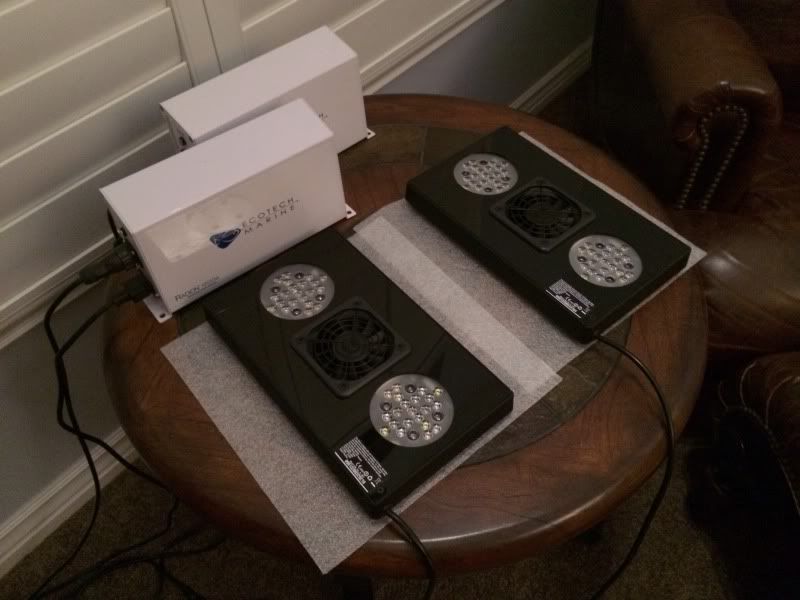 These are the controls for the return pumps and for my Skimmer. http://s118.photobucket.com/user/love2skiutah/media/6557396E-30AC-47F1-8057-4F780518E1F6-1411-000001D9748DA37F_zpscea211d2.jpg.html" rel="nofollow"> 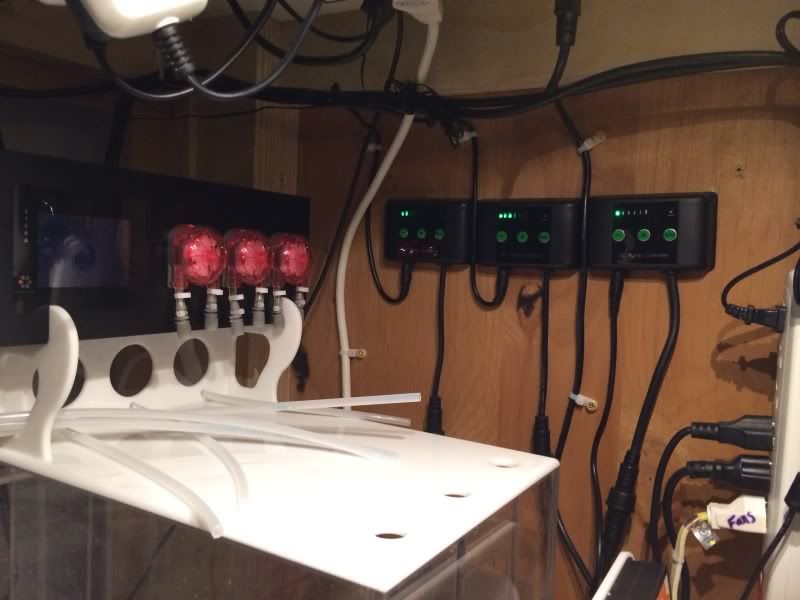 Here is a shot of what is going on with all my controls. It's insane how much stuff is under this cabinet. I'm glad I took the time to plan it out or else it would have not fit right. http://s118.photobucket.com/user/love2skiutah/media/730C2CA1-A548-4427-A7BC-63437D9653E2-1411-000001D967A10112_zps4747b583.jpg.html" rel="nofollow"> 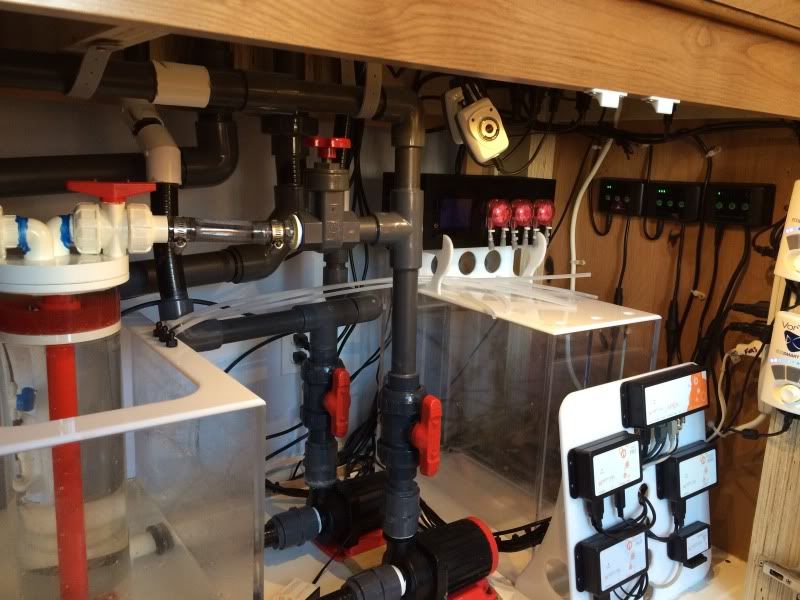 Here is a front shot of my Neptune board. http://s118.photobucket.com/user/love2skiutah/media/E16B88B1-E494-4630-B8F3-3352A1538492-1411-000001D9805AB9E7_zpsd1e4a58e.jpg.html" rel="nofollow"> 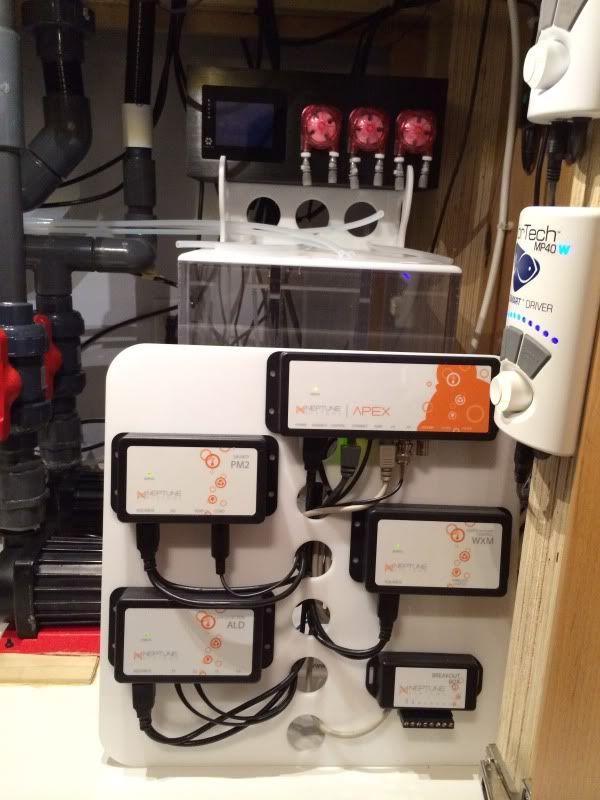 Got my dosser hooked up to my 1/4 inch lines directly into the sump http://s118.photobucket.com/user/love2skiutah/media/6768843C-7B8B-4960-95C7-525BEF7090B0-1411-000001D98450A570_zpsc1fc2bea.jpg.html" rel="nofollow"> 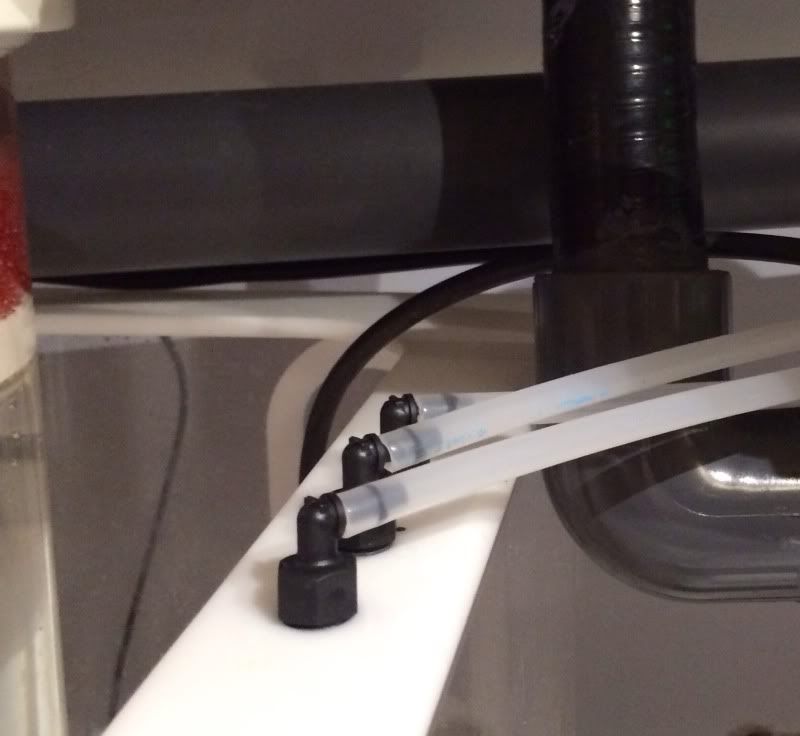 T'd in my Vertex reactor for my media (Will add it in a few weeks). I turned my Skimmer on the lowest setting. I don't want to skim anything yet because I have no cycled all the way yet. http://s118.photobucket.com/user/love2skiutah/media/D4587028-49F4-4462-8747-3EB7F96CFBC0-1411-000001D978647B21_zps1f5da46a.jpg.html" rel="nofollow"> 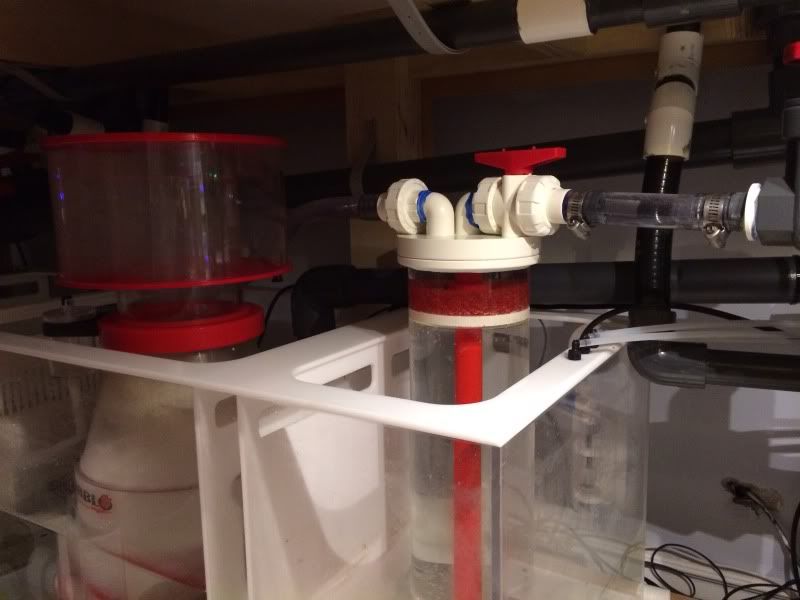 I decided to go with the BRS bio-pellet - http://s118.photobucket.com/user/love2skiutah/media/55075F8B-6C8A-4015-A05B-8E45DABAB0DC-1411-000001D987CF336E_zpsba96588e.jpg.html" rel="nofollow"> 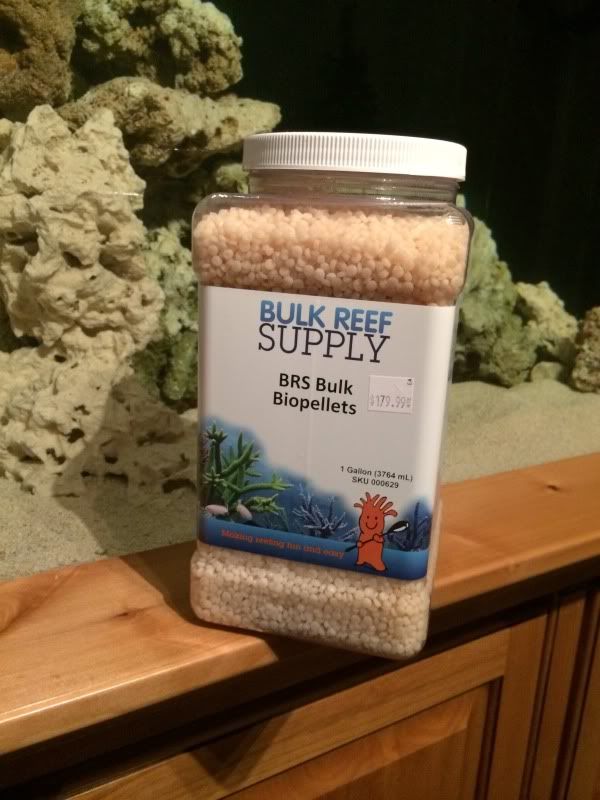 This is for the wife :) Got 2 of them under the cabinet - They will send me emails and texts if it detects water http://s118.photobucket.com/user/love2skiutah/media/471EDA5A-0C9D-477A-B47B-B4C298750AFC-1411-000001D97C75E106_zpsa91e8ad2.jpg.html" rel="nofollow"> 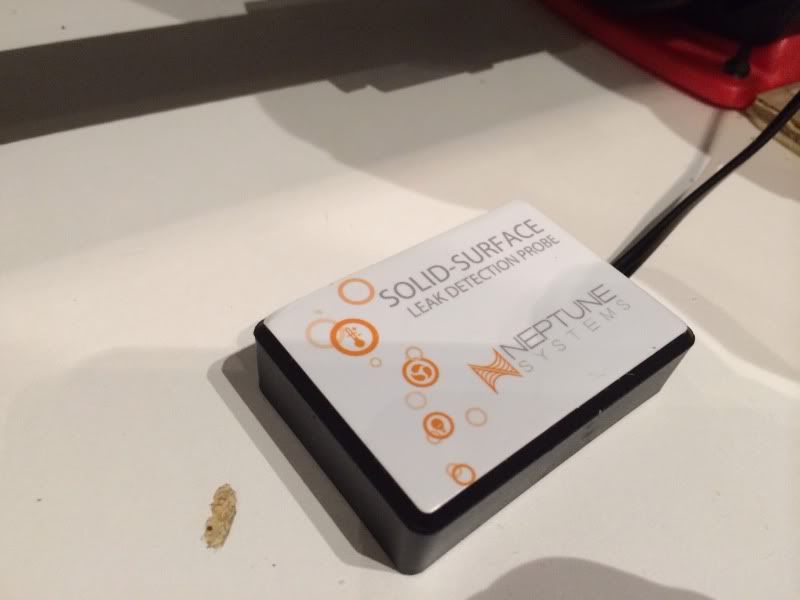 |
Posted By: Elite-Aquatics
Date Posted: November 11 2013 at 8:23am
|
Looking good man! ------------- Premium aquarium filtration! |
Posted By: Mike Savage
Date Posted: November 11 2013 at 4:50pm
|
Fantastic build! ------------- |
Posted By: Scott B
Date Posted: November 11 2013 at 5:02pm
|
Awesome!!! ------------- 28g jbj led nano, 150 g mixed reef, skimz skimmer, AI blue sol's, Reef Angel controller, wp40's, aquamedic reef doser |
Posted By: jbutler
Date Posted: November 11 2013 at 7:17pm
| Looking good man! Can't wait to see some livestock in there. |
Posted By: love2skiutah
Date Posted: November 11 2013 at 7:24pm
|
The morning of the mwrf, I thought I had a small trace of ammonia, but I'm pretty sure I just messed up the number of drops for the test because I was in a hurry. So I'm on Day 17 and no ammonia.... Ugh |
Posted By: Akira
Date Posted: November 11 2013 at 8:41pm
|
Have you decided on how your going mount those bad boy lights yet ? Slide mounts or fixed? |
Posted By: love2skiutah
Date Posted: November 11 2013 at 8:44pm
I'm not sure yet. I'm going to get them mounted on Friday. I'm leaning towards the ecotech hanging kits as of right now... |
Posted By: Dion Richins
Date Posted: November 12 2013 at 10:24am
|
Let me know if you need something. :) ------------- http://www.customaquariumfurniture.com" rel="nofollow - Bad "censored" Cabinets Best quality in the valley! He is one sexy bald guy, even with out a finger!(MAC) |
Posted By: love2skiutah
Date Posted: November 12 2013 at 11:11pm
|
Finally get to work on the lights.... I received the other 2 today. http://s118.photobucket.com/user/love2skiutah/media/A495F964-EB04-4A2B-9A11-7C5A6CB844EF-3359-00000430F5BF77A8_zps09637ccf.jpg.html" rel="nofollow"> 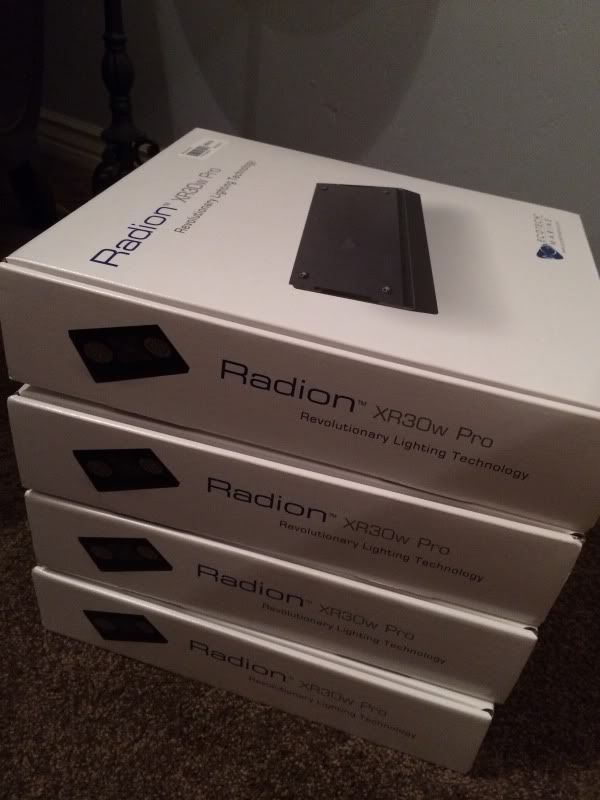 Several of you have PM'd me about this box and how it works. As you can see one end goes from the dosser to the sump and the other end goes through the hole and down the back of the box. It pulls the liquid from the bottom of the box. http://s118.photobucket.com/user/love2skiutah/media/D65E22F4-7047-49F8-B037-9E62A8E33A45-3359-000004310735F516_zps4a822fa6.jpg.html" rel="nofollow"> 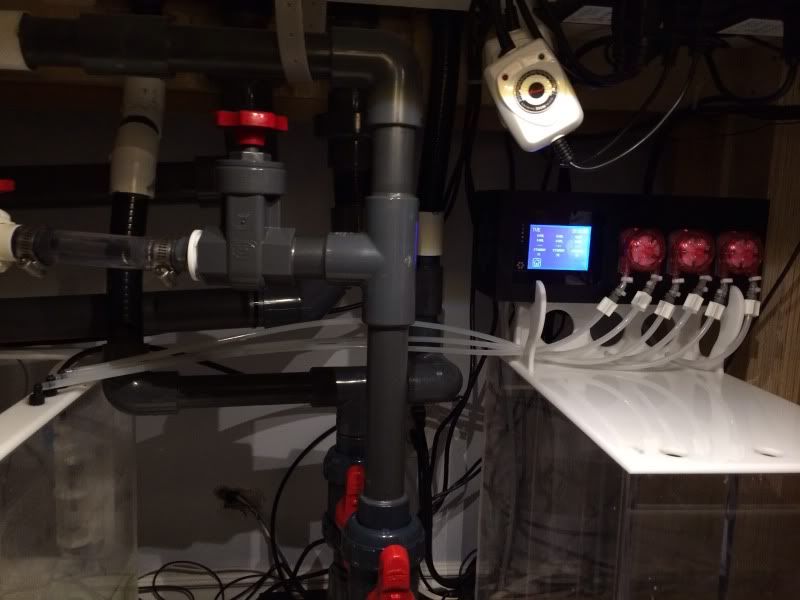 |
Posted By: tileman
Date Posted: November 12 2013 at 11:15pm
|
Love it. ------------- 335G Reef TOTM. http://www.advancedaquarist.com/2015/2/aquarium ReefKeepers TOTM Feb. 2012 http://reefkeeping.com/joomla/index....k-of-the-month & |
Posted By: fishnfresh
Date Posted: November 13 2013 at 12:39am
| Very nice and clean looking love it |
Posted By: lskurys
Date Posted: November 13 2013 at 10:18am
|
It is looking really good. I can wait to see it with the lighting up. Then with the fish and corals..... Well now that I think about it. I really think that you should move this tank to my house and I will keep an eye on it for you. Yes I think that is a much better plan.
------------- 220g , large elite aquatics sump. 3 Radion Pro Gen 3 lights 3 Mp 40's |
Posted By: love2skiutah
Date Posted: November 15 2013 at 4:50pm
|
Today, I decided to start messing around with the programming on the lights and get them mounted. http://s118.photobucket.com/user/love2skiutah/media/33F4B8F3-D85D-4691-988E-0B2160BFCF2B-786-000000A6AD881C79_zps4796008c.jpg.html" rel="nofollow"> 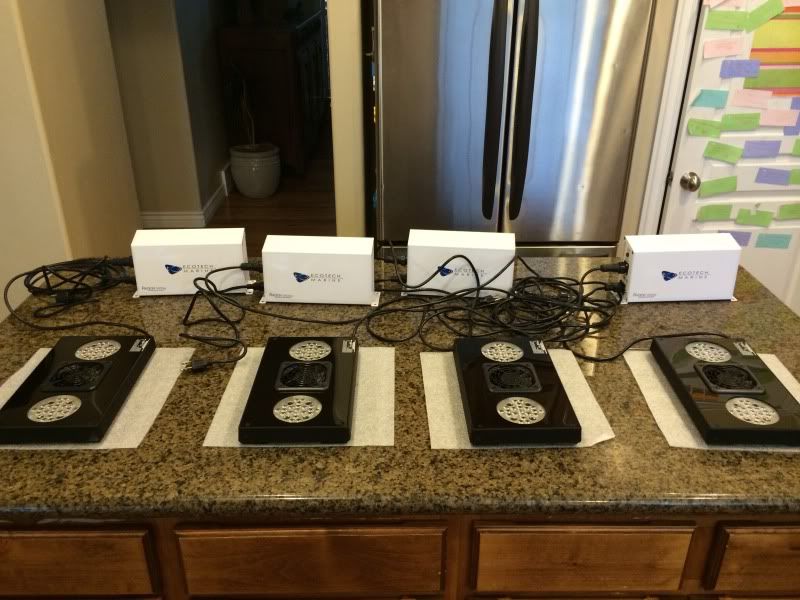 http://s118.photobucket.com/user/love2skiutah/media/4FD4C927-E205-42C1-88EF-EE3E8AF1DFD3-786-000000A6B4E9B8D2_zps2569062a.jpg.html" rel="nofollow"> 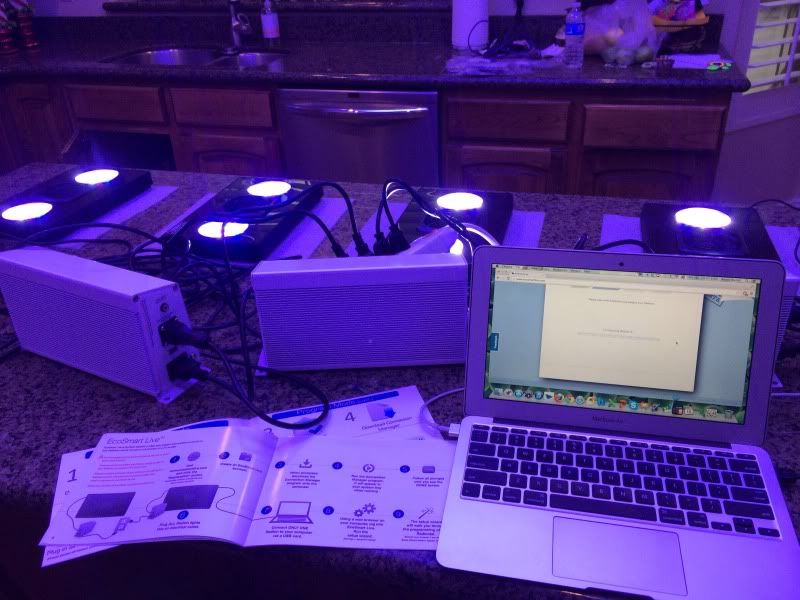 Mounting the power supply's was kind of a pain because I couldn't figure out where to put them. I settled for the front of the tank and moved them to where I thought they would not be in the way when I change have to work on equipment. You can't really see them when you are looking into the cabinet from the front. http://s118.photobucket.com/user/love2skiutah/media/19749BF3-BF6D-422C-B3E4-0E70C5D5BC15-786-000000A6BECF0CFC_zps175ae61e.jpg.html" rel="nofollow"> 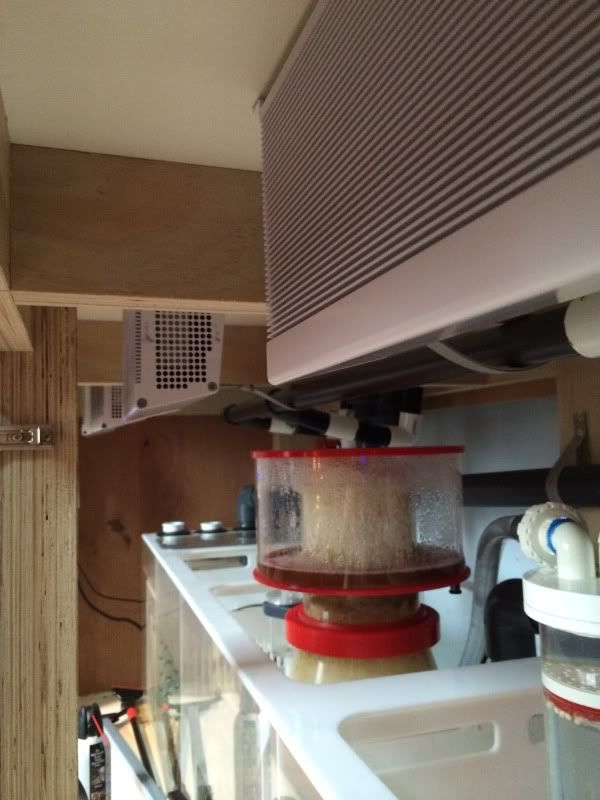 http://s118.photobucket.com/user/love2skiutah/media/98E519DB-7F7D-4D18-A827-45FF3594587A-786-000000A6C524E288_zps6f32ccb3.jpg.html" rel="nofollow"> 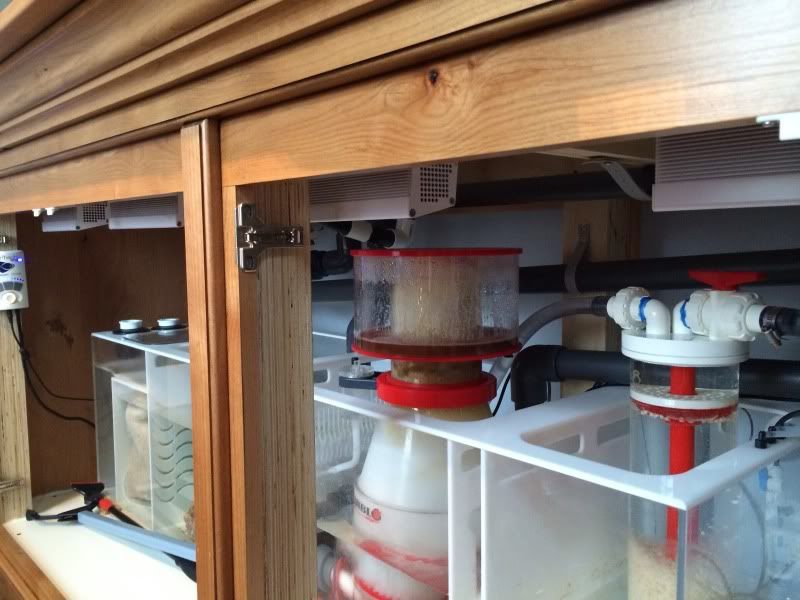 I decided to go with the Radion hanging kits. At first I printed off the manual and went over to Home Depot thinking I was pretty smart and that I would find all the parts. NOPE - They are a little over priced at $45 a piece, but after I spent an hour at Home Depot and pretty much giving up, I decided these kits were a good, SIMPLE and EASY investment for the installation. http://s118.photobucket.com/user/love2skiutah/media/E0667DF6-12E5-4A84-9908-72A6AA9A454A-786-000000A6D3CA3149_zpscff7660c.jpg.html" rel="nofollow"> 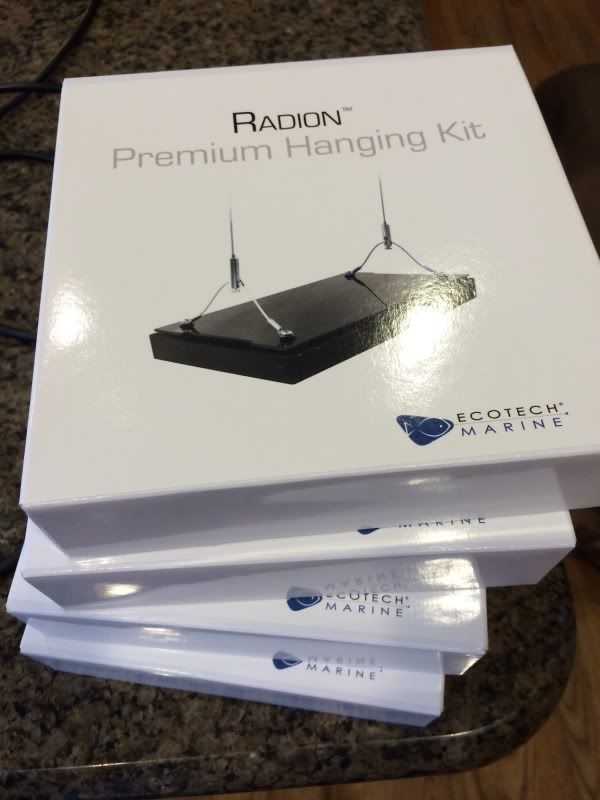 They make it very simple for the installation. http://s118.photobucket.com/user/love2skiutah/media/763E9941-F2BE-4B83-A664-55F8550B6E68-786-000000A6DA144477_zps1fa6f512.jpg.html" rel="nofollow">  http://s118.photobucket.com/user/love2skiutah/media/7CEFFB50-2CA8-468A-8BF1-48C525AD27F7-786-000000A6E61C891E_zpsd762bc9a.jpg.html" rel="nofollow"> 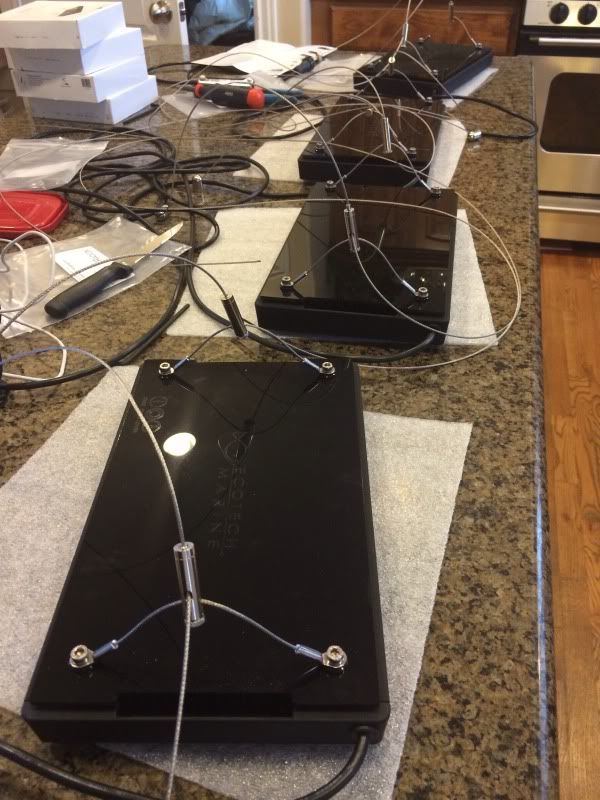
|
Posted By: love2skiutah
Date Posted: November 15 2013 at 4:53pm
|
This is the inside of the cabinet tipped on it's back so that I could mount the buttons. http://s118.photobucket.com/user/love2skiutah/media/FF0B8D73-3A06-44DA-BB41-452E604F5A97-786-000000A6F2A1C684_zpsfa1eeadd.jpg.html" rel="nofollow">  Some zip ties, a level and tape measure and we are good to go! http://s118.photobucket.com/user/love2skiutah/media/4DC38FB4-F8AD-420D-ADC4-A1289A8C1C8A-786-000000A70222F2CD_zpscfc8fd2d.jpg.html" rel="nofollow"> 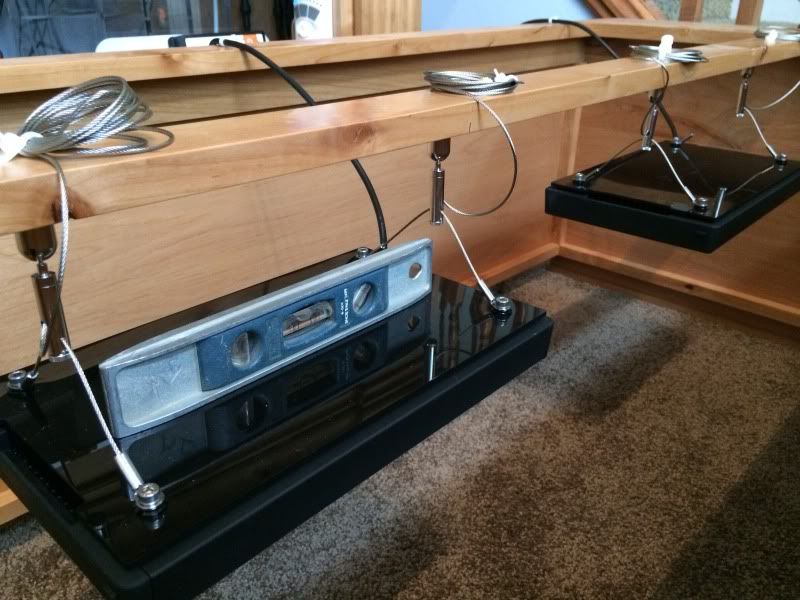 http://s118.photobucket.com/user/love2skiutah/media/23F6668C-F5DA-4F49-B93E-2D211BE33296-786-000000A70D60CA6C_zps39e95fe3.jpg.html" rel="nofollow"> 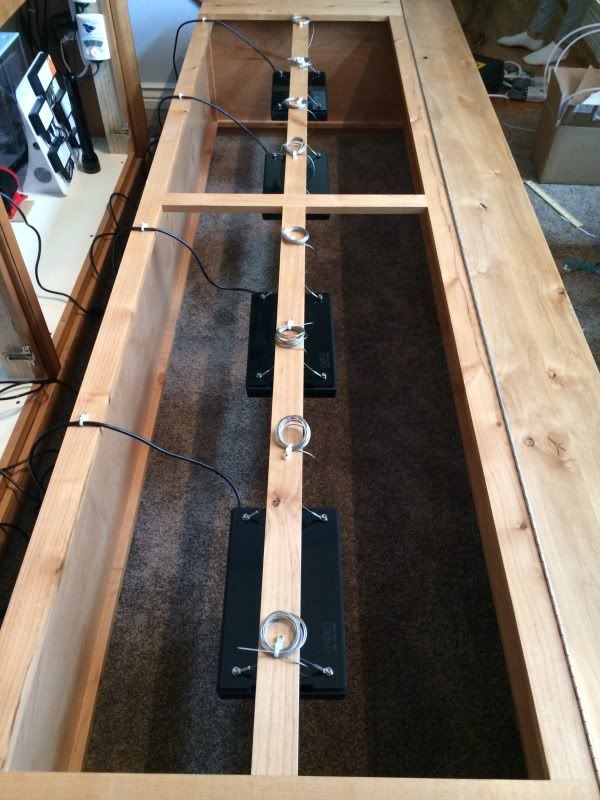 http://s118.photobucket.com/user/love2skiutah/media/3F0BADDF-FA20-4BD9-A998-F916CDFC9A18-786-000000A71DE8A5F8_zps4a5d3b45.jpg.html" rel="nofollow"> 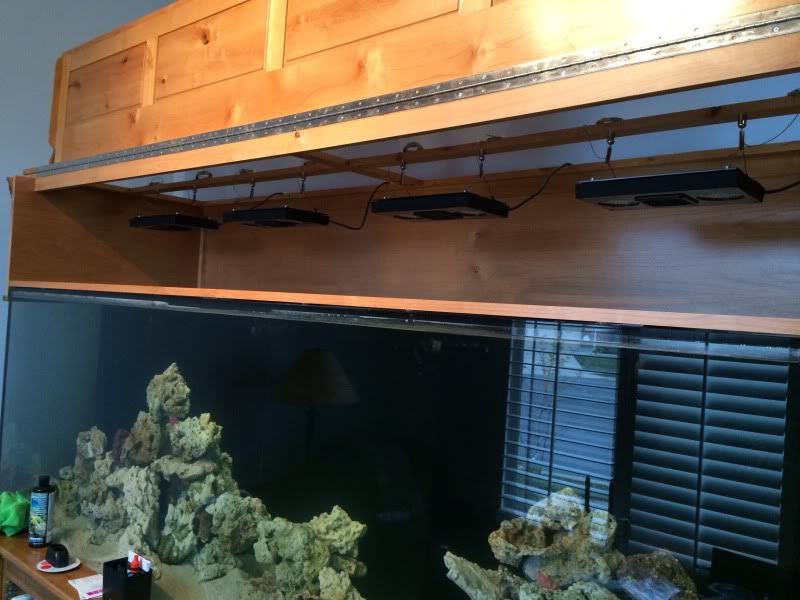 http://s118.photobucket.com/user/love2skiutah/media/907044AB-29F6-4F53-8841-20041852065B-786-000000A75B72D69F_zpsc2be8bba.jpg.html" rel="nofollow"> 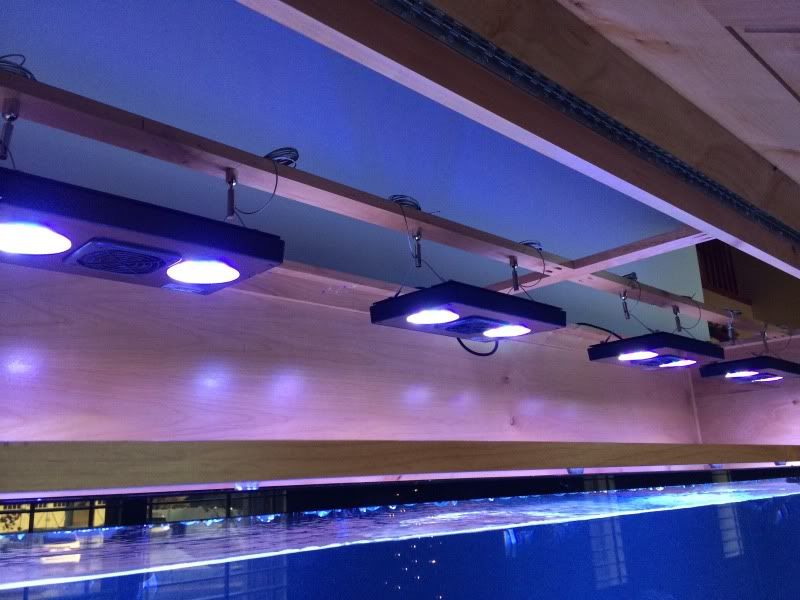 |
Posted By: love2skiutah
Date Posted: November 15 2013 at 4:57pm
|
ANNNDDDDD... We have light! It looks like I'm getting a lot of micro bubbles from the skimmer I just turned on. I can make some adjustments and dump the outlet into a bag if I have too. I will play that by ear over the next few weeks. I threw in a couple shots of the scape with the lights on it. http://s118.photobucket.com/user/love2skiutah/media/3AF85BEE-443B-4EA1-A86E-89B7F48CFF89-786-000000A73981C2AD_zpsd781a434.jpg.html" rel="nofollow"> 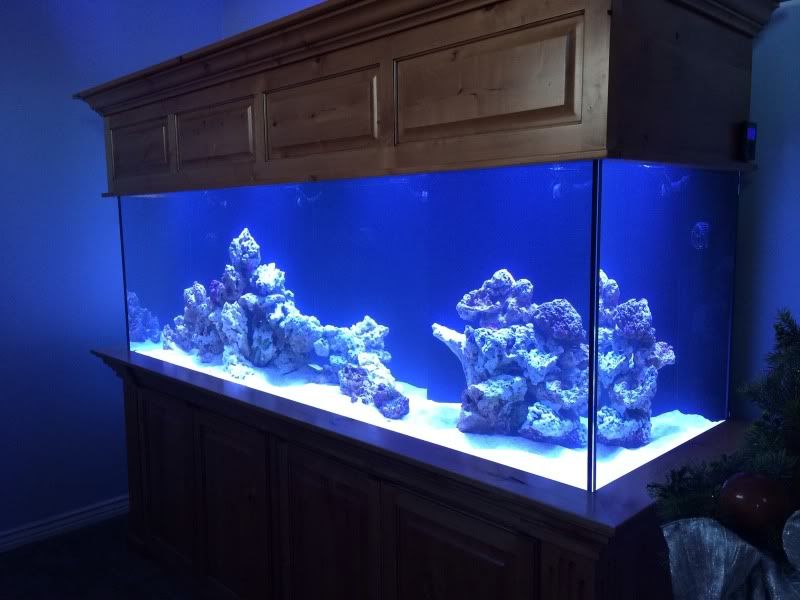 http://s118.photobucket.com/user/love2skiutah/media/23E717A0-B008-43FE-9AD7-635691E5B3A6-786-000000A734006D22_zps32d7589d.jpg.html" rel="nofollow"> 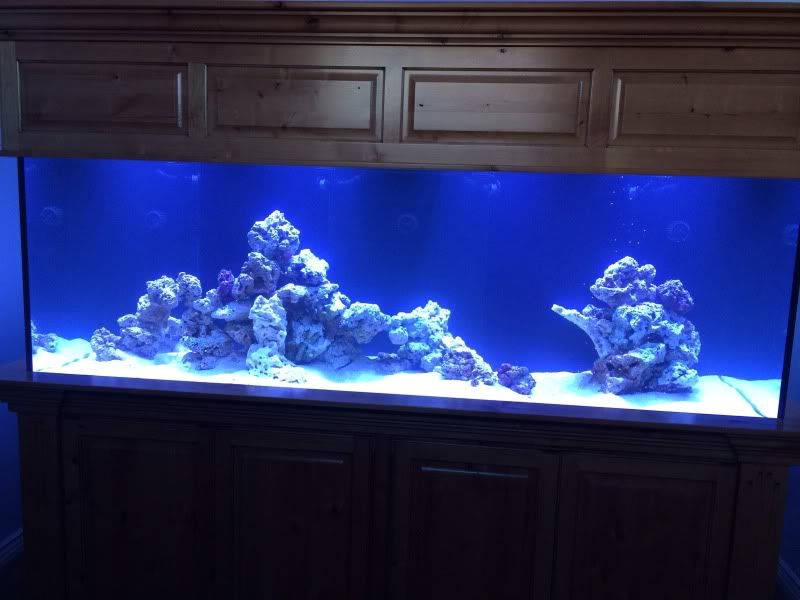 http://s118.photobucket.com/user/love2skiutah/media/C9074045-7001-411D-AA5A-51D33030595C-786-000000A75791A3BB_zps082ecc98.jpg.html" rel="nofollow">  http://s118.photobucket.com/user/love2skiutah/media/88127926-FF5C-418E-AF97-52D322020511-786-000000A753B03FCB_zpsd80d96e0.jpg.html" rel="nofollow"> 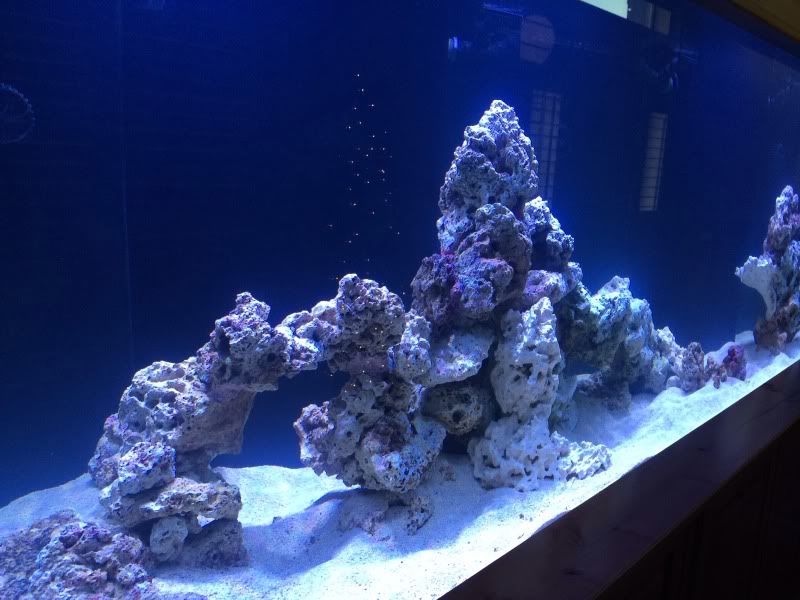 http://s118.photobucket.com/user/love2skiutah/media/8FF1B394-494C-4595-BFAE-1F77954112EF-786-000000A74AB937B9_zps29e2e05d.jpg.html" rel="nofollow"> 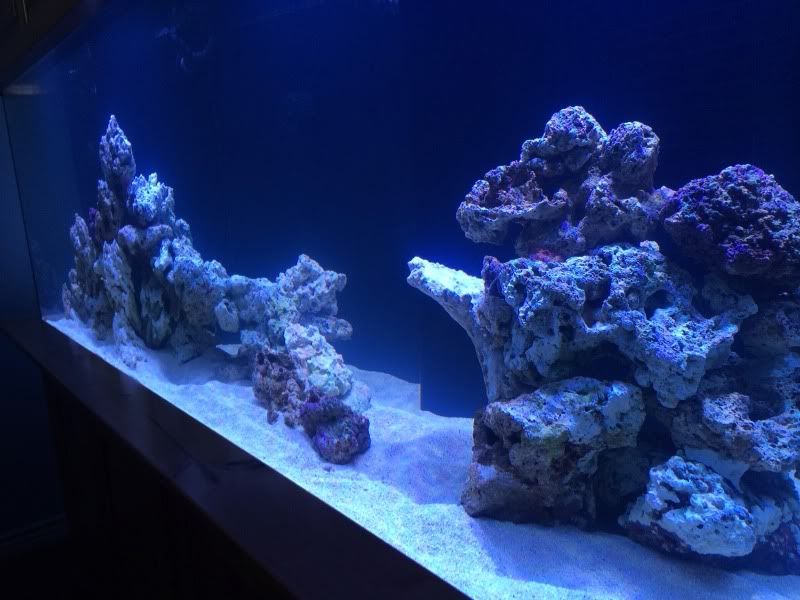 http://s118.photobucket.com/user/love2skiutah/media/434599A9-3383-42CE-A400-3BE6322A89E1-786-000000A74EBBBCEF_zpscf64293f.jpg.html" rel="nofollow"> 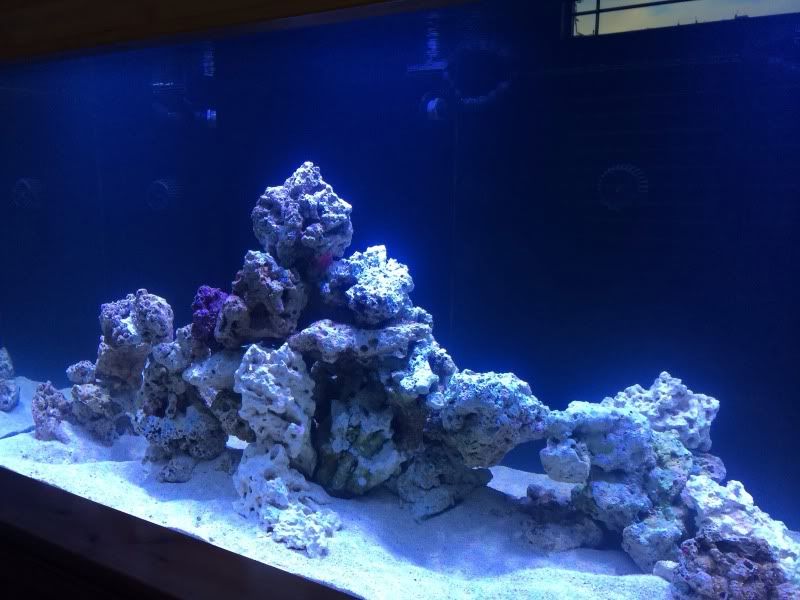 |
Posted By: kody72
Date Posted: November 15 2013 at 5:02pm
|
Looks really good and clean. I like it ------------- http://www.utahreefs.com/forum/forum_posts.asp?TID=60612&title=kody72-fishroom" rel="nofollow - KODY72 FISHROOM BUILD 281g DT 187g Rimless Frag ATI PM lighting SRO DSCR-300ext 8013908179 |
Posted By: P.Kapp
Date Posted: November 15 2013 at 5:44pm
|
Looks very clean. I love your scape and all the swim space it gives. I think it will look amazing when you get some colonies growing in there too!
------------- Preston Kapp 210 Gal Reef |